How To Factory Reset Airpods Pro
Here is the introduction paragraph: If you're experiencing issues with your AirPods Pro, such as poor sound quality, connectivity problems, or malfunctioning features, a factory reset may be the solution. A factory reset will restore your AirPods Pro to their original settings, erasing all personalized data and settings. In this article, we'll guide you through the process of factory resetting your AirPods Pro, from preparation to completion. Before you start, it's essential to understand what to expect and how to prepare your AirPods Pro for the reset. We'll cover the necessary steps to take before initiating the reset, the factory reset process itself, and what to do after the reset is complete. So, let's begin by discussing what you need to do before you start the factory reset process.
Before You Start
Before you start using your AirPods Pro, there are a few things you should do to ensure a smooth and enjoyable experience. First, it's essential to backup your AirPods Pro data to prevent any loss of information. Additionally, charging your AirPods Pro is crucial to ensure they have enough power to function properly. Lastly, updating your AirPods Pro firmware is vital to ensure you have the latest features and security patches. By doing these three simple steps, you'll be able to enjoy your AirPods Pro to the fullest. In this article, we'll dive deeper into each of these steps, starting with the importance of backing up your AirPods Pro data.
Backup Your AirPods Pro Data
Before you start the factory reset process, it's essential to backup your AirPods Pro data to avoid losing any important information. This includes your AirPods Pro settings, such as your preferred ear tip size, noise cancellation mode, and custom controls. To backup your AirPods Pro data, go to the Settings app on your connected device, such as your iPhone or iPad, and select Bluetooth. Find your AirPods Pro in the list of connected devices and tap the "i" icon next to them. Then, tap "Forget Device" and confirm that you want to forget your AirPods Pro. This will disconnect your AirPods Pro from your device and prompt you to set them up again. During the setup process, you will be given the option to restore your AirPods Pro settings from a backup. Make sure to select this option to restore your settings. Additionally, if you have an Apple Watch, you can also backup your AirPods Pro data by going to the Apple Watch app on your connected device, selecting "My Watch," and then selecting "AirPods." From there, you can select "Forget AirPods" and confirm that you want to forget your AirPods Pro. This will also prompt you to set them up again and restore your settings from a backup. By backing up your AirPods Pro data, you can ensure that you don't lose any important information and can easily restore your settings after the factory reset process.
Charge Your AirPods Pro
Here is the paragraphy: To ensure a seamless factory reset process, it's essential to charge your AirPods Pro beforehand. This step is crucial because it guarantees that your earbuds have enough power to complete the reset process without any interruptions. If your AirPods Pro are completely drained, you won't be able to initiate the reset process. To charge your AirPods Pro, simply place them in their charging case and plug the case into a power source using a Lightning cable. If you're using a wireless charging case, you can place it on a Qi-compatible charging mat. Allow your AirPods Pro to charge for at least 30 minutes to an hour before attempting to reset them. This will ensure that they have sufficient power to complete the process. Additionally, make sure that your charging case is also fully charged, as this will help to prevent any power-related issues during the reset process. By charging your AirPods Pro and their case, you'll be able to complete the factory reset process without any hiccups.
Update Your AirPods Pro Firmware
Here is the paragraphy: To ensure a smooth factory reset process, it's essential to update your AirPods Pro firmware to the latest version. Updating the firmware can resolve any connectivity issues, improve sound quality, and enhance overall performance. To check for updates, put your AirPods Pro in their charging case and connect them to your iPhone or iPad. Open the Settings app, tap on Bluetooth, and find your AirPods Pro in the list of devices. If an update is available, you'll see a prompt to update the firmware. Tap on "Update" to begin the process. The update may take a few minutes to complete, so be patient and keep your AirPods Pro connected to your device. Once the update is finished, your AirPods Pro will restart, and you'll be ready to proceed with the factory reset process. It's crucial to note that updating the firmware will not erase any data or settings, so you don't have to worry about losing any information. By updating your AirPods Pro firmware, you'll ensure that your earbuds are running with the latest software, which is essential for a successful factory reset.
The Factory Reset Process
Here is the introduction paragraph: The factory reset process for AirPods Pro is a straightforward process that can be completed in just a few steps. To reset your AirPods Pro, you will need to start by putting them in their case. This is the first step in the process, and it is essential to ensure that your AirPods Pro are properly seated in their case before proceeding. Once your AirPods Pro are in their case, you will need to press and hold the setup button until the status light flashes. Finally, you will need to release the setup button when the status light flashes, which will complete the factory reset process. In this article, we will walk you through each of these steps in more detail, starting with putting your AirPods Pro in their case. Here is the 200 words supporting paragraph: The factory reset process for AirPods Pro is a simple and effective way to restore your earbuds to their original settings. This process can be useful if you are experiencing issues with your AirPods Pro, such as connectivity problems or poor sound quality. By resetting your AirPods Pro, you can resolve these issues and get your earbuds working properly again. Additionally, the factory reset process can be useful if you are planning to sell or give away your AirPods Pro, as it will erase all of your personal data and settings from the earbuds. Overall, the factory reset process is a useful tool that can help you to troubleshoot and resolve issues with your AirPods Pro, and it is an essential step to take before selling or giving away your earbuds. By following the steps outlined in this article, you can easily reset your AirPods Pro and get them working like new again. To get started, simply put your AirPods Pro in their case.
Put Your AirPods Pro in Their Case
To factory reset your AirPods Pro, start by putting them in their case. This is a crucial step, as it allows the AirPods to disconnect from any nearby devices and prepares them for the reset process. Make sure the AirPods are properly seated in the case and the lid is closed. This will help the AirPods to enter a state of dormancy, which is necessary for the reset to take place. Additionally, putting the AirPods in their case will also help to conserve battery life, as they will not be actively searching for devices to connect to. By following this simple step, you can ensure that your AirPods Pro are properly prepared for the factory reset process, which will restore them to their original settings and remove any paired devices.
Press and Hold the Setup Button
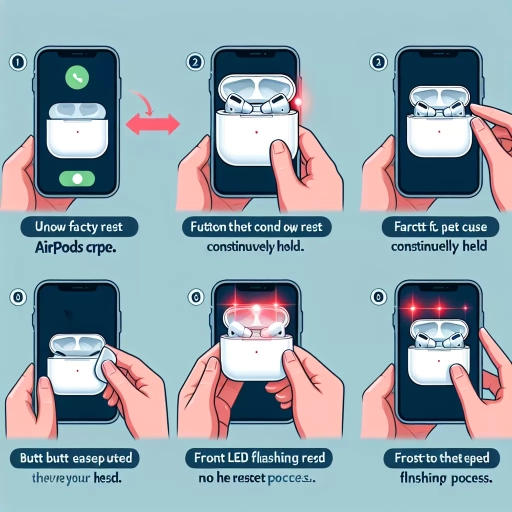
To initiate the factory reset process on your AirPods Pro, start by placing them in their charging case. Next, locate the small setup button on the back of the case. This button is crucial for resetting your AirPods Pro to their original settings. Press and hold the setup button until the status light on the front of the case begins to flash amber. This indicates that the reset process has started. Continue holding the button for about 15 seconds, or until the light flashes white, signaling that the factory reset is complete. It's essential to hold the button for the entire duration to ensure a successful reset. If you release the button too soon, the process may not complete, and you'll need to start again. By following these steps, you'll be able to restore your AirPods Pro to their original settings, erasing all paired devices and custom settings.
Release the Setup Button When the Status Light Flashes
When the status light flashes, release the setup button. This is a crucial step in the factory reset process for your AirPods Pro. The flashing light indicates that the AirPods Pro are in reset mode, and releasing the setup button allows the process to proceed. If you continue to hold the setup button, the reset process will not complete, and you may need to start over. By releasing the button, you are allowing the AirPods Pro to reset to their factory settings, which will erase all of your personalized settings and data. This is an important step in restoring your AirPods Pro to their original state, and it is essential to follow the instructions carefully to ensure a successful reset.
After the Factory Reset
After resetting your AirPods Pro, you'll need to set them up again to get them working properly. This process is relatively straightforward, but it does require some effort. To start, you'll need to set up your AirPods Pro again, which involves pairing them with your device and configuring the settings to your liking. Additionally, if you had previously backed up your AirPods Pro, you can restore them from that backup to get back to where you were before the reset. It's also a good idea to check for any software updates, as these can often resolve issues and improve performance. By following these steps, you can get your AirPods Pro up and running again in no time. So, let's start with the first step: setting up your AirPods Pro again.
Set Up Your AirPods Pro Again
To set up your AirPods Pro again, start by opening the charging case and placing the earbuds inside. Next, go to your iPhone or iPad's Bluetooth settings and select "AirPods Pro" from the list of available devices. If you don't see your AirPods Pro, tap "Other Options" and then "Add a Device." You will then be prompted to place the AirPods Pro near your device and open the charging case. Once your device detects the AirPods Pro, you will see a setup animation on your screen. Tap "Connect" to complete the setup process. You will then be asked to set up Siri and other features, such as Active Noise Cancellation and Transparency mode. Follow the on-screen instructions to complete the setup process. If you're using a non-Apple device, you can set up your AirPods Pro by going to the Bluetooth settings and selecting "AirPods Pro" from the list of available devices. You may need to enter a passcode to complete the pairing process. Once you've set up your AirPods Pro, you can customize the settings to your liking by going to the Bluetooth settings on your device.
Restore Your AirPods Pro from a Backup
If you've previously backed up your AirPods Pro, you can easily restore them from that backup after a factory reset. To do this, put your AirPods Pro in their case and make sure they're close to your iPhone or iPad. Open the Settings app on your device and tap on Bluetooth. Find your AirPods Pro in the list of available devices and tap the "i" icon next to them. Tap "Forget Device" and confirm that you want to forget your AirPods Pro. Then, go back to the Bluetooth settings and tap on "AirPods Pro" to reconnect them. Your device will automatically restore your AirPods Pro from the backup, and you'll be able to use them as you did before the factory reset. Note that if you've made any changes to your AirPods Pro settings since the last backup, those changes will be lost. Additionally, if you've paired your AirPods Pro with multiple devices, you may need to repeat the process for each device.
Check for Any Software Updates
After the factory reset, it's essential to check for any software updates to ensure your AirPods Pro are running with the latest features and security patches. To do this, put your AirPods Pro in their charging case and make sure your iPhone or iPad is connected to the internet. Then, go to the Settings app on your device, tap on Bluetooth, and find your AirPods Pro in the list of connected devices. Tap the "i" icon next to your AirPods Pro, and then tap on "Check for Update." If an update is available, tap on "Update" to begin the installation process. Your AirPods Pro will automatically restart and install the update. It's also a good idea to check for any firmware updates on your iPhone or iPad, as these can sometimes affect the performance of your AirPods Pro. To do this, go to the Settings app, tap on General, and then tap on Software Update. If an update is available, tap on "Download and Install" to begin the installation process. By keeping your AirPods Pro and device up to date, you can ensure that you have the latest features and security patches, and that your AirPods Pro are working at their best.