How To Draw A Circle
Drawing a circle may seem like a simple task, but it requires precision and technique to achieve a perfect shape. Whether you're an artist, designer, or simply looking to improve your drawing skills, mastering the art of drawing a circle is essential. In this article, we'll explore the fundamentals of drawing a circle, including understanding the basics, various methods for creating a circle, and tips for refining and perfecting your shape. To start, it's crucial to understand the basics of drawing a circle, including the tools and techniques required to achieve a smooth, continuous curve. By grasping these fundamental concepts, you'll be able to move on to more advanced methods and techniques, ultimately producing a flawless circle. So, let's begin by Understanding the Basics of Drawing a Circle.
Understanding the Basics of Drawing a Circle
Drawing a circle may seem like a simple task, but it requires a good understanding of the basics to achieve a perfect shape. To start with, it's essential to define the center point of the circle, which will serve as the reference point for the entire drawing. This is crucial in ensuring that the circle is symmetrical and evenly proportioned. In addition to defining the center point, choosing the right tools is also vital in drawing a circle. The type of tool used can affect the accuracy and smoothness of the circle. Furthermore, understanding the geometry of a circle is also necessary to draw a perfect circle. This includes knowing the relationship between the radius, diameter, and circumference of the circle. By grasping these fundamental concepts, one can draw a circle with ease and precision. In this article, we will delve into the basics of drawing a circle, starting with defining the center point.
Defining the Center Point
To define the center point of a circle, you need to identify the exact middle of the shape. This point is equidistant from every point on the circle's circumference. One way to find the center point is to draw two perpendicular lines that intersect at a point within the circle. This intersection point is the center. Alternatively, you can use a compass to draw a circle and the point where the compass is placed is the center. Another method is to draw a line through two points on the circle's circumference and then draw a perpendicular bisector of that line. The point where the bisector intersects the line is the center point. By accurately defining the center point, you can ensure that your circle is symmetrical and evenly proportioned.
Choosing the Right Tools
When it comes to drawing a circle, having the right tools can make all the difference. A compass is the most traditional and accurate tool for drawing circles, but it can be limiting for larger circles or more free-form designs. A circular object, such as a plate or a coin, can be used as a makeshift compass for smaller circles. For more precise control, a string and pencil method can be employed, where a string is tied to a pencil and a fixed point, allowing for smooth and consistent curves. Digital drawing tools, such as a graphics tablet or a drawing app, can also be used to create perfect circles with ease. Additionally, a protractor or a circular template can be used to draw circles with specific diameters or angles. Ultimately, the choice of tool depends on the desired level of precision, the size of the circle, and personal preference. By selecting the right tool, artists and designers can achieve professional-looking results and bring their circular creations to life.
Understanding Circle Geometry
Understanding circle geometry is essential to drawing a perfect circle. A circle is a set of points that are all equidistant from a central point called the center. The distance from the center to any point on the circle is called the radius. The diameter is the longest distance across the circle, passing through its center, and is twice the length of the radius. The circumference is the distance around the circle, and its length is calculated using the formula C = 2πr, where C is the circumference and r is the radius. Understanding these basic components of a circle is crucial to drawing a circle accurately. Additionally, being familiar with the properties of a circle, such as its symmetry and the fact that all radii are equal, can also aid in drawing a circle. By grasping the fundamental principles of circle geometry, you can create a precise and perfect circle, whether you're using a compass, a string, or a digital drawing tool.
Methods for Drawing a Circle
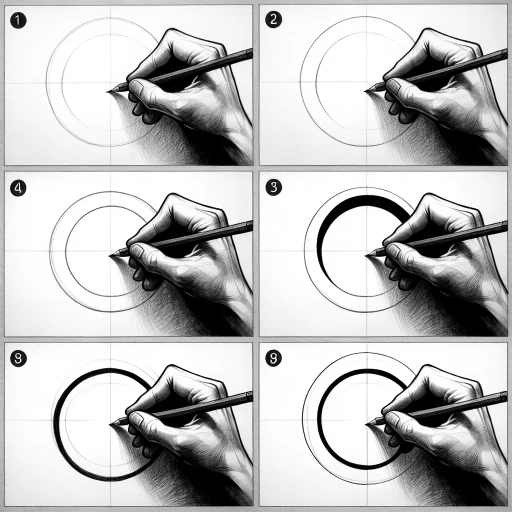
Drawing a circle can be a challenging task, especially when precision is required. Fortunately, there are several methods that can help you achieve a perfect circle. Three of the most effective methods include using a compass, employing the string method, and utilizing a circular object. Each of these methods has its own unique advantages and can be used in various situations. For instance, using a compass is ideal for drawing small circles with high precision, while the string method is better suited for larger circles. On the other hand, utilizing a circular object is a quick and easy way to draw a circle, but it may not be as precise as the other two methods. In this article, we will explore each of these methods in detail, starting with the most precise and widely used method: using a compass.
Using a Compass
Using a compass is a precise method for drawing a circle. To begin, place the point of the compass on the surface where you want the center of the circle to be. Open the compass to the desired radius by adjusting the hinge. Make sure the pencil or pen is securely held in the compass's holder. With the compass in place, rotate it slowly and smoothly in a complete circle, keeping the point steady and the pencil or pen moving in a continuous motion. Apply gentle pressure to maintain a consistent line width. As you rotate the compass, the pencil or pen will draw a perfect circle. To ensure accuracy, it's essential to keep the compass steady and the surface flat. If you're drawing a large circle, you may need to use a compass with a longer leg or a beam compass. Additionally, you can use a compass to draw arcs or segments of a circle by adjusting the angle of rotation. With practice, using a compass becomes a straightforward and efficient way to draw precise circles.
Employing the String Method
Employing the string method is a simple yet effective technique for drawing a circle. This method involves using a length of string or a flexible material, such as a rubber band, to create a circular shape. To begin, tie a knot at one end of the string, leaving a small loop at the other end. Place the knotted end on the surface where you want to draw the circle, and hold the looped end with a pencil or pen. Keeping the string taut, move the pencil or pen around the knotted end, allowing the string to guide the drawing motion. As you move the pencil or pen, the string will maintain a consistent distance from the center point, creating a smooth and accurate circle. This method is particularly useful for drawing large circles or for creating circular shapes in a variety of materials, such as paper, fabric, or even metal. By adjusting the length of the string, you can easily create circles of different sizes, making this method a versatile and reliable tool for artists, designers, and craftspeople.
Utilizing a Circular Object
Drawing a circle can be a challenging task, but utilizing a circular object can make it much easier. One of the most common methods for drawing a circle is to use a circular object as a guide. This can be a coin, a plate, a frisbee, or any other round object that is the desired size. Simply place the object on the paper and draw around it with a pencil. This will give you a perfect circle. Another method is to use a circular object as a stencil. Cut out a circle from a piece of cardboard or paper, and place it on the paper. Draw around the edge of the stencil to create a circle. This method is especially useful if you need to draw multiple circles of the same size. You can also use a circular object to create a circle by tracing its edge. For example, you can place a coin on the paper and trace its edge with a pencil. This will give you a small circle. You can also use a circular object to create a circle by rotating it while drawing. For example, you can place a pencil on the paper and rotate a circular object around it while drawing. This will give you a circle with a smooth edge. Overall, utilizing a circular object is a simple and effective way to draw a circle.
Refining and Perfecting Your Circle
Refining and perfecting your circle is a crucial step in creating a precise and visually appealing shape. To achieve this, it's essential to focus on three key areas: ensuring symmetry, smoothing out the edges, and adding final touches. By paying attention to these details, you can transform a rough circle into a polished and professional-looking shape. Ensuring symmetry is the first step in refining your circle, as it lays the foundation for a balanced and harmonious shape. By carefully examining and adjusting the circle's proportions, you can create a sense of stability and cohesion that draws the viewer's eye. In the next section, we'll explore the importance of ensuring symmetry in more detail.
Ensuring Symmetry
Ensuring symmetry is a crucial step in drawing a perfect circle. To achieve this, start by identifying the center point of your circle. This can be done by creating a small mark or dot in the middle of your paper. Next, use a ruler or a straightedge to draw a line through the center point, creating a diameter. This line will serve as a reference point to ensure your circle is symmetrical. Now, place your compass or circular object on the center point and begin drawing your circle. As you draw, periodically check your circle against the diameter line to ensure it is even and symmetrical. If necessary, make adjustments to your circle as you go along. Another technique to ensure symmetry is to draw your circle in small sections, working your way around the center point. This will help you maintain evenness and prevent your circle from becoming lopsided. By taking the time to ensure symmetry, you can create a circle that is visually appealing and accurate.
Smoothing Out the Edges
Smoothing out the edges of your circle is a crucial step in refining and perfecting your drawing. To achieve a smooth and even curve, start by examining your circle for any bumps, wobbles, or irregularities. Look for areas where the line may be uneven or where the curve may be too sharp or too flat. Once you've identified these areas, use a gentle and subtle touch to smooth out the edges. You can do this by lightly tracing over the line with a pencil or pen, using a soft and flowing motion to guide your hand. As you smooth out the edges, pay attention to the overall shape and proportions of your circle, making sure that it remains symmetrical and even. You can also use a blending stump or tortillon to soften and smooth out any harsh lines or edges, creating a more subtle and nuanced curve. By taking the time to smooth out the edges of your circle, you can create a more polished and refined drawing that showcases your attention to detail and skill as an artist.
Adding Final Touches
Adding the final touches to your circle drawing is a crucial step in refining and perfecting your artwork. This stage involves making subtle adjustments to enhance the overall appearance and accuracy of your circle. Begin by carefully examining your drawing, paying attention to any minor imperfections or deviations from the desired shape. Use a sharp pencil or a fine-tip pen to make precise corrections, gently erasing any mistakes or smudges as needed. Next, consider adding a subtle outline or border to your circle, using a ruler or a straightedge to ensure a crisp, clean line. This will help define the shape and create a sense of depth and dimension. Additionally, you may want to add some texture or pattern to your circle, using various techniques such as hatching, cross-hatching, or stippling to create visual interest and complexity. Finally, take a step back and evaluate your circle drawing as a whole, making any necessary adjustments to achieve a balanced and harmonious composition. By adding these final touches, you can transform a simple circle into a stunning work of art that showcases your skill and creativity.