How To Screenshot On Iphone 7
Taking a screenshot on an iPhone 7 is a simple yet powerful feature that allows users to capture and share moments from their screen. Whether you want to save a funny meme, document a problem, or share a milestone, knowing how to take a screenshot is essential. In this article, we will explore the basics of taking a screenshot on iPhone 7, including the methods for capturing the perfect shot, and how to edit and share your screenshots with others. We will start by understanding the basics of taking a screenshot on iPhone 7, including the hardware and software requirements, and the different types of screenshots you can take. By the end of this article, you will be equipped with the knowledge and skills to take, edit, and share screenshots like a pro. So, let's get started by understanding the basics of taking a screenshot on iPhone 7.
Understanding the Basics of Taking a Screenshot on iPhone 7
Taking a screenshot on an iPhone 7 is a straightforward process that can be mastered with a few simple steps. To get started, it's essential to understand the basics of screenshotting on this device. This involves locating the Sleep/Wake button and Home button, which are crucial for capturing a screenshot. Once you've taken a screenshot, you'll receive a notification, which we'll explore in more detail. Additionally, you'll need to know how to access your screenshots in the Photos app. By understanding these fundamental concepts, you'll be able to take screenshots like a pro. So, let's begin by locating the Sleep/Wake button and Home button, which are the first steps in taking a screenshot on your iPhone 7.
Locating the Sleep/Wake Button and Home Button
The Sleep/Wake button and Home button are two essential components of the iPhone 7 that play a crucial role in taking a screenshot. To locate these buttons, start by holding your iPhone 7 in your hand, with the screen facing you. The Sleep/Wake button is situated on the top right side of the device, while the Home button is positioned at the bottom center of the screen. The Sleep/Wake button is a small, oval-shaped button that is used to turn your iPhone on and off, as well as put it to sleep or wake it up. The Home button, on the other hand, is a circular button with a square icon in the center, which is used to return to the home screen, access Siri, and take screenshots. To take a screenshot, you will need to press and hold the Sleep/Wake button and the Home button simultaneously, so it's essential to familiarize yourself with the location of these buttons to capture screenshots with ease.
Understanding the Screenshot Notification
When you take a screenshot on your iPhone 7, you'll receive a notification that a screenshot has been captured. This notification is a convenient feature that allows you to quickly access and share your screenshot. The notification will appear in the bottom left corner of your screen and will display a thumbnail of the screenshot you just took. You can tap on this thumbnail to open the screenshot in the Photos app, where you can edit, share, or delete it. Additionally, you can also swipe left on the notification to dismiss it, or swipe right to share it immediately. The screenshot notification is a useful feature that saves you time and effort, allowing you to quickly access and manage your screenshots.
Accessing Screenshots in the Photos App
Accessing Screenshots in the Photos App is a straightforward process that allows you to view, edit, and share your captured screenshots. To access your screenshots, open the Photos app on your iPhone 7, which can be found on the home screen. Once the app is open, tap on the "Albums" tab at the bottom of the screen. From there, select the "Screenshots" album, which is usually located at the top of the list. This album is automatically created by your iPhone to store all your screenshots. Inside the Screenshots album, you'll find all the screenshots you've taken, organized in chronological order. You can then select a screenshot to view it in full screen, edit it using the built-in editing tools, or share it with others via email, message, or social media. Additionally, you can also use the "Media Types" feature to filter your screenshots and other media types, such as photos and videos, making it easier to find specific screenshots. By accessing your screenshots in the Photos app, you can easily manage and share your captured screens with others.
Methods for Taking a Screenshot on iPhone 7
Taking a screenshot on an iPhone 7 is a straightforward process that can be accomplished in a few different ways. Whether you want to capture a memorable moment, save a recipe, or document a problem with your device, knowing how to take a screenshot is an essential skill. In this article, we will explore three methods for taking a screenshot on an iPhone 7: using the Sleep/Wake and Home buttons combination, using AssistiveTouch, and using Siri. Each of these methods has its own advantages and can be useful in different situations. For example, the Sleep/Wake and Home buttons combination is a quick and easy way to take a screenshot, while AssistiveTouch can be helpful for those who have difficulty pressing multiple buttons at once. Siri can also be used to take a screenshot, providing a hands-free option. Let's start by exploring the first method: using the Sleep/Wake and Home buttons combination.
Using the Sleep/Wake and Home Buttons Combination
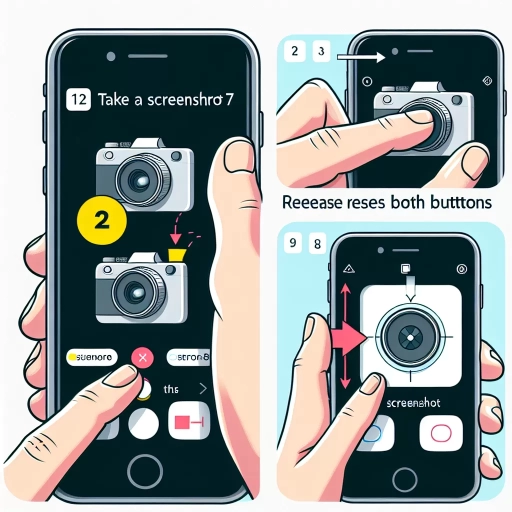
To take a screenshot on an iPhone 7, you can use the combination of the Sleep/Wake and Home buttons. This method is straightforward and works efficiently. First, locate the Sleep/Wake button, which is situated on the top right side of your iPhone, and the Home button, which is at the bottom center of the screen. Next, simultaneously press and hold both buttons for a brief moment, about one second. You will know the screenshot has been taken when you hear a camera shutter sound and see a flash on the screen. The screenshot will then be saved to your Screenshots album in the Photos app, where you can view, edit, and share it as desired. This method is quick and easy, making it a convenient way to capture and preserve moments on your iPhone 7.
Using AssistiveTouch to Take a Screenshot
To take a screenshot on your iPhone 7 using AssistiveTouch, start by enabling the feature in your Settings app. Go to Settings, then General, and select Accessibility. From there, tap on AssistiveTouch and toggle the switch to the right to turn it on. Once enabled, a small white circle will appear on your screen, which is the AssistiveTouch menu. To take a screenshot, tap on the AssistiveTouch menu, then select Device, and finally tap on More. In the More menu, you'll see the Screenshot option, which you can tap to capture your screen. The screenshot will be saved to your Screenshots album in the Photos app, where you can view, edit, and share it as needed. Using AssistiveTouch to take a screenshot can be especially helpful if you have difficulty pressing the physical buttons on your iPhone 7, or if you want to take a screenshot without having to press multiple buttons at the same time.
Using Siri to Take a Screenshot
Using Siri to take a screenshot is a convenient and hands-free method that can be especially useful when you need to capture a screenshot with one hand or when your other hand is occupied. To use Siri, make sure that Siri is enabled on your iPhone 7 by going to Settings > Siri & Search. Once Siri is enabled, you can activate it by saying "Hey Siri" or by pressing and holding the Home button. Then, say "Take a screenshot" or "Capture the screen." Siri will then take a screenshot of your current screen and save it to your Screenshots album in the Photos app. You can also ask Siri to "Take a screenshot and share it" if you want to share the screenshot immediately. This method is not only convenient but also allows you to multitask while taking a screenshot. However, keep in mind that using Siri to take a screenshot may not be as quick as using the physical buttons, and you may need to wait for a brief moment for Siri to process your request. Nevertheless, using Siri to take a screenshot is a great alternative method that can be useful in various situations.
Editing and Sharing Screenshots on iPhone 7
The iPhone 7 offers a range of features that make it easy to capture, edit, and share screenshots. Whether you want to highlight a specific part of an image, add text or drawings, or simply share a funny moment with friends, the iPhone 7 has got you covered. In this article, we'll explore the various ways you can edit and share screenshots on your iPhone 7, including using the Markup tool to edit screenshots, sharing them via Messages, Email, or social media, and deleting them to free up storage space. By the end of this article, you'll be able to take your screenshot game to the next level. So, let's dive in and start with the basics of editing screenshots using the Markup tool.
Editing Screenshots with the Markup Tool
Editing screenshots with the Markup tool is a powerful feature that allows you to annotate, highlight, and enhance your screenshots on your iPhone 7. To access the Markup tool, simply take a screenshot and then tap the thumbnail that appears in the bottom-left corner of the screen. This will open the Markup tool, which offers a range of editing options, including a pen, pencil, and highlighter. You can use these tools to draw, write, or highlight important information on your screenshot, making it easier to communicate your point or illustrate a concept. Additionally, the Markup tool allows you to add text, shapes, and even a signature to your screenshot, giving you a high degree of customization and flexibility. Furthermore, you can also use the Markup tool to crop, rotate, and resize your screenshot, ensuring that it is perfectly formatted for sharing or presentation. With the Markup tool, you can transform a simple screenshot into a visually appealing and informative image that effectively conveys your message. Whether you're a student, professional, or simply someone who wants to enhance their screenshots, the Markup tool is an essential feature that can help you get the most out of your iPhone 7.
Sharing Screenshots via Messages, Email, or Social Media
When you've captured the perfect screenshot on your iPhone 7, you'll likely want to share it with others. Fortunately, Apple makes it easy to share screenshots via Messages, email, or social media. To share a screenshot, simply tap the thumbnail that appears in the bottom-left corner of the screen after you've taken the screenshot. This will open the Markup editor, where you can edit and annotate your screenshot before sharing it. From here, you can tap the "Share" icon (represented by a box with an arrow coming out of it) to bring up the share sheet. Here, you can choose to share your screenshot via Messages, Mail, or social media platforms like Facebook, Twitter, or Instagram. You can also use the "More" option to share your screenshot via other apps, such as WhatsApp or Slack. If you want to share multiple screenshots at once, you can select them from the Screenshots album in the Photos app and share them as a batch. Additionally, you can also use the "AirDrop" feature to share screenshots with nearby devices. Overall, sharing screenshots on your iPhone 7 is a quick and easy process that can be done in just a few taps.
Deleting Screenshots to Free Up Storage Space
Deleting screenshots is a simple yet effective way to free up storage space on your iPhone 7. Over time, your Screenshots album can accumulate hundreds of images, taking up valuable space on your device. By regularly deleting unnecessary screenshots, you can reclaim this space and improve your iPhone's performance. To delete a screenshot, open the Photos app, navigate to the Screenshots album, and select the image you want to delete. Tap the "Trash" icon in the bottom-right corner, then confirm that you want to delete the screenshot. You can also delete multiple screenshots at once by tapping "Select" in the top-right corner, choosing the images you want to delete, and then tapping the "Trash" icon. Additionally, you can use the "Edit" feature to quickly delete multiple screenshots by swiping left on each image and tapping "Delete." By regularly deleting screenshots, you can free up storage space, reduce clutter, and keep your iPhone running smoothly.