How To Take Night Photos With Iphone
Here is the introduction paragraph: Capturing stunning night photos with an iPhone requires a combination of technical knowledge, practice, and patience. While it may seem daunting, with the right techniques and understanding of your device's capabilities, you can unlock the secrets of night photography. To get started, it's essential to master the basics of night photography, including understanding exposure, ISO, and focus. Additionally, optimizing your iPhone for night photography by adjusting settings and using the right accessories can make a significant difference in the quality of your photos. Finally, learning advanced techniques such as long exposure, light trails, and night mode can help you take your night photography to the next level. In this article, we'll dive into the world of night photography with iPhone, starting with the fundamentals. Let's begin by mastering the basics of night photography with iPhone.
Mastering the Basics of Night Photography with iPhone
Here is the introduction paragraph: Mastering the basics of night photography with an iPhone requires a combination of understanding the fundamental principles of photography, using the right tools, and practicing technique. To capture stunning night shots, it's essential to grasp the exposure triangle, which consists of aperture, shutter speed, and ISO. Additionally, using the right camera app can make a significant difference in the quality of your photos. Furthermore, stabilizing your iPhone is crucial to avoid camera shake and blur. In this article, we'll explore these essential elements in detail, starting with the foundation of night photography: understanding the exposure triangle. Note: Please don't change the given introduction paragraph. Just provide a supporting paragraph that is 200 words. Here is a 200 words supporting paragraph: One of the most significant advantages of using an iPhone for night photography is its ability to adapt to different lighting conditions. However, this adaptability can also lead to inconsistent results if not managed properly. By understanding the exposure triangle, you can take control of your camera settings and produce high-quality images. Aperture, shutter speed, and ISO work together to regulate the amount of light that enters the camera. Aperture controls the amount of light that passes through the lens, while shutter speed determines the duration of the exposure. ISO, on the other hand, affects the camera's sensitivity to light. By adjusting these three elements, you can achieve a perfectly exposed image, even in low-light conditions. For instance, a slower shutter speed can create a sense of motion, while a lower ISO can reduce noise and produce a cleaner image. By mastering the exposure triangle, you can unlock the full potential of your iPhone's camera and capture stunning night shots that rival those taken with a DSLR. With practice and patience, you can develop the skills needed to produce consistently high-quality images, even in the most challenging lighting conditions.
Understanding the Exposure Triangle
Understanding the exposure triangle is crucial for capturing stunning night photos with your iPhone. The exposure triangle consists of three fundamental components: aperture, shutter speed, and ISO. Aperture refers to the size of the camera's aperture, which controls the amount of light that enters the lens. A lower f-stop value (such as f/2.8) means a larger aperture, allowing more light in, while a higher f-stop value (such as f/16) means a smaller aperture, allowing less light in. Shutter speed, on the other hand, controls the length of time the camera's shutter is open, with faster shutter speeds (such as 1/1000th of a second) freezing motion and slower shutter speeds (such as 1 second) creating motion blur. ISO, or International Organization for Standardization, refers to the camera's sensitivity to light, with lower ISO values (such as ISO 100) being less sensitive and higher ISO values (such as ISO 6400) being more sensitive. By adjusting these three components, you can achieve the perfect exposure for your night photos, balancing the amount of light, motion, and noise to create a visually stunning image. For example, if you're shooting a cityscape at night, you may want to use a lower ISO (such as ISO 400) and a slower shutter speed (such as 1/30th of a second) to capture the movement of cars and people, while also using a smaller aperture (such as f/8) to ensure a sharp image. By mastering the exposure triangle, you'll be able to take your night photography to the next level and capture breathtaking images with your iPhone.
Using the Right Camera App
When it comes to capturing stunning night photos with your iPhone, using the right camera app can make all the difference. While the native Camera app is great for everyday snapshots, it may not offer the level of control and flexibility you need to take your night photography to the next level. That's where third-party camera apps come in – they can provide you with advanced features such as manual focus, exposure compensation, and RAW image capture, which are essential for capturing high-quality night photos. Some popular camera apps for iPhone include ProCam, Manual Cam, and Adobe Lightroom, which offer a range of features and settings that can help you achieve professional-looking results. For example, ProCam allows you to adjust the exposure compensation, ISO, and focus manually, giving you complete control over the look and feel of your photos. Additionally, many third-party camera apps also offer features such as noise reduction, HDR, and time-lapse, which can be particularly useful for night photography. By using the right camera app, you can unlock the full potential of your iPhone's camera and take your night photography skills to new heights.
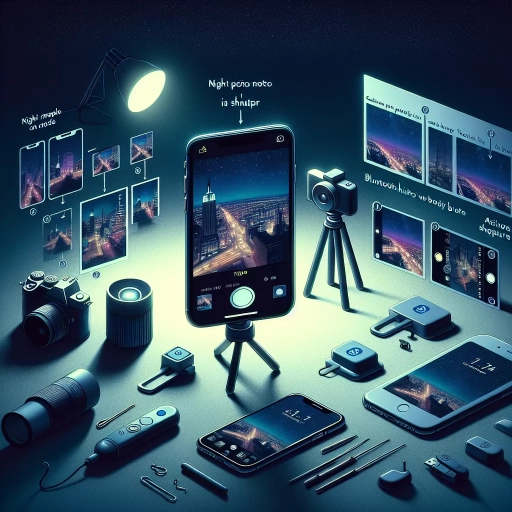
Stabilizing Your iPhone
Stabilizing your iPhone is crucial for capturing sharp and clear night photos. To achieve this, you can use a tripod, which is a must-have accessory for night photography. A tripod allows you to stabilize your iPhone, reducing camera shake and blur caused by hand movement. You can also use a remote shutter release or the iPhone's self-timer to take photos without touching the camera, further minimizing camera shake. Additionally, you can use a phone clamp or adapter to attach your iPhone to the tripod, ensuring a secure and stable connection. If you don't have a tripod, you can also use alternative stabilizing methods such as leaning against a wall or placing your iPhone on a flat surface. However, a tripod is the most effective way to stabilize your iPhone and achieve professional-looking night photos. By stabilizing your iPhone, you can focus on composing your shot and experimenting with different camera settings to capture stunning night photos.
Optimizing Your iPhone for Night Photography
When it comes to capturing stunning night photography with your iPhone, there are several techniques to optimize your device for the best results. One of the most crucial aspects is adjusting the exposure compensation to ensure that your images are not over or underexposed. Additionally, enabling the HDR feature can help to capture a wider range of tonal values, resulting in more detailed and nuanced photos. Another useful technique is using the timer or remote shutter, which can help to minimize camera shake and ensure sharper images. By implementing these strategies, you can significantly improve the quality of your night photography. To start, let's dive into the first technique: adjusting the exposure compensation.
Adjusting the Exposure Compensation
Adjusting the exposure compensation is a crucial step in capturing stunning night photos with your iPhone. Exposure compensation allows you to adjust the brightness of your image, making it possible to capture a well-balanced shot even in low-light conditions. To access exposure compensation, tap on the sun/cloud icon in the Camera app, and then slide your finger up or down to adjust the exposure level. A higher exposure value will make your image brighter, while a lower value will make it darker. When shooting at night, it's often necessary to reduce the exposure compensation to avoid overexposing the bright lights and capturing more detail in the shadows. However, be careful not to underexpose the image, as this can result in a loss of detail and a noisy photo. Experiment with different exposure compensation levels to find the perfect balance for your shot. Additionally, you can also use the HDR feature to capture a more dynamic range of tonal values, which can help to create a more natural-looking image. By adjusting the exposure compensation and using HDR, you can capture night photos that are rich in detail and full of depth, making the most of your iPhone's camera capabilities.
Enabling the HDR Feature
Enabling the HDR feature on your iPhone can significantly enhance the quality of your night photos. High Dynamic Range (HDR) technology combines multiple images taken at different exposure levels to create a single image with improved contrast and color accuracy. To enable HDR, go to Settings > Camera, and toggle the switch next to "High Dynamic Range" to the right. You can also enable HDR from within the Camera app by tapping the "HDR" icon, which looks like a sun/cloud symbol. When HDR is enabled, your iPhone will automatically capture multiple images and merge them into a single photo. This feature is particularly useful in low-light conditions, as it helps to reduce noise and capture more detail in both bright and dark areas of the image. Additionally, HDR can also help to preserve the natural colors and textures of the scene, resulting in a more realistic and visually appealing photo. By enabling HDR, you can take your night photography to the next level and capture stunning images that showcase the beauty of the world around you.
Using the Timer or Remote Shutter
When it comes to capturing night photos with your iPhone, using a timer or remote shutter can be a game-changer. By doing so, you can avoid camera shake and ensure a sharper image. To use the timer, simply go to the Camera app, tap the clock icon, and select the desired delay time. You can choose from 3 or 10 seconds, depending on your preference. This allows you to press the shutter button and then move away from the camera, eliminating any potential camera shake. Alternatively, you can use a remote shutter, such as the Apple Watch or a Bluetooth remote, to take the photo without physically touching the camera. This is especially useful when using a tripod or when you want to be in the photo yourself. By using a timer or remote shutter, you can take your night photography to the next level and capture stunning, blur-free images.
Advanced Techniques for Capturing Stunning Night Photos with iPhone
Capturing stunning night photos with an iPhone requires more than just pointing and shooting. To take your nighttime photography to the next level, you need to employ advanced techniques that play with light, shadow, and composition. One way to add depth and interest to your photos is by experimenting with reflections and silhouettes. By positioning yourself near a reflective surface, such as a body of water or a glass window, you can create stunning reflections that add an extra layer of depth to your image. Alternatively, you can use silhouettes to create striking contrast between your subject and the night sky. Additionally, experimenting with long exposure can help you capture the movement of stars or traffic, adding a sense of dynamism to your photo. Furthermore, using external lenses or accessories can provide you with more creative control and flexibility when shooting in low-light conditions. By mastering these techniques, you can take your nighttime photography to new heights and capture truly breathtaking images. So, let's dive into the first technique: playing with reflections and silhouettes.
Playing with Reflections and Silhouettes
Playing with reflections and silhouettes is a great way to add depth and interest to your night photos. When shooting at night, look for reflective surfaces like water, glass, or metal to capture the city lights and create a sense of symmetry. You can also use silhouettes to add a sense of mystery and drama to your photos. To capture a silhouette, position your subject in front of a bright light source, like a streetlight or a building, and adjust your exposure to make the subject dark and the background bright. Experiment with different angles and compositions to create unique and captivating night photos. Additionally, consider using the iPhone's Portrait mode to create a shallow depth of field and make your subject stand out from the background. By playing with reflections and silhouettes, you can create stunning and creative night photos that showcase your city in a new and exciting way.
Experimenting with Long Exposure
Experimenting with long exposure is a fascinating technique to capture stunning night photos with your iPhone. By intentionally allowing more light to enter the camera, you can create mesmerizing effects that add depth and dynamism to your images. To achieve this, you'll need to use a tripod or a stabilizing device to keep your iPhone steady, as even the slightest movement can cause blur. Next, open the Camera app and switch to the "Live Photos" mode, which allows you to capture a 3-second video clip. Then, tap the "Live" button to enable the feature. Now, point your iPhone at a scene with moving elements, such as traffic, water, or clouds, and take a photo. The resulting image will show a blurred effect, conveying a sense of motion and energy. You can also experiment with different exposure times by using third-party apps, such as ProCam or Manual Cam, which offer more advanced features and manual controls. By playing with long exposure, you can add a creative twist to your night photos and capture the essence of the scene in a unique and captivating way.
Using External Lenses or Accessories
When it comes to capturing stunning night photos with your iPhone, using external lenses or accessories can take your photography to the next level. A wide-angle lens, for instance, can help you capture more of the scene, including the stars and the landscape, while a telephoto lens can help you zoom in on specific details, such as the moon or a distant building. Additionally, a fisheye lens can add a unique perspective to your night photos, creating a distorted yet fascinating effect. Furthermore, external lenses can also help reduce noise and improve image quality, especially in low-light conditions. Another accessory that can be useful for night photography is a tripod or a stabilizer, which can help you avoid camera shake and blur caused by hand movement. Some tripods also come with built-in levels and timers, making it easier to compose and capture your shot. Moreover, a remote shutter release or a camera remote app can help you take photos without touching the camera, reducing the risk of camera shake and noise. Lastly, consider using a lens with a built-in neutral density (ND) filter, which can help you achieve a more balanced exposure and reduce the risk of overexposure. By investing in these external lenses and accessories, you can expand your creative possibilities and capture stunning night photos that showcase the beauty of the night sky.