How To Remove Background In Powerpoint
Here is the introduction paragraph: Removing the background from an image in PowerPoint can be a game-changer for presentations, allowing you to seamlessly integrate images into your slides and enhance visual appeal. However, many users struggle with this task, unsure of where to start or how to achieve professional-looking results. Fortunately, removing backgrounds in PowerPoint is easier than you think, and with the right techniques, you can take your presentations to the next level. In this article, we'll explore the basics of PowerPoint background removal, discuss various methods for removing backgrounds, and dive into advanced techniques for achieving flawless results. By understanding the fundamentals, learning effective methods, and mastering advanced techniques, you'll be able to remove backgrounds like a pro. So, let's start by understanding the basics of PowerPoint background removal.
Understanding the Basics of PowerPoint Background Removal
When it comes to creating visually appealing and professional-looking presentations, PowerPoint is one of the most popular tools used by individuals and businesses alike. One of the key features that can elevate the quality of a presentation is the ability to remove backgrounds from images. But what exactly is background removal in PowerPoint, and why is it important? In this article, we will delve into the basics of background removal in PowerPoint, exploring what it entails, its benefits, and the tools and features available to achieve it. We will start by defining what background removal in PowerPoint is, and then move on to discuss why removing backgrounds is crucial for effective presentations. Finally, we will examine the various tools and features that PowerPoint offers to make background removal a seamless process. So, let's begin by understanding what background removal in PowerPoint is.
What is Background Removal in PowerPoint?
Background removal in PowerPoint is a feature that allows users to remove the background of an image, making it easier to use the image in presentations without any distractions. This feature uses artificial intelligence (AI) to detect the background of an image and separate it from the foreground, allowing users to remove the background with just a few clicks. The background removal tool in PowerPoint can be used to remove solid colors, patterns, and even complex backgrounds, making it a powerful feature for anyone who wants to enhance their images. With background removal, users can make their images stand out, remove unwanted elements, and create a more professional-looking presentation. This feature is especially useful for users who want to use images with transparent backgrounds, such as logos, icons, or graphics, in their presentations. By removing the background, users can place these images on top of other elements, such as text or other images, without any distractions. Overall, background removal in PowerPoint is a powerful feature that can help users create more engaging and professional-looking presentations.
Why Remove Background in PowerPoint?
Removing the background in PowerPoint is a crucial step in creating visually appealing and professional-looking presentations. By removing the background, you can isolate the main subject of your image and make it stand out against a clean and distraction-free background. This is particularly important when working with images that have complex or cluttered backgrounds, as it allows you to focus the audience's attention on the key message or object. Additionally, removing the background enables you to easily change the background color or image to match your presentation's theme or brand, ensuring a consistent and cohesive look throughout. Furthermore, removing the background can also help to improve the overall readability and accessibility of your presentation, making it easier for your audience to understand and engage with your content. Overall, removing the background in PowerPoint is a simple yet effective way to enhance the visual impact and effectiveness of your presentations.
Tools and Features for Background Removal in PowerPoint
PowerPoint offers a range of tools and features to help you remove backgrounds from images with precision and ease. The Remove Background tool is a powerful feature that uses artificial intelligence to automatically detect and remove the background of an image. This tool is particularly useful for images with complex backgrounds or those that require a high level of accuracy. Additionally, PowerPoint also offers a range of manual tools, such as the Lasso Select tool and the Mark Areas to Remove tool, which allow you to manually select and remove the background of an image. These tools are ideal for images with simple backgrounds or those that require a high level of customization. Furthermore, PowerPoint also offers a range of advanced features, such as the ability to refine the edges of an image and adjust the tolerance of the Remove Background tool, which allow you to fine-tune the background removal process and achieve professional-looking results. Overall, PowerPoint's tools and features for background removal make it easy to remove unwanted backgrounds from images and create visually appealing presentations.
Methods for Removing Background in PowerPoint
Here is the introduction paragraph: Removing the background from an image in PowerPoint can be a daunting task, especially for those who are new to the software. However, with the right techniques and tools, it can be done efficiently and effectively. In this article, we will explore three methods for removing background in PowerPoint: using the Remove Background Tool, the Transparency Tool, and the Crop Tool. Each of these methods has its own strengths and weaknesses, and by understanding how to use them, you can achieve professional-looking results. By the end of this article, you will be able to confidently remove backgrounds from your images and enhance your PowerPoint presentations. Let's start by exploring the first method: using the Remove Background Tool in PowerPoint.
Using the Remove Background Tool in PowerPoint
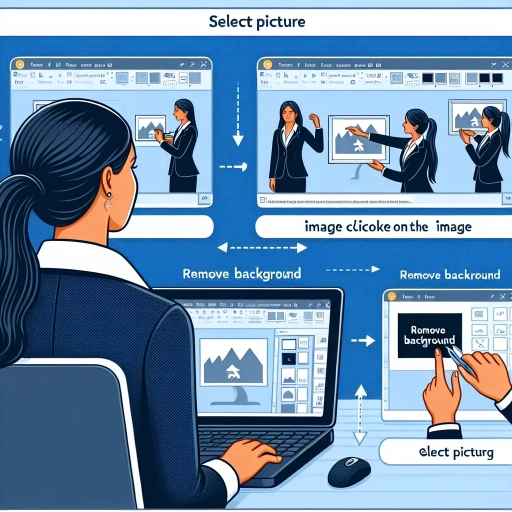
The Remove Background tool in PowerPoint is a powerful feature that allows users to automatically remove the background of an image, making it easier to isolate the subject and create visually appealing presentations. To use this tool, select the image you want to edit, go to the "Picture Tools" tab, and click on the "Remove Background" button. PowerPoint will then analyze the image and automatically detect the background, which will be highlighted in purple. You can adjust the selection by using the "Mark Areas to Keep" and "Mark Areas to Remove" tools, which allow you to fine-tune the background removal process. Once you're satisfied with the selection, click "Keep Changes" to apply the changes. The Remove Background tool is particularly useful for images with complex backgrounds or when you need to remove a distracting background to focus attention on the subject. By using this tool, you can create professional-looking images and enhance the overall visual impact of your presentation.
Using the Transparency Tool in PowerPoint
Using the Transparency Tool in PowerPoint is a simple and effective way to remove the background from an image. This tool allows you to make a part of the image transparent, which can be useful for removing unwanted backgrounds or creating a transparent overlay. To use the Transparency Tool, select the image you want to edit and go to the "Picture Tools" tab in the ribbon. Click on the "Format" tab and select "Color" from the drop-down menu. Then, click on the "Set Transparent Color" option and select the color you want to make transparent. You can also use the "Transparency" slider to adjust the level of transparency. Once you've made the desired adjustments, click "OK" to apply the changes. The Transparency Tool is a great option for removing backgrounds with a solid color, but it may not work as well for images with complex or gradient backgrounds.
Using the Crop Tool in PowerPoint
The Crop Tool is a powerful feature in PowerPoint that allows you to remove unwanted parts of an image, helping you to focus on the essential elements of your presentation. To use the Crop Tool, select the image you want to edit and navigate to the "Picture Tools" tab in the ribbon. Click on the "Crop" button, and a cropping frame will appear around the image. You can then drag the edges of the frame to select the area of the image you want to keep. To remove the background, simply drag the edges of the frame to exclude the unwanted parts of the image. You can also use the "Aspect Ratio" option to maintain the original proportions of the image while cropping. Additionally, you can use the "Crop to Shape" option to crop the image into a specific shape, such as a circle or a triangle. Once you have cropped the image, you can further refine the edges by using the "Picture Corrections" options, such as adjusting the brightness, contrast, and saturation. By using the Crop Tool effectively, you can enhance the visual appeal of your presentation and draw attention to the key elements of your message.
Advanced Techniques for Background Removal in PowerPoint
When it comes to creating professional-looking presentations in PowerPoint, one of the most important aspects is background removal. A well-removed background can make a huge difference in the overall visual appeal of your slides. However, removing backgrounds can be a daunting task, especially when dealing with complex images. Fortunately, PowerPoint offers several advanced techniques for background removal, including using the Pen Tool for precise control, the Magic Wand Tool for quick and easy removal, and the Background Removal feature in PowerPoint Online. In this article, we will explore these techniques in detail, starting with the Pen Tool, which allows for precise background removal by creating a custom path around the object. By mastering these techniques, you can take your PowerPoint presentations to the next level and make a lasting impression on your audience. With the Pen Tool, you can achieve professional-looking results with ease, making it an essential skill for any PowerPoint user.
Using the Pen Tool for Precise Background Removal
Using the Pen Tool for Precise Background Removal is a powerful technique in PowerPoint that allows users to achieve professional-looking results with ease. This advanced method is particularly useful when dealing with complex images or intricate details that require a high level of precision. To begin, select the Pen Tool from the toolbar and choose the "Subtract from selection" option. This will enable you to carefully draw around the object or area you want to keep, while the background is automatically removed. As you draw, the Pen Tool will create a path that follows the contours of the object, allowing for precise control and accuracy. To refine your selection, use the "Add to selection" option to add small areas or details that may have been missed. The Pen Tool also allows for adjustments to be made after the initial selection has been made, making it easy to fine-tune your results. By using the Pen Tool for Precise Background Removal, users can achieve seamless and professional-looking results that elevate their presentations to the next level.
Using the Magic Wand Tool for Quick Background Removal
The Magic Wand Tool is a powerful feature in PowerPoint that allows for quick and efficient background removal. To access the tool, select the image you want to edit and navigate to the "Picture Tools" tab in the ribbon. From there, click on the "Remove Background" button, and the Magic Wand Tool will appear. This tool uses artificial intelligence to automatically detect the background of the image and remove it. Simply click and drag the tool over the area you want to remove, and the background will be deleted. The Magic Wand Tool is particularly useful for images with complex backgrounds or those that have a lot of noise or texture. It's also a great time-saver, as it eliminates the need for manual background removal using the eraser or other tools. Additionally, the Magic Wand Tool can be used in conjunction with other background removal techniques, such as the "Mark Areas to Keep" and "Mark Areas to Remove" tools, to achieve even more precise results. By using the Magic Wand Tool, you can quickly and easily remove backgrounds from your images and create professional-looking presentations.
Using the Background Removal Feature in PowerPoint Online
Using the Background Removal feature in PowerPoint Online is a straightforward process that can help you remove unwanted backgrounds from your images and make them more visually appealing. To access this feature, select the image you want to edit and go to the "Picture Tools" tab in the ribbon. From there, click on the "Remove Background" button, which is located in the "Adjust" group. PowerPoint Online will then automatically detect the background of the image and highlight it in purple. You can adjust the selection by using the "Mark Areas to Keep" and "Mark Areas to Remove" tools, which allow you to specify which parts of the image you want to keep or remove. Once you're satisfied with the selection, click "Keep Changes" to apply the background removal. The resulting image will have a transparent background, which you can then use as is or further edit using other PowerPoint features. The Background Removal feature in PowerPoint Online is a powerful tool that can help you create professional-looking images and enhance your presentations.