How To Make Smithing Table
In the world of Minecraft, crafting and building are essential skills for survival and progression. One of the most important tools in a player's arsenal is the smithing table, which allows for the creation of high-quality tools and armor. To make a smithing table, players must first gather the necessary materials, including wood and stone. Once the materials are gathered, the next step is to build the smithing table, which requires a specific arrangement of blocks. Finally, with the smithing table complete, players can use it to craft and upgrade their equipment. In this article, we will guide you through the process of making a smithing table, starting with the first step: gathering the necessary materials.
Gathering Materials
Gathering materials is a crucial step in any crafting or building project. Whether you're a seasoned crafter or a beginner, having the right materials is essential to bringing your vision to life. In this article, we'll explore three key materials that are commonly used in crafting and building projects: wood planks, cobblestone, and iron ingots. We'll take a closer look at how to collect wood planks, gather cobblestone, and smelt iron ingots, providing you with the knowledge and skills you need to get started. From the forest to the furnace, we'll cover it all. So, let's start with the basics and explore how to collect wood planks, a fundamental material that's used in a wide range of crafting and building projects.
Collecting Wood Planks
Collecting wood planks is a crucial step in crafting a smithing table, as it provides the necessary material for the table's frame and surface. To collect wood planks, you can start by punching trees or using an axe to chop down trees and collect the logs. Once you have a sufficient amount of logs, you can then use a crafting table to convert them into wood planks. The type of wood planks you collect will depend on the type of tree you chop down, with different types of trees yielding different types of wood planks. For example, oak trees will yield oak wood planks, while spruce trees will yield spruce wood planks. It's worth noting that the type of wood planks you collect may not affect the functionality of the smithing table, but it can affect its appearance. Therefore, you may want to collect a variety of wood planks to create a unique and visually appealing smithing table. Additionally, collecting wood planks can also be a great way to explore your surroundings and discover new biomes and resources. As you collect wood planks, you may stumble upon other valuable resources, such as minerals or rare materials, that can be used to craft other essential items. Overall, collecting wood planks is a fun and rewarding experience that can help you progress in your crafting journey and create a functional and stylish smithing table.
Gathering Cobblestone
Gathering cobblestone is a crucial step in crafting a smithing table, as it serves as the primary material for the table's base. Cobblestone can be found in abundance in the game's world, particularly in caves, ravines, and underground tunnels. To gather cobblestone, players can use a pickaxe, which is a fundamental tool for mining and excavating resources. The type of pickaxe used can affect the efficiency of cobblestone gathering, with higher-tier pickaxes allowing for faster mining and increased resource yield. When mining for cobblestone, players should aim to dig into stone or rocky areas, as these are the most likely to contain the desired material. It's also essential to be mindful of the game's terrain and any potential hazards, such as lava or water, which can hinder progress or even cause damage. By gathering a sufficient amount of cobblestone, players can then proceed to craft the smithing table, which will enable them to upgrade their tools and equipment, ultimately enhancing their overall gameplay experience.
Smelting Iron Ingots
Smelting iron ingots is a crucial step in the smithing process, as it transforms raw iron ore into a usable form for crafting tools and other essential items. To smelt iron ingots, you will need to gather iron ore, which can be found in caves, ravines, and underground tunnels. Once you have collected a sufficient amount of iron ore, you can smelt it in a furnace using coal or charcoal as fuel. The smelting process involves heating the iron ore to extremely high temperatures, typically between 1,200°C to 1,300°C, until it melts and forms a molten iron. This molten iron is then poured into a mold, where it cools and solidifies into an iron ingot. The resulting iron ingot can be used to craft a variety of items, including tools, armor, and other essential equipment. It's worth noting that smelting iron ingots can be a time-consuming process, requiring a significant amount of fuel and attention. However, the end result is well worth the effort, as iron ingots are a fundamental component of many crafting recipes. By mastering the art of smelting iron ingots, you can unlock a wide range of crafting possibilities and take your smithing skills to the next level.
Building the Smithing Table
Building a smithing table is a crucial step in any Minecraft player's journey, as it allows them to craft and repair essential tools and equipment. To create a high-quality smithing table, players must follow a series of steps that require attention to detail and a clear understanding of the game's mechanics. In this article, we will guide you through the process of building a smithing table, from creating the table base to adding the anvil and finalizing the table design. By following these steps, you will be able to craft a functional and efficient smithing table that will serve you well in your Minecraft adventures. First, we will start by creating the table base, which is the foundation of the smithing table and requires careful planning and execution.
Creating the Table Base
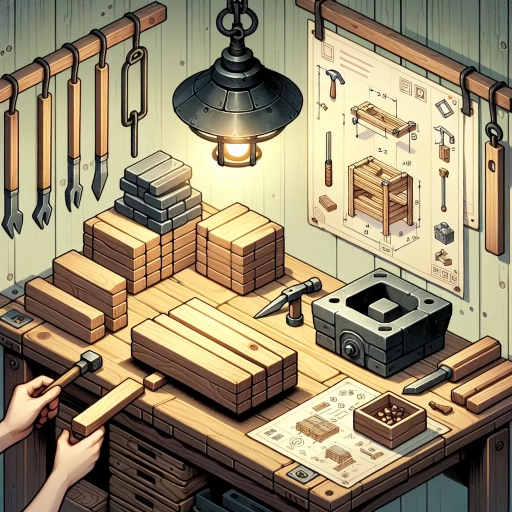
To create the table base, start by gathering the necessary materials, including four wooden planks and two wooden slabs. Place the planks in a square shape on the crafting grid, with one plank in each corner. This will form the base of the table. Next, place the two wooden slabs in the center of the grid, one on top of the other, to create the table's surface. Make sure to align the slabs properly to ensure a sturdy and even base. Once the base is complete, you can move on to adding the table's legs and other decorative elements. The table base is a crucial component of the smithing table, providing a stable surface for crafting and repairing tools. By following these simple steps, you can create a functional and visually appealing table base that will serve as the foundation for your smithing table.
Adding the Anvil
Adding the Anvil is a crucial step in building the Smithing Table. To do this, you will need to place the Anvil on top of the base you created in the previous step. The Anvil should be centered and aligned with the base, making sure it is secure and even. Once the Anvil is in place, you can begin to add the other components of the Smithing Table, such as the hammer and tongs. It's essential to ensure that the Anvil is level and stable, as this will affect the overall functionality of the Smithing Table. If the Anvil is not properly aligned, it may cause the table to become unstable, leading to accidents or injuries. Therefore, take your time and make sure the Anvil is securely in place before moving on to the next step.
Finalizing the Table Design
Finalizing the table design is a crucial step in building a smithing table. At this stage, you should have a clear idea of the table's dimensions, material, and features. Review your design and make any necessary adjustments to ensure it meets your needs and is functional. Consider the height and depth of the table, as well as the placement of the anvil, forge, and other tools. You may also want to add features such as a vice, storage compartments, or a removable top. Once you are satisfied with your design, create a detailed plan and make a list of the materials and tools you will need to bring your vision to life. This will help you stay organized and ensure that your project stays on track. With a solid design in place, you can move forward with confidence and start building your smithing table.
Using the Smithing Table
The Smithing Table is a crucial tool in Minecraft that allows players to upgrade and enhance their equipment. With the Smithing Table, players can upgrade their diamond tools, enchant their tools and armor, and repair and refurbish their items. In this article, we will explore the various uses of the Smithing Table and how it can benefit players in their Minecraft journey. One of the most significant advantages of the Smithing Table is its ability to upgrade diamond tools, allowing players to improve their mining and crafting efficiency. We will start by discussing how to upgrade diamond tools using the Smithing Table, and then move on to other uses such as enchanting tools and armor, and repairing and refurbishing items. By the end of this article, players will have a comprehensive understanding of how to use the Smithing Table to improve their gameplay experience. First, let's take a look at how to upgrade diamond tools using the Smithing Table.
Upgrading Diamond Tools
Upgrading diamond tools is a crucial step in Minecraft that can significantly enhance a player's efficiency and productivity. To upgrade diamond tools, players need to use a smithing table, which is a specialized crafting station that allows for the upgrade of diamond tools to netherite tools. The smithing table can be crafted using two iron ingots and four wooden planks, and it can be placed on the ground to access its interface. Once the smithing table is placed, players can upgrade their diamond tools by placing the tool in the first slot and a netherite ingot in the second slot. The upgraded tool will then appear in the output slot, and it will have improved durability and efficiency compared to the original diamond tool. Upgrading diamond tools is especially important for players who engage in activities that require a lot of digging or chopping, such as mining or woodcutting, as it can significantly reduce the time and effort required to complete these tasks. Additionally, upgraded tools can also provide a significant advantage in combat, as they can deal more damage to enemies and withstand more damage before breaking. Overall, upgrading diamond tools is a simple yet effective way to improve a player's gameplay experience in Minecraft.
Enchanting Tools and Armor
Here is the paragraphy: Enchanting tools and armor is a crucial aspect of Minecraft gameplay, allowing players to enhance their gear and gain a competitive edge. To enchant tools and armor, players need to use an enchanting table, which can be crafted using four obsidian blocks, two diamonds, and one book. Once the enchanting table is set up, players can place their tools or armor on the table and select from a list of available enchantments. The enchantments available depend on the type of tool or armor being enchanted, as well as the player's experience level. For example, a diamond sword can be enchanted with Sharpness, Smite, or Fire Aspect, while a set of diamond armor can be enchanted with Protection, Blast Protection, or Thorns. Enchanting tools and armor can significantly improve their durability, damage output, and overall effectiveness, making it a vital part of any Minecraft player's strategy. By combining enchanting with other gameplay mechanics, such as brewing and smithing, players can create powerful and customized gear that suits their playstyle.
Repairing and Refurbishing Items
Repairing and refurbishing items is an essential aspect of using a smithing table. With a smithing table, you can repair and refurbish various items, including tools, armor, and other equipment. To repair an item, you need to place it on the smithing table and add the required materials. The materials needed for repair vary depending on the item and its level of damage. For example, to repair a damaged sword, you may need to add a certain amount of metal ingots, while to repair a damaged piece of armor, you may need to add leather or other materials. Once you have added the required materials, the smithing table will repair the item, restoring its durability and effectiveness. Refurbishing items, on the other hand, involves upgrading or modifying them to improve their performance or appearance. This can be done by adding new materials or components to the item, such as enchantments or other upgrades. By refurbishing items, you can extend their lifespan, improve their performance, and make them more effective in various situations. Overall, repairing and refurbishing items is a crucial aspect of using a smithing table, and it can help you to get the most out of your equipment and tools.