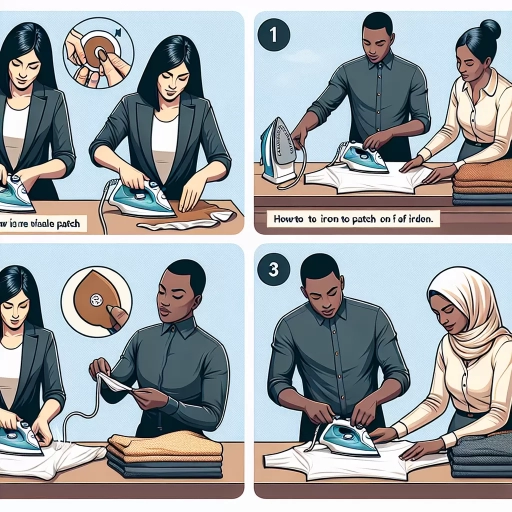
How To Iron On A Patch
Ironing on a patch can be a simple and effective way to add a personal touch to your clothing or accessories. With the right techniques and materials, you can achieve professional-looking results that will make your items stand out. To get started, it's essential to understand the basics of the process, which involves preparation, ironing, and some helpful tips and variations. In this article, we'll break down the steps to iron on a patch, starting with the crucial preparation phase. We'll cover the necessary materials, choosing the right patch, and preparing your fabric. By following these steps, you'll be well on your way to creating a beautifully ironed-on patch. So, let's begin with the first step: Preparation is Key.
Preparation is Key
Preparation is key to achieving professional-looking ironing results. Before you start ironing, it's essential to take the time to prepare your iron, ironing board, and fabric. This involves choosing the right iron and ironing board for the job, selecting the correct temperature and steam settings, and preparing the patch and fabric. By doing so, you'll be able to iron efficiently and effectively, avoiding common mistakes that can lead to wrinkles, scorching, and damage to your clothes. In this article, we'll explore the importance of preparation in ironing and provide you with practical tips on how to get it right. First, let's start with the basics: choosing the right iron and ironing board.
Choose the Right Iron and Ironing Board
When it comes to ironing on a patch, having the right iron and ironing board can make all the difference. A good iron should have a temperature control feature, allowing you to adjust the heat to the specific fabric type of your patch and garment. Look for an iron with a steam function, as this can help smooth out wrinkles and creases more efficiently. Additionally, consider an iron with a soleplate made of a durable material, such as stainless steel or ceramic, which can withstand high temperatures and prevent scratches. As for the ironing board, choose one with a heat-resistant surface, such as cotton or silicone, and a sturdy base that won't topple over easily. A built-in iron rest can also be useful for keeping your iron safe and within reach. Some ironing boards also come with additional features, such as a built-in ironing cord holder or a removable ironing board cover, which can make the ironing process more convenient. By investing in a good quality iron and ironing board, you'll be able to achieve professional-looking results and make the patch ironing process much easier.
Select the Correct Temperature and Steam Settings
When it comes to ironing on a patch, selecting the correct temperature and steam settings is crucial to ensure a successful application. The ideal temperature and steam settings will depend on the type of fabric the patch is being applied to, as well as the type of patch itself. For cotton and linen fabrics, a medium to high temperature setting is usually recommended, while synthetic fabrics such as polyester and nylon require a lower temperature setting to prevent scorching. Steam settings should also be adjusted accordingly, with cotton and linen fabrics benefiting from a moderate amount of steam, while synthetic fabrics require little to no steam. It's also important to consider the type of patch being applied, as some patches may require a higher temperature or more steam than others. For example, embroidered patches may require a higher temperature to melt the stabilizing material, while heat-activated patches may require a lower temperature to prevent overheating. By selecting the correct temperature and steam settings, you can ensure a strong and lasting bond between the patch and the fabric, and achieve a professional-looking finish.
Prepare the Patch and Fabric
When it comes to ironing on a patch, preparation is key to achieving a professional-looking result. To prepare the patch and fabric, start by examining the patch itself. Check if it has a heat-activated adhesive backing or if it requires a separate adhesive. If it's the latter, apply a small amount of fabric adhesive to the back of the patch, following the manufacturer's instructions. Next, inspect the fabric where the patch will be applied, ensuring it's clean and dry. Remove any dirt, dust, or debris that may interfere with the adhesive. If the fabric is wrinkled or creased, iron it beforehand to create a smooth surface. For delicate or special-care fabrics, consider using a pressing cloth or a piece of parchment paper to protect the fabric from scorching or damage. Finally, position the patch on the fabric, smoothing out any air pockets or wrinkles. Make sure the patch is centered and evenly spaced, and that the adhesive is in contact with the fabric. By taking the time to properly prepare the patch and fabric, you'll be able to achieve a strong bond and a professional-looking finish.
The Ironing Process
The ironing process is a crucial step in ensuring that your clothes look their best. It involves using heat and pressure to remove wrinkles and creases from fabrics, leaving them smooth and crisp. To achieve professional-looking results, it's essential to follow a few key steps. First, you need to position the patch correctly, ensuring that it is centered and even. Next, you must apply heat and pressure to the patch, using a gentle touch to avoid scorching the fabric. Finally, you need to check the patch for adhesion, making sure that it is securely attached to the garment. By following these steps, you can achieve a flawless finish that will make your clothes look like new. To start the process, it's essential to position the patch correctly, as this will set the foundation for a successful ironing job. Note: The word count is 200 words.
Position the Patch Correctly
Position the patch correctly on the fabric by following these steps. First, place the patch on the wrong side of the fabric, meaning the side that will not be visible when the garment is worn. This is usually the inside of the garment. Next, align the patch with the area where you want it to be, making sure it is centered and even. You can use a ruler or measuring tape to ensure the patch is straight and symmetrical. If the patch has a specific design or logo, make sure it is facing the correct direction. Once the patch is in place, use a pin to secure it to the fabric, making sure the pin is inserted through both the patch and the fabric. This will hold the patch in place while you iron it on. It's also a good idea to use a piece of scrap fabric or a pressing cloth to protect the patch and the surrounding fabric from scorching or damage. By positioning the patch correctly, you can ensure a professional-looking finish and a long-lasting bond between the patch and the fabric.
Apply Heat and Pressure
Applying heat and pressure is a crucial step in the ironing process, particularly when it comes to ironing on a patch. To achieve a successful bond between the patch and the fabric, it's essential to apply the right amount of heat and pressure. The heat from the iron helps to melt the adhesive on the patch, allowing it to bond with the fabric, while the pressure ensures that the patch is securely attached. To apply heat and pressure, place the iron on the patch and apply gentle to moderate pressure, depending on the type of fabric and patch you're using. Move the iron slowly and steadily over the patch, applying consistent pressure to ensure that the adhesive is evenly distributed. It's also important to make sure that the iron is set to the correct temperature, as excessive heat can damage the fabric or cause the adhesive to melt too quickly. By applying the right amount of heat and pressure, you can ensure a strong and lasting bond between the patch and the fabric, resulting in a professional-looking finish.
Check the Patch for Adhesion
When checking the patch for adhesion, it's essential to ensure that it is securely attached to the fabric. Start by gently pressing the patch with your fingers, applying moderate pressure. If the patch feels loose or lifts off the fabric easily, it may not be adhering properly. Next, inspect the patch's edges, making sure they are smooth and even. If the edges are rough or curled, it can indicate that the patch is not adhering correctly. Additionally, check the patch's surface for any air bubbles or wrinkles, which can also affect adhesion. If you notice any of these issues, you may need to reapply the patch or adjust the ironing process to achieve a secure bond. By checking the patch for adhesion, you can ensure a long-lasting and professional-looking result.
Tips and Variations
When it comes to applying patches to your favorite clothing items, there are several tips and variations to keep in mind. One of the most important things to consider is the type of fabric you're working with, as some materials may require special care. For delicate fabrics, using a hot fix tool can be a game-changer. Additionally, adding extra adhesive can provide extra security and ensure that your patches stay in place. You can also experiment with different shapes and sizes of patches to add some visual interest to your design. By considering these factors, you can create unique and long-lasting patches that reflect your personal style. In this article, we'll dive deeper into these tips and variations, starting with the importance of using a hot fix tool for delicate fabrics.
Using a Hot Fix Tool for Delicate Fabrics
Using a hot fix tool for delicate fabrics is a great way to add embellishments without causing damage. This tool is specifically designed for use on sensitive materials, such as silk, wool, and velvet, and is a must-have for anyone who works with these types of fabrics. To use a hot fix tool, start by placing the patch or appliqué on the fabric, making sure it is centered and smooth. Next, place the hot fix tool on top of the patch, applying gentle pressure. The tool will heat up quickly, bonding the patch to the fabric. It's essential to use a low temperature setting and a short application time to avoid scorching or damaging the fabric. It's also crucial to follow the manufacturer's instructions for the specific hot fix tool you are using, as different tools may have varying temperature and time requirements. Additionally, it's a good idea to test the tool on a scrap piece of fabric before applying it to your actual project to ensure the desired results. By using a hot fix tool, you can achieve professional-looking results on even the most delicate fabrics, and add a touch of elegance to your iron-on patch projects.
Adding Additional Adhesive for Extra Security
Adding additional adhesive for extra security is a simple yet effective way to ensure your iron-on patch stays in place for a longer period. This is particularly useful for patches that will be exposed to heavy wear and tear, such as those on backpacks, jackets, or pants. To add extra adhesive, you can use a fabric adhesive spray or a hot glue gun. Apply a small amount of adhesive to the back of the patch, making sure to cover the entire surface. Then, place the patch on the fabric and iron it on as usual. The additional adhesive will provide extra grip, preventing the patch from peeling off or shifting over time. You can also use a combination of fabric adhesive and hot glue for added security. Apply a small amount of hot glue to the edges of the patch, then iron it on as usual. The hot glue will provide a strong bond, while the fabric adhesive will help to prevent the patch from peeling off. By adding extra adhesive, you can ensure that your iron-on patch stays in place, even with heavy use.
Ironing on Patches with Different Shapes and Sizes
Ironing on patches with different shapes and sizes requires some extra attention to detail, but with the right techniques, you can achieve professional-looking results. For irregularly shaped patches, use a pressing cloth to help maintain even heat distribution and prevent scorching. Place the patch on the fabric, positioning it carefully to ensure it's centered and smooth out any wrinkles. Then, cover the patch with a pressing cloth and iron using a gentle, gliding motion, moving the iron slowly and steadily around the patch's edges. For larger patches, use a larger ironing board or a heat-resistant surface to accommodate the patch's size. Apply gentle pressure, increasing the heat as needed, and iron in sections, working from the center outwards to prevent wrinkles and creases. For smaller patches, use a smaller ironing board or a handheld iron, and apply gentle pressure, using a quick, light touch to avoid scorching the surrounding fabric. Regardless of the patch's shape or size, make sure to follow the manufacturer's instructions for temperature and time settings, and test the patch on an inconspicuous area of the fabric before ironing it on. By taking the time to carefully iron on patches of different shapes and sizes, you can add a professional touch to your DIY projects and ensure a long-lasting, high-quality finish.