How To Make Stickers With Tape
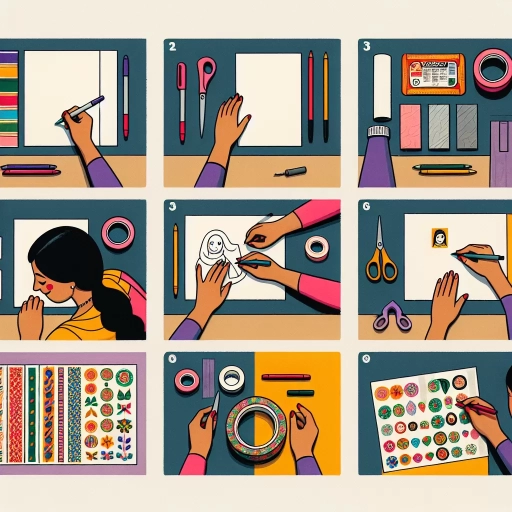
Making stickers with tape is a fun and creative way to add a personal touch to your belongings, gifts, or even your laptop. With just a few simple materials and tools, you can create unique and colorful stickers that reflect your personality. In this article, we will guide you through the process of making stickers with tape, from gathering the essential materials and tools to designing and preparing your sticker, and finally, applying and sealing it. To get started, it's crucial to have the right materials and tools, which we will discuss in the next section, Making Stickers with Tape: Essential Materials and Tools.
Making Stickers with Tape: Essential Materials and Tools
Making stickers with tape is a fun and creative activity that can be enjoyed by people of all ages. To get started, it's essential to have the right materials and tools. The type of tape used is crucial, as it will determine the quality and durability of the stickers. There are various types of tape suitable for making stickers, including masking tape, washi tape, and double-sided tape. In addition to the right tape, a cutting mat and craft knife are also necessary for precise cutting and shaping. Furthermore, having additional supplies such as scissors, rulers, and pencils can also be helpful in the sticker-making process. By having these essential materials and tools, you can create high-quality stickers that are perfect for decorating, labeling, or gift-giving. With the right tape, you can start creating your own unique stickers, so let's take a closer look at the different types of tape suitable for making stickers.
Different Types of Tape Suitable for Making Stickers
There are various types of tape suitable for making stickers, each with its own unique characteristics and advantages. Masking tape is a popular choice for making stickers due to its ease of use, affordability, and versatility. It is available in a range of widths and can be easily cut into desired shapes and sizes. Duct tape is another popular option, known for its strength and durability, making it ideal for creating stickers that need to withstand heavy use or harsh environments. Packing tape is also a great option, offering a strong adhesive and a smooth finish, making it perfect for creating stickers with intricate designs. Double-sided tape is also a great option, allowing for the creation of stickers that can be easily applied to a variety of surfaces. Additionally, there are also specialized tapes such as vinyl tape, foam tape, and transfer tape, which offer unique properties and are suitable for specific applications. For example, vinyl tape is great for creating stickers with a glossy finish, while foam tape is ideal for creating stickers with a textured surface. Transfer tape, on the other hand, is perfect for creating stickers with intricate designs and small details. By choosing the right type of tape, you can create high-quality stickers that meet your specific needs and requirements.
The Importance of a Cutting Mat and Craft Knife
A cutting mat and craft knife are essential tools for making stickers with tape, as they enable you to cut your stickers accurately and safely. A cutting mat provides a stable and protective surface for cutting, preventing damage to your work surface and ensuring that your stickers are cut cleanly and evenly. It also helps to prevent the tape from slipping or moving around while you're cutting, which can lead to uneven cuts and wasted materials. A craft knife, on the other hand, is a versatile tool that allows you to make precise cuts in your tape, enabling you to create intricate designs and shapes. When choosing a craft knife, look for one with a sharp blade and a comfortable grip, as this will make it easier to maneuver and control. By using a cutting mat and craft knife together, you can achieve professional-looking results and ensure that your stickers are cut to perfection. Additionally, a cutting mat and craft knife can be used for a variety of other craft projects, making them a valuable investment for any crafter or DIY enthusiast.
Additional Supplies: Scissors, Rulers, and Pencils
When it comes to making stickers with tape, having the right additional supplies can make all the difference in the quality and appearance of your final product. Scissors are a must-have for cutting the tape into the desired shape and size. Look for sharp, dedicated scissors that are specifically designed for cutting tape or paper to ensure clean cuts and prevent the tape from tearing. Rulers are also essential for creating straight edges and measuring out precise lengths of tape. A metal ruler is ideal, as it provides a sturdy edge for cutting against and can help prevent the tape from slipping or curling. Finally, pencils are necessary for drawing designs or patterns onto the tape before cutting it out. A sharp pencil with a fine tip is best, as it allows for precise lines and details. By having these additional supplies on hand, you can ensure that your stickers turn out professional-looking and are fun to make.
Designing and Preparing Your Sticker with Tape
Designing and preparing your sticker with tape can be a fun and creative process. To get started, you'll need to sketch out your design on paper or digitally, which will help you visualize your idea and make any necessary adjustments. Once you have a solid design, you can transfer it onto the tape, using a variety of techniques to ensure a precise and accurate application. Finally, you'll need to cut out intricate details and shapes, which can be a bit tricky, but with the right tools and techniques, you can achieve professional-looking results. By following these steps, you can create a unique and eye-catching sticker that showcases your personality and style. So, let's start by sketching out your design on paper or digitally, and see where your creativity takes you.
Sketching Out Your Design on Paper or Digitally
Sketching out your design on paper or digitally is an essential step in creating stickers with tape. This stage allows you to visualize your idea, make necessary adjustments, and refine your design before committing to the actual sticker creation process. When sketching on paper, use a pencil or a fine-tip pen to draw your design, considering the size, shape, and proportions of your sticker. You can also use a ruler or a straightedge to ensure clean lines and precise measurements. On the other hand, digital sketching offers more flexibility and precision, allowing you to easily edit and modify your design using software like Adobe Illustrator or Canva. You can also use a graphics tablet or a digital drawing app on your tablet or smartphone to create your design. Regardless of the method you choose, take your time to refine your design, considering the colors, textures, and overall aesthetic you want to achieve. A well-planned design will make the sticker creation process much smoother and ensure a professional-looking result.
Transferring Your Design onto the Tape
Here is the paragraphy: To transfer your design onto the tape, start by cutting a piece of tape slightly larger than your design. Place the tape over the design, making sure to cover the entire area. Use a credit card or similar tool to smooth out any air bubbles or wrinkles. Apply even pressure to ensure the tape adheres to the design. If necessary, use a ruler or other straight edge to help align the tape with the design. Once the tape is in place, use a pair of scissors or a craft knife to trim the excess tape around the edges of the design. Be careful not to cut too close to the design, as this can cause the tape to lift or tear. If your design has intricate details or small features, you may need to use a smaller piece of tape or a more delicate touch to avoid damaging the design. Finally, inspect the tape to make sure it is securely attached to the design and that there are no air bubbles or wrinkles. If necessary, use a small amount of pressure or a gentle touch to smooth out any imperfections. With the tape securely in place, your design is now ready to be applied to your desired surface.
Cutting Out Intricate Details and Shapes
Designing and preparing your sticker with tape is a crucial step in creating high-quality stickers. When it comes to cutting out intricate details and shapes, it's essential to use the right tools and techniques. To achieve precise cuts, use a craft knife or a pair of sharp scissors specifically designed for cutting tape. For more complex designs, consider using a cutting mat or a paper trimmer with a grid pattern to help guide your cuts. If you're struggling to cut out intricate details, try using a ruler or a straightedge to help you stay on track. Additionally, you can use a small pair of tweezers to carefully remove excess tape from small areas. To ensure clean cuts, make sure to cut slowly and carefully, applying gentle pressure to avoid tearing the tape. By taking your time and using the right tools, you can achieve professional-looking results and create stickers with intricate details and shapes that will make your designs stand out.
Applying and Sealing Your Tape Sticker
Applying and sealing your tape sticker is a crucial step in ensuring its longevity and durability. To achieve a professional-looking finish, it's essential to follow a few simple steps. First, you need to apply the sticker to your desired surface, making sure it's clean and dry. Next, you'll need to smooth out any air bubbles and wrinkles that may have formed during the application process. Finally, to protect your sticker from fading, peeling, or damage, you'll need to seal it with clear tape or varnish. By following these steps, you can ensure that your tape sticker looks great and lasts for a long time. In this article, we'll take a closer look at each of these steps, starting with the first and most critical one: applying the sticker to your desired surface.
Applying the Sticker to Your Desired Surface
Applying the sticker to your desired surface is a crucial step in the sticker-making process. To ensure a smooth and bubble-free application, start by cleaning the surface thoroughly with a damp cloth to remove any dirt, dust, or oils. Next, peel the backing paper off the sticker, taking care not to touch the adhesive side to prevent oils from your skin from interfering with the adhesive. Align the sticker with your desired surface, starting from the center and working your way outwards. Use a credit card or similar tool to gently press the sticker onto the surface, applying even pressure to avoid air bubbles. If air bubbles do form, use a pin or needle to carefully prick the bubble and smooth out the sticker. For more complex surfaces, such as curved or irregular shapes, consider using a transfer tape to help guide the sticker into place. Once the sticker is applied, use a soft cloth to smooth out any wrinkles or air pockets, ensuring a professional-looking finish. By following these steps, you can achieve a successful and long-lasting sticker application that will make your design stand out.
Smoothing Out Air Bubbles and Wrinkles
When applying and sealing your tape sticker, it's essential to smooth out any air bubbles and wrinkles that may form. To do this, start by gently pressing the tape down onto the surface, working from the center outwards. Use a credit card or similar tool to apply even pressure, making sure to smooth out any air pockets that may have formed. If a bubble does appear, don't panic - simply use a pin or needle to carefully prick the bubble and then smooth out the area with your finger or a cloth. For more stubborn wrinkles, try using a hair dryer on a low setting to gently heat the tape, making it more pliable and easier to smooth out. Alternatively, you can also use a specialized tool, such as a squeegee or a smoothing tool, to remove any air bubbles and wrinkles. By taking the time to smooth out any imperfections, you can ensure that your tape sticker looks professional and lasts for a long time.
Sealing Your Sticker with Clear Tape or Varnish
Sealing your sticker with clear tape or varnish is a crucial step in protecting it from wear and tear, ensuring it remains vibrant and intact for a longer period. Clear tape, such as packing tape or Scotch tape, can be applied over the sticker to create a barrier against moisture, dust, and other environmental factors that may cause it to deteriorate. This method is especially useful for stickers that will be exposed to outdoor conditions or handled frequently. On the other hand, varnish can be applied using a brush or spray, providing a more durable and long-lasting seal. Varnish is available in various sheens, from matte to glossy, allowing you to choose the desired finish for your sticker. When applying varnish, make sure to follow the manufacturer's instructions and test it on a small, inconspicuous area first to ensure it doesn't affect the sticker's color or texture. By sealing your sticker with clear tape or varnish, you can enjoy a professional-looking finish and extend the lifespan of your sticker.