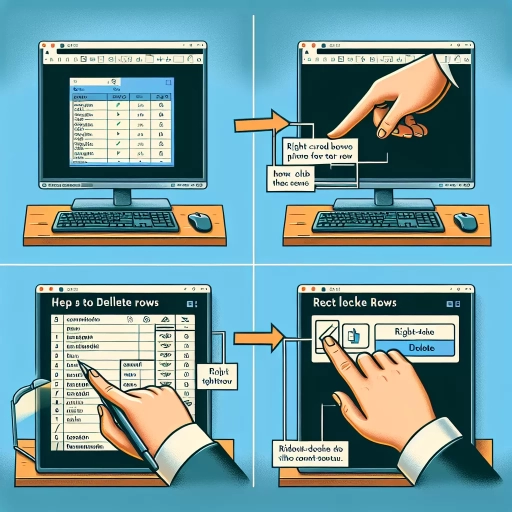
How To Delete Rows In Excel
When working with data in Excel, managing rows is a crucial part of data manipulation. Deleting rows is a common task that can help you clean up your data, remove errors, or reorganize your spreadsheet. However, deleting rows can be a bit tricky, especially if you're new to Excel. In this article, we'll explore the different methods for deleting rows in Excel, from the basics to advanced techniques. We'll start by understanding the basics of deleting rows in Excel, including how to select and delete rows, and how to avoid common mistakes. Then, we'll dive into the different methods for deleting rows, including using the "Delete" button, keyboard shortcuts, and formulas. Finally, we'll cover advanced techniques for deleting rows, including using VBA macros and Power Query. By the end of this article, you'll be equipped with the knowledge and skills to efficiently delete rows in Excel and take your data management to the next level. First, let's start with the basics.
Understanding the Basics of Deleting Rows in Excel
When working with large datasets in Excel, deleting rows can be a crucial task to maintain data accuracy and organization. However, many users are unsure about the different methods to delete rows in Excel, how to select rows for deletion, and the keyboard shortcuts available to streamline the process. Understanding the basics of deleting rows in Excel is essential to avoid errors and ensure data integrity. In this article, we will explore the various methods to delete rows in Excel, including the use of the "Delete" button, keyboard shortcuts, and formulas. We will also discuss how to select rows for deletion, including selecting entire rows, non-adjacent rows, and rows based on specific criteria. Additionally, we will cover the keyboard shortcuts available for deleting rows, including the "Ctrl + -" shortcut. By the end of this article, you will have a comprehensive understanding of how to delete rows in Excel efficiently and effectively. So, let's start by exploring the different methods to delete rows in Excel.
What are the different methods to delete rows in Excel?
To delete rows in Excel, you can use several methods, each with its own advantages and use cases. The most common method is to select the row(s) you want to delete and press the "Delete" key on your keyboard. Alternatively, you can right-click on the row header and select "Delete" from the context menu. Another method is to use the "Delete Row" button in the "Home" tab of the ribbon, which is located in the "Cells" group. You can also use the "Go To Special" feature to select entire rows and then delete them. Additionally, you can use Excel's built-in shortcut keys, such as "Ctrl + -" (minus sign) to delete rows. If you want to delete multiple rows at once, you can select the rows and use the "Delete" button or press the "Delete" key. You can also use Excel's "Find and Select" feature to select rows based on specific criteria and then delete them. Furthermore, you can use Excel's "Power Query" feature to delete rows based on specific conditions. Lastly, you can use VBA macros to automate the process of deleting rows in Excel.
How to select rows for deletion in Excel?
To select rows for deletion in Excel, start by identifying the rows you want to delete. You can do this by scanning the data and looking for rows that meet specific criteria, such as duplicate values, errors, or irrelevant information. Once you've identified the rows, select them by clicking on the row header, which is the number or letter at the beginning of the row. You can select multiple rows by holding down the Ctrl key while clicking on each row header. Alternatively, you can select a range of rows by clicking on the first row header, holding down the Shift key, and clicking on the last row header. If you want to select entire rows based on specific conditions, you can use the "Find and Select" feature. To do this, go to the "Home" tab, click on "Find and Select" in the "Editing" group, and select "Go To Special". Then, choose "Conditional Formatting" and select the condition that applies to the rows you want to delete. Excel will select the rows that meet the condition, and you can then delete them by pressing the "Delete" key or right-clicking and selecting "Delete Row".
What are the keyboard shortcuts for deleting rows in Excel?
To delete rows in Excel, you can use several keyboard shortcuts to streamline the process. The most common shortcut is to select the row(s) you want to delete and press `Ctrl + -` (minus sign). This will open the "Delete" dialog box, where you can choose to delete the entire row. Alternatively, you can use `Alt + E + D` to delete the row without opening the dialog box. If you want to delete multiple rows, you can select them and use `Ctrl + Shift + -` (minus sign). Additionally, you can also use `Ctrl + -` (minus sign) and then press `R` to delete the row and shift cells up. These keyboard shortcuts can save you time and increase your productivity when working with large datasets in Excel.
Methods for Deleting Rows in Excel
Here is the introduction paragraph: Managing data in Excel can be a daunting task, especially when it comes to deleting rows. Whether you're working with a small dataset or a large spreadsheet, deleting rows can be a time-consuming process if you don't know the right methods. In this article, we'll explore three efficient methods for deleting rows in Excel: using the "Delete" button in the Home tab, utilizing the "Go To Special" feature, and leveraging VBA macros. By the end of this article, you'll be able to choose the best method for your specific needs and streamline your data management process. Let's start with the simplest method: using the "Delete" button in the Home tab.
How to delete rows using the "Delete" button in the Home tab?
To delete rows using the "Delete" button in the Home tab, start by selecting the row or rows you want to delete. You can do this by clicking on the row number on the left side of the spreadsheet or by selecting the entire row by pressing the "Ctrl + Space" keys. Once the row is selected, go to the Home tab in the ribbon and click on the "Delete" button in the "Cells" group. Alternatively, you can also right-click on the selected row and choose "Delete Row" from the context menu. Excel will then prompt you to confirm the deletion, and once you click "OK", the selected row or rows will be deleted. Additionally, you can also use the keyboard shortcut "Ctrl + -" to quickly delete the selected row. It's worth noting that when you delete a row, all the data in that row will be removed, and the rows below it will shift up to fill the gap.
How to delete rows using the "Go To Special" feature?
To delete rows using the "Go To Special" feature in Excel, start by selecting the entire range of cells that you want to work with. Then, go to the "Home" tab in the ribbon and click on the "Find & Select" button in the "Editing" group. From the drop-down menu, select "Go To Special." In the "Go To Special" dialog box, choose "Blanks" to select all blank cells in the range. If you want to delete rows based on specific criteria, such as errors or formulas, select the corresponding option. Once you've selected the type of cells you want to work with, click "OK." Excel will then select all the cells that match your criteria. To delete the rows, right-click on the selection and choose "Delete Row" from the context menu. Alternatively, you can use the keyboard shortcut "Ctrl + -" (minus sign) to delete the rows. This method is particularly useful when you need to delete multiple rows at once, or when you want to delete rows based on specific conditions. By using the "Go To Special" feature, you can quickly and easily delete rows in Excel without having to manually select each row individually.
How to delete rows using VBA macros?
To delete rows using VBA macros in Excel, start by opening the Visual Basic Editor by pressing "Alt + F11" or navigating to Developer > Visual Basic in the ribbon. In the Editor, click "Insert" > "Module" to create a new module. In the module window, type "Sub DeleteRows()" to create a new subroutine. Define the range of rows you want to delete by using the "Range" object, for example, "Range("A1:A10").Select" to select rows 1 to 10. Then, use the "Delete" method to delete the selected rows, such as "Selection.Delete Shift:=xlUp". You can also use the "Rows" object to delete entire rows, for example, "Rows("1:10").Delete". To delete rows based on a condition, use the "For" loop to iterate through the rows and check the condition, for example, "For i = 1 To 10: If Cells(i, 1).Value = "" Then Rows(i).Delete: Next i". Finally, end the subroutine with "End Sub" and run the macro by clicking "Run" or pressing "F5".
Advanced Techniques for Deleting Rows in Excel
When working with large datasets in Excel, deleting rows can be a daunting task, especially when you need to delete specific rows based on certain conditions. Fortunately, Excel offers several advanced techniques to make this process more efficient. In this article, we will explore three powerful methods for deleting rows in Excel: using filters to delete rows based on conditions, utilizing the "Find and Select" feature to delete rows, and leveraging Power Query to delete rows. By mastering these techniques, you can streamline your data management workflow and save time. Let's start by exploring how to delete rows based on conditions using filters, a feature that allows you to quickly and easily identify and remove unwanted data.
How to delete rows based on conditions using filters?
To delete rows based on conditions using filters in Excel, start by selecting the entire data range, including headers. Then, go to the "Data" tab in the ribbon and click on "Filter" to enable filtering. Next, click on the filter dropdown arrow in the column header of the criteria you want to apply, and select "Filter by Condition" from the menu. Choose the condition you want to apply, such as "Greater than" or "Contains", and enter the specific value or criteria. Click "OK" to apply the filter, and only the rows that meet the condition will be visible. To delete the filtered rows, select the visible cells, right-click, and choose "Delete Row" or use the keyboard shortcut "Ctrl + -". Alternatively, you can also use the "Go To Special" feature to select only the visible cells, and then delete the rows. To do this, press "Ctrl + G" to open the "Go To" dialog box, select "Special", and then choose "Visible cells only". Click "OK" to select only the visible cells, and then delete the rows. By using filters to delete rows based on conditions, you can quickly and easily remove unwanted data from your Excel spreadsheet.
How to delete rows using the "Find and Select" feature?
To delete rows using the "Find and Select" feature in Excel, start by selecting the range of cells that you want to search for specific data. Then, go to the "Home" tab in the ribbon and click on the "Find & Select" button in the "Editing" group. From the drop-down menu, select "Find..." to open the "Find and Replace" dialog box. In the "Find what" field, enter the value or text that you want to use as the criteria for deleting rows. You can also use wildcards or formulas to refine your search. Next, click on the "Find All" button to highlight all the cells that match your search criteria. Then, click on the "Close" button to close the "Find and Replace" dialog box. Finally, right-click on the highlighted cells and select "Delete Row" from the context menu to delete the entire rows that contain the searched data. Alternatively, you can also use the "Go To Special" feature to select the entire rows and then delete them. To do this, go back to the "Find & Select" button and select "Go To Special" from the drop-down menu. Then, select "Current selection" and click on the "OK" button to select the entire rows. Finally, right-click on the selected rows and select "Delete Row" to delete them.
How to delete rows using Power Query?
To delete rows using Power Query, start by selecting the table that contains the rows you want to delete. Then, go to the "Data" tab in the ribbon and click on "From Table/Range" to open the Power Query Editor. In the Power Query Editor, click on the "Remove Rows" button in the "Home" tab. From the drop-down menu, select "Remove Top Rows" or "Remove Bottom Rows" depending on the location of the rows you want to delete. If you want to delete rows based on a condition, select "Remove Rows" and then "Remove Errors" or "Remove Duplicates" from the drop-down menu. You can also use the "Filter" button to filter out the rows you want to delete. To delete rows based on a specific condition, click on the "Add Column" button and create a new column with a formula that returns true or false. Then, click on the "Filter" button and select the new column to filter out the rows that meet the condition. Finally, click on the "Close & Load" button to apply the changes to your original table.