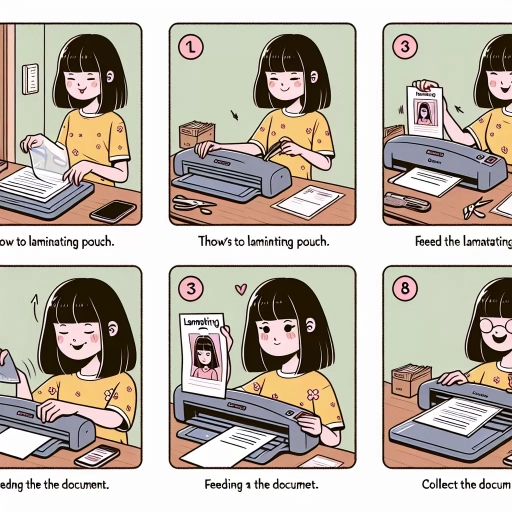
How To Laminate
Lamination is a simple yet effective way to protect and preserve important documents, photos, and other paper-based items. By encasing them in a clear plastic sheet, you can safeguard them against damage, wear, and tear. However, to achieve professional-looking results, it's essential to follow a step-by-step approach. In this article, we'll guide you through the process of lamination, from preparation to aftercare. We'll start by emphasizing the importance of preparation, as it lays the foundation for a successful lamination process. We'll then delve into the lamination process itself, covering the necessary tools and techniques. Finally, we'll provide troubleshooting tips and aftercare advice to ensure your laminated items remain in pristine condition. By following these steps, you'll be able to laminate like a pro. So, let's begin by exploring the crucial first step: Preparation is Key.
Preparation is Key
When it comes to laminating documents or items, preparation is key to achieving professional-looking results. To ensure a successful lamination process, it's essential to consider several factors before starting. First, choosing the right laminator is crucial, as different types of laminators are designed for specific tasks and materials. Additionally, selecting the correct lamination pouches is vital, as they come in various sizes, thicknesses, and finishes. Finally, preparing the document or item to be laminated is also important, as it can affect the final outcome. By considering these factors, individuals can ensure that their laminated documents or items are of high quality and meet their needs. In this article, we will explore each of these factors in more detail, starting with the importance of choosing the right laminator.
Choosing the Right Laminator
Choosing the right laminator is a crucial step in the laminating process. With so many options available in the market, it can be overwhelming to decide which one to choose. To make the right decision, consider the type of documents you will be laminating, the frequency of use, and the level of protection you need. If you plan to laminate small documents such as ID cards, business cards, or photos, a pouch laminator is a good option. These laminators are compact, easy to use, and affordable. On the other hand, if you need to laminate larger documents such as posters, maps, or signs, a roll laminator is a better choice. Roll laminators are more versatile and can handle larger documents, but they are also more expensive and require more space. Additionally, consider the thickness of the laminating pouches you will be using. If you need to laminate documents with a high level of protection, look for a laminator that can handle thicker pouches. Some laminators also come with additional features such as adjustable temperature control, automatic shut-off, and a reverse function. These features can be useful, but they also add to the cost of the laminator. Ultimately, the right laminator for you will depend on your specific needs and budget. By considering these factors, you can choose a laminator that meets your needs and helps you achieve professional-looking results.
Selecting the Correct Lamination Pouches
When it comes to laminating documents, selecting the correct lamination pouches is crucial to ensure a professional finish and longevity of the laminated item. With various types of lamination pouches available in the market, choosing the right one can be overwhelming. To make the right selection, consider the size of the document, the type of material, and the desired level of protection. For standard documents such as ID cards, business cards, and photos, a 3-4 mil pouch is sufficient. However, for thicker documents like menus, maps, and posters, a 5-7 mil pouch is recommended. Additionally, consider the type of material being laminated, such as paper, cardstock, or fabric, and choose a pouch that is specifically designed for that material. It's also essential to consider the level of protection required, such as UV protection, waterproofing, or tamper-evident features. By selecting the correct lamination pouches, you can ensure a professional finish, prevent damage, and extend the lifespan of your laminated documents.
Preparing the Document or Item
Preparing the document or item is a crucial step in the lamination process. It is essential to ensure that the document or item is clean, dry, and free of dust, dirt, and other contaminants. Any debris or moisture can cause bubbles, wrinkles, or other imperfections in the laminate, which can compromise its integrity and appearance. To prepare the document or item, start by gently dusting it with a soft-bristled brush or a lint-free cloth to remove any loose particles. If the document or item is particularly dirty or stained, you may need to use a mild cleaning solution and a soft cloth to gently wipe it clean. However, be careful not to use too much moisture, as this can cause the document or item to become brittle or discolored. Once the document or item is clean, use a dry cloth to wipe it down and remove any excess moisture. If you are laminating a document with ink or toner, it is a good idea to let it sit for a few hours or overnight to allow the ink to fully dry. This will help prevent the ink from smudging or running during the lamination process. Finally, make sure the document or item is flat and smooth, with no creases or wrinkles. If necessary, use a bone folder or a similar tool to gently smooth out any wrinkles or creases. By taking the time to properly prepare the document or item, you can ensure that it is protected and preserved for years to come, and that the lamination process is successful and trouble-free.
The Lamination Process
The lamination process is a simple yet effective way to protect and preserve documents, photos, and other items from damage. To achieve a high-quality laminate, it is essential to follow a step-by-step approach. First, setting up the laminator is crucial to ensure that the machine is functioning correctly and at the right temperature. Next, inserting the document or item into the lamination pouch requires care and attention to detail to prevent air bubbles and creases. Finally, sealing the lamination pouch is the final step that completes the lamination process. By following these steps, individuals can achieve professional-looking results and extend the lifespan of their documents and items. To begin the lamination process, it is essential to start by setting up the laminator.
Setting Up the Laminator
Setting up the laminator is a crucial step in the lamination process. To begin, place the laminator on a flat surface, ensuring it is stable and secure. Next, plug in the laminator and turn it on, allowing it to heat up to the recommended temperature. The temperature setting may vary depending on the type of laminator and the thickness of the laminating pouches being used. It is essential to consult the user manual for specific temperature guidelines. While the laminator is heating up, prepare the laminating pouches by placing the document or item to be laminated in the center of the pouch, leaving a small border around the edges. This ensures that the laminator can seal the pouch properly. Once the laminator is ready, carefully place the laminating pouch into the machine, following the manufacturer's instructions for the correct orientation and alignment. The laminator will then seal the pouch, creating a durable and long-lasting protective covering for the document or item.
Inserting the Document or Item
Inserting the document or item is a crucial step in the lamination process. To do this, place the document or item in the center of the laminating pouch, ensuring it is aligned with the edges of the pouch. Make sure the document or item is not larger than the pouch, as this can cause the laminating machine to jam. If the document or item is smaller than the pouch, you can use a laminating pouch with a grid or a ruler to help you center it. Once the document or item is in place, close the laminating pouch, making sure the edges are aligned and the pouch is sealed. If you are using a laminating machine with a manual feed, you will need to insert the pouch into the machine, following the manufacturer's instructions. If you are using a laminating machine with an automatic feed, simply place the pouch in the machine's tray and let it do the work for you. It's also important to note that some laminating machines may have specific requirements for inserting the document or item, such as using a carrier sheet or a laminating sleeve, so be sure to check your machine's instructions before proceeding.
Sealing the Lamination Pouch
Sealing the lamination pouch is the final step in the lamination process. This step involves applying heat and pressure to the pouch to seal the edges and encase the document or item inside. The heat activates the adhesive in the lamination film, causing it to melt and bond with the document, while the pressure ensures a tight seal. The sealed pouch is then allowed to cool, causing the adhesive to set and the seal to become permanent. Proper sealing is crucial to ensure the longevity and durability of the laminated item, as it prevents moisture, dust, and other contaminants from entering the pouch and damaging the contents. A well-sealed pouch also helps to prevent the document from becoming brittle or yellowed over time. To achieve a strong seal, it is essential to use the correct temperature and pressure settings on the laminator, as well as to ensure that the pouch is properly aligned and free of air bubbles or wrinkles. By following these guidelines, individuals can ensure that their laminated items are protected and preserved for years to come.
Troubleshooting and Aftercare
Troubleshooting and aftercare are crucial steps in the lamination process. After investing time and resources into laminating your documents, photos, or artwork, it's essential to ensure they remain in pristine condition. However, common mistakes can occur, and air bubbles or wrinkles may appear, compromising the integrity of your laminated items. To prevent these issues, it's vital to understand the common lamination mistakes to avoid, such as incorrect temperature settings, inadequate pressure, or using low-quality laminating pouches. By being aware of these potential pitfalls, you can take proactive steps to prevent them and ensure your laminated items remain in excellent condition. In this article, we will explore common lamination mistakes to avoid, provide tips on removing air bubbles and wrinkles, and offer guidance on storing and handling laminated items to ensure their longevity. By following these best practices, you can enjoy your laminated items for years to come. Let's start by examining common lamination mistakes to avoid.
Common Lamination Mistakes to Avoid
Here is the paragraphy: When laminating, it's easy to make mistakes that can ruin the entire process. One common mistake is not preparing the surface properly, which can lead to air bubbles, wrinkles, and uneven lamination. To avoid this, make sure to clean the surface thoroughly and remove any dust, dirt, or oils. Another mistake is not using the right temperature or pressure, which can cause the laminate to melt or become misshapen. Always follow the manufacturer's instructions for temperature and pressure settings. Additionally, not aligning the laminate properly can result in a crooked or uneven finish. To avoid this, use a ruler or other straightedge to ensure the laminate is properly aligned. Finally, not trimming the excess laminate can leave a rough edge, which can be unsightly and prone to peeling. To avoid this, use a sharp utility knife or scissors to trim the excess laminate carefully. By avoiding these common mistakes, you can ensure a smooth and successful lamination process.
Removing Air Bubbles and Wrinkles
Removing air bubbles and wrinkles is a crucial step in the lamination process. To remove air bubbles, start by gently pricking the bubble with a pin or a needle, then smooth out the area with a credit card or a similar tool. For larger bubbles, you can use a bubble removal tool or a similar device specifically designed for this purpose. If the bubble is particularly stubborn, you can try applying heat to the area using a hair dryer or a heat gun, but be careful not to apply too much heat, as this can damage the laminate. To remove wrinkles, start by identifying the source of the wrinkle, which is usually a crease or a fold in the laminate. Once you've identified the source, use a credit card or a similar tool to gently smooth out the wrinkle, working from the center of the laminate outwards. If the wrinkle is particularly deep, you can try applying heat to the area, but again, be careful not to apply too much heat. It's also important to note that some laminates are more prone to wrinkles and air bubbles than others, so it's a good idea to choose a high-quality laminate that is designed to minimize these issues. By following these steps, you should be able to remove air bubbles and wrinkles from your laminated document, leaving it looking smooth and professional.
Storing and Handling Laminated Items
Storing and handling laminated items requires careful consideration to maintain their quality and longevity. To prevent damage, it is essential to store laminated items in a cool, dry place, away from direct sunlight and moisture. Avoid folding or creasing laminated documents, as this can cause cracks and breaks in the laminate. Instead, store them flat or rolled up tightly, using a sturdy cardboard tube to prevent bending. When handling laminated items, always wear gloves to prevent oils from your skin from transferring to the laminate, which can cause damage over time. Additionally, avoid touching the laminated surface, as this can leave fingerprints and smudges. If you must handle laminated items, use a soft, dry cloth to gently wipe away any dirt or debris. For long-term storage, consider using acid-free tissue paper or archival-quality storage materials to prevent yellowing or degradation of the laminate. By following these simple storage and handling tips, you can help extend the life of your laminated items and keep them looking their best.