How To Proof Yeast
Yeast is a microorganism that plays a crucial role in the fermentation process, responsible for converting sugars into carbon dioxide and alcohol. However, not all yeast is created equal, and its quality can significantly impact the outcome of your baking or brewing endeavors. To ensure that your yeast is active and healthy, it's essential to proof it before using it in your recipe. In this article, we'll delve into the world of yeast, exploring its role in fermentation, and provide you with methods for proofing yeast to guarantee its viability. We'll also troubleshoot common issues that may arise during the proofing process, so you can avoid costly mistakes and achieve the best possible results. By understanding yeast and its role in fermentation, you'll be better equipped to proof your yeast effectively, and we'll start by examining the fundamentals of yeast and its function in the fermentation process.
Understanding Yeast and Its Role in Fermentation
Yeast is a microorganism that plays a crucial role in various fermentation processes, including baking, brewing, and winemaking. Understanding yeast and its functions is essential for achieving desired outcomes in these industries. In this article, we will delve into the world of yeast, exploring its characteristics, importance, and applications. We will discuss what yeast is and how it works, highlighting its unique properties and behaviors. Additionally, we will examine the significance of yeast in fermentation processes, including its role in producing carbon dioxide, ethanol, and other compounds. Finally, we will look at common types of yeast used in baking and brewing, providing insights into their specific uses and benefits. By the end of this article, readers will have a comprehensive understanding of yeast and its vital role in fermentation. So, let's start by exploring the basics of yeast and how it works.
What is Yeast and How Does it Work?
Yeast is a microorganism that belongs to the fungus kingdom. It is a single-celled organism that is responsible for fermentation, a process that converts sugars into alcohol and carbon dioxide. Yeast is commonly used in baking, brewing, and winemaking to produce a variety of products, including bread, beer, and wine. Yeast works by consuming sugars and producing carbon dioxide gas as a byproduct. This process is known as fermentation, and it is what gives bread its rise and beer its fizz. Yeast is also responsible for the production of ethanol, which is the main ingredient in alcoholic beverages. In addition to its role in fermentation, yeast is also used in the production of biofuels, nutritional supplements, and pharmaceuticals. Yeast is a versatile microorganism that has been used for thousands of years, and its uses continue to expand as new technologies and applications are developed.
The Importance of Yeast in Fermentation Processes
Yeast plays a vital role in fermentation processes, and its importance cannot be overstated. Yeast is a microorganism that consumes sugars and produces alcohol, carbon dioxide, and other compounds as byproducts. In the context of fermentation, yeast is responsible for converting the sugars present in the raw materials into the desired end products, such as beer, wine, bread, and biofuels. The unique characteristics of yeast, including its ability to ferment a wide range of sugars, its tolerance to various environmental conditions, and its capacity to produce a variety of compounds, make it an essential component of fermentation processes. Without yeast, many of the foods and beverages we enjoy today would not be possible, and the production of biofuels and other industrial products would be severely impacted. Furthermore, yeast is also used in the production of nutritional supplements, such as vitamin B and protein powders, and in the development of new medicines and therapies. In addition, yeast is also used in the field of biotechnology, where it is used to produce a wide range of products, including enzymes, hormones, and vaccines. Overall, the importance of yeast in fermentation processes cannot be overstated, and its contributions to the production of food, beverages, and other products are invaluable.
Common Types of Yeast Used in Baking and Brewing
Yeast is a microorganism that plays a crucial role in fermentation, and there are several types of yeast used in baking and brewing. The most common type of yeast used in baking is Saccharomyces cerevisiae, also known as baker's yeast. This type of yeast is responsible for the fermentation of sugars in dough, producing carbon dioxide gas and causing the dough to rise. Another type of yeast used in baking is instant yeast, which is a more active and convenient form of baker's yeast. Instant yeast can be added directly to dry ingredients, eliminating the need for proofing. In brewing, the most common type of yeast used is Saccharomyces pastorianus, also known as lager yeast. This type of yeast is responsible for the fermentation of sugars in wort, producing ethanol and carbon dioxide. Ale yeast, on the other hand, is a type of yeast that is used to ferment ales and is known for its ability to produce a wide range of flavors and aromas. Wild yeast, such as Brettanomyces, is also used in brewing to produce sour and funky flavors. In addition to these types of yeast, there are also specialty yeasts, such as champagne yeast and wine yeast, which are used to produce specific types of fermented beverages. Overall, the type of yeast used in baking and brewing can greatly impact the final product, and understanding the different types of yeast and their characteristics is essential for achieving the desired results.
Methods for Proofing Yeast
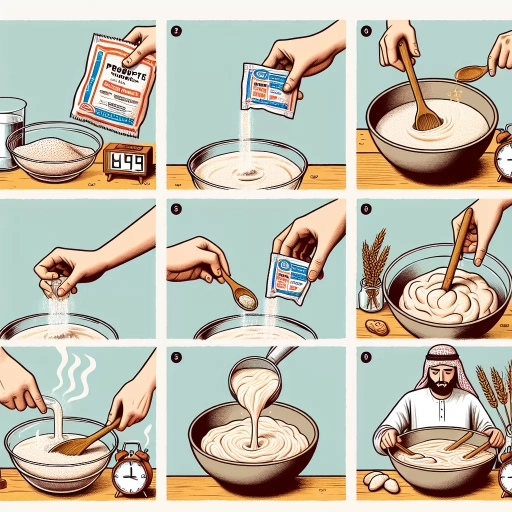
When it comes to baking, yeast is a crucial ingredient that can make or break the final product. However, not all yeast is created equal, and it's essential to ensure that your yeast is active and healthy before adding it to your dough. This is where proofing yeast comes in – a simple process that tests the viability of your yeast. There are several methods for proofing yeast, including the water test, using sugar to activate yeast, and proofing yeast with flour. Each of these methods has its own advantages and can help you determine whether your yeast is good to go. In this article, we'll explore these methods in more detail, starting with the simplest and most straightforward approach: the water test. By using just water and yeast, you can quickly determine whether your yeast is active and ready to use in your recipe.
The Water Test: A Simple Method for Proofing Yeast
The water test is a simple and effective method for proofing yeast, which involves mixing yeast with warm water to activate its fermentation process. To perform the water test, start by filling a clean glass or cup with 1/2 cup of warm water, ideally between 90°F to 100°F (32°C to 38°C). Next, add 1 teaspoon of sugar to the water, as yeast feeds on sugars to produce carbon dioxide gas. Then, add 1 packet (2 1/4 teaspoons) of active dry yeast or 1 teaspoon of instant yeast to the water. Stir the mixture gently to dissolve the yeast and sugar. Now, cover the glass or cup with a cloth or plastic wrap to prevent contamination and let it sit in a warm, draft-free place for 5 to 10 minutes. Observe the mixture after the waiting period; if the yeast is active, you should see a layer of foam or bubbles on the surface, and the mixture should have a slightly sour or yeasty smell. This indicates that the yeast is fermenting the sugars and producing carbon dioxide gas, which is a sign of its viability. If there is no foam or bubbles, it may be a sign that the yeast is dead or inactive, and you may need to try again with a fresh packet of yeast. The water test is a quick and easy way to proof yeast, and it can be used for both active dry yeast and instant yeast.
Using Sugar to Activate Yeast
When it comes to proofing yeast, using sugar is a common method to activate the microorganisms. Yeast feeds on sugars and converts them into carbon dioxide gas, which is responsible for the fermentation process. To use sugar to activate yeast, start by mixing 1-2 teaspoons of sugar with 1/2 cup of warm water (around 100°F to 110°F) in a small bowl. The sugar can be granulated, brown, or even honey, but granulated sugar is the most commonly used. Next, add 1 teaspoon of active dry yeast or 1 packet (2 1/4 teaspoons) of instant yeast to the sugar-water mixture. Stir gently to dissolve the yeast, and then let it sit for 5-10 minutes in a warm, draft-free place. During this time, the yeast will start to feed on the sugar, producing carbon dioxide gas and causing the mixture to foam and bubble. This is a clear indication that the yeast is active and ready to use in your recipe. It's essential to note that using too much sugar can inhibit yeast activity, so it's crucial to use the right amount. Additionally, if you're using a yeast that's past its expiration date or has been stored improperly, it may not activate even with sugar. In such cases, it's best to try a different yeast or check the expiration date before proceeding with your recipe. By using sugar to activate yeast, you can ensure that your yeast is active and ready to help your dough rise, resulting in a lighter, airier, and more flavorful final product.
Proofing Yeast with Flour: A More Accurate Method
When it comes to proofing yeast, many bakers rely on the traditional method of mixing yeast with warm water and sugar. However, this method can be unreliable, as it doesn't account for the yeast's ability to interact with flour, a crucial component in bread making. A more accurate method for proofing yeast is to mix it with flour and water, creating a mini-dough that allows the yeast to ferment and produce carbon dioxide. This approach, known as the "flour method," provides a more realistic environment for the yeast to activate, as it would in a real dough. By using flour, you can better assess the yeast's strength and viability, ensuring that your bread turns out light and airy. To proof yeast with flour, simply mix 1-2 teaspoons of active dry yeast with 1-2 tablespoons of flour and 1-2 tablespoons of warm water. Let the mixture sit for 5-10 minutes, or until it becomes frothy and bubbly, indicating that the yeast is active and ready to use. This method is particularly useful for bakers who work with sourdough or wild yeast, as it allows them to monitor the yeast's activity and adjust their recipes accordingly. By incorporating the flour method into your proofing routine, you can gain a deeper understanding of your yeast's behavior and produce more consistent, high-quality bread.
Troubleshooting Common Issues with Yeast Proofing
Yeast proofing is a crucial step in the baking process, as it ensures that the yeast is active and will help the dough rise. However, many bakers encounter common issues with yeast proofing, which can be frustrating and affect the final product. In this article, we will explore some of the most common issues with yeast proofing and provide troubleshooting tips to help you overcome them. We will discuss what to do if your yeast doesn't activate, how temperature affects yeast proofing, and how to avoid over-proofing your yeast. By understanding these common issues and how to address them, you can ensure that your yeast is proofed correctly and your baked goods turn out light and fluffy. If your yeast doesn't activate, don't worry, we've got you covered - let's start by exploring what to do in this situation.
What to Do if Your Yeast Doesn't Activate
If your yeast doesn't activate, there are several steps you can take to troubleshoot the issue. First, check the expiration date on the yeast packaging to ensure it's not past its prime. Yeast that's too old may not be viable, so try using a fresh packet or jar. Next, verify that you're using the correct temperature water for activation. Yeast thrives in warm temperatures between 100°F and 110°F, so if your water is too hot or too cold, it may not activate. Also, make sure you're not using chlorinated water, as chlorine can kill yeast. If you're using a yeast starter or preferment, check that it's at the right stage of fermentation and that it's not contaminated. Finally, consider the type of yeast you're using - some types, like instant yeast, may not require activation at all. If you've checked all these factors and your yeast still isn't activating, it may be worth trying a different brand or type of yeast to see if that resolves the issue.
Understanding the Impact of Temperature on Yeast Proofing
Understanding the impact of temperature on yeast proofing is crucial for achieving optimal results in baking. Yeast is a living organism that thrives in a specific temperature range, typically between 75°F and 85°F (24°C and 30°C). When yeast is exposed to temperatures outside of this range, its activity and ability to ferment sugars can be significantly affected. If the temperature is too low, yeast growth and fermentation will slow down, leading to a longer proofing time or even failure to proof. On the other hand, temperatures that are too high can cause yeast to over-activate, leading to over-proofing and potentially ruining the dough. It's essential to maintain a consistent temperature during the proofing process to ensure that yeast can ferment sugars efficiently and produce the desired amount of carbon dioxide. By understanding the impact of temperature on yeast proofing, bakers can take steps to control the environment and optimize the proofing process, resulting in better-textured and more flavorful baked goods.
How to Avoid Over-Proofing Your Yeast
When it comes to proofing yeast, one of the most common mistakes bakers make is over-proofing. Over-proofing occurs when the yeast is allowed to ferment for too long, causing the dough to become over-inflated and ultimately leading to a dense, flat, or even collapsed final product. To avoid over-proofing, it's essential to monitor the proofing process closely and take action when necessary. Here are some tips to help you avoid over-proofing your yeast: First, make sure to check the yeast's expiration date and store it properly to ensure its potency. Next, use the right amount of yeast for the recipe, as too much yeast can lead to over-proofing. When mixing the dough, keep an eye on the temperature, as yeast thrives in warm environments. Aim for a temperature between 75°F and 80°F (24°C and 27°C) for optimal proofing. During the proofing process, gently fold the dough every 30 minutes to redistribute the yeast and prevent over-proofing. You can also use a proofing basket or a lightly oiled bowl to help the dough rise evenly. Another crucial step is to check the dough's progress regularly. Look for signs of over-proofing, such as a strong, sour smell, a dense or soggy texture, or a collapse of the dough. If you notice any of these signs, it's time to move on to the next step in the recipe. Finally, be patient and don't rush the proofing process. Yeast proofing can take anywhere from 1 to 2 hours, depending on the recipe and environmental conditions. By following these tips and keeping a close eye on your yeast, you can avoid over-proofing and achieve a light, airy, and delicious final product.