How To Felt Wool
 Knitting, and crafting in general, might be a common hobby, but the art of felting wool is a less-explored territory that provides remarkable results. This insightful article promises to open up that world by walking you through each step of the process, ensuring that beginners to the craft can start without intimidation and that seasoned pros can enhance their skills. Originating from the tradition of compressing wool fibers into soft, durable textiles, this method has been elevated to an art form through years of crafting evolution. We'll tackle three essential steps in this process: the importance of thorough preparation, the nuances of the felting technique itself, and the critical aspects of shaping and finishing your felt masterpiece. Each section will offer in-depth guidance on how to undertake these steps most effectively. With an array of vibrant colors and delightful textures at our disposal, a successful felting endeavor starts with the first step: Preparation is Key.
Preparation is Key
In any successful endeavor, Preparation is Key, and the process of crafting intricate wool-based creations via felting is no exception to this universal truth. The journey to creating an amazing felt masterpiece begins even prior to the first stitch. It encompasses essential knowledge points - the selection of suitable wool materials, the previously unthought-of task of preparing the wool for the felting process, and, very importantly, redesigning and managing your personal workspace for efficiency and style. The need to keenly consider these significant variables before the felting process commences further emphasizes the importance of sound preparation. After all, the products we craft are true reflections of the quality of the preparations we have put in place. Now, our first step in this preparational journey involves understanding and mastering the art of choosing the right wool for your project, a critical stage that has a significant impact on your project's final outcome. Indeed, the choice of wool sets the foundation for the remaining processes, hence the need for careful selection at this primary stage. Let's delve into this further in 'Choosing the Right Wool'.
Choosing the Right Wool
Choosing the right wool is a pivotal step in the process of crafting high-quality woolen items, and it simply cannot be done without proper preparation and knowledge. Three key characteristics to consider when selecting wool are fiber content, fiber length, and color. For felting projects, 100% wool fiber is advisable. It's important to avoid wool labeled 'superwash' or 'machine washable', as these have been treated to resist the felting process. The fiber length, also known as the staple length, determines how easily the wool will felt. Shorter lengths, typically around 1-3 inches, can felt up relatively quickly while longer lengths upwards of 7-8 inches may require more effort to get the same result. Hand-dyed or natural colored wool should be used to attain vibrant colors. Pre-dyed wool may seem convenient, but the colors can sometimes bleed or fade during the felting process. A factor that is often overlooked is that not every breed of sheep produces wool suitable for all types of projects. For example, merino wool is fine, soft, and best suited for wearables like scarves or hats that require a softer touch. On the other hand, Icelandic wool, known for its dual texture of coarse outer fibers and soft inner fibers, is great for creating rugs because they are more durable and sturdy. Furthermore, wool comes in different forms - raw fleece, roving, batting, or yarn. Fleece directly from the sheep is the most raw form and requires extensive preparation like washing, carding or combing before felting. Roving and batting are forms of wool where the fibers are aligned in the same direction and carded together, making it easy to use for beginners. Yarn is wool that’s been spun into strands and is ideal for felting projects like knitting or crocheting. With many different variables to consider, preparation is crucial to choosing the right wool for your project. It includes analyzing the project requirement, understanding the types of wool, processing stages, characteristics, and then making an informed selection. Doing so will result not only in a satisfying crafting process but also in a high-quality, durable woolen piece. Always remember, good preparation is the bedrock of great felting, and the selection of wool is no different.
Preparing the Wool for Felting
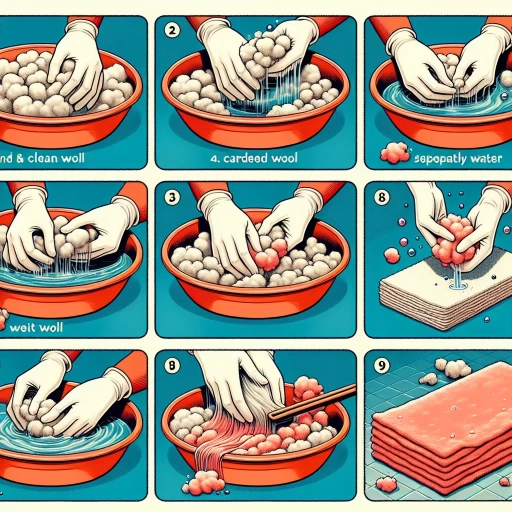
Preparing the wool for felting is a crucial step that determines the final quality of your felt. This preparation phase, if done right, rewards you with an end product that is notably durable, warm, bright, and intricately detailed. However, if skipped or performed shoddily, it generally results in a sub-par felt that is prone to fraying, dullness, and general quality deterioration. To start with, the wool you want to felt must be of good quality. Therefore, it's vital to choose unspun wool, preferably in its roving form. Roving wool refers to a bundle of fiber intersections that are, in this case, sheep's wool, prepared into long, narrow, and high-density strips. When selecting the wool, opt for an assortment of organic and dyed fibers for variations in color and texture to suit your project's demands. Once you have your roving wool, section it out into smaller strips. The size of these wool strips depends on the size of the project and the intricacy of the details involved. The rationale behind this step is that the tiny wool pieces allow for better control over their placement, resulting in a more exquisite detailing outcome than larger chunks would. Following the sectioning, the wool fibers need agitation. Rubbing, rolling, and even throwing the wool around can create the agitation necessary for the individual fibers to become entangled, a precondition for the felting process. Depending on the size and complexity of the project, the agitation could take minutes or hours. Note, too much manipulation can lead to overly hardened felt that is unpleasant to touch and work with. Simultaneously, introducing moisture to the wool is paramount. Moisture, coupled with agitation, sees to it the microscopic scales on the fiber’s surface to open up and latch onto each other, creating a strong bond. Generally, warm to hot water is recommended for the felting process. As you can observe, preparing the wool for felting is a detailed process that demands patience and precision. Precise in the choice of wool, the sectioning, the degree of agitation, and moisture application. It's these meticulous details that breathe life into the final felt product. Understanding and mastering this preparatory phase is key to felting success. Rewardingly enough, the time and attention you invest in this phase equates to the quality, functionality, and aesthetic appeal of your final product. Therefore, as you embark on your wool felting journey, remember, preparation is indeed key!
Setting Up Your Workspace
Within the process of felting wool, there are several factors that require strategic planning and preparation, with setting up your workspace being a paramount component. Having an organized and conveniently equipped work environment can significantly streamline your felting process, concurrently heightening the quality of your final output. To set up an ideal workspace, you first need to select a well-lit room with ample space to manoeuvre. Adequate lighting is paramount because it allows for the most accurate yield of wool colour, enabling you to identify any extraneous elements that might have been incorporated during the felting process. Further, ensure the room is well-ventilated to prevent any unwanted moisture or odour. Once you have your room, designate a sturdy, easily cleanable table for your main working area. This is where you will be doing most of your felting, so ensure it is at a comfortable height and free from clutter. Ideally, the table should be resistant to water and heat, as you'll be using warm water frequently. Remember, wool can shrink when hot water is applied, hence the reason to carefully manage heat during the process. The next phase is to gather all your felting tools and material and arrange them neatly for easy access. Your arsenal might include items like wool roving, felting needles, foam pads, soap, towels, hot water kettle, and a bowl. A variety in needle sizes and types is recommended to cater for different stages and styles of felting. Having everything you need close at hand saves time and reduces frustration during the intricate felting process. Also, consider investing in some storage solutions. Cups, jars, or small storage boxes can be very helpful in segregating your materials and keeping things tidy. Since felting wool can also be somewhat messy, arranging for an easy-to-clean solution like having a dedicated fabric sheet to collect the stray fibres also proves beneficial. In summary, maintaining an efficient workspace ultimately yields precise, high-quality felted wool. It requires systematic organization and optimal space utilization. A well-structured workspace, just like well-prepared wool, sets the foundation for a smooth, enjoyable, and productive felting journey. Hence, always remember - whether in felting wool or any other craft, preparation is indeed key!
The Felting Process
Felting is a centuries-old process that transforms raw wool into a resilient and versatile material. The technique involves three primary steps: soaking, agitating, and checking the felt. Initially, the wool is soaked into warm, soapy water, allowing its fibers to open up and intertwine. This wetting process, technically known as "Soaking the Wool", is crucial as it sets the foundation for creating a high-quality felt material. The wet wool is then subjected to agitation. During "Agitating the Wool", the wool fibers further interlock, creating an even denser textile. The extent of agitation largely dictates the felt's firmness and toughness, meaning a more strenuous agitation results in a sturdier end product. Finally, "Checking the Felt" involves examining the felt's quality and making necessary adjustments, ensuring that the piece is properly felted and ready for crafting. Following these steps, artisans can create an array of felt products, like clothing, accessory pieces, and home décor. Diving deeper into understanding each of these steps, let's start with the first one—Soaking the Wool.
Soaking the Wool
Fascinatingly, the soaking process marks the beginning of the transformation of raw wool into a piece of art, an integral part of the felting process. This method is not only unique but critical in manipulating woolen fibers into their desired positions. Indeed, the immersion of wool in warm, soapy water significantly aids in the felting process, acting as a catalyst, particularly in the wet felting method. Soaking the wool allows the strands to swell, resulting in the loosening and opening of wool fibers. This technique predominantly assists in ensuring that the fibers are adequately prepared to lock and entangle together, an aspect associated with the creation of an altogether new shape and texture in the felting process. The most effective wool soaking should utilize warm water above body temperature but not boiling, as it is the most conducive for felting. The choice of soap is equally essential; a mild detergent, specially designed soaps for wool, or traditional felting soaps like olive oil soap are recommended because they lead to the breakdown of the natural wool grease, removing potential barriers to felting. Consequently, they facilitate optimal conditions for both friction and agitation, thus enabling the fibers to bind together. Ideally, soaking the wool should not be rushed; patience is key. The wool needs ample time to absorb enough water, ensuring each fiber is properly expanded. This period allows the soap to penetrate fully, lubricating the individual fibers, which eases their movement and interaction. On average, a thorough soaking would take about 20 - 30 minutes. This timing, however, can vary depending on the type and size of the wool. Appreciably, the soaking process is a fine balancing act. It requires a keen eye for detail to identify when the wool reaches its saturation point. While under-soaked wool will not felt efficiently, over-soaked wool generates excessive suds and results in a prolonged felting process and waste of soap. Therefore, it is vital to strike a perfect balance to ensure an efficient and effective felting process. In conclusion, the soaking of wool in the felting process serves as a preliminary stage that sets the tone for the rest of the process. It serves to remember that the soak allocation time and materials used can significantly impact the quality of the final felted product. Therefore, mastering this step is imperative for successful wool felting. Whether creating a fashionable accessory or a warm blanket, the soaking process ensures that the wool evolves from a fluffy assortment of fibers into a compact, intricately tangled piece of art.
Agitating the Wool
Fibers in wool yarn are interlocked through a process known as felting. Felting involves two major steps - wetting and agitating the wool. Once the wool is thoroughly soaked, agitation comes into play, which ultimately binds the fibers snugly together. This is achieved by creating a rubbing or rolling movement which encourages wool fibers to lock together, thus giving birth to a tough, durable fabric called felt. Now let us shed some light on the process of agitating the wool. This essential part of the process may appear simple, but it requires careful attention in order to achieve the perfect felt. To agitate the wool, you will need to gently rub your hands over the surface of the wool. Make sure your hands are wet and soapy. This allows the fibers to slip and slide easily, enabling them to intertwine and bind together more efficiently. There are also other methods to agitate the wool if you are working on a larger project. You can roll the wool into a cylinder, wrapping it in a bamboo mat or similar grippy material, then roll it back and forth as if you are making dough. Alternatively, you can place the wool in a large zip lock bag, inflate the bag, and then press and rub on the exterior of the bag. This will create the friction required to interlock the fibers, without touching the wool directly. Another technique involves using a washing machine or dryer. Here, both heat and mechanical agitation work hand in hand in felting the wool. Placing your wool garment in a pillowcase or mesh bag can help protect it, while ensuring it still receives plenty of agitation. Despite these methods being time efficient, they don't offer the same level of control as manual agitation. The objective of wool agitation is to create a robust fabric that will not fall apart, fray or unravel, even if cut. Hence, it's crucial to maintain a firm and persistent agitation, without being too harsh. Too little agitation can leave the wool partially felted, while too much can cause it to shrink excessively. Agitating the wool is a physical process that typically requires time and patience. The duration, intensity, and method of agitation can considerably influence the wool's final texture and firmness. As felting is irreversible, one can't over emphasize the importance of mindful, controlled agitation. It's always advisable to begin the agitation gently, progressively increasing the pressure as the wool begins to felt. This will not only help you to achieve the desired level of felting, but also allow you to shape your creation to your preferred dimensions and form. In the case of felting wool, agitation isn't a term indicating disruption or annoyance, rather it refers to the gentle, painstaking coaxing of wool fibers into a tough, interlocked fabric. It's an art in itself, requiring a careful balance between strength and gentleness, between patience and persistence.
Checking the Felt
Checking the felt is an integral stage in the felting process, which requires the careful observation and handling of the felt material. As an essential stage in how to felt wool, this step guides the maker in producing a sturdy, uniform, and high-quality end product. Additionally, this phase aids in determining the imminent steps required in the felting process and identifying any possible modifications to enhance the finished product quality. The checking of the felt process begins by prodding the fiber gently to see if it holds together. This early check can help identify if more time is needed in the felting process or if additional water and soap are needed. The wool fibers intertwine and lock together when correctly felted, culminating in a fabric-like material that doesn't easily pull apart. Thus, this initial check is of paramount importance as it mitigates the possibility of premature completion, which might lead to a weak or loosely structured felt. Another important aspect in checking the felt is assessing its shrinkage. Felted wool tends to shrink during the process, which can significantly affect the final product's size. Regular checks for shrinkage help ensure that the size of the felted product aligns with the desired measurements. Some projects may require felt with high shrinkability, while others may call for less. Being aware of your felt's shrinkage rate can aid in making necessary adjustments to the felting process, ensuring a product that meets specific size requirements. Texture is another critical component to check during the felting process. The felt should have a soft and comfortable feel, yet hold a firm structure. Each project may require a different level of softness or firmness, thus examining the texture is crucial to producing a quality end product. Checking the texture entails lightly brushing the surface of the felt to see if it is smooth, uniform, and free of any bumps or irregularities. Texture checks can also indicate if additional felting time is necessary or if any adjustments to the felting technique are required. In summary, checking the felt is not just a mere step in the felting process, but a significant activity that determines the quality of the final product. This procedure gives us the ability to monitor the progress of the felting, enabling us to take prompt action if required. By consistently checking the shrinking rate, texture, and structure of the felt, we are better positioned to obtain a final product that meets desired specifications. Ignoring this critical step may result in a product with inferior quality or one that does not meet the desired dimensions or aesthetic appeal.
Shaping and Finishing
At the heart of artistic endeavors lie the processes of shaping and finishing, crucial steps that significantly transform a basic material into a work of art. This article delves into the fascinating domain of fabric arts, focusing primarily on the intricate system of shaping and finishing felt creations. Deep-diving into the subject matter, the article revolves around three fundamental aspects- Shaping the Felt, Adding Embellishments, and Sealing the Felt. Each of these steps plays a crucial role in fabricating a masterpiece with felt. Firstly, ‘Shaping the Felt’ culminates in the evolution of the framework from a piece of basic felt fabric, lending it a defined structure and pattern. As we progress further into the process, we'll elucidate on how 'Adding Embellishments' builds upon the basic structure, adding complexity and beauty to it. Lastly, to ensure longevity and sturdiness, 'Sealing the Felt' is an essential step that cannot be overlooked. Now, let’s initially focus our attention on the primary step- Shaping the Felt- and explore the tricks and tips that lay the foundation of a felt masterpiece.
Shaping the Felt
underpins the wool felting process; the shaping and finishing steps. Shaping the felt is a crucial sub-process that helps achieve the desired end product. It's an art form that involves manipulating and forming the raw, freshly-felted wool into a specific shape, size, or design. The task necessitates a depth of detail and dedication to maintain the unique textural attributes of the wool while giving it a distinct form. Understanding the behavior of wool when wet, how much it will shrink, and how it responds to agitation and rubbing is crucial to successful shaping. To begin, the felted wool is soaked in warm soapy water. This softens the wool and makes it Flexible, allowing it to be stretched or folded into the preferred shape. Then it's rolled around a foam roller or rubbed with the hands, which initiates the fulling process that combines warmth, moisture, and friction to further compact the wool fibers. Meanwhile, soap is added to increase the slipperiness between fibers. This makes wool's unique structure – the microscopic scales on each fiber – lock together more firmly when agitated, creating a tougher, denser fabric. The amount of agitation and the temperature of the water used while shaping can greatly influence the final product's thickness, toughness, and flexibility. For precise shaping, like in creating felt hats or footwear, wooden or plastic forms (resists) are used. The wool is wrapped around these resist and then worked gradually until it fits the shape snugly. This requires a significant amount of time and patience, as forcing or rushing the process can lead to unevenness, creases, or misshapen pieces. Once the desired shape is achieved, it's time for finishing. This involves careful rinsing to remove any soap residue, followed by gently squeezing out excess water. It's important not to wring or twist the wool as it can distort the newly formed shape. The wool is then left to dry naturally, preserving its shape and size. Once dry, the wool can be embellished or decorated as desired, reflecting personal tastes and aesthetic sensibilities. Therefore, shaping and finishing are considered crucial in the wool-felting process. They offer unlimited potential for creativity and adaptation. Whether for crafting a beret, slippers, or a sculpture, shaping the felt seizes control over the wool's innate qualities, enabling the creation of unique, personal, and meaningful pieces of work. Learning and mastering these steps are integral to the art of crafting with wool, refining raw materials into functional and aesthetic artworks.
Adding Embellishments
Adding embellishments is not just a process; it's the delightful stage where creativity truly comes to life. As an integral part of shaping and finishing, it signifies adding personal flairs to the wool felt, stamping individuality in every stitch. Embellishments can range from simple features such as buttons and beads to intricate embroidery and applique work. It can also involve adding other types of fabrics or materials in the mix – lace, sequins, ribbons, or even feathers. These added elements accomplish more than just injecting a dose of aesthetic appeal. They essentially enhance the character and texture of the felt wool, making every piece distinct and unique. However, the embellishing process also requires attention to detail and a careful hand. It involves using the needle and thread to securely affix each embellishment onto the wool surface, ensuring they'll remain in place even after washing or routine use. Strategically positioning these embellishments is also paramount. They can be used to highlight specific areas of the design, draw the eye, create patterns, or add depth and dimension to the felt wool. It’s like putting the finishing touches to an artwork. It does not only conclude the piece but also transforms it into a distinctive and aesthetically pleasing craft. For instance, delicately sewn beads can mimic a cascade of twinkling stars on a night sky-themed woolen mat, while multi-colored embroidery threads can bring a landscape design to life. In essence, embellishing is an expressive technique that allows the artisan to instill a part of their personality into a simple felt wool piece. It provides a platform to experiment with various materials, color palettes, and design elements— meaning the possibilities of what one can create are virtually limitless. Therefore, in shaping and finishing felt wool, adding embellishments is not just a mere afterthought; it's the heart and soul of creative story-telling. Moreover, beyond the creative aspect, embellishments play a huge role in enhancing the practicality of the finished product. For instance, adding a layer of sturdy fabric or densely stitched embroidery can provide reinforcing strength to certain parts, enabling the felt wool items to withstand daily use that requires more durability. Adding embellishments indeed demands a little extra time, effort, and patience, but there is great joy in watching a humble wool felt transform into something truly extraordinary. After all, shaping and finishing are not simply about attaining a beautiful product at the end. It's about enjoying the process, embracing the challenges, and celebrating both the technical skills and creative flair it takes to convert an ordinary ball of wool into a unique, personalised, multi-dimensional craft that whispers tales of its maker's imagination, spirit, and love for the craft. Now, isn't that a captivating tale to tell?
Sealing the Felt
Sealing the felt is an imperatively vital process within the integral activity of wool felting. This stage acts as a protective measure to the work you've accomplished so far. The additional seal adds an extra layer of vibrancy and durability, culminating in a more solid, long-lasting finished product. As a pivotal part of the 'Shaping and Finishing' phase in felting wool, sealing the felt is a technique that demands precision and attention to detail. Generally, the procedure involves cautious application of a specialist sealant, typically a clear acrylic spray or a craft sealant designed explicitly for felt or wool materials. When properly applied, your woolen artifact will not only gain an elegant, shiny finish, but also the strength to withstand daily wear and tear, and even possible adverse weather conditions. Apply the sealant evenly over your felt, ensuring every area from edge to edge is adequately covered. It's vital to make sure that the sealant does not oversaturate any particular areas as this could lead to hardening patches of the felt, which takes away from the aesthetic appeal and smoothness of the wool. You might want to consider doing the sealing outside or in a well-ventilated area due to the sprays having a strong odor that can be rather overpowering. It is also advised to protect your work area with newspaper or a cloth to prevent any checkered patterns or excess sealant from marking your table. Furthermore, it's worth noting that the drying process can range from a few hours to a full day, depending upon the brand of sealant used and environmental conditions. Patience is crucial at this stage; rushing the process can result in your hard work being compromised with the felt not properly sealed. After you have successfully sealed and dried your woolen felt, it is now ready for any final decorative detail additions or simply to be enjoyed in its completed form. Sealing the felt thus facilitates higher-spun resilience in the wool fibers, further preparing your craft to endure any pointed exposure. Regardless if you're creating a gorgeous wool scarf or a charming felted figurine, sealing the felt guarantees you that your beautiful creations will remain flawless in their finely tuned, artful design, reaping the utmost satisfaction out of your wool felting process. It's a step that definitely adds a charm to the 'Shaping and Finishing' phase, enriching your wool felting experience, and delivering superior quality outcomes that stand the test of time.