How To Refinish A Table
Refinishing a table can be a rewarding DIY project that not only saves you money but also allows you to give new life to an old piece of furniture. With the right techniques and materials, you can transform a worn-out table into a beautiful and functional piece that complements your home decor. To achieve a professional-looking finish, it's essential to follow a step-by-step process that involves preparation, stripping and sanding, and applying the new finish. In this article, we'll guide you through each of these critical stages, starting with the importance of preparation. By understanding the significance of preparation, you'll be able to set yourself up for success and ensure a smooth refinishing process. Preparation is Key.
Preparation is Key
Preparation is key to a successful table restoration project. Before diving into the actual restoration process, it's essential to take the time to prepare the table and gather the necessary tools and materials. This involves assessing the table's condition to identify any damage or areas that need special attention, gathering essential tools and materials to ensure a smooth restoration process, and removing hardware and accessories to prevent damage and make the restoration process more manageable. By taking these steps, you'll be able to tackle the restoration project with confidence and achieve professional-looking results. To start, let's take a closer look at assessing the table's condition.
Assessing the Table's Condition
Assessing the table's condition is a crucial step in the refinishing process. Before you start sanding or applying a new finish, take a close look at the table's surface, legs, and any other components. Check for any damage, such as scratches, dents, or water marks, and make a note of any areas that need special attention. Inspect the table's joints and hardware, such as screws, nails, or hinges, to ensure they are secure and functioning properly. If you find any loose or damaged joints, you may need to repair or replace them before proceeding. Additionally, check the table's surface for any old finish, wax, or dirt buildup, which can affect the adhesion of the new finish. Use a flashlight to inspect the surface, as it can help reveal any imperfections or areas that need extra attention. Take photos of the table from different angles to document its condition, which can be helpful if you need to reference them later. By thoroughly assessing the table's condition, you can identify any potential issues and develop a plan to address them, ensuring a successful refinishing project.
Gathering Essential Tools and Materials
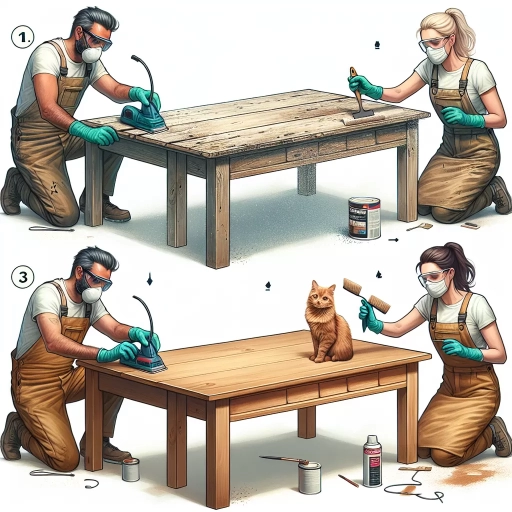
To refinish a table, you'll need to gather essential tools and materials to ensure a successful project. Start by collecting the necessary tools, including a sander, preferably an orbital sander, to smooth out the surface and remove old finishes. A sanding block can also be useful for getting into tight spaces and corners. A putty knife or scraper will come in handy for removing old wax or varnish, while a tack cloth will help remove dust and debris. A paintbrush or foam brush will be necessary for applying stain or paint, and a clean, lint-free cloth will be needed for wiping away excess stain or paint. Additionally, you'll need a drop cloth or old sheets to protect your work surface and surrounding areas from stains and spills. In terms of materials, you'll need to choose a new finish, such as stain, paint, or varnish, and consider the type of wood and desired color. You may also need to purchase wood filler or putty to fill any holes or gaps, and a wood conditioner to enhance the wood's natural color and grain. Finally, make sure you have a well-ventilated workspace and safety goggles to protect yourself from dust and chemicals. By gathering all the necessary tools and materials, you'll be well-prepared to tackle your table refinishing project and achieve professional-looking results.
Removing Hardware and Accessories
When it comes to refinishing a table, one of the most crucial steps is removing hardware and accessories. This process is essential to ensure a smooth and even finish, as any remaining hardware or accessories can interfere with the refinishing process or create uneven surfaces. To start, remove any loose items such as tablecloths, placemats, or centerpieces. Next, take out the screws or bolts that hold the hardware in place, such as table legs, drawer pulls, or hinges. Gently pry off any stuck or stubborn hardware using a flathead screwdriver or a wrench. Be careful not to damage the surrounding surface or strip the screws. If the hardware is particularly stubborn, consider using a hair dryer or a heat gun to loosen the adhesive. Once the hardware is removed, set it aside in a safe place to avoid losing any small parts. Additionally, remove any accessories such as table runners, placemats, or coasters to prevent them from getting damaged during the refinishing process. By removing all hardware and accessories, you'll be able to refinish your table with ease and achieve a professional-looking finish.
Stripping and Sanding
Stripping and sanding are essential steps in refinishing and restoring old furniture, floors, and other wooden surfaces. When done correctly, these processes can reveal the beauty of the underlying wood, removing old finishes, imperfections, and damage. However, with so many stripping methods and sanding techniques available, it can be overwhelming to know where to start. To achieve a smooth, professional-looking finish, it's crucial to choose the right stripping method for your project, master various sanding techniques, and carefully remove old finishes and imperfections. By understanding these key elements, you'll be well on your way to transforming your wooden surfaces into stunning works of art. In this article, we'll explore the best practices for stripping and sanding, starting with the importance of choosing the right stripping method for your specific project.
Choosing the Right Stripping Method
Choosing the right stripping method is crucial when refinishing a table. There are several methods to choose from, including chemical stripping, heat gun stripping, and sanding. Chemical stripping involves applying a chemical solution to the surface of the table to dissolve the old finish. This method is effective for removing multiple layers of finish, but it can be messy and requires proper ventilation. Heat gun stripping uses a heat gun to soften the old finish, making it easier to scrape off. This method is faster than chemical stripping, but it can be more difficult to control and may damage the wood if not done carefully. Sanding is a more labor-intensive method that involves using progressively finer grits of sandpaper to remove the old finish. This method is safer and more environmentally friendly than chemical stripping, but it can be time-consuming and may not be effective for removing multiple layers of finish. Ultimately, the best stripping method for your table will depend on the type of finish, the condition of the wood, and your personal preference. It's a good idea to test a small, inconspicuous area of the table first to determine the best method for your specific project.
Sanding Techniques for a Smooth Finish
Sanding is a crucial step in the refinishing process, as it helps to create a smooth surface for painting or staining. To achieve a smooth finish, it's essential to use the right sanding techniques. Start by using a coarse-grit sandpaper, such as 80-100 grit, to remove any imperfections, old finishes, or debris from the surface. Work in small circular motions, applying moderate pressure, to ensure even sanding. As you progress, switch to higher grit sandpaper, such as 120-150 grit, to further smooth out the surface. For an ultra-smooth finish, use a fine-grit sandpaper, such as 220-240 grit, and sand in the direction of the wood grain. To remove any remaining dust or debris, use a tack cloth or a vacuum cleaner with a soft brush attachment. Finally, inspect the surface for any remaining imperfections and sand as needed. By following these sanding techniques, you'll be able to achieve a smooth finish that's perfect for painting or staining. Additionally, using a sanding block can help to keep the sandpaper flat and prevent uneven sanding, while a dust mask can protect you from inhaling dust and debris. With patience and practice, you'll be able to master the art of sanding and achieve professional-looking results.
Removing Old Finish and Imperfections
Removing old finish and imperfections is a crucial step in the refinishing process. It allows you to start with a clean slate, ensuring a smooth and even application of the new finish. To begin, inspect the table for any imperfections, such as scratches, dents, or water marks. Use a wood filler to fill in any holes or gaps, and let it dry according to the manufacturer's instructions. Next, use a chemical stripper to remove the old finish. Apply the stripper to the table, following the manufacturer's instructions, and let it sit for the recommended amount of time. Use a scraper or putty knife to remove the old finish, working in small sections to avoid scratching the wood. Be sure to wear protective gloves and eyewear, as the stripper can be harsh on skin and eyes. Once the old finish is removed, use a sanding block or orbital sander to smooth out the wood, removing any remaining imperfections. Start with a coarse-grit sandpaper and progress to finer grits, working your way up to 220-grit or higher. This will help to create a smooth surface for the new finish to adhere to. Finally, use a tack cloth to remove any dust or debris from the sanding process, ensuring a clean and even surface for the new finish.
Applying the New Finish
Applying the new finish to your wood project can be a daunting task, but with the right techniques and materials, you can achieve a professional-looking result. To ensure a successful finish, it's essential to start with a solid foundation, which involves selecting the perfect stain or paint that complements the wood's natural beauty. Additionally, applying a primer can make a significant difference in the final outcome, as it helps to create a smooth and even surface. Finally, adding a protective topcoat is crucial for durability and longevity. In this article, we will explore these three critical steps in detail, starting with the first and most important one: selecting the perfect stain or paint.
Selecting the Perfect Stain or Paint
When it comes to selecting the perfect stain or paint for your refinishing project, there are several factors to consider. First, think about the color and style you want to achieve. Do you want a light, airy feel or a rich, dark tone? Consider the natural color of the wood and how it will interact with the stain or paint. If you're looking for a bold, bright color, paint may be the way to go. However, if you want to enhance the natural beauty of the wood, stain is often a better choice. Next, consider the type of finish you want to achieve. Do you want a glossy, high-shine finish or a more subtle, matte finish? Different stains and paints offer varying levels of sheen, so choose one that fits your desired look. Additionally, think about the durability and maintenance requirements of the finish. If you're refinishing a table that will be used frequently, you may want to choose a stain or paint that is highly durable and resistant to scratches and spills. Finally, consider any environmental or health concerns you may have. Some stains and paints contain harsh chemicals or VOCs, so look for eco-friendly options if this is a concern for you. By carefully considering these factors, you can select the perfect stain or paint for your refinishing project and achieve a beautiful, long-lasting finish.
Applying a Primer for a Professional Look
Applying a primer is a crucial step in achieving a professional-looking finish when refinishing a table. A primer serves as a bonding agent between the old surface and the new finish, ensuring a strong and durable bond. It also helps to create a uniform base tone, which is essential for a smooth and even finish. When choosing a primer, select one that is specifically designed for your table's material, such as wood, metal, or laminate. Apply the primer according to the manufacturer's instructions, usually with a roller or brush, and make sure to cover the entire surface evenly. Allow the primer to dry completely before applying the new finish, following the recommended drying time on the product label. A well-applied primer will result in a finish that is not only visually appealing but also long-lasting and resistant to wear and tear. By taking the time to prime your table, you'll be able to achieve a professional-looking finish that will make your refinished table look like new.
Adding a Protective Topcoat for Durability
Adding a protective topcoat is a crucial step in the refinishing process, as it provides a durable barrier against spills, scratches, and fading. A topcoat can be applied using a variety of methods, including brushing, rolling, or spraying, and comes in different sheens, from matte to glossy. When choosing a topcoat, consider the level of protection and durability you need, as well as the desired appearance. For example, a water-based polyurethane topcoat is a popular choice for its ease of application and low odor, while an oil-based topcoat provides a harder, more durable finish. Apply the topcoat according to the manufacturer's instructions, typically in thin, even coats, allowing each coat to dry before applying the next. It's also essential to work in a well-ventilated area and use a dust mask to avoid inhaling fumes. To ensure a smooth finish, lightly sand the topcoat between coats, using a fine-grit sandpaper. Once the final coat is dry, your refinished table will be protected and ready for use. Regular maintenance, such as cleaning and polishing, will help extend the life of the topcoat and keep your table looking its best.