How To Install Blink Outdoor Camera
Here is the introduction paragraph: Installing a Blink Outdoor Camera is a straightforward process that can be completed in a few simple steps. To ensure a successful installation, it's essential to start with the right preparation. Before mounting the camera, you'll need to meet certain pre-installation requirements, such as choosing the right location and ensuring a stable internet connection. Once you've met these requirements, you can proceed to mount the camera in a secure and weather-resistant location. Finally, you'll need to configure the camera to connect to your Wi-Fi network and start capturing footage. In this article, we'll guide you through each of these steps, starting with the pre-installation requirements that will set you up for success.
Pre-Installation Requirements
Before installing your Blink device, it's essential to ensure you have everything you need to get started. This includes checking the package contents to ensure all the necessary components are included. You'll also want to choose a suitable location for your device, taking into account factors such as power supply, internet connectivity, and visibility. Additionally, downloading the Blink app is crucial for setting up and controlling your device remotely. By completing these pre-installation requirements, you'll be able to enjoy a seamless and hassle-free installation experience. So, let's start by checking the package contents to ensure you have everything you need to get started.
Check the Package Contents
When you receive your Blink Outdoor Camera, it's essential to check the package contents to ensure everything is included and in good condition. The package should contain the Blink Outdoor Camera, a wall mount, a USB cable, a USB power adapter, a battery pack, and a quick start guide. Verify that all these items are present and undamaged. The wall mount is used to secure the camera to an exterior wall, while the USB cable and power adapter are used to charge the battery pack. The battery pack is what powers the camera, allowing it to be placed anywhere without being tethered to a power outlet. The quick start guide provides step-by-step instructions on how to set up and install the camera. If any of these items are missing or damaged, contact Blink's customer support for assistance. By checking the package contents, you can ensure a smooth and successful installation process.
Choose a Suitable Location
When choosing a suitable location for your Blink Outdoor Camera, consider the following factors to ensure optimal performance and security. First, select a spot that provides a clear view of the area you want to monitor, such as a front door, garage, or backyard. Avoid obstructing objects like trees, bushes, or pillars that could block the camera's field of view. Next, consider the lighting conditions. Blink Outdoor Cameras are designed to work in various lighting conditions, but direct sunlight or extreme darkness may affect image quality. If possible, choose a location with partial shade or indirect sunlight. Additionally, ensure the camera is installed at a height that is difficult for potential intruders to reach, ideally between 9-10 feet off the ground. This will also help to reduce tampering and vandalism. Furthermore, consider the proximity to a power source, as the camera requires a USB connection to function. If you plan to use the camera wirelessly, ensure it is within range of your Wi-Fi network. Finally, check local regulations and homeowners' association rules to ensure that your camera installation complies with any relevant laws and guidelines. By carefully evaluating these factors, you can choose a suitable location for your Blink Outdoor Camera that provides optimal security and performance.
Download the Blink App
To download the Blink app, start by opening the App Store on your iOS device or Google Play Store on your Android device. Search for "Blink Home Monitor" in the search bar, and select the app from the search results. Tap the "Get" or "Install" button to begin the download process. Wait for the app to download and install on your device, which should only take a few seconds. Once the installation is complete, tap the "Open" button to launch the Blink app. You will be prompted to create an account or log in if you already have one. Follow the in-app instructions to complete the setup process, which includes linking your Blink account to your camera and setting up your Wi-Fi network. The Blink app is free to download and use, and it's compatible with both iOS and Android devices. Make sure your device meets the minimum system requirements, which include iOS 10.3 or later for iOS devices and Android 5.0 or later for Android devices. By downloading the Blink app, you'll be able to access and control your Blink outdoor camera remotely, receive motion alerts, and customize your camera's settings to suit your needs.
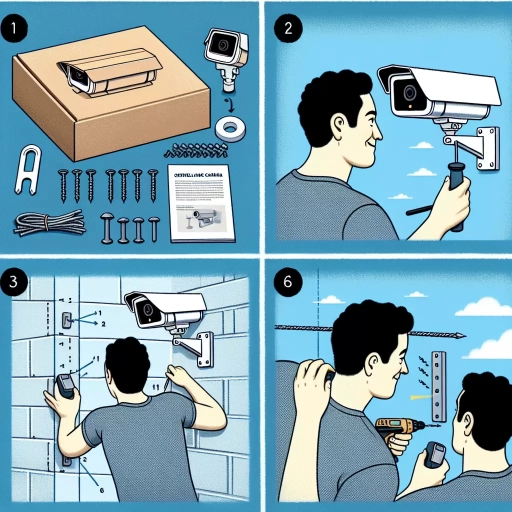
Mounting the Blink Outdoor Camera
To mount your Blink Outdoor Camera, you'll need to follow a few simple steps to ensure it's securely attached and capturing the footage you need. The process begins with attaching the mounting bracket, which is designed to fit snugly onto the camera and provide a sturdy base for installation. Before you start, make sure you have all the necessary tools and equipment, including a drill and screws, in case you need to drill pilot holes for a more secure fit. Once the bracket is attached, you'll need to secure the camera to the bracket, making sure it's level and pointing in the right direction. By following these steps, you'll be able to successfully mount your Blink Outdoor Camera and start monitoring your outdoor space in no time. First, let's take a closer look at attaching the mounting bracket.
Attach the Mounting Bracket
To attach the mounting bracket, start by holding the bracket against the wall or surface where you want to install the camera. Make sure it's level and aligned with the desired viewing angle. Next, use a pencil to mark the spot where the screw will go. If you're using a drill, make a small pilot hole to avoid damaging the surface. Then, insert the screw into the hole and tighten it firmly to secure the bracket in place. If you're using an adhesive strip, peel off the backing and press the bracket firmly onto the surface, holding it for a few seconds to ensure it adheres properly. Once the bracket is attached, you can proceed to mount the camera.
Drill Pilot Holes (If Necessary)
When mounting the Blink Outdoor Camera, it's essential to consider the surface you're attaching it to. If you're dealing with a hard material like brick, concrete, or stucco, you may need to drill pilot holes to ensure a secure and stable installation. Pilot holes are small holes drilled into the surface before inserting the screws or anchors that hold the camera in place. Drilling pilot holes is necessary to prevent the material from cracking or breaking, which can lead to a weak hold and potentially cause the camera to fall or become dislodged. By drilling pilot holes, you can create a precise and controlled hole that allows the screws or anchors to grip the surface firmly, providing a strong and reliable hold for your Blink Outdoor Camera. Additionally, pilot holes can help to reduce the risk of damage to the surrounding material, making the installation process neater and more efficient. If you're unsure about the type of surface you're working with or the best way to drill pilot holes, it's always a good idea to consult the manufacturer's instructions or seek advice from a professional.
Secure the Camera to the Bracket
To secure the camera to the bracket, start by locating the mounting holes on the back of the camera. These holes are specifically designed to attach the camera to the bracket, ensuring a sturdy and secure fit. Next, take the bracket and align the screw holes with the mounting holes on the camera. Gently push the camera onto the bracket, making sure it clicks into place. Once the camera is attached, use the provided screws to secure it to the bracket. Tighten the screws firmly, but avoid overtightening, which can damage the camera or bracket. It's also essential to ensure the camera is level and plumb to prevent any tilting or unevenness. You can use a level tool to double-check the camera's alignment. Finally, give the camera a gentle tug to ensure it's securely attached to the bracket and won't come loose over time. By following these steps, you'll have successfully secured your Blink Outdoor Camera to the bracket, providing a stable and reliable foundation for optimal performance.
Configuring the Blink Outdoor Camera
Configuring the Blink Outdoor Camera is a straightforward process that requires attention to a few key settings to ensure optimal performance. To get started, it's essential to sync the camera with the Blink app, which allows you to access and control the device remotely. Once synced, you'll need to configure the Wi-Fi settings to connect the camera to your home network. Additionally, setting up motion detection and alerts is crucial to receive notifications when motion is detected, providing an added layer of security and peace of mind. By following these steps, you'll be able to fully utilize the features of your Blink Outdoor Camera and enjoy a secure and convenient home security solution. To begin, let's start by syncing the camera with the Blink app.
Sync the Camera with the Blink App
To sync the camera with the Blink app, start by opening the app and tapping the "+" icon in the top right corner to add a new device. Select "Blink Outdoor" from the list of available devices, then tap "Next" to proceed. You will be prompted to scan the QR code located on the back of the camera or on the packaging. Hold your phone's camera over the QR code until it is recognized, then tap "Next" again. The app will then ask you to enter the serial number of the camera, which can be found on the back of the device or on the packaging. Enter the serial number and tap "Next" to continue. The app will then connect to the camera and sync the two devices. You may be prompted to update the camera's firmware, which is recommended to ensure you have the latest features and security patches. Once the sync process is complete, you can begin using the Blink app to view live footage, receive motion alerts, and customize your camera's settings.
Configure Wi-Fi Settings
To configure Wi-Fi settings for your Blink Outdoor Camera, start by opening the Blink app on your mobile device. Tap on the "Home" tab and select the camera you want to configure. Next, tap on the "Settings" icon, represented by three horizontal lines, and then select "Wi-Fi Settings." If you're setting up a new camera, you'll be prompted to select your Wi-Fi network from a list of available options. Choose your network and enter your Wi-Fi password to connect. If you're having trouble finding your network, try restarting your router or moving the camera closer to the router. Once connected, you can also configure additional Wi-Fi settings, such as setting up a guest network or changing the Wi-Fi channel to minimize interference. It's also a good idea to ensure that your Wi-Fi network is secure and up-to-date to prevent any potential security risks. By following these steps, you can easily configure your Blink Outdoor Camera's Wi-Fi settings and start monitoring your outdoor space in no time.
Set Up Motion Detection and Alerts
To set up motion detection and alerts on your Blink Outdoor Camera, start by opening the Blink app and navigating to the camera settings. Tap on the "Motion Detection" option and toggle the switch to enable it. You can then adjust the sensitivity of the motion detection by sliding the bar to your desired level. A higher sensitivity setting will detect more subtle movements, while a lower setting will only detect more significant movements. Next, you'll need to set up alerts by tapping on the "Alerts" option. Here, you can choose to receive notifications when motion is detected, and you can also customize the notification settings to suit your needs. For example, you can set the app to only send notifications during certain hours of the day or when you're not at home. Additionally, you can also set up custom alert zones, which allow you to specify areas within the camera's field of view where you want to receive motion alerts. This feature is particularly useful if you have a specific area of your property that you want to keep an eye on, such as a shed or a fence. By setting up motion detection and alerts, you'll be able to stay informed and up-to-date on any activity that's happening around your home, even when you're not there.