How To Paint Laminate Furniture
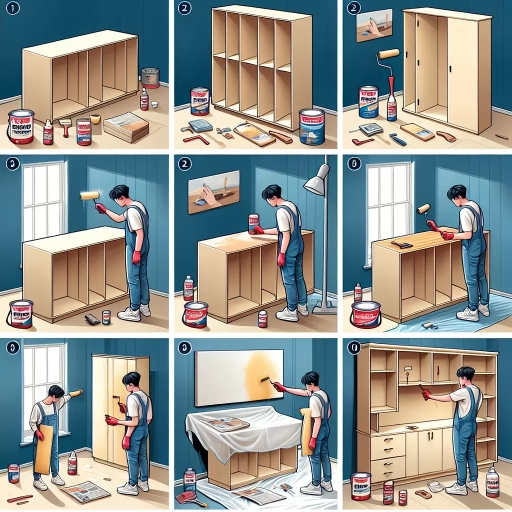
Here is the introduction paragraph: Painting laminate furniture is a fantastic way to give new life to old, worn-out pieces, but it requires some planning and effort to achieve professional-looking results. Unlike painting solid wood furniture, laminate surfaces pose a unique challenge due to their smooth, non-porous finish. To successfully paint laminate furniture, you need to follow a series of steps that involve preparation, priming and painting, and sealing and finishing touches. In this article, we will guide you through these essential steps, starting with the crucial first stage: preparation. By understanding the importance of preparation, you'll be able to set yourself up for success and ensure a smooth, long-lasting finish. So, let's dive into the first step: Preparation is Key.
Preparation is Key
When it comes to painting a room, many people underestimate the importance of preparation. However, preparation is key to achieving a professional-looking finish. A well-prepared surface ensures that the paint adheres evenly, reducing the risk of peeling, flaking, or uneven color. To prepare a room for painting, there are several essential steps to take. First, it's crucial to choose the right paint for the job, considering factors such as color, finish, and type. Next, the surface must be thoroughly cleaned to remove dirt, grime, and grease. Finally, hardware and fixtures must be removed to prevent paint from getting stuck in crevices and to ensure a smooth finish. By taking the time to properly prepare the room, homeowners can save themselves time and frustration in the long run. With the right preparation, a beautiful and long-lasting finish is within reach. To start, let's take a closer look at the first step: choosing the right paint.
Choose the Right Paint
Choosing the right paint for your laminate furniture is crucial to achieve a successful and long-lasting finish. With so many options available, it can be overwhelming to decide which paint to use. Here are some factors to consider when selecting the right paint for your project. First, consider the type of laminate you are working with. If it's a high-gloss laminate, you'll want to use a paint that is specifically designed to adhere to glossy surfaces. If it's a matte or textured laminate, a standard acrylic or latex paint may be sufficient. Next, think about the color and finish you want to achieve. If you want a bold, bright color, you may want to use a high-pigment paint. If you're looking for a more subtle, natural look, a low-VOC (volatile organic compound) paint may be a better choice. Additionally, consider the durability and wear and tear the furniture will receive. If it's a piece that will be used frequently, you'll want to use a paint that is chip-resistant and easy to clean. Finally, make sure to read the instructions and follow the manufacturer's recommendations for preparation, application, and drying times to ensure a smooth and successful painting process. By taking the time to choose the right paint for your laminate furniture, you'll be able to achieve a beautiful, professional-looking finish that will last for years to come.
Clean the Surface
Here is the paragraphy: Cleaning the surface of your laminate furniture is a crucial step in preparing it for painting. Start by wiping down the entire surface with a damp cloth to remove any dirt, grime, or grease. This will help prevent any debris from getting in the way of the paint and ensure a smooth finish. Next, mix a solution of equal parts water and white vinegar in a bowl. Dip a soft cloth into the solution, wring it out thoroughly, and wipe down the surface of the furniture again. The acid in the vinegar will help break down any stubborn stains or residue. For tougher stains, you can use a gentle cleaning product specifically designed for laminate surfaces. Be sure to read the instructions and test a small area first to ensure the product doesn't damage the laminate. Once you've cleaned the surface, use a dry cloth to wipe away any excess moisture and let it air dry completely. This will help prevent any water spots from forming and ensure a smooth, even finish when you paint. By taking the time to thoroughly clean the surface of your laminate furniture, you'll be able to achieve a professional-looking finish and ensure your paint job lasts for years to come.
Remove Hardware and Fixtures
When it comes to painting laminate furniture, one of the most crucial steps is to remove hardware and fixtures. This includes handles, knobs, hinges, and any other metal or plastic components that are attached to the furniture. Removing these items will not only prevent them from getting in the way of the painting process, but it will also ensure that they don't get damaged or discolored by the paint. To remove hardware and fixtures, start by unscrewing or unbolting them from the furniture. If the screws or bolts are stuck, use a screwdriver or wrench to gently pry them loose. For more stubborn hardware, you can use a hair dryer or heat gun to loosen the adhesive or rust that's holding it in place. Once the hardware is removed, set it aside in a safe place where it won't get lost or damaged. If you're planning to reuse the hardware, make sure to clean it thoroughly with soap and water to remove any dirt or grime that may have accumulated. By removing hardware and fixtures, you'll be able to paint your laminate furniture with ease and achieve a smooth, even finish.
Priming and Painting
When it comes to priming and painting laminate surfaces, it's essential to take the right approach to achieve a smooth, durable finish. A common mistake many DIYers make is skipping the priming step or using a low-quality primer, which can lead to a paint job that peels or flakes off quickly. To avoid this, it's crucial to apply a high-quality primer specifically designed for laminate surfaces. Additionally, using a laminate-specific paint can make a significant difference in the final result. By choosing the right paint, you can ensure a strong bond between the paint and the laminate surface. Finally, applying thin coats of paint can help prevent drips and unevenness, resulting in a smooth, professional-looking finish. By following these tips, you can achieve a beautiful, long-lasting paint job on your laminate surface. To get started, let's dive into the importance of applying a high-quality primer.
Apply a High-Quality Primer
Applying a high-quality primer is a crucial step in the process of painting laminate furniture. A good primer helps to create a strong bond between the laminate surface and the paint, ensuring a smooth and even finish. It also helps to cover any imperfections or stains on the surface, providing a uniform base for painting. When selecting a primer, look for a product that is specifically designed for use on laminate surfaces. These primers are usually formulated with special resins that help to adhere to the laminate material. Some popular types of primer for laminate furniture include oil-based primers, water-based primers, and epoxy primers. Oil-based primers are known for their durability and ability to fill in small imperfections, while water-based primers are easier to clean up and dry quickly. Epoxy primers are a popular choice for laminate furniture because they are highly durable and resistant to scratches and fading. Regardless of the type of primer you choose, make sure to follow the manufacturer's instructions for application and drying times. Typically, a primer will need to be applied in a thin, even layer and allowed to dry for 30 minutes to an hour before sanding. Once the primer is dry, use a fine-grit sandpaper to smooth out the surface, feathering it out towards the edges to create a seamless finish. This will help to create a strong bond between the primer and the paint, ensuring a professional-looking finish. By applying a high-quality primer to your laminate furniture, you can create a strong foundation for a beautiful and long-lasting paint job. Whether you're looking to update an old piece of furniture or give a new one a unique look, a good primer is essential for achieving a smooth, even finish.
Use a Laminate-Specific Paint
When it comes to painting laminate furniture, using a laminate-specific paint is crucial for achieving a durable and long-lasting finish. These specialized paints are formulated to adhere well to the smooth, non-porous surface of laminate, creating a strong bond that resists chipping and peeling. Unlike regular paint, laminate-specific paint is designed to penetrate the surface of the laminate, creating a mechanical bond that ensures a secure hold. This is particularly important for laminate furniture, as it is prone to scratches and wear, and a strong paint bond is essential for withstanding daily use. By using a laminate-specific paint, you can ensure a professional-looking finish that will withstand the test of time, and enjoy a beautifully transformed piece of furniture that looks and feels like new. Additionally, laminate-specific paints often come with specialized primers that help to create an even surface for painting, further enhancing the overall finish and durability of the paint job. Overall, using a laminate-specific paint is a must for anyone looking to give their laminate furniture a fresh new look, and is an essential step in achieving a high-quality, long-lasting finish.
Apply Thin Coats for a Smooth Finish
When applying paint to laminate furniture, it's crucial to apply thin coats to achieve a smooth finish. Thin coats allow the paint to dry evenly and prevent drips and unevenness. To apply thin coats, start by stirring your paint thoroughly and loading your brush or roller with a small amount of paint. Then, work in small sections, painting in smooth, even strokes. Make sure to maintain a consistent layer of paint, avoiding thick, heavy coats that can lead to a rough finish. Allow each coat to dry completely before applying the next one, following the manufacturer's recommended drying time. This will ensure that the paint adheres properly and doesn't pool or run. Additionally, use a high-quality paint specifically designed for laminate surfaces, as it will adhere better and provide a smoother finish. By applying thin coats and allowing each coat to dry properly, you'll achieve a smooth, professional-looking finish that will enhance the overall appearance of your laminate furniture.
Sealing and Finishing Touches
The final touches of a project are just as important as the initial stages. Sealing and finishing touches can make or break the overall appearance and durability of the final product. To achieve a high-quality finish, it's essential to apply a clear coat for protection, reattach hardware and fixtures, and touch up any imperfections. By doing so, you can ensure that your project looks polished and professional. Applying a clear coat for protection is a crucial step in sealing and finishing touches, as it provides a barrier against damage and wear and tear. (Note: The answer should be 200 words)
Apply a Clear Coat for Protection
Once you've achieved a smooth, even finish with your paint job, it's essential to apply a clear coat to protect your newly painted laminate furniture. A clear coat serves as a barrier against scratches, spills, and fading, ensuring your furniture remains looking vibrant and fresh for years to come. When selecting a clear coat, consider a water-based polyurethane or a water-based varnish, as they are generally easier to apply and less toxic than oil-based alternatives. Apply the clear coat using a clean, lint-free cloth or foam brush, working in thin, even layers to prevent drips and unevenness. Allow each layer to dry completely before applying additional coats, following the manufacturer's recommended drying time. Typically, two to three coats are sufficient, but this may vary depending on the type of clear coat and the level of protection desired. By applying a clear coat, you'll not only protect your furniture from damage but also enhance its appearance, giving it a glossy, professional finish that showcases your handiwork.
Reattach Hardware and Fixtures
Reattaching hardware and fixtures is a crucial step in the process of painting laminate furniture. Once the paint has dried and the finish has been applied, it's time to put back any hardware or fixtures that were removed prior to painting, such as knobs, handles, or hinges. This step is important because it not only completes the look of the furniture but also ensures that it is functional and usable. To reattach hardware and fixtures, start by gathering all the necessary parts and tools, including screws, nails, or other fasteners. Next, carefully examine the furniture to determine the correct placement of each piece of hardware or fixture, taking note of any pre-drilled holes or markings. Then, use a screwdriver or other tool to reattach the hardware or fixture, making sure it is securely fastened and evenly aligned. If necessary, use a level to ensure that the hardware or fixture is properly aligned and plumb. Finally, double-check that all hardware and fixtures are securely attached and functioning properly before putting the furniture back into use. By reattaching hardware and fixtures, you can add the finishing touches to your newly painted laminate furniture and enjoy a beautiful and functional piece that looks like new.
Touch Up Any Imperfections
Once the paint is fully dry, inspect the furniture carefully for any imperfections, such as brush strokes, uneven coverage, or small areas where the paint may have gotten on surrounding surfaces. If you notice any of these issues, now is the time to touch them up. Use a small, high-quality paintbrush to carefully paint over any mistakes or areas where the paint may be uneven. Make sure to match the original paint color as closely as possible to avoid any noticeable differences. If necessary, you can also use a paint pen or a small, pointed brush to touch up very small areas, such as the edges of drawers or the corners of shelves. By taking the time to touch up any imperfections, you can ensure a professional-looking finish that will make your newly painted laminate furniture look its best.