How To Install Ring Doorbell Wired
Here is the introduction paragraph: Installing a Ring Doorbell Wired is a great way to enhance your home's security and convenience. With its advanced features and sleek design, this smart doorbell allows you to see, hear, and speak with visitors at your door from anywhere in the world. However, to ensure a seamless and successful installation, it's essential to follow a step-by-step guide. In this article, we'll walk you through the entire process, from pre-installation requirements to post-installation setup and testing. Before we dive into the installation process, it's crucial to meet the pre-installation requirements, which include checking your doorbell's compatibility, gathering necessary tools and materials, and preparing your home's electrical system. By doing so, you'll be able to ensure a smooth and trouble-free installation. Let's start by exploring the pre-installation requirements in more detail.
Pre-Installation Requirements
Before installing a Ring Doorbell Wired, it's essential to ensure a smooth and successful process by meeting the necessary pre-installation requirements. This involves checking the compatibility of your door and doorbell, choosing the right Ring Doorbell Wired model, and preparing the necessary tools and materials. By doing so, you'll avoid any potential issues or complications that may arise during the installation process. In this article, we'll delve into each of these critical steps, starting with the importance of checking the compatibility of your door and doorbell. (Note: The answer should be 200 words)
Check the Compatibility of Your Door and Doorbell
When it comes to installing a Ring Doorbell Wired, one of the most crucial pre-installation requirements is to check the compatibility of your door and doorbell. This step is often overlooked, but it's essential to ensure a seamless and successful installation process. First, you need to verify that your door is compatible with the Ring Doorbell Wired. Check if your door is made of a material that can support the weight and size of the doorbell, such as wood, metal, or fiberglass. If your door is made of glass or has a fragile material, you may need to consider alternative installation options. Next, inspect your door's thickness to ensure it can accommodate the doorbell's mounting bracket. The Ring Doorbell Wired requires a door thickness of between 1.3 and 2.2 inches. If your door is thicker or thinner, you may need to purchase additional accessories or consider a different doorbell model. Additionally, check if your door has any obstructions, such as a storm door or a screen door, that could interfere with the doorbell's installation or functionality. It's also essential to verify that your doorbell is compatible with your home's electrical system. Check if your doorbell is wired to a 16-volt or 24-volt transformer, as the Ring Doorbell Wired requires a specific voltage range to function correctly. If your doorbell is wired to a different voltage, you may need to purchase a voltage converter or consider hiring a professional electrician to modify your home's electrical system. By checking the compatibility of your door and doorbell, you can avoid potential installation issues and ensure a smooth and successful installation process.
Choose the Right Ring Doorbell Wired Model
When choosing the right Ring Doorbell Wired model, consider the specific features and functionalities that matter most to your home's needs. The Ring Video Doorbell Pro and Pro 2 are popular options, offering advanced features like 1080p and 1536p video resolution, respectively, as well as customizable motion zones and advanced motion detection. The Ring Video Doorbell Elite, on the other hand, boasts a sleek and slim design, making it ideal for homes with limited space. Additionally, consider the power requirements and ensure the chosen model is compatible with your home's electrical setup. If you're looking for a more budget-friendly option, the Ring Video Doorbell 3 Plus is a great choice, offering many of the same features as the Pro models at a lower price point. Ultimately, assess your specific needs and preferences to select the Ring Doorbell Wired model that best suits your home's unique requirements.
Prepare the Necessary Tools and Materials
To ensure a seamless installation process, it's essential to prepare the necessary tools and materials beforehand. For a Ring Doorbell Wired installation, you'll need a few specific items. First, make sure you have a screwdriver, preferably a Phillips head screwdriver, to remove the existing doorbell and install the new one. You'll also need a drill and bits to make holes for the screws if your door or wall requires them. Additionally, have a level handy to ensure the doorbell is installed straight and level. A voltage tester is also necessary to verify the wiring and voltage at the doorbell location. Furthermore, if you're replacing an existing doorbell, you may need to use wire nuts or connectors to connect the wires to the new doorbell. It's also a good idea to have some electrical tape on hand to secure any loose wires. Finally, make sure you have the Ring Doorbell Wired device itself, along with any additional components such as a chime or transformer, if required. By having all the necessary tools and materials ready, you'll be able to complete the installation efficiently and effectively.
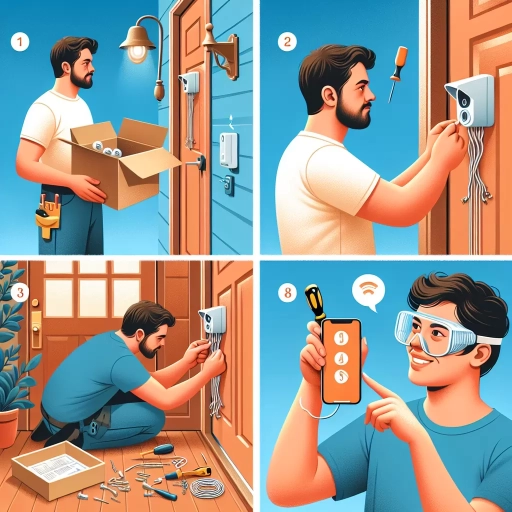
Step-by-Step Installation Process
Installing a Ring Doorbell Wired is a relatively straightforward process that can be completed with a few basic tools and some knowledge of electrical systems. To ensure a safe and successful installation, it's essential to follow a step-by-step process. The first step is to shut off the power to your doorbell circuit, which will prevent any accidental electrical shocks or injuries. This is a crucial step that should not be overlooked. Once the power is off, you can proceed to remove the old doorbell and install the new mounting bracket, which will provide a secure base for your new doorbell. Finally, you will need to connect the Ring Doorbell Wired to your home's electrical system, which will provide the power needed to operate the device. By following these steps, you can ensure a safe and successful installation of your Ring Doorbell Wired. So, let's start with the first step: Shut Off the Power to Your Doorbell Circuit.
Shut Off the Power to Your Doorbell Circuit
To ensure a safe and successful installation, it's crucial to shut off the power to your doorbell circuit before starting the process. Locate your home's main electrical panel, usually found in the basement, garage, or utility room, and identify the circuit breaker or fuse that controls the doorbell circuit. Switch off the breaker or remove the fuse to disconnect power to the circuit. Verify that the doorbell is no longer functioning by pressing the button and checking for any lights or sounds. This simple yet essential step will prevent any accidental shocks or electrical injuries, allowing you to work on the installation with confidence. Additionally, take a moment to inspect the wiring and connections to ensure they are secure and not damaged, as this will also impact the overall performance of your new Ring doorbell. By shutting off the power and inspecting the wiring, you'll be well-prepared to move forward with the installation process.
Remove the Old Doorbell and Install the New Mounting Bracket
To remove the old doorbell, start by taking out the screws that hold it in place. Gently pry the doorbell away from the wall or door frame, taking care not to damage any surrounding surfaces. Once the old doorbell is removed, inspect the area for any remaining screws, wires, or debris. If necessary, use a screwdriver or pliers to remove any leftover screws or wires. Next, take the new mounting bracket that came with your Ring Doorbell and hold it up against the wall or door frame, ensuring it is level and aligned with the surrounding area. Mark the screw holes with a pencil, then use a drill to create pilot holes for the screws. Insert the screws into the pilot holes and tighten them firmly to secure the mounting bracket in place. Make sure the bracket is snug against the wall or door frame, but avoid overtightening, which can damage the surface. With the mounting bracket securely installed, you can now proceed to the next step of installing your Ring Doorbell.
Connect the Ring Doorbell Wired to Your Home's Electrical System
To connect the Ring Doorbell Wired to your home's electrical system, you'll need to follow a few straightforward steps. First, ensure you have a compatible doorbell transformer, which is usually 16-24 volts AC. If your existing transformer is not compatible, you may need to replace it with a Ring-approved transformer. Next, turn off the power to your doorbell circuit at the breaker box or fuse box to avoid any electrical shocks. Then, locate the doorbell wires, which are usually connected to the existing doorbell. You'll need to disconnect these wires from the old doorbell and connect them to the Ring Doorbell Wired. The wires are usually color-coded, with the black wire connecting to the "COM" terminal and the white wire connecting to the "L1" terminal. If you have a digital doorbell chime, you may need to connect the wires to the "L2" terminal as well. Once the wires are connected, turn the power back on and test the doorbell to ensure it's working properly. It's also a good idea to check the voltage of your doorbell transformer to ensure it's within the recommended range for the Ring Doorbell Wired. By following these steps, you'll be able to successfully connect your Ring Doorbell Wired to your home's electrical system.
Post-Installation Setup and Testing
After installing your Ring Doorbell Wired, it's essential to complete the post-installation setup and testing to ensure it functions correctly and meets your security needs. This process involves several crucial steps that will help you get the most out of your device. First, you'll need to download and install the Ring app on your smartphone, which will serve as the central hub for controlling and monitoring your doorbell. Next, you'll need to configure your Ring Doorbell Wired settings and preferences, allowing you to customize features such as motion detection, alerts, and video quality. Finally, it's vital to test your Ring Doorbell Wired to ensure it's working properly and providing clear video and audio. By following these steps, you'll be able to enjoy the full benefits of your Ring Doorbell Wired and enhance your home's security. To get started, let's begin with the first step: downloading and installing the Ring app on your smartphone.
Download and Install the Ring App on Your Smartphone
To download and install the Ring App on your smartphone, start by opening the App Store on your iOS device or the Google Play Store on your Android device. Search for "Ring" in the search bar, and select the Ring app from the search results. Tap the "Get" or "Install" button to begin the download process. Once the download is complete, tap the "Open" button to launch the app. You will be prompted to create a Ring account or log in to an existing one. Follow the in-app instructions to complete the setup process, which includes verifying your email address and setting up a password. After setting up your account, you will be asked to add your Ring device, which in this case is your Ring Doorbell Wired. Follow the in-app instructions to complete the setup process, which includes connecting your device to your Wi-Fi network and configuring any additional settings as desired. Once the setup process is complete, you will be able to use the Ring app to monitor and control your Ring Doorbell Wired, receive notifications, and view live video feed.
Configure Your Ring Doorbell Wired Settings and Preferences
To configure your Ring Doorbell Wired settings and preferences, start by opening the Ring app on your mobile device. Tap on the three horizontal lines on the top left corner to access the menu, then select "Devices" and choose your Ring Doorbell Wired from the list. From here, you can customize various settings to suit your needs. Under "Device Settings," you can adjust the motion detection sensitivity, set up motion zones, and enable or disable alerts for specific zones. You can also configure the doorbell's Wi-Fi settings, such as changing the network or updating the Wi-Fi password. Additionally, you can set up and manage your doorbell's audio settings, including the volume and alert tones. To personalize your doorbell's behavior, go to "Smart Alerts" and set up custom alerts for specific events, such as motion detection or doorbell presses. You can also integrate your doorbell with other smart devices and services, such as Amazon Alexa or Google Assistant, by going to "Linked Devices" and following the prompts. Furthermore, you can review and manage your doorbell's video and audio recordings, as well as adjust the video quality and storage settings, by accessing the "Video Settings" section. Finally, make sure to check for any software updates and install them to ensure your doorbell is running with the latest features and security patches. By configuring these settings and preferences, you can tailor your Ring Doorbell Wired to your specific needs and preferences, enhancing your home security and convenience.
Test Your Ring Doorbell Wired to Ensure Proper Functionality
To ensure your Ring Doorbell Wired is functioning properly, it's essential to test it after installation. Start by checking the device's power status, making sure it's receiving power from the wiring. Next, test the doorbell's Wi-Fi connectivity by checking the Ring app to see if it's connected to your network. Then, test the doorbell's motion detection feature by walking in front of the camera to trigger a motion alert. You should receive a notification on your phone or tablet. Additionally, test the doorbell's video streaming by viewing live footage in the Ring app. Check the video quality, ensuring it's clear and not pixelated. Test the two-way audio feature by speaking through the app and listening for the audio to come through the doorbell's speaker. Finally, test the doorbell's chime feature by pressing the doorbell button and listening for the chime to sound. If any of these tests fail, refer to the Ring app or user manual for troubleshooting guides. By thoroughly testing your Ring Doorbell Wired, you can ensure it's working correctly and providing you with the security and convenience you need.