How To Pay Bell Bill Online
Here is the introduction paragraph: Paying your Bell bill online is a convenient and efficient way to manage your account and avoid late fees. With just a few clicks, you can settle your bill from the comfort of your own home, 24/7. But before you start making online payments, it's essential to understand the basics of your Bell bill, including the different charges and fees. In this article, we'll guide you through the process of paying your Bell bill online, starting with understanding your bill, setting up online payment, and making a one-time online payment. By the end of this article, you'll be able to navigate the online payment system with ease and confidence. So, let's begin by understanding your Bell bill.
Understanding Your Bell Bill
Understanding your Bell bill is crucial to managing your finances effectively and avoiding any unexpected charges. A typical Bell bill can be overwhelming, with numerous sections and charges that may seem unclear. However, by breaking down your bill into its components, identifying your account information, and recognizing any outstanding charges or fees, you can gain a better understanding of your bill and make informed decisions about your services. In this article, we will delve into the specifics of each of these components, starting with the most fundamental aspect: breaking down your bill into its individual parts. By doing so, you will be able to identify the various charges and services that make up your bill, and understand how they contribute to your overall monthly cost. Let's begin by breaking down your bill into components.
Breaking Down Your Bill into Components
Understanding your Bell bill can be a daunting task, but breaking it down into its components can make it more manageable. Your Bell bill is comprised of several key elements, including the monthly service charge, usage charges, and additional features or services. The monthly service charge is the base fee for your Bell service, and it varies depending on the type of service you have, such as TV, internet, or phone. Usage charges, on the other hand, are fees for the specific services you use, such as data, minutes, or texts. Additional features or services, such as premium channels or international calling, are also billed separately. Furthermore, you may see additional charges for equipment rental, installation fees, or late payment fees. By understanding each of these components, you can better manage your Bell bill and make informed decisions about your services. For instance, you may be able to reduce your usage charges by switching to a more cost-effective plan or by being more mindful of your data usage. Similarly, you may be able to eliminate additional features or services that you don't use, resulting in cost savings. By taking the time to review and understand your Bell bill, you can take control of your expenses and make the most of your Bell services.
Identifying Your Account Information
To identify your account information, start by locating the top right corner of your Bell bill, where you'll find your account number. This unique 16-digit number is essential for making online payments, so make sure to note it down. Next, look for the billing date, which is usually displayed prominently on the bill. This date indicates when your payment is due, and it's crucial to pay by this date to avoid any late fees. You'll also find your billing address, which should match the address associated with your Bell account. If you've recently moved, ensure that your address is up-to-date to avoid any issues with your service. Additionally, take note of your payment amount, which is clearly displayed on the bill. This amount includes any outstanding balances, new charges, and applicable taxes. If you have any questions or concerns about your account information, you can contact Bell's customer service directly for assistance. By verifying your account information, you can ensure a smooth and hassle-free online payment experience.
Recognizing Any Outstanding Charges or Fees
When reviewing your Bell bill, it's essential to recognize any outstanding charges or fees to avoid any unexpected surprises. Start by checking the "Current Charges" section, which outlines the total amount due for the current billing period. Look for any additional fees, such as late payment fees, NSF fees, or equipment rental fees. These fees can add up quickly, so it's crucial to address them promptly. You may also notice charges for services or features you no longer use, such as premium channels or international calling. Take this opportunity to review your services and cancel any unnecessary features to avoid future charges. Furthermore, if you've recently made any changes to your account, such as upgrading or downgrading your plan, you may see prorated charges or credits. Make sure to review these charges carefully to ensure they're accurate. By recognizing and addressing any outstanding charges or fees, you can avoid any potential issues and ensure your Bell bill is accurate and up-to-date.
Setting Up Online Payment with Bell
Setting up online payment with Bell is a convenient and efficient way to manage your bills. To get started, you'll need to register for a MyBell account, which will serve as the central hub for all your online payment activities. Once you've created your account, you can link your bank account or credit card to enable seamless transactions. Finally, you can set up automatic payments to ensure that your bills are paid on time, every time. By following these simple steps, you can enjoy the benefits of online payment with Bell. In this article, we'll guide you through the process, starting with the first step: registering for a MyBell account.
Registering for a MyBell Account
To register for a MyBell account, start by visiting the Bell website and clicking on the "Register" button at the top right corner of the page. You will be prompted to enter your Bell account number, which can be found on your bill or by contacting Bell customer service. Next, create a username and password for your account, making sure to choose a strong and unique password to protect your account security. You will also need to provide some basic information, such as your name and email address. Once you have completed the registration form, click "Submit" to create your account. You will then receive an email from Bell to confirm your registration and activate your account. After activating your account, you can log in to your MyBell account to view your bill, make payments, and manage your account settings. Registering for a MyBell account is a straightforward process that only takes a few minutes to complete, and it provides you with easy access to your account information and online payment options.
Linking Your Bank Account or Credit Card
To set up online payment with Bell, you'll need to link your bank account or credit card to your Bell account. This is a straightforward process that can be completed in a few steps. First, log in to your Bell account online or through the Bell app. Once you're logged in, navigate to the "Payment" or "Billing" section, where you'll find the option to add a payment method. Click on "Add Payment Method" and select either "Bank Account" or "Credit Card" as your preferred payment option. If you choose to link your bank account, you'll need to provide your account number and transit number, which can be found on a cheque or through your online banking. If you prefer to use a credit card, you'll need to enter your card number, expiration date, and security code. Once you've entered the required information, click "Save" to link your account or card to your Bell account. You'll receive a confirmation message once the payment method has been successfully added. With your bank account or credit card linked, you can now set up automatic payments or make one-time payments online. You can also view your payment history and manage your payment methods at any time through your Bell account. By linking your bank account or credit card, you'll be able to take advantage of the convenience and flexibility of online payment with Bell.
Setting Up Automatic Payments
Setting up automatic payments is a convenient and hassle-free way to manage your Bell bill payments. By authorizing Bell to automatically deduct your monthly payments from your bank account or credit card, you can ensure that your payments are made on time, every time. To set up automatic payments, simply log in to your MyBell account and navigate to the "Payment" section. From there, you can select the "Automatic Payments" option and follow the prompts to enter your payment information. You can choose to pay your entire bill or a fixed amount each month, and you can also set up a payment schedule that works for you. Once you've set up automatic payments, you'll receive a confirmation email from Bell, and your payments will be processed automatically on the due date. You can also view your payment history and manage your automatic payments at any time through your MyBell account. By setting up automatic payments, you can avoid late fees, reduce your stress levels, and enjoy the peace of mind that comes with knowing your payments are taken care of. Additionally, Bell offers a variety of payment options, including credit cards, debit cards, and bank accounts, so you can choose the method that works best for you. Overall, setting up automatic payments is a simple and convenient way to manage your Bell bill payments and stay on top of your finances.
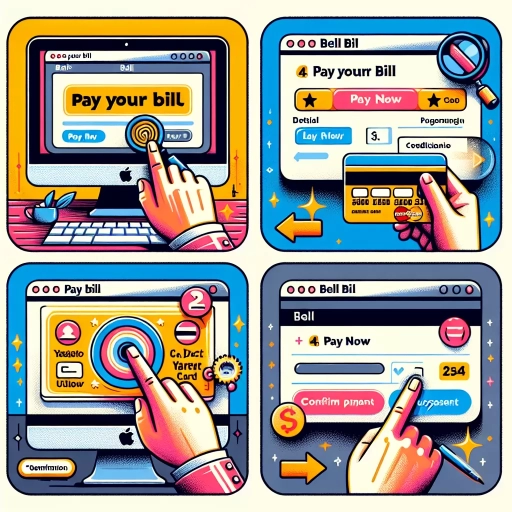
Making a One-Time Online Payment
Making a one-time online payment is a convenient and efficient way to settle your bills. To do so, you will need to follow a few simple steps. First, you will need to log into your MyBell account, which will give you access to your account information and allow you to initiate the payment process. Next, you will need to enter your payment details, including the amount you wish to pay and your payment method. Finally, you will need to confirm your payment, ensuring that all details are accurate and complete. By following these steps, you can quickly and easily make a one-time online payment. To get started, log into your MyBell account.
Logging into Your MyBell Account
To log into your MyBell account, start by navigating to the Bell website and clicking on the "MyBell" tab at the top right corner of the page. From there, you will be directed to the login page where you will be prompted to enter your username and password. If you are a new user, you can click on the "Register" button to create an account. Once you have entered your login credentials, click on the "Log in" button to access your account. If you have forgotten your username or password, you can click on the "Forgot username or password" link to reset them. After logging in, you will be able to view your account information, check your balance, and make a one-time online payment. You can also set up automatic payments, view your payment history, and update your account settings. Additionally, you can use the MyBell app to log in and manage your account on-the-go. By logging into your MyBell account, you can take control of your Bell services and stay on top of your payments.
Entering Your Payment Details
When entering your payment details to make a one-time online payment for your Bell bill, it's essential to ensure accuracy and security. Start by selecting your payment method, which can be a credit card, debit card, or bank account. If you choose to pay with a credit or debit card, enter the card number, expiration date, and security code. For bank account payments, you'll need to provide your account number and transit number. Double-check that all the information is correct to avoid any errors or declined payments. Additionally, make sure you have sufficient funds in your account to cover the payment amount. Bell's online payment system uses robust security measures to protect your sensitive information, so you can confidently enter your payment details. Once you've entered your payment information, review it carefully before submitting the payment. This will help prevent any mistakes and ensure that your payment is processed successfully. By following these simple steps, you can quickly and securely enter your payment details and complete your one-time online payment for your Bell bill.
Confirming Your Payment
To confirm your payment, you will need to verify the details of your transaction. Once you have entered your payment information and submitted it, you will be taken to a confirmation page. This page will display the amount you have paid, the payment method used, and the date of the payment. Review this information carefully to ensure that everything is accurate. If you notice any errors, you can usually go back and correct them before finalizing the payment. Once you are satisfied that the information is correct, you can confirm the payment. You may also receive a confirmation email from Bell, which will include a summary of your payment details. It's a good idea to keep this email for your records, in case you need to refer to it later. By confirming your payment, you can be sure that your account has been updated and that you will not receive any late payment fees.