How To.screen Record On Iphone
Screen recording on an iPhone is a valuable tool for creating tutorials, demonstrating apps, and sharing gameplay. With the built-in screen recording feature, you can capture high-quality video of your iPhone screen and edit it to perfection. But before you start recording, it's essential to prepare your iPhone and understand the basics of screen recording. In this article, we'll take you through the step-by-step process of screen recording on an iPhone, from preparation to editing and sharing. We'll start by discussing the preparation required to ensure a smooth screen recording experience, including enabling the screen recording feature and setting up your iPhone. Next, we'll dive into the actual recording process, covering how to start and stop recording, and how to capture audio. Finally, we'll explore the editing and sharing options available, including trimming, cropping, and sharing your recording on social media or via email. Let's begin by preparing your iPhone for screen recording.
Preparation for Screen Recording on iPhone
Screen recording on an iPhone can be a powerful tool for creating tutorials, demonstrating apps, and sharing experiences with others. However, before you start recording, it's essential to prepare your device to ensure a smooth and high-quality recording experience. To begin with, you'll need to enable the screen recording feature, which is not turned on by default. But before you do that, it's crucial to choose the right iPhone model that supports screen recording, as not all models have this capability. Additionally, you'll need to update to the latest iOS version to ensure that you have the latest features and improvements. By taking these steps, you'll be well on your way to creating high-quality screen recordings on your iPhone. So, let's start by enabling the screen recording feature.
Enable Screen Recording Feature
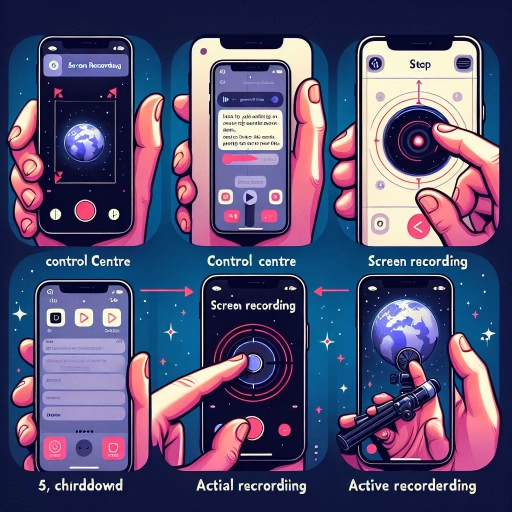
Here is the paragraphy: To enable the screen recording feature on your iPhone, you'll need to access the Settings app. Start by opening the Settings app, which is usually found on your home screen. Scroll down and tap on "Control Center." Within the Control Center settings, locate the "Customize Controls" section. Here, you'll find a list of available controls that you can add or remove from your Control Center. Look for the "Screen Recording" option and tap the green "+" icon next to it to add it to your Control Center. Once you've added the screen recording feature, you can exit the Settings app. Now, to access the screen recording feature, simply swipe up from the bottom of your screen (or down from the top right corner on iPhone X and later) to open the Control Center. You'll see the screen recording icon, which looks like a white circle within a black circle. Tap this icon to start recording your screen. A three-second countdown will begin, and then your screen recording will start. You can stop the recording by tapping the red status bar at the top of your screen or by opening the Control Center and tapping the screen recording icon again.
Choose the Right iPhone Model
Here is the paragraphy: When it comes to screen recording on an iPhone, choosing the right model is crucial. The good news is that most modern iPhones support screen recording, but there are some differences in features and capabilities across models. If you're looking to record high-quality video, you'll want to opt for an iPhone 11 or later, which supports 4K video recording at 60fps. The iPhone 12 series and later also offer improved stabilization and a wider color gamut, making them ideal for recording vibrant and smooth footage. On the other hand, if you're looking for a more budget-friendly option, the iPhone 8 and later still support screen recording, albeit at a lower resolution. Additionally, if you plan on editing your screen recordings, consider an iPhone with a faster processor, such as the iPhone 13 or later, which will make editing and exporting your videos much faster. Ultimately, the right iPhone model for screen recording depends on your specific needs and preferences, so be sure to research and compare features before making a decision.
Update to the Latest iOS Version
To ensure a seamless screen recording experience on your iPhone, it's essential to update to the latest iOS version. Apple regularly releases new updates that include bug fixes, security patches, and feature enhancements, which can significantly impact the performance of your device. By updating to the latest iOS version, you'll not only improve the overall functionality of your iPhone but also ensure that you have access to the latest features and capabilities, including those related to screen recording. To update your iPhone, go to the Settings app, tap on "General," and then select "Software Update." If an update is available, tap on "Download and Install" to begin the process. Make sure your iPhone is connected to a stable Wi-Fi network and has sufficient battery life to complete the update. Once the update is installed, your iPhone will restart, and you'll be ready to start screen recording with the latest features and improvements. Additionally, updating to the latest iOS version will also ensure that you have the latest version of the Screen Recording feature, which may include new features, such as the ability to record audio from your iPhone's microphone or add captions to your recordings. By staying up-to-date with the latest iOS version, you'll be able to take full advantage of your iPhone's screen recording capabilities and create high-quality recordings with ease.
Recording Your iPhone Screen
Recording your iPhone screen can be a useful tool for various purposes, such as creating tutorials, demonstrating apps, or capturing gameplay. To start recording your iPhone screen, you'll need to access the screen recording feature, which is a built-in function on iOS devices. Once you've accessed the feature, you can start and stop the recording as needed, and even use the microphone to capture audio. In this article, we'll explore how to access the screen recording feature, start and stop the recording, and use the microphone for audio. By the end of this article, you'll be able to record your iPhone screen with ease. First, let's start by accessing the screen recording feature.
Accessing the Screen Recording Feature
To access the screen recording feature on your iPhone, navigate to the Settings app and select "Control Center." From there, tap on "Customize Controls" and locate the "Screen Recording" option. Tap the green "+" icon next to it to add it to your Control Center. Once added, you can access the screen recording feature by swiping up from the bottom of the screen (or down from the top right corner on iPhone X and later models) to open the Control Center, and then tapping the screen recording icon, which resembles a white circle within a circle. You can also ask Siri to "Turn on Screen Recording" to activate the feature. Additionally, you can customize the screen recording settings by going to Settings > Control Center > Customize Controls, and then tapping on the "Screen Recording" option to choose whether to record audio or not. By following these simple steps, you can easily access the screen recording feature on your iPhone and start capturing your screen activity.
Starting and Stopping the Screen Recording
To start and stop the screen recording on your iPhone, you'll need to access the Control Center. If your iPhone has a home button, swipe up from the bottom of the screen. If it doesn't have a home button, swipe down from the top right corner. Once you're in the Control Center, you'll see a record button that looks like a white circle inside a red circle. Tap this button to start recording your screen. You'll see a three-second countdown before the recording begins. To stop the recording, go back to the Control Center and tap the record button again. The screen recording will be saved to your Photos app, where you can view, edit, and share it. You can also stop the recording by opening the app switcher and tapping the red status bar at the top of the screen. Additionally, you can use Siri to start and stop the screen recording by saying "Hey Siri, start recording my screen" or "Hey Siri, stop recording my screen."
Using the Microphone for Audio
When recording your iPhone screen, using the microphone for audio can enhance the overall quality of your video. To do this, simply tap the microphone icon in the screen recording controls. This will allow you to capture your voice or any other external sounds, making your video more engaging and informative. For example, if you're creating a tutorial or walkthrough, using the microphone will enable you to provide clear and concise commentary, helping your viewers understand the content better. Additionally, if you're recording a video of a presentation or lecture, the microphone will pick up the speaker's voice, allowing you to capture the audio in high quality. It's also worth noting that you can choose to record audio from the iPhone's built-in microphone or an external microphone, giving you more flexibility and control over the audio quality. By using the microphone for audio, you can create a more immersive and professional-looking video that will engage your audience and convey your message more effectively.
Editing and Sharing Your Screen Recording
Once you've finished recording your screen, the next step is to edit and share it with others. Editing your screen recording can help you refine the content, remove any unnecessary parts, and make it more engaging for your audience. There are several ways to edit your screen recording, including trimming and cropping the recording to focus on the most important parts, adding text, drawings, or filters to highlight key points or add visual interest, and sharing the recording via email or social media to reach a wider audience. By editing and sharing your screen recording, you can create a more polished and effective video that communicates your message clearly and concisely. In this article, we'll explore these three key aspects of editing and sharing your screen recording, starting with the basics of trimming and cropping the recording.
Trimming and Cropping the Recording
Once you've captured your screen recording, you may want to trim or crop it to remove any unnecessary parts, enhance the viewing experience, or focus on a specific section. Trimming allows you to cut out the beginning or end of the recording, while cropping enables you to remove unwanted sections from the middle. To trim your recording, open the Photos app, select the screen recording, and tap "Edit." Then, drag the edges of the timeline to the desired start and end points. You can also split the recording into multiple clips by tapping the "Split" button. To crop your recording, tap the "Crop" button and adjust the borders to remove any unwanted areas. You can also rotate the video or flip it horizontally. Additionally, you can use the "Markup" tool to add text, drawings, or other annotations to your recording. Once you're satisfied with your edits, tap "Done" to save the changes. By trimming and cropping your screen recording, you can create a more polished and engaging video that effectively communicates your message.
Adding Text, Drawings, or Filters
Here is the paragraphy: Once you've recorded your screen, you can add text, drawings, or filters to enhance the video. To add text, tap the "Text" icon in the top right corner of the screen and type in your desired text. You can choose from various font styles, sizes, and colors to customize the appearance of the text. To add drawings, tap the "Marker" icon and use your finger to draw on the screen. You can choose from different brush sizes and colors to create custom drawings. If you want to add filters, tap the "Filters" icon and select from a range of options, including sepia, black and white, and more. You can also add emojis, shapes, and other graphics to make your video more engaging. Additionally, you can trim, split, or merge clips to edit your video further. All these editing features are available in the Photos app, making it easy to edit and share your screen recordings directly from your iPhone.
Sharing the Recording via Email or Social Media
Here is the paragraphy: Once you've edited your screen recording, it's time to share it with others. You can easily share your recording via email or social media platforms. To share via email, simply tap the "Share" icon, select "Mail," and choose the email account you want to use. You can then add recipients, write a message, and send the email. If you prefer to share on social media, tap the "Share" icon and select the platform you want to use, such as Facebook, Twitter, or Instagram. You can also share your recording on other platforms like YouTube, Vimeo, or Google Drive. Additionally, you can share your recording via messaging apps like WhatsApp, Messenger, or Skype. When sharing your recording, you can also choose to share a link to the video or attach the video file directly to the message. Sharing your screen recording is a great way to communicate with others, demonstrate a process, or showcase a product or feature. By sharing your recording, you can reach a wider audience and make your content more accessible.