How To Delete Games On Nintendo Switch
 Are you running out of storage on your Nintendo Switch due to the multitude of games you've downloaded over time? Don't fret, because we have the perfect solution for you. We present an insightful guide on how to bid goodbye to those games you are no longer playing, thereby freeing up some much-needed space. In this well-crafted piece, we'll provide you with a comprehensive, step-by-step guide on deleting games from your cherished gadget. We delve deep into the different methods of removal, encompassing both direct deletion from the Nintendo Switch menu and from the more technical perspective of the Nintendo Switch MicroSD card. Without any further ado, let’s dive into our first supporting paragraph, “Deleting Games on Nintendo Switch: A Step-by-Step Guide.”
Deleting Games on Nintendo Switch: A Step-by-Step Guide
The Nintendo Switch has become an essential part of contemporary gaming and has transformed portable gaming with its versatility and ever-growing library of games. As you fill your console with games, saving screenshots, and downloadable content, you may find you need more space; that's when understanding how to delete games becomes vital. This guide will walk you through the process step-by-step. We'll discuss the Nintendo Switch's storage options, precautions you should take before deleting games, and how to delete games directly from the Nintendo Switch home screen. It is essential to make informed decisions about managing your console's space, especially with limited storage. With that in mind, let's dive into understanding the intricate aspects of the Nintendo Switch's storage options.
Understanding the Nintendo Switch's Storage Options
Understanding the storage options on a Nintendo Switch console is essential before you dive into the process of deleting games. Why? Because knowing how your console's storage works, playing a pivotal role in managing games, can help provide a lag-free gaming experience. The Nintendo Switch contains 32GB of internal storage, but users quickly realize that it is not enough, considering most major titles need 10GB to 15GB space. Hence the need for a deletion process becomes apparent. The clever design of the Nintendo Switch allows for expansion in storage capacity. Through the use of a microSD card, gamers can swiftly expand their storage space up to 2TB, offering much more room for game data, updates, screenshots, or recordings. Remember, in the quest for high-quality entertainment, the selection of a microSD card is also a factor. For games with huge data requirement and graphics-intensive gameplay, a high-speed microSD card is a worthy investment. Yet, even with microSD expansion, managing storage for optimal gaming experience can still be a challenge. It hinges on a delicate balance. Often, storage overloads lead to slow loading times and lag, affecting the game’s performance and, in turn, the user's experience. Here, smart management strategy is key. Regularly delete unwanted game data form your Switch to free up space. This space can then be utilized for new games or updates for your current favorites. To further ensure an unimpeded gaming experience, you need to be well-acquainted with the data management feature in your console. The Nintendo Switch offers two ways to view and manage your data – 'Quick Archive' and 'Manage Software.' While 'Quick Archive' offers a direct route to delete games that aren't currently in use, 'Manage Software' gives a detailed view of all the games and the amount of storage space they take up. This detailed view allows users to make informed decisions about what to keep and what to delete, thereby creating a solid strategy around their storage management. To summarize, understanding Nintendo Switch's storage options prior to the deletion process offers the dual benefit of enhanced usability with an improved gaming experience. It assists in understanding the space allocation mechanism and the relevance of speedier microSD cards. It also highlights the importance of regular deletion of irrelevant game data and a cautious approach to storage management. Essentially, this understanding forms an integral part of ensuring a smooth, hassle-free gaming experience on Nintendo Switch.
Precautions Before Deleting Games
Before proceeding to the deletion process, it's prudent to take several precautions for smooth and risk-free operation. Keep in mind that deleting games on your Nintendo Switch is not a reversible action, which means that you’ll lose all the saved progress for that particular game once you carry out this operation. It is, therefore, essential to ensure that all your saved game data is backed up beforehand. Nintendo provides cloud storage for saved game data through its Nintendo Switch Online service. Consider subscribing to this service if you haven't done so already, as it provides a safety net for your saved game data in any unforeseen circumstances. If you can't subscribe or choose not to, you can manually backup your Nintendo Switch games saved data locally. One thing to keep in mind is that not all games support cloud saving, so it's vital to double-check. Also, ensure to check the game's details before you choose to delete it. With the Nintendo Switch's limited storage capacity, you may find yourself needing to delete less frequently games to create space for new ones. However, do remember that once a game is deleted, you will need to redownload or reinsert the game cartridge to reinstall it, so ensure that the game doesn't have any upcoming contents or updates which you might be interested in. Relatively, digital games bought from Nintendo eShop are linked to your Nintendo Account and can be downloaded again for free from your account. Nonetheless, this will necessitate a stable internet connection and could consume a significant amount of time, depending on your internet speed and the game's size. Keep this in mind, particularly if the game you plan to delete is one that you may want to play again in the near future. It's also worthwhile to remember that deleting a game doesn't mean you lose the right to the game. If the game was purchased, it can be redownloaded at any point in time. If it's a physical game, then no worries at all, you always can insert the game card and play it. However, remember that saved game data is not stored on the game card. Therefore, if you haven't backed up your save data, you will start the game from scratch. In conclusion, while the process of deleting games on the Nintendo Switch is quite straightforward, taking precautions can save you from potential headaches, loss of saved progress, and data, ensuring a stress-free gaming experience. Be sure about your decision and take note of these precautionary measures before pressing that delete button.
Deleting Games from the Nintendo Switch Home Screen
Deleting games from the Nintendo Switch Home Screen is a crucial step that allows players to manage their console's storage properly and keep it organized. This process is not as straightforward as it appears, but it can be mastered quickly. This maintenance task can seem daunting at first, especially when one does not know where and how to start the process. To commence the deletion process, the first step is to navigate to the Nintendo Switch Home Screen. Unlike most platforms that adopt the direct delete process, Nintendo Switch requires its users to go through the System Settings on the home screen before any deletion can take place. The System Settings section is a critical part of the console, that is intentionally created for the management of all apps and games. It is here that players can get a complete overview of their Nintendo Switch console's storage, see how much space specific games take up, and decide whether those games are worth the used space. When a player hoards too many games on the console, it may get clustered, disorganized, and potentially slower, leaving players with an unpleasant gaming experience. This is due to the excess weight that numerous games put on the console memory, affecting the overall performance of the console in the long run. Hence, deleting any unnecessary or completed games can resolve these issues and improve the gaming experience, making it smoother and more enjoyable. Moreover, eliminating games that have been completed or rarely played provides room for new ones. Every game occupies a significant amount of memory space, and deleting them increases the console’s storage capacity. With more storage space, players can download new games without worrying about running out of space, effectively increasing their game collection. Deleting games from your Nintendo Switch is convenient as it not only declutters your home screen but also renames and rearranges your games in your preferred order. It generates a more straightforward navigation process, enabling you to quickly identify and select your favorite games. On the Nintendo Switch Home Screen, you can also see your most recently played games at the front of the line, providing easy access without needing to scroll through all of your games. In conclusion, the process of deleting games from the Nintendo Switch Home Screen is essential to every player. It is a simple yet effective method that can help to improve and optimize the console's performance. The steps to do this are user-friendly and easy to follow. Once mastered, this can become a routine task to keep your Nintendo Switch Home Screen organized and your console running at its peak performance. The benefits of deleting games from your Nintendo Switch Home Screen are many, providing a smoother and more enjoyable gaming experience.
Deleting Games from the Nintendo Switch Menu
With the ever-growing library of fascinating games, it's natural that our Nintendo Switch's memory gets overwhelmed, leading us to delete some games. Understanding how to successfully manage this process can save you valuable gaming time and guarantee a smoother Nintendo experience. This article will guide you through each step of deleting games from the Nintendo Switch menu in detail. First, we'll delve into accessing the Nintendo Switch menu to familiarize you with the primary starting point. Next, we'll explore the precise process of locating and deleting games from the menu, ensuring you understand how to effortlessly find your games and eliminate them. Lastly, we'll discuss confirming deletions and fully removing games from your console, preventing inadvertent deletions or unnecessary memory usage. By the end of this guide, you'll be well-equipped to maintain your device and make sure your gameplay stays as fun and efficient as possible. Let's begin by accessing the Nintendo Switch menu.
Accessing the Nintendo Switch Menu
Accessing the Nintendo Switch Menu is a simple process, but it's an essential part of managing your Nintendo Switch console. Whether you want to delete a game, check progress, or manage settings, you'll first need to navigate to the menu. First, switch on your Nintendo Switch console. The switch houses a user interface that is navigated via the touchscreen or the Joy-Con controllers which adds an element of versatility and user convenience to the experience. You will see the home screen once it's fully booted up. The home screen has several icons, including a row of your most recently used games and software. Underneath these icons, there's a taskbar with several crucial commands. Here, you'll find the Nintendo eShop, where you can buy new games and software; the Album, where screenshots and game video clips are stored; and the System Settings, where you can manage everything from themes to user data. To access the menu from the home screen, just press the "Home" button on the right Joy-Con controller. Now, you've successfully accessed the Nintendo Switch Menu. In case you're wondering how to delete games, it's from this menu - however, it's under the System Settings section specifically. Before proceeding with deletion, make sure that you really want to remove the game as it'll be completely erased from your system. Navigating the Nintendo Switch Menu might seem intimidating at first, but in reality, it's quite straightforward. It offers a seamless gateway to manage your games, alter settings, and customize your Nintendo Switch experience to your liking. Ensuring you know how to access and use the Nintendo Switch Menu effectively will significantly enhance your overall gaming experience, as it's pivotal to core aspects like game management, console settings, and user data control.
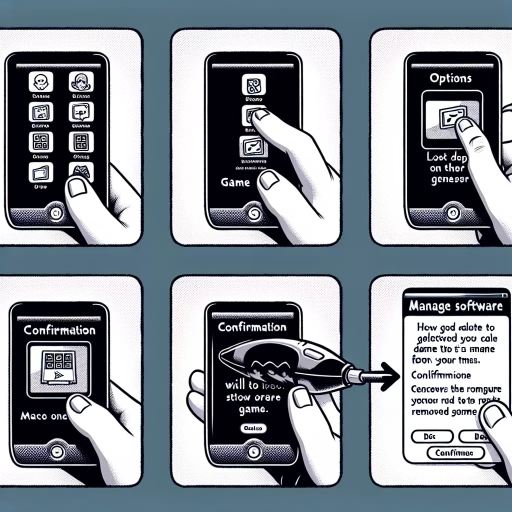
Locating and Deleting Games from the Menu
When you are utilizing a Nintendo Switch, there may come a time when you need to delete games to free up space on your console. The dynamic games and versatility of this console mean that you may have downloaded a substantial number of games that may eventually consume all your Switch's memory. Locating and deleting games from the menu is timely and straightforward. You can easily manage this clean up by starting off in the Home menu. From the home screen, navigate to the 'System Settings' by moving your cursor to the gear icon at the bottom of your screen. Once you’ve successfully entered there, scroll down to the 'Data Management' tab. The following step would be going to the 'Manage Software' tab, then choose 'Software.' Here, you will find a list of all the games that have been installed on your Nintendo Switch. There is more than meets the eye in this section. Each game's icon in the 'Manage Software' section provides an overview of the particular game's details. When you click on a specific game, you will be shown information such as when the game was last played, its size, and version. This feature is particularly helpful because it gives you an understanding of how much space each game is taking up. Now suppose you choose to delete a game. In that case, the 'Delete Software' option is available on every game's detailed information page, right at the bottom of the screen. Upon selecting 'Delete Software,' the system will prompt a dialogue box asking for confirmation. This double check system is designed to avoid the accidental deletion of games. Once confirmed, the deletion process is almost instantaneous, and the game is permanently removed from your Nintendo Switch's internal memory. Be aware that deleting a game from your system doesn’t mean you lose the right to download it again. It is important to note that all the games you've bought digitally will remain tied to your Nintendo Account and be readily available for re-download from the eShop at zero cost, unless otherwise stated by Nintendo. Therefore, these game deletions aren't a one-way process, but a flexible routine to regulate your Nintendo Switch's memory and keep your gaming environment clutter-free. The process of locating and deleting games from the Nintendo Switch menu is quite simple and user-friendly. The efficient organization of steps guarantees not to burden even the least tech-savvy individuals. By freeing up space you no longer use, you get to enhance your gaming experience by adding newer, perhaps more exciting titles to your library. Ultimately, maintaining this routine will preserve the longevity and performance of your Nintendo Switch console.
Confirming Deletion and Removing Games
Deleting games from a Nintendo Switch console may seem like an arduous task but it is actually quite straightforward when the right steps are followed. However, before completely removing a game from the console, it's crucial to consider the process of confirming deletion. This is the final part of the deletion process and is critical to ensure that the game you're disposing of is the one you actually intend to delete. The reason for this caution is that once a game is deleted from the Nintendo Switch console, it cannot be retrieved back. The only way to play the game again would be to download it once again from the Nintendo eShop, which would consume time and possibly necessitate another purchase. When you navigate through the Nintendo Switch menu towards deletion of a game, the console always gives its user an opportunity to confirm or cancel the decision. This is usually presented as a dialogue box with two options: 'Delete' or 'Cancel'. Choosing 'Delete' confirms your decision to get rid of the game, while 'Cancel' aborts the process. The painstaking process ensues if there was no backup saved on a cloud or an SD card, as your game data goes along with the game. This can be pretty frustrating for gamers who have made significant progress on their games. With cloud backup, you can still recover your progress if you decide to download the game again in the future. Therefore, to avoid uninstalling a game accidentally, always double-check and confirm deletion before proceeding. Additionally, it's vital to remember that removing games from your Nintendo Switch does not only provide extra space but also helps declutter the console's menu. A neatly organized system not only aids speedy navigation but also enhances gaming performance. Sophisticated modern gaming software like the Nintendo Switch Bedrock version demands a substantial amount of space for smooth operation. It could also improve system performance and provide a more seamless gaming experience without hitches. In conclusion, it's crucial to carefully confirm deletion when removing games from the Nintendo Switch console. This not only protects your progress but also saves your time and resources. Also, decluttering the system through deletion of unneeded games augments system performance and improves navigation on the menu which makes gaming on the Nintendo Switch a more satisfying and thrilling experience.
Deleting Games from the Nintendo Switch MicroSD Card
In this era of high-capacity gaming, managing storage space on your Nintendo Switch console can become a task quite fast. Overflowing library of games? Fret no longer! In this article, we will guide you through three simple steps to optimize your Switch's storage, ultimately enhancing your gaming experience. Firstly, you will learn how to insert a MicroSD card and format it according to the console's requirements. Secondly, we will walk you through the process of transferring your favorite games to an expanded memory via the MicroSD card. This way, you can take your entire game library wherever you go. Finally, we will delve into deleting games from the MicroSD card, a crucial step in freeing up space for new adventures. By following these steps, not only will you be able to save more games but also play them more efficiently. Now, let's begin our journey by shedding light on how to insert and format the MicroSD card correctly within your Nintendo Switch console.
Inserting and Formatting the MicroSD Card
MicroSD cards are a vital component of storing, managing, and deleting games on your Nintendo Switch. Before you can directly delete a game from your Nintendo Switch, you'll need to understand how to properly insert and format the microSD card because this device serves as the primary storage space where all downloaded games and saved data are stored. Inserting the microSD card into your Nintendo Switch isn’t as complicated as it seems. The microSD card slot is situated at the back and towards the bottom of the Nintendo Switch unit. You'll notice a small rectangular slot; this is where the card goes. Keep in mind the microSD card should be inserted with the gold strip facing downwards. You'll hear a soft clicking sound upon successfully inserting the card into the slot. Note that the Nintendo Switch console has to be turned off completely before adding or removing a microSD card to avoid data corruption or loss. Equally important is formatting your microSD card, an important step to prepare the card for first-time use or to clear all data from the card. Be warned though, once you format your microSD card, all data currently stored on it will be removed and cannot be recovered. Therefore, if you have any important data on that card, ensure to back it up elsewhere before initiating the format. To format the microSD card using the Nintendo Switch console, you will need to navigate through the System Settings. Select 'System', then 'Formatting Options', and finally 'Format microSD Card.' You'll then be prompted to input your PIN if you've set one up. Remember to read the warning about formatting erasing all information on the card before confirming 'Continue.' Once completed, your Nintendo Switch can now readily use the microSD card for storing games and other software. The process of inserting and formatting the microSD card is prerequisite when deleting games from your Nintendo Switch as it becomes the main hub for saved games. By understanding how it works, you can confidently manage your gaming experience and storage availability on the Nintendo Switch console.
Transferring Games to the MicroSD Card
Transferring games to the MicroSD Card is an important process in managing storage on your Nintendo Switch. It frees up the internal storage of your console, enabling optimal performance for other activities and applications. Be aware, however, that only downloaded games can be transferred to a MicroSD card; you can't store game data from a physical game card. The process of transferring is simple and straightforward. Start by inserting your MicroSD card to the console. Afterward, you have to navigate on the home screen to 'System Settings', then 'Data Management', and finally onto 'Move Data between System/MicroSD Card'. Choose 'Move to MicroSD Card', then select your desired game or games by checking the box next to the title. Afterwards, confirm the transfer. During this process, remember not to remove the MicroSD card or turn off your console, as it could potentially corrupt your game data. After successful game transfers, you might need to free up space on your MicroSD or system storage. At this point, you may want to consider deleting games from the Nintendo Switch MicroSD card. Just remember, though, when you delete a game, the saved data for that game remains in your system storage. You can redownload games whenever you wish, as Nintendo keeps a record of all purchased games linked to your account. However, if you wish to remove all game data entirely, this should be done carefully to avoid deleting important saved data.
Deleting Games from the MicroSD Card
Deleting Games from the MicroSD Card is an essential aspect of managing your Nintendo Switch storage space, especially for Switch users who prefer downloading games rather than purchasing physical copies. The MicroSD card, an external storage device that significantly increases the console's storage capacity, can get filled up rather quickly depending on the number of games installed and the size of these games. Deleting games that are no longer in use or not frequently played is, therefore, paramount to maintaining a healthy storage space balance and to make room for downloading new or more exciting games. To delete games from the MicroSD card, first ensure the Nintendo Switch system is switched off then eject the MicroSD card carefully from its slot. Employ the use of a laptop or PC with a card reader to facilitate this process. Once the card is inserted into the computer, a list of files will appear on screen. Here, you'll be able to navigate through and pick out the specific games you wish to delete. Players should note that deleting a game from the MicroSD card does not necessarily mean losing it forever. As long as the game was purchased, it would still be available for download again via the Nintendo eShop. However, bear in mind that deleting games means erasing all associated user data. This will include high scores, levels achieved, and characters unlocked, among other things. To avoid such hassles, Nintendo advises creating a backup of saved data on the cloud before proceeding with deletion. Nintendo Switch offers a cloud-saving tool called Save Data Cloud to bind gaming data with a specific user account. Through this, players can delete games without compromising their progress, and when they feel the need to return to the deleted game, they can reinstall it and pick up right where they left off. In a nutshell, the key to maintaining maximum efficiency and enjoyment of the Nintendo Switch involves not only careful management of the MicroSD card space but also understanding the workings of deleting and reinstalling games. It offers the opportunity to experience a wider variety of games without the worry of running out of space as well as the preservation of gaming history and progress. Deleting games from the MicroSD card is a relatively straightforward process that significantly enhances the overall Nintendo Switch experience.