How To Save Live Photo As Video
Live Photos are a unique feature of Apple devices, capturing a brief moment in time with a combination of still images and videos. However, sometimes you may want to save a Live Photo as a video to share with others or to edit further. Fortunately, there are several ways to convert Live Photos to videos, depending on the device you're using. In this article, we'll explore how to save Live Photos as videos on both iPhone and Mac, as well as how to share and edit the converted files. We'll start by looking at the process of converting Live Photos to videos on iPhone, which is a straightforward process that can be done directly from the Photos app. By the end of this article, you'll know how to easily convert your Live Photos to videos and share them with others. So, let's get started with converting Live Photos to videos on iPhone.
Converting Live Photos to Videos on iPhone
Converting live photos to videos on an iPhone can be a fun and creative way to share your favorite memories. With the advancements in iPhone technology, there are now multiple ways to achieve this conversion. You can use the built-in Photos app, which provides a straightforward method to turn your live photos into videos. Alternatively, you can utilize the Shortcuts app to create a custom shortcut that streamlines the process. Additionally, if you're looking for more flexibility and customization options, you can export your live photos as GIFs or videos using third-party apps. In this article, we'll explore these methods in more detail, starting with the simplest approach: using the Photos app.
Using the Photos App
The Photos app on your iPhone is a powerful tool for managing and editing your photos and videos, including Live Photos. To use the Photos app, start by opening it from your home screen. You'll see a grid of your photos and videos, with the most recent ones at the bottom. You can browse through your photos and videos by scrolling up or down, or use the tabs at the bottom of the screen to switch between different views, such as "Media Types" or "Albums". To view a photo or video in more detail, simply tap on it. From here, you can use the editing tools to make adjustments, such as cropping, applying filters, or adding text. You can also use the "Share" button to send the photo or video to others via email, message, or social media. Additionally, the Photos app allows you to create albums and folders to organize your photos and videos, making it easy to find specific ones later. By using the Photos app, you can easily manage and edit your Live Photos, and even convert them to videos, as we'll discuss in the next section.
Utilizing the Shortcuts App
The Shortcuts app is a powerful tool that can be used to automate various tasks on your iPhone, including converting Live Photos to videos. By utilizing the Shortcuts app, you can create a custom shortcut that can quickly and easily convert your Live Photos into videos, saving you time and effort. To get started, open the Shortcuts app and tap on the "+" icon to create a new shortcut. From there, you can add the "Convert Live Photo to Video" action, which can be found in the "Photos" section. This action will allow you to select a Live Photo and convert it into a video. You can also add additional actions to your shortcut, such as saving the video to your camera roll or sharing it with others. Once you've created your shortcut, you can run it by tapping on the "Play" button, and the Shortcuts app will take care of the rest. By using the Shortcuts app to convert your Live Photos to videos, you can streamline your workflow and make the most of your iPhone's capabilities.
Exporting as GIF or Video through Third-Party Apps
Exporting as GIF or Video through Third-Party Apps. If you're looking for more flexibility in exporting your Live Photos, you can use third-party apps to convert them into GIFs or videos. There are several apps available on the App Store that can help you achieve this, such as Lively, Live Studio, and IntoLive. These apps allow you to export your Live Photos in various formats, including GIF, MP4, and even Boomerang-style videos. Some apps also offer additional features, such as the ability to add music, text, or filters to your exported videos. To export your Live Photo as a GIF or video using a third-party app, simply select the app you want to use, choose the Live Photo you want to export, and follow the app's instructions to convert and save it in your desired format. You can then share your exported GIF or video on social media, via email, or through messaging apps. Using third-party apps can be a great way to add more creativity and flexibility to your Live Photo exports, and can help you to create unique and engaging content for your online audience.
Converting Live Photos to Videos on Mac
Converting Live Photos to videos on Mac can be a straightforward process if you know the right tools and techniques to use. There are several methods to achieve this, each with its own set of advantages. For instance, you can use Preview and QuickTime Player, two built-in applications on Mac, to convert your Live Photos into videos. Alternatively, you can utilize the Photos App, which provides a simple and intuitive way to convert Live Photos. Additionally, if you're looking for more advanced features and editing capabilities, you can opt for third-party video editing software. In this article, we'll explore these methods in detail, starting with the most straightforward approach: using Preview and QuickTime Player.
Using Preview and QuickTime Player
Using Preview and QuickTime Player are two alternative methods to convert Live Photos to videos on Mac. Preview is a built-in image viewer on Mac that allows users to view and edit images, including Live Photos. To convert a Live Photo to a video using Preview, users can open the Live Photo in Preview, go to the "Tools" menu, and select "Export". Then, they can choose the "Animated GIF" or "Movie" option to export the Live Photo as a video. On the other hand, QuickTime Player is a media player on Mac that can also be used to convert Live Photos to videos. To do this, users can open the Live Photo in QuickTime Player, go to the "File" menu, and select "Export As". Then, they can choose the "Movie" option to export the Live Photo as a video. Both Preview and QuickTime Player offer a simple and straightforward way to convert Live Photos to videos on Mac.
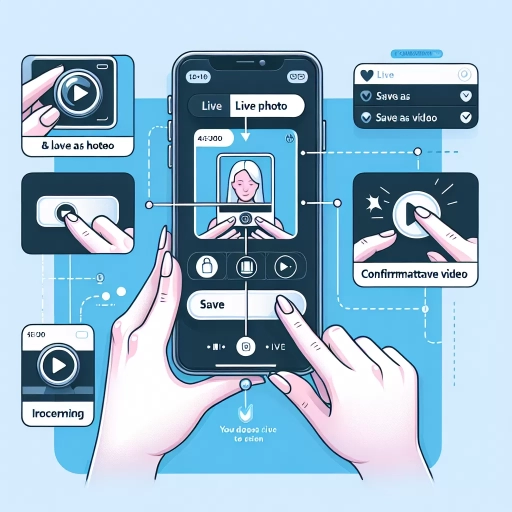
Converting Live Photos through the Photos App
Converting Live Photos through the Photos App is a straightforward process that allows you to transform your Live Photos into shareable videos. To do this, open the Photos app on your Mac and select the Live Photo you want to convert. Click on the "Edit" button in the top right corner of the screen, and then click on the "Live" button at the top of the editing window. This will give you the option to "Save as Video." Clicking on this will convert your Live Photo into a video file that can be shared or exported. Alternatively, you can also use the "Export" option to save your Live Photo as a video file. To do this, select the Live Photo, go to "File" > "Export" > "Export Unmodified Original," and then choose the video format you want to use. This will save your Live Photo as a video file that can be shared or used in other applications. By converting your Live Photos through the Photos App, you can easily share your favorite moments with others or use them in creative projects.
Utilizing Third-Party Video Editing Software
Utilizing third-party video editing software is a great way to enhance and customize your converted Live Photos. There are numerous options available, catering to different skill levels and desired outcomes. For instance, Adobe Premiere Pro and Final Cut Pro are professional-grade tools that offer advanced features and precise control, ideal for those seeking to create polished, high-end videos. On the other hand, user-friendly options like iMovie, DaVinci Resolve, and Shotcut provide an intuitive interface and a range of built-in effects, making them perfect for beginners or those looking for a more streamlined editing experience. By leveraging these third-party video editing software, you can add music, transitions, and text overlays to your converted Live Photos, as well as adjust color, brightness, and contrast to achieve a desired aesthetic. Additionally, many of these software options allow for easy sharing and exporting of your edited videos to various platforms, including social media, YouTube, and more. By exploring the capabilities of third-party video editing software, you can unlock the full potential of your converted Live Photos and create stunning, engaging videos that showcase your creativity and style.
Sharing and Editing Converted Live Photos
Here is the introduction paragraph: Converting Live Photos to videos has opened up a world of creative possibilities. With the ability to share and edit these converted videos, users can now showcase their favorite moments in a more engaging and dynamic way. In this article, we will explore the various ways to share and edit converted Live Photos, including sharing videos on social media platforms, editing videos with iMovie or Adobe Premiere Rush, and adding effects and filters to enhance videos. By the end of this article, you will have a comprehensive understanding of how to take your converted Live Photos to the next level. So, let's start by exploring the first step in sharing your converted Live Photos - sharing videos on social media platforms. Here is the 200 words supporting paragraph for Sharing Videos on Social Media Platforms: Sharing videos on social media platforms is a great way to showcase your converted Live Photos with friends and family. Most social media platforms, including Instagram, Facebook, and Twitter, support video sharing, making it easy to upload and share your converted Live Photos. When sharing videos on social media, it's essential to consider the platform's video length and format requirements. For example, Instagram has a 60-second video limit, while Facebook allows up to 240 minutes. Additionally, you can add captions, tags, and location information to make your videos more discoverable. You can also use social media analytics tools to track the performance of your videos and understand what works best for your audience. By sharing your converted Live Photos on social media, you can increase engagement, reach a wider audience, and build your personal brand. With the right strategy, you can make the most out of sharing your converted Live Photos on social media platforms.
Sharing Videos on Social Media Platforms
Sharing videos on social media platforms has become an essential part of online engagement, allowing users to convey their thoughts, showcase their creativity, and connect with others. With the rise of visual-centric platforms like Instagram, TikTok, and YouTube, sharing videos has become a popular way to express oneself and reach a wider audience. When sharing videos on social media, it's essential to consider the platform's unique features and audience. For instance, Instagram is ideal for short-form videos, while YouTube is better suited for longer, more in-depth content. TikTok, on the other hand, is perfect for creating and sharing short, entertaining videos that often go viral. To maximize engagement, it's crucial to optimize video content for each platform, using relevant hashtags, captions, and tags. Additionally, sharing videos at the right time can significantly impact their visibility, with peak hours usually occurring during lunch breaks and early evenings. By sharing high-quality, engaging videos on social media platforms, users can increase their online presence, build their personal brand, and connect with like-minded individuals. Moreover, sharing videos can also be an effective way to drive website traffic, generate leads, and boost sales. As social media continues to evolve, sharing videos will remain a vital component of online marketing and communication, offering a unique way to convey messages, tell stories, and inspire others. By leveraging the power of video sharing, individuals and businesses can expand their reach, build their audience, and achieve their online goals.
Editing Videos with iMovie or Adobe Premiere Rush
When it comes to editing videos, two popular options are iMovie and Adobe Premiere Rush. iMovie is a free video editing software that comes pre-installed on Macs, making it a great option for beginners. It offers a range of features, including the ability to trim clips, add transitions and effects, and share videos directly to social media. Adobe Premiere Rush, on the other hand, is a more advanced video editing software that is designed for professionals and serious hobbyists. It offers a range of advanced features, including multi-camera editing, color grading, and audio ducking. Both iMovie and Adobe Premiere Rush are user-friendly and offer a range of tutorials and guides to help you get started. When editing videos, it's a good idea to start by importing your footage and organizing it into a timeline. From there, you can trim and arrange your clips, add transitions and effects, and adjust the audio levels. You can also add text and graphics to your video, and experiment with different color and lighting effects. Once you're happy with your edit, you can export your video in a range of formats, including HD, 4K, and even 360-degree video. Whether you're a beginner or a pro, iMovie and Adobe Premiere Rush offer a range of features and tools to help you create high-quality, engaging videos.
Adding Effects and Filters to Enhance Videos
Adding effects and filters to enhance videos is a great way to give them a professional touch and make them more engaging. There are many video editing software and apps available that offer a wide range of effects and filters that can be applied to videos. These effects and filters can be used to adjust the brightness, contrast, and saturation of the video, as well as add text, transitions, and animations. Some popular video editing software that offer effects and filters include Adobe Premiere Pro, Final Cut Pro, and DaVinci Resolve. Additionally, there are also many mobile apps available that offer effects and filters, such as VivaVideo, InShot, and PowerDirector. When adding effects and filters to a video, it's essential to use them sparingly and tastefully, as overusing them can make the video look amateurish and distracting. It's also important to consider the tone and style of the video and choose effects and filters that complement it. For example, if the video is a serious documentary, it's best to use subtle and understated effects, while a more playful and creative video can benefit from more bold and eye-catching effects. By adding effects and filters to a video, creators can enhance the visual appeal and make it more engaging for viewers.