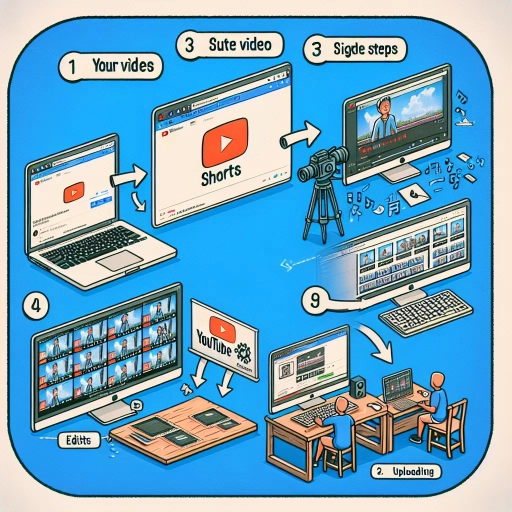
How To Make A Youtube Short On Pc
YouTube Shorts have revolutionized the way we consume and create content on the platform. With their short-form, engaging, and easily digestible format, they offer a unique opportunity for creators to showcase their talents, share their passions, and connect with their audience. However, creating a high-quality YouTube Short on a PC requires more than just a good idea. To produce a successful Short, you need to have the right equipment and software, a solid plan, and the skills to bring it all together. In this article, we'll take you through the process of making a YouTube Short on a PC, covering the essential equipment and software requirements, pre-production and planning strategies, and the recording and editing techniques you need to know. By the end of this article, you'll be equipped with the knowledge and skills to create your own engaging YouTube Shorts. So, let's start by exploring the equipment and software requirements you'll need to get started.
Equipment and Software Requirements
When it comes to creating high-quality video content, having the right equipment and software is crucial. A good camera, microphone, and video editing software can make all the difference in producing a professional-looking video. Investing in a good quality camera is essential for capturing clear and crisp footage. A camera with high resolution and good low-light performance can help to ensure that your video looks great, even in challenging lighting conditions. In addition to a good camera, selecting the right microphone for clear audio is also important. A good microphone can help to capture high-quality audio that is free from background noise and distortion. Finally, choosing a reliable video editing software is also crucial for putting it all together. With the right software, you can edit and enhance your footage, add music and effects, and export your final product in a variety of formats. By investing in these three key areas, you can ensure that your video content is of the highest quality. Investing in a good quality camera is the first step in creating high-quality video content, and it's an investment that will pay off in the long run.
Investing in a Good Quality Camera
Investing in a good quality camera is crucial for creating high-quality YouTube Shorts. A good camera will help you capture clear and crisp visuals, which are essential for engaging your audience and showcasing your content in the best possible way. When choosing a camera, consider the resolution, frame rate, and low-light performance. A 4K resolution camera is ideal, as it provides excellent video quality and allows for smooth zooming and cropping. Additionally, look for a camera with a high frame rate, such as 60fps, which will help create a more cinematic and professional look. If you plan to record in low-light conditions, look for a camera with good low-light performance, such as a camera with a wide aperture or image stabilization. Furthermore, consider the type of camera that suits your needs, such as a DSLR, mirrorless, or action camera, and make sure it has good autofocus, white balance, and color accuracy. By investing in a good quality camera, you'll be able to produce high-quality visuals that will enhance your YouTube Shorts and help you stand out from the competition.
Selecting the Right Microphone for Clear Audio
Selecting the right microphone is crucial for capturing clear audio in your YouTube Shorts. With so many options available, it can be overwhelming to choose the best one for your needs. Here are some factors to consider when selecting a microphone: **type**, **polar pattern**, and **connectivity**. The type of microphone you choose depends on your recording environment and the type of content you're creating. For example, if you're recording in a noisy space, a **dynamic microphone** is a good choice, while a **condenser microphone** is better suited for quieter environments. The polar pattern of a microphone determines how it picks up sound. **Cardioid** microphones are great for recording a single person, while **omnidirectional** microphones capture sound from all directions. Finally, consider the connectivity options: **USB**, **XLR**, or **wireless**. USB microphones are plug-and-play, while XLR microphones require an audio interface. Wireless microphones offer more flexibility, but may have latency issues. Some popular microphone options for YouTube Shorts include the **Blue Yeti**, **Rode NT-USB**, and **HyperX QuadCast Gaming Microphone**. By considering these factors and choosing the right microphone for your needs, you can ensure clear and high-quality audio for your YouTube Shorts.
Choosing a Reliable Video Editing Software
When it comes to choosing a reliable video editing software for creating YouTube Shorts on your PC, there are several options to consider. First and foremost, you'll want to select a software that is compatible with your computer's operating system, whether it's Windows or macOS. Some popular video editing software options include Adobe Premiere Pro, Final Cut Pro, and DaVinci Resolve. Adobe Premiere Pro is a industry-standard software that offers advanced features and seamless integration with other Adobe apps, making it a great choice for professionals. Final Cut Pro, on the other hand, is exclusive to macOS and offers a user-friendly interface and advanced color grading tools. DaVinci Resolve, meanwhile, is a free software that offers a robust set of features, including color correction and audio editing tools. Other options to consider include CyberLink PowerDirector, Vegas Pro, and Hitfilm Express. When choosing a video editing software, consider factors such as your level of expertise, the type of content you're creating, and the specific features you need. Additionally, be sure to read reviews and watch tutorials to get a sense of the software's user interface and functionality. Ultimately, the best video editing software for you will depend on your specific needs and preferences. By doing your research and selecting a reliable software, you'll be well on your way to creating high-quality YouTube Shorts that engage and entertain your audience.
Pre-Production and Planning
The pre-production and planning phase is a crucial step in creating a successful YouTube short. This phase involves several key elements that help you prepare for a smooth and efficient production process. To start, it's essential to define your target audience and content style, which will help guide your creative decisions and ensure your video resonates with your viewers. Additionally, scripting and storyboarding your YouTube short will allow you to visualize your ideas and make any necessary changes before filming. Finally, planning your shots and camera angles will help you capture the desired footage and create a cohesive visual narrative. By focusing on these key elements, you can set yourself up for success and create a high-quality YouTube short that engages and entertains your audience. In this article, we'll dive deeper into the importance of defining your target audience and content style, and explore how this foundational step can inform the rest of your pre-production process.
Defining Your Target Audience and Content Style
When creating a YouTube Short on PC, defining your target audience and content style is a crucial step in the pre-production and planning phase. Your target audience refers to the specific group of people you want to reach with your content, and understanding their demographics, interests, and preferences is essential to creating content that resonates with them. To define your target audience, consider factors such as age, location, language, and interests. For example, if you're creating a cooking channel, your target audience might be young adults aged 18-35 who are interested in healthy recipes and cooking tips. Once you have a clear understanding of your target audience, you can tailor your content to meet their needs and preferences. Your content style, on the other hand, refers to the tone, format, and aesthetic of your videos. This can include elements such as humor, educational content, or inspirational stories. For example, if your target audience is young adults, you may want to create content that is fun, relatable, and engaging, with a mix of humor and informative content. By defining your target audience and content style, you can create content that is tailored to their needs and preferences, increasing the chances of your video going viral and attracting a large following. Additionally, having a clear understanding of your target audience and content style will also help you to create a consistent brand identity and tone across all your videos, making it easier for viewers to recognize and engage with your content.
Scripting and Storyboarding Your YouTube Short
When it comes to creating a YouTube Short, scripting and storyboarding are crucial steps in the pre-production and planning phase. Scripting involves writing down the narrative, dialogue, and actions of your short video, while storyboarding is the visual representation of your script. A well-written script and a detailed storyboard will help you to organize your ideas, visualize the pacing and flow of your video, and ensure that your message is conveyed effectively. To start scripting, begin by brainstorming and outlining your concept, then write a detailed script that includes character descriptions, dialogue, and camera angles. Keep your script concise and focused, as YouTube Shorts are limited to 60 seconds or less. Next, create a storyboard by sketching out each scene and shot, using stick figures or simple drawings to represent characters and objects. This will help you to visualize the sequence of events and make any necessary adjustments before you start filming. You can use online tools or apps, such as Adobe Animate or TVPaint Animation, to create a digital storyboard, or stick to traditional hand-drawn methods. By scripting and storyboarding your YouTube Short, you'll be able to refine your idea, identify potential problems, and create a clear plan for production, ultimately saving you time and effort in the long run.
Planning Your Shots and Camera Angles
When planning your shots and camera angles, it's essential to consider the visual style and tone you want to convey in your YouTube Short. Think about the story you're trying to tell and the emotions you want to evoke in your audience. Start by breaking down your script into individual scenes and shots, and then decide on the best camera angles to capture the action. Consider using a mix of wide shots, close-ups, and over-the-shoulder shots to add visual interest and create a dynamic feel. Don't forget to plan for establishing shots, which help set the scene and provide context for the viewer. Additionally, think about using camera movements such as pans, tilts, and dollies to add energy and emphasize key moments. When planning your shots, also consider the lighting and how it will affect the mood and atmosphere of your video. Natural light can be a great asset, but you may also need to invest in lighting equipment to achieve the desired effect. Finally, make sure to plan for contingencies and have a backup plan in case things don't go as expected. By carefully planning your shots and camera angles, you can create a visually stunning and engaging YouTube Short that captures your audience's attention and leaves a lasting impression.
Recording and Editing Your YouTube Short
Here is the introduction paragraph: Creating high-quality YouTube Shorts requires more than just a good idea - it also requires the right equipment and editing skills. To help you get started, this article will cover the basics of recording and editing your YouTube Shorts. We'll begin by discussing how to set up your camera and lighting for recording, which is essential for capturing clear and visually appealing footage. Then, we'll dive into the process of recording your footage using a PC and camera, and finally, we'll explore the world of video editing software and how to use it to enhance your footage. By the end of this article, you'll have a solid understanding of how to record and edit your YouTube Shorts like a pro. So, let's start with the first step: Setting Up Your Camera and Lighting for Recording.
Setting Up Your Camera and Lighting for Recording
When setting up your camera and lighting for recording a YouTube Short, there are several key considerations to keep in mind. First, choose a high-quality camera that can capture clear and crisp footage. If you're using a smartphone, make sure it has a good camera with 4K resolution and optical image stabilization. If you're using a dedicated camera, consider investing in a 4K-resolution model with interchangeable lenses. Next, consider the lighting in your recording space. Natural light is always the best option, so try to record near a window or outside during the golden hour (the hour just before sunset) for soft, warm light. If you're recording indoors, invest in a good lighting kit that includes a key light, fill light, and backlight. Position the key light at a 45-degree angle to your subject's face, the fill light on the opposite side of the key light, and the backlight behind your subject to create depth and dimension. Additionally, pay attention to the color temperature of your lights, with daylight-balanced lights (5600K) being ideal for most recording situations. Finally, make sure your camera is set to the correct white balance and exposure settings to ensure your footage looks its best. By taking the time to set up your camera and lighting correctly, you'll be able to capture high-quality footage that will make your YouTube Short look professional and engaging.
Recording Your Footage with a PC and Camera
When it comes to recording your footage with a PC and camera, there are a few key considerations to keep in mind. First, you'll want to choose a camera that is compatible with your PC and meets your recording needs. This could be a built-in webcam, a USB camera, or a more advanced digital camera. Next, you'll need to select a recording software that can capture high-quality video and audio. Some popular options include OBS Studio, XSplit, and Adobe Premiere Pro. Once you've chosen your camera and software, you'll need to set up your recording space to ensure optimal lighting and sound. This may involve investing in a microphone, lighting kit, or pop filter to reduce background noise and improve audio quality. With your equipment and software in place, you can begin recording your footage, using features such as screen recording, webcam capture, and external camera input to capture the perfect shot. Finally, be sure to save your recordings in a format that is compatible with your editing software, such as MP4 or AVI, to make the editing process as smooth as possible. By following these steps, you can ensure that your footage is high-quality, well-lit, and ready for editing.
Editing Your Footage Using Video Editing Software
Editing your footage using video editing software is a crucial step in creating a captivating YouTube Short. Once you've recorded your video, it's time to trim, cut, and arrange your clips to tell a cohesive story. Video editing software such as Adobe Premiere Pro, Final Cut Pro, or DaVinci Resolve offers a wide range of tools and features to help you refine your footage. Start by importing your recorded clips into the software and organizing them into a timeline. From there, you can trim and split clips to remove any unwanted parts, and arrange them in a logical order to create a smooth narrative flow. You can also add transitions and effects to enhance the visual appeal of your video, such as fade-ins, fade-outs, and text overlays. Additionally, you can adjust the audio levels, add music or sound effects, and even color correct your footage to give it a professional look. As you edit, pay attention to the pacing and timing of your video, making sure it's engaging and easy to follow. With practice and patience, you can master the art of video editing and create a YouTube Short that showcases your creativity and style.