How To Reset Descale On Keurig
 No one can deny the heavenly sensation of waking up to a fresh, perfectly brewed cup of coffee, courtesy of our trusty Keurig machines. But what happens when it starts acting up, delivering less-than-perfect coffee, or presenting you with a hard-to-ignore 'descale' notice? What exactly does this alert mean, and how do you go about resetting and descaling your Keurig? These might be the questions running through your mind. To answer your concerns, we've prepared this comprehensive guide that will walk you through the intricacies of understanding the descale process on your Keurig, selecting the best descaling solution, and finally, a simple step-by-step procedure to reset and descale your beloved coffee maker. So, let's take the first step towards brewing an impeccable cup of joe by delving into understanding the descaling process on a Keurig machine.
Understanding the Descale Process on Keurig
A vital aspect of maintaining your Keurig coffee maker's efficient performance is to regularly undertake the descale process. Descaling is not just essential for the longevity of your beloved kitchen appliance, but it significantly contributes to the taste and quality of the coffee it produces. This article intends to be your joiner's mate through this cleaning procedure by familiarizing you with what descaling is and why it is necessary, how to identify when your Keurig needs this maintenance, and the essential steps to prepare for descaling your Keurig. Each of these segments is designed to fully brief you, ensuring a complete understanding and successful execution of the process. To start, let's delve into understanding what it means to descale and why it's so significant to your coffee maker's overall health and the quality of your brew.
What is Descale and Why is it Necessary?
Descale, as the name suggests, refers to the process of removing scale or mineral deposits that accumulate in your Keurig coffee maker over time. These deposits come from the water that's used in the brewing process. Different types of water—hard, soft, and somewhere in between—vary in mineral content which causes the build-up of mineral scale inside the appliance. It's worth noting that these mineral deposits are non-toxic but they can impact the performance of your Keurig by clogging its system or hampering its heating ability. Why does descaling matter? Although these mineral deposits are harmless, the build-up can impact your machine. It may slow down the brewing process, affect the water temperature, or worst case, cause your brewer to stop working entirely. Moreover, scale buildup can also influence the taste of your coffee, leaving you with a stale or flat brew that lacks the crisp taste you typically enjoy. So, descaling is necessary not only for the smooth functioning of your Keurig but also to ensure a flavorful cup of coffee every time. Some signs indicate that your Keurig might need descaling. These include an increase in brewing time, intermittent brewing, or a small cup size. Remember, these signs hint at potential scale buildup, and failure to descale could lead to permanent damage. It's recommended to descale your Keurig every three to six months, depending on the hardness of your water and frequency of use. However, please refer to the owner's manual for your specific model as frequency advice may vary. Also, your Keurig might have a built-in descaling alert. Therefore, it's also wise to respond to those prompts when they appear. In the end, regular descaling maintains the longevity of your Keurig coffee maker, ensuring it provides top-notch performance for years to come. It's a small maintenance task when you think about the cost of replacing your beloved Keurig. Remember, a clean machine makes a mean brew—ensuring that you get the best flavor profile possible from your chosen coffee beans.
How to Identify When Your Keurig Needs Descaling
Ensuring the optimal performance of your Keurig coffee maker involves understanding some hints and signs when descaling is due. Descaling your Keurig is a vital procedure to keep your machine running seamlessly and your coffee tasting divine. Neglecting this process could invite issues such as inconsistent brewing times, unexpected shutdowns, shorter brewing cycles, and irregular coffee temperature. Ultimately, understanding when your Keurig is crying out for a descale can save both your machine and your taste buds from unnecessary hassles. One of the critical signs that your Keurig needs descaling is the appearance of a descaling light on the coffee maker. This light is a clear indication that your Keurig's well-being is compromised by mineral build-up (primarily limescale) from your water source. Another sign, though subtler, is when you observe unusual interruptions or delays in the brewing cycle. If your machine takes longer than the regular time to brew a cup or it brews lesser amounts, it's time to consider descaling. Spotting these tell-tale signs is not rocket science- they're noticeable even to the most infrequent user. If your machine sounds differently- louder or quieter- during the brewing process, this could be explained by the water flow being interrupted by accumulated minerals inside the machine. You may also notice a decrease in the coffee temperature if the water is unable to efficiently flow through and heat up. Most users also report a change in the taste of their brewed coffee when descaling is due; it often tastes bitter or off-taste. Similarly, if your Keurig is frequently getting clogged or if the water reservoir requires frequent refilling than the usual, these could be indications that your machine is craving for a descaling process. In some severe cases, the machine may shut down unexpectedly in the middle of brewing cycles- a surefire sign that it's high time for a descale. Being aware of these signals can save you from experiencing washed-out coffee, reduced brewing volumes, screeching noises, or unexpected shutdowns attributed to a Keurig that needs descaling. Regular descaling not only keeps your Keurig coffee maker in top shape but also promises you a perfect brew every single time. Ignoring these signs could gradually degrade your machine and strip away all the joy from your coffee moments. Therefore, during the lifespan of your Keurig, be vigilant for these signs and follow the right descaling process to ensure that every brewing experience is as pleasurable as the first one. Detection, followed by proper maintenance and user-awareness, can keep you from falling into the trap of a misbehaving coffee machine.
Preparation Before Descaling Your Keurig
The preparation before descaling your Keurig is a critical process that not only extends your coffee machine's durability but also ensures the safe consumption of the end product - your coffee. Before plunging into the descaling process, it's essential to understand the steps and materials needed. You will require a large ceramic mug, fresh water, a descaling solution or white vinegar which serves as a valuable and budget-friendly alternative. Start by ensuring that your Keurig machine is unplugged and cool down for safety purposes. Secondly, remove any K-cup pods from the machine and discard any leftover water in the water reservoir. Assess your Keurig model's specification as different models have variations in water reservoir detachability; models like B40 Elite, K44 Classic, and B70 Platinum have removable water reservoirs while others like the K130/B130 and the B31 MINI Plus do not. Proper cleaning of the external components of your Keurig, such as the K-cup holder, exit needle, and pack holder assembly, promotes efficiency during the descaling process. It's advisable to use a mild, non-abrasive dish soap accompanied by non-metallic sponge to adequately clean these components to mitigate potential damages. Rinse thoroughly to ensure no soap residues are left, which might tamper with the coffee taste. After a comprehensive cleaning, reassemble all the parts and plug your brewer to get it ready for the descaling process. Considering that the frequency of descaling hinges on the mineral content in the water used, as stated by Keurig, you should always keep track of your descaling schedules. Machineries in regions with hard water may require descaling as often as after every three to six months while those in areas with soft water may stretch the period to about a year. Thus, it would be prudent to test your water hardness and use the Keurig's programmable water hardness feature if available. Descaling ensures the smooth running and longevity of your Keurig machine, and you wouldn't want to compromise these aspects. Remember, preparation is not only about what you do before the process but also continues all through by ensuring you maintain a regular descaling schedule. Moreover, the preparation stage is also about your safety. Remember to remove the hot water tank or drain it if the appliance model allows. This precautionary step is particularly significant when dealing with commercial brewers that have direct waterline plumb kits. Conclusively, the preparation before descaling your Keurig is a step that demands attention to detail as skipping or mishandling any element may affect the descaling results and ultimately tamper with coffee flavor or cause health hazards. Have everything you need within reach, work systematically, and whenever in doubt, consult the appropriate Keurig model manual to guide you in the process.
Choosing the Right Descaling Solution for Your Keurig
of any regular Keurig maintenance routine, descaling plays a critical role in upholding the performance and longevity of your coffee machine. Over time, mineral build-up from water can clog your Keurig, impairing its function and possibly damaging it permanently. Therefore, it's imperative to choose the right descaling solution to maintain your Keurig's optimal operation. This choice can be influenced by several variables, which we will delve into in the forthcoming passages. Although there's an array of descaling options available in the current market, knowing which one best suits your Keurig can be quite challenging. These solutions range in components, effectiveness, pricing, and brands. Our extensive guide aims to help you make an informed decision by providing an overview of the various types of descaling solutions, focusing on notable factors to consider when choosing a solution, and discussing the top-ranking descaling solution brands for Keurig. Keep reading for an in-depth look at these crucial points. We will begin by exploring the different descaling solutions available in the market, outlining the pros and cons of each type.
Types of Descaling Solutions Available in the Market
Descaling solutions are fundamental tools in maintaining the efficiency, longevity, and performance of appliances such as Keurig coffee machines, which often suffer from limescale buildup due to hard water. Several types of descaling solutions are available on the market, each with its unique characteristic and formulation. The first type is vinegar-based descaling solutions, which are cost-effective and an excellent option for general descaling applications. These solutions leverage the acidic properties of vinegar to dissolve limescale efficiently, thus combating the most common problem associated with hard water. However, vinegar-based descalers may leave an aftertaste in your coffee, so it's advisable to rinse your machine thoroughly after use. Citric-acid descaling solutions are also popular due to their affordability and high effectiveness. Just like vinegar, citric acid is sour and acidic, properties that make it capable of breaking down limescale. An added advantage of citric-acid descalers is that they are mostly odorless and tasteless, thus reducing chances of leaving residues that can alter the taste of your coffee or other beverages. Chemical descaling solutions, which often contain compounds such as sulfamic acid, hydrochloric acid, and phosphoric acid, are another option available for consumers. These solutions are exceptionally potent and can remove stubborn limescale deposits. However, they are known to be harsh and can potentially damage your appliance if not used properly. Therefore, they are better suited for commercial appliances or severe cases of limescale buildup. There are also branded descaling solutions available, specially designed for specific brands of appliances. An example is Keurig’s own descaling solution, which is made to work perfectly with their machines, ensuring efficient removal of limescale without damaging the appliance. While these solutions may be slightly pricier, they offer peace of mind considering they are tailored to the specific demands of the appliance. Finally, environmentally friendly descaling solutions have been gaining traction. These descalers employ biodegradable ingredients and maintain effectiveness without contributing to pollution. These are the ideal choice for environmentally conscious consumers looking for an effective and eco-friendly descaling option. In summary, the choice of descaling solution ultimately depends on the severity of the limescale buildup, personal preference, budget, and environmental consciousness. Hence, it's important to evaluate the options critically to make the right choice.
Factors to Consider When Selecting a Descaling Solution
Choosing an appropriate descaling solution for your Keurig machine is an essential aspect of properly maintaining it to enhance its lifespan while assuring optimal coffee making performance. In fact, selecting the most suitable descaler entails evaluating various factors. Firstly, consider the safety of the descaling solution on both your appliance and the environment. Information regarding safety is usually indicated in the product's description or label. Safe descaling solutions chosen should be free from hazardous chemicals that could either damage the components of your coffee maker or harm the environment. Organic-based products tend to fall under this category as they’re made from non-toxic, biodegradable ingredients. Hence, they present minimal damage to your machine and the environment. Secondly, you should assess the descaling solution's effectiveness. An exemplary descaler should dissolve calcium deposits and other residue swiftly and thoroughly with minimal use. You can, therefore, deem a descaler’s efficiency by evaluating customer reviews and ratings on various platforms. Such feedback can reveal actual user experiences, allowing you to make informed decisions. Thirdly, take into account compatibility with your specific Keurig model. Compatibility aids in ensuring that the descaler you select won't be detrimental to your machine's components. For instance, some descaling solutions are deemed more potent and may potentially damage certain Keurig devices. Thus, always ensure that the descaler solution you select is compatible with your specific Keurig coffee maker. This information can usually be found in the product description or reached out to the manufacturer for confirmation. Moreover, the cost of the descaling solution cannot be overlooked. Robust, effective, and safe descaling solutions can vary in price. However, this isn't to stay that more expensive products are necessarily better. Check to confirm that the price of the descaler solution offers real value in comparison to other options in the market. Lastly, the use of the solution should be relatively easy without necessitating professional weight in. Go for a descaler that provides clear, detailed instructions on how much to use and the entire descaling process. This will ensure that the cleaning process is simple and straightforward, even to novices. Conclusively, selecting the right descaling solution for your Keurig combines a little research and the consideration of factors such as safety, effectiveness, compatibility, cost, and simplicity in usage. Making an informed decision ensures your machine continues running efficiently as it wards off mineral accumulation without causing harm to the environment.
Popular Descaling Solution Brands for Keurig
Using a descaling solution for your Keurig coffee maker is imperative for maintaining its efficient functioning and prolonging its lifespan. Various brands are renowned for delivering exceptional descaling solutions specifically tailored for Keurig machines. Some of the popular ones include Descaling Solution by Keurig, Urnex Dezcal, and Impresa. The Keurig Descaling Solution is an exclusive formulation compatible for all Keurig coffee makers. It's a great way of removing mineral build-up and lime that usually occurs due to the frequent use of hard water. In addition, this solution optimizes the machine's performance while maintaining the authentic taste of your beverages. Alternatively, Urnex Dezcal is recognized worldwide for its superior cleaning capabilities, offering a myriad of non-toxic, biodegradable, and safe solutions for coffee and espresso equipment. Impresa, on the other hand, offers an all-natural, odorless option that is efficient in eradicating mineral and limescale deposits. Another brand worth considering would be Brew Rite, which is popular for its no-odor, non-acidic, and eco-friendly descaling solution. This solution works efficiently in removing hard water deposits and limestone that could potentially impair your coffee maker's performance. Moreover, Essential Values has also carved a niche in the market with its highly effective and easy-to-use descaling solution. Truly value for money, it is compatible with all Keirug models, ensuring thorough cleaning without compromising on the authentic coffee flavor. Lastly, BottleWise provides a professional-grade, fast-acting, non-toxic solution that guarantees an optimal brewing experience by eliminating grease, oil, calcium, and mineral deposits. In conclusion, when choosing the appropriate descaling solution for your Keurig, factors such as ease of use, effectiveness, safety, environmental impact, and value for money should be taken into account. A well-maintained Keurig contributes to a consistent and flavorful coffee experience. Therefore, investing in a high-quality descaling solution from a proven brand can ensure your Keurig's longevity and performance.
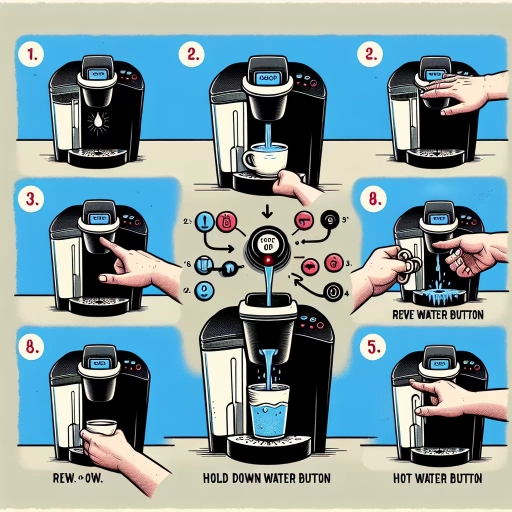
Step-by-Step Guide to Resetting and Descaling Your Keurig
Resetting and descaling your Keurig is an essential maintenance activity to ensure that your device keeps functioning optimally. Regular descaling helps in removing mineral build-up, improving your coffee's taste, and enhancing the overall performance and durability of your appliance. This article provides a helpful step-by-step guide to performing this task with finesse, divided into three easy-to-follow steps: first, turning off and unplugging your Keurig; second, preparing an effective descaling solution with water; and finally, running the descaling cycle on your Keurig. Now, let's dive into all the steps in detail starting with the first task - turning off and unplugging your Keurig, an essential step to ensure your safety while descaling and resetting your device. Following these steps will ensure your Keurig remains in tip-top shape, ready to come up with those delicious cups of coffee whenever you need one.
Step 1: Turn Off and Unplug Your Keurig
Before diving into the nitty-gritty of the resetting and descaling process, the first and foremost step you must follow is to turn off and unplug your Keurig coffee machine. This might appear to be an unimportant or trivial step, but let us assure you, it is anything but that. Shutting down and unplugging your Keurig is paramount for safety reasons, and it also allows the machine to cool down before initiating the resetting and descaling process, which drastically improves the efficiency of the procedure. Unbeknownst to many, the heating elements in Keurig machine continue working for a while, even after the machine has been turned off. Ergo, unplugging from the power source gives the Keurig the necessary downtime and plays an essential role in the maintenance of the device's longevity. So how do you go about this strategically vital first step? It's pretty simple, predictable maybe, but by no means should it be overlooked. Start by turning off your Keurig machine using the power button, which is typically located at the top of the device. After powering down, prudently unplug the detachable power cord to disconnect the machine from any electricity. You don't want to run the risk of electric shock or damage while descaling. Do bear in mind, however, that you also need to give appropriate time for the machine to ambiently cool down after unplugging. A hot machine can lead to splattering and burns when you're trying to descale the system. Therefore, it is recommended that you leave the device unplugged and turned off for at least a couple of hours before proceeding further. Although not universally mandated, a cool, restful period is crucial for the effective, safe, and efficient resetting and descaling of your beloved Keurig coffee-maker. Thus, whether you're a coffee connoisseur who can't begin the day without your gourmet blend or you're the occasional caffeine indulger, taking care of your Keurig machine is as important as the coffee it brews. Knowing how to properly turn off and unplug your Keurig machine, and understanding why it matters plays a critical role in that process. This fundamental first step sets the stage perfectly for the steps to follow, ensuring the eventual success of your resetting and descaling operation. In conclusion, taking the time to carefully follow this first step can save you time, money, and potential injury down the line. Always remember that a little maintenance today could mean avoiding a significant problem tomorrow. So before you embark on the journey to reset and descale your Keurig, make sure you're beginning on the right foot by ensuring the device is turned off, unplugged, and appropriately cooled down. Happy descaling!
Step 2: Mix the Descaling Solution with Water
Step 2: Mix the Descaling Solution with Water Following the unplugging of your Keurig, the next crucial step is preparing the descaling solution. It's a fundamentally essential practice that aids in breaking down mineral deposits collected over time, boosting the lifespan of your machine and the quality of your beverages. To start with, you'll require a descaling solution. Numerous commercial descaling solutions are available in the market, however, approved Keurig’s Descaling Solution is highly recommended due to its effectiveness and compatibility with Keurig coffee makers. Now, it’s time to mix the substance with water. Initially, empty the water reservoir of your Keurig coffee maker, then fill it halfway with the descaling solution. It's immeasurably important to only fill it halfway, thereby leaving enough room for the rest of the required water. The remaining half should be filled with fresh water. The mixture ratio should always be maintained at 50% descaling solution and 50% water for the maximum descaling output. Stir the solution to ensure it is evenly distributed, but take care not to shake the reservoir violently to avoid unnecessary spills. After giving it a gentle stir, plug the machine back in. The descaling solution now mixed with water works by dissolving the built-up mineral deposits to ensure every part of your Keurig is clean. Never skip this step, as failure to use a descaler can result in a buildup of mineral scale that can affect the performance of your machine. The mixture is designed to work optimally with both hot and cold water temperatures. Therefore, there is no need to preheat the water before mixing. However, heated water can accelerate the time it takes for the solution to dissolve completely. Moreover, be sure to use clean water while mixing with the descaling solution. The use of dirty or hard water may affect the effectiveness of the solution and could potentially further damage your coffee machine. Remember, it's not enough to just pour the solution into the water reservoir and turn on the machine. You'll want to give it ample time to interact with the inner parts of the machine, especially the heating elements, which are most affected by mineral buildups. Consequently, make sure you perform this process in a well-ventilated area to avoid any potential health issues related to inhalation of the solution's fumes. So, preparing your descaling solution correctly is a vital part of resetting and descaling your Keurig. The proper mixture ensures the safety of your machine, the flavor of your coffee, and the longevity of your Keurig.
Step 3: Run the Descaling Cycle on Your Keurig
After successfully resetting your Keurig coffee maker, the next integral step involves running the descaling cycle. Descaling is a fundamental process that aids in removing mineral buildup, commonly known as scale, that forms in your machine over time due to the constant heating of water. This mineral buildup not only affects the taste and quality of your coffee but also hampers the functioning of your Keurig machine, thereby reducing its lifespan. So, let's look at how to perform this crucial process. To start, ensure your Keurig machine is switched off and unplugged from the power source. This safety precaution minimizes the risk of electrical mishaps. Next, empty any remaining water from the water reservoir to create room for the Keurig descaling solution. Prepare the descaling solution as per the instructions given on the package. Typically, a bottle of Keurig Descale Solution is mixed with a full reservoir of water. Once the mix is ready, pour it into the water reservoir up to the maximum fill line. Plug your machine back into the power source, switch it on, then place a large mug on the drip tray to collect the dispensed solution during the descaling process. Initiate the descaling process by pressing the 'brew' button without inserting any K-cups. The machine will dispense the hot descaling mixture into the mug. Repeat this process until the 'add water' indicator comes on. This might take a few cycles, but it’s crucial to make sure all the solution in the water reservoir is used for this process to be effective. The next step is the “soak” period. At this point, you should leave the machine to sit for about 30 minutes to allow the descaling solution time to break up any mineral deposits completely. After the soak period is over, thoroughly clean the water reservoir to remove any residuals of the descaling solution before refilling it with fresh water. Running a few brew cycles with only fresh water ensures complete rinsing out of the solution from the machine's inner components and prepares the machine for the next brewing session. In conclusion, the Keurig descaling process is an essential maintenance task that boosts your machine's performance and longevity while ensuring the flavor of your coffee remains uncompromised. Running the descaling cycle at least every 3 to 6 months, depending on the hardness of your water and frequency of use, is advised for optimal maintenance. Armed with this knowledge, you are now equipped to run a successful descaling cycle on your Keurig machine, thereby ensuring you continue to enjoy delicious coffee for years to come.