How To Connect Pro Controller To Switch
 Connecting your Pro controller to your Nintendo Switch can significantly enhance your gaming experience. Attaining an optimal setup is key, whether you're planning to spend hours lost in the vast landscape of "The Legend of Zelda: Breath of the Wild," or battling it out with friends in "Super Smash Bros. Ultimate." Having the knowledge and ability to establish either a wired or wireless connection not only allows for versatility but also ensures you're ready for whatever multiplayer scenario might arise. This comprehensive guide provides an easy, in-depth explanation on how to connect your Pro controller to your Nintendo Switch. It is divided into three sections: A step-by-step guide on how to connect your Pro Controller to the Switch, setting up your Pro Controller for a wireless connection, and a tutorial on connecting your Pro Controller via USB-C. For those unsure where to begin, let's delve into our first section - Connecting Your Pro Controller to the Switch: A Step-by-Step Guide. This simple, easy to follow guide will have you ready to game in no time.
Connecting Your Pro Controller to the Switch: A Step-by-Step Guide
Connecting your Pro Controller to the Nintendo Switch significantly improves the overall gaming experience due to its enhanced control features. Whether you are aiming to improve your gaming skills or simply want a more immersive experience, understanding how to achieve this connection efficiently can greatly benefit you. The process might appear challenging at first, but breaking it down to manageable steps makes it far less daunting. Ensuring an understanding of this is crucial, we will provide thorough guidance in the following areas: Choosing the Right Connection Method – understanding that not all connections are created equal is necessary for an enjoyable gaming experience; Understanding the Different Connection Options - wired or wireless, each has its advantages and can fundamentally alter your gaming experience; and lastly, Preparing Your Pro Controller for Connection – ensuring your controller is ready to connect can prevent potential issues. With these key areas discussed, getting your Pro Controller connected should no longer be a hurdle. We spend ample time on each consideration, beginning with guiding you on Choosing the right connection method. Let's dive in.
Choosing the Right Connection Method
Choosing the right connection method for your Pro Controller and Switch is pivotal for an enhanced gaming experience. With a variety of connection options available, understanding each of them can ensure seamless interaction between the controller and the Nintendo Switch. The two primary connection methods are Bluetooth and USB. Bluetooth, a wireless method, is preferred for users who value the freedom of movements. With the Bluetooth connection, you can play your games from any point within the effective range without being tethered to your Nintendo Switch. It's effortless to establish this kind of connection; all it needs is a simultaneous press of the pairing button on the Controller and the Switch. However, this method might experience latency issues, especially when there are several Bluetooth devices within range. On the other hand, connecting your Pro Controller to the Switch using a USB cable fosters the direct flow of data between these two devices. This method potentially offers more consistent and reliable performance, reducing the chances of input latency that could affect gameplay. Also, it's an easy and straightforward way to set up; you only need to plug the USB cable into the console and the Pro Controller. It further provides the advantage of charging your Pro Controller while playing. However, with a USB connection, your movements become restricted — you can only move as far as the cable length allows. Thus, choosing the right connection method isn't a one-size-fits-all scenario but hinges on personal preferences, tolerances and specific gaming needs. If you favor freedom and comfort while gaming, Bluetooth connection would be an ideal choice. But if you prioritize performance consistency and hates the idea of constantly recharging your Pro Controller, then a USB connection would be more suitable. See each connection method as toolkits for your gaming performance; understand their strengths and drawbacks, and choose one that suits your needs most closely. Remember, optimal gaming experience doesn't end with having a Pro Controller; it extends to how well you'll connect it to your Switch.
Understanding the Different Connection Options
When it comes to connecting your Pro Controller to the Switch, it is crucial to understand that there are several different connection options available. Each of these options serves a distinct purpose and can be more or less suitable based on your specific needs and circumstances. Firstly, you have the option to connect your Pro Controller to the Switch wirelessly, which is the most common method. This requires no physical connection, as the controller and the Switch communicate via Bluetooth. This is notably convenient if you're looking to play from a distance or if physical wires would get in your way or create clutter. However, be aware that a wireless connection relies on battery life and can sometimes suffer from latency issues, especially in areas with many other active Bluetooth devices. Alternatively, you can connect your Pro Controller to the Switch using a USB cable. This method ensures a stable and uninterrupted connection, eliminating any delay or lag that could potentially interfere with your gaming experience. Furthermore, a wired connection can provide power to your controller, bypassing the need for frequent battery changes or recharges. However, this method does restrict your mobility and requires more careful placement of your Switch and controller to avoid pulling or straining the cable. Lastly, you might also consider a docked connection wherein the Switch is connected to a larger display through a docking station. While this method doesn't directly involve the controller, it significantly changes the gaming experience by allowing you to game on a larger screen. The Pro Controller can be paired either wirelessly or via USB in this setup, emphasizing its versatile nature. In conclusion, each connection option – wireless, wired, or docked – brings its unique benefits to the table, and your personal preference, gaming style, and gaming environment will play a considerable role in determining the most suitable method for you. Regardless of your choice, it's comfort, efficiency, and seamless gameplay that ultimately matters. Understanding these different connection options puts you in an informed position to connect your Pro Controller to the Switch successfully and enjoy your gaming experience to the fullest. This knowledge serves as a bedrock on which you can build a gaming setup that works best for you.
Preparing Your Pro Controller for Connection
Preparing Your Pro Controller for Connection
When synchronizing a Pro Controller to the Nintendo Switch system, preliminary preparations are fundamental to ensuring a successful connection. As a crucial component of 'Connecting Your Pro Controller to the Switch: A Step-by-Step Guide', the preparatory stage involves several key procedures to ensure your Pro Controller is primed and ready to pair with your system. Firstly, charge your Pro Controller. Connection instability or failure may result from a low battery, so provide full charge before attempting to connect. A fully-charged Pro Controller not only guarantees a smooth and continuous gaming experience, but also minimizes the chances of unexpected disconnections during critical gaming moments. It's essential to remember that a USB-C to USB-A cable, which comes along with the controller, is needed for charging. Connect one end of the cable to the controller and the other end to a powered-on Nintendo Switch dock or other compatible charging device. Secondly, ensure that your Nintendo Switch system is updated to the latest software version. Older versions might not support Pro Controller or might not provide optimum performance. To check for any system updates, navigate to 'System settings' on your home screen, select 'System', then 'System Update'. Regular system updates not only enable smooth device synchronization but also help maintain the Switch system’s longevity and efficiency. Additionally, verify whether your Pro Controller is authentic. Counterfeit controllers can exhibit issues with system connectivity and overall performance. Authorized Nintendo retailers and the official Nintendo website are the recommended sources for purchasing a legitimate Pro Controller. Lastly, a quick check for physical impediments between the Pro Controller and the Nintendo Switch is necessary. Clear all obstacles to ensure a seamless, interference-free connection and optimal gaming experience. Objects such as metal objects, wireless devices, or even thick walls can block or interfere with Bluetooth signals used in the pairing process. A direct line of sight is preferred, and a distance of less than 10 meters is recommended. To recap, preparing your Pro Controller for connection entails charging the device, updating the Nintendo Switch system, ensuring the controller’s authenticity, and removing any physical obstacles between the controller and the system. By taking the time to complete these steps, you'll secure a smooth and consistent gaming experience. This thorough preparation forms a strong foundation for successful Pro Controller to Nintendo Switch synchronization, ultimately enhancing your gameplay enjoyment and satisfaction.Setting Up Your Pro Controller for Wireless Connection
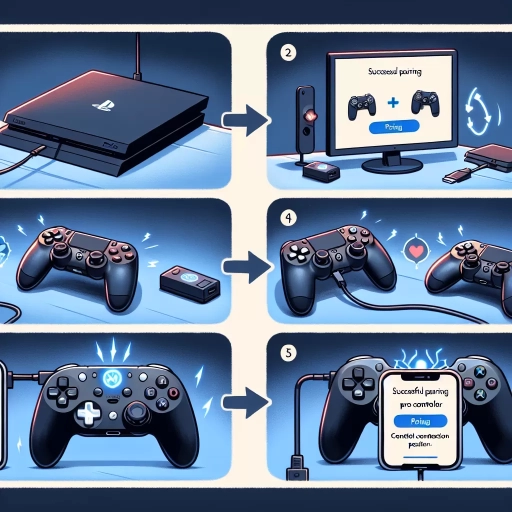
Setting up your Pro Controller for wireless connection can enhance your gaming experience by offering you the freedom to move around while playing and eliminating the constraints of cabled connections. To achieve this, there are three significant steps involved. Firstly, you must enable wireless connection on your Pro Controller, a task accomplished by navigating the controller's settings to turn on its Bluetooth capability. Secondly, to make use of this wireless feature, it's essential that you understand how to correctly pair your Pro Controller with your Nintendo Switch. This involves finding the appropriate options within the Switch's settings menu to synch your devices securely and effectively. Lastly, after successfully implementing these steps, the final, crucial step is to verify a successful wireless connection. This will ensure that your controller and video game console are communicating without any interruptions or lag, giving you a seamless gaming experience. Now that we have an overview, let's delve into the first process: enabling wireless connection on your Pro Controller.
Enabling Wireless Connection on Your Pro Controller
Enabling wireless connection on your Pro Controller is an integral part of setting up your Pro Controller for wireless operation. This process allows seamless interaction between your Pro Controller and the Switch console. A Pro Controller, unlike a conventional gaming unit, offers an advanced level of control, significantly augmenting the user's gaming experience. To initiate this wireless connectivity, first, make sure your Pro Controller is fully charged. Dead batteries could nip the connection process in the bud, hence ensuring the controller is powered is paramount. To facilitate wireless connection, you need to navigate the home screen of your Nintendo Switch. The home screen hosts the controllers' section where you find the ‘Change Grip/order’ setting. Select it to prompt the system to the pairing mode. Once in pairing mode, on your pro controller, press and release the sync button located on the top of the gamepad. This action prompts the detection and pairing of the Pro Controller by the Nintendo Switch console. Upon successful detection, the player LED on the Pro Controller will stop blinking and illuminate steadily indicating that your Pro Controller is now in wireless mode and ready for gameplay. It's also important to note that a Pro Controller can support up to eight controllers in wireless connection, making multiplayer modes more exciting and engaging. To maintain a stable wireless connection, ensure that the Switch console and the Pro Controller are within 10 meters of each other. This proximity is essential as it prevents any possible interferences that could disrupt the wireless linkage. Furthermore, a swift connection is optimum in gaming scenarios where reaction time makes a big difference. The process of enabling wireless connection on your Pro Controller is an easy step to understanding advanced gaming. This step marks the transition from being tethered by wires to experiencing the freedom of wireless gaming technology. The Pro Controller, with its immaculate precision and responsiveness, combined with the freedom of wireless connectivity, completely transforms your gaming experience on the Nintendo Switch console. It's also an indication of the future trajectory of gaming, where the flexibility of wireless technology will be increasingly dominant. In summary, enabling the wireless connection on your Pro Controller plays an instrumental role in maximizing the benefits of your Nintendo Switch console. It not only makes your gaming sessions more seamless and enjoyable but also opens up new avenues for multiplayer gaming. The process is straightforward and user-friendly, designed to enhance your overall gaming experience. Embrace the convenience of wireless technology by enabling your Pro Controller's wireless mode and dive into an immersive gaming world.
Pairing Your Pro Controller with Your Switch
Understanding how to pair your Pro Controller with your Nintendo Switch is fundamental to having a seamless gaming experience. First off, you need to power on your Pro Controller. This is done by necessitating the Home button located on the front of the Pro Controller. Once powered on, the next step is to enter your system settings on your Switch console. To do this, select the System Settings option from your Home menu, represented by an icon that looks like a cogwheel. Within this menu, find and select Controllers and Sensors followed by the Change Grip/Order option. Your Pro Controller needs to be discoverable in order to connect to your Switch. Consequently, you must enter a pairing mode, which is achieved by pressing the Sync button—located at the top of the Pro Controller—until the player LED surrounding the home button starts to flash. This blinking light is an indication that your Pro Controller is in pairing mode and is ready to connect to your Switch. Now, on your Switch, select the Find Controllers option. This option prompts your Switch to start searching for nearby controllers that are in pairing mode. Ensure that the Pro Controller is close enough for enhanced connectivity, generally within a 10-meter range. Once your Switch locates your Pro Controller, it will automatically sync with it, establishing a connection between the two devices. Interestingly, your Pro Controller can also pair with the Switch when it’s in its dock. To pair while docked, the procedure is the same – you will need to get into the Change Grip/Order screen on the Switch, put your Pro Controller in pairing mode, then let the Switch discover and sync with it. Because the Switch supports multiple controllers, each synced controller is assigned a player number, which is displayed on the LED of the Controller. For instance, if your Pro Controller is the first controller to be synced, it’s designated as the player 1 controller, and so on for succeeding controllers. Pairing your Pro Controller with your Switch significantly enhances your gaming experience since it permits you to play your favorite games wirelessly. The Pro Controller features ergonomic design to gratify extended gaming periods, and also boasts motion controls, HD rumble, and built-in amiibo functionality, hence offering an immersive and interactive gaming experience. In conclusion, pairing your Pro Controller with your Switch is a relatively seamless process that requires you to enter your Switch’s controllers settings, power on your Pro Controller, put it in pairing mode, and let your Switch discover and connect with it. Once connected, the Pro Controller provides a comprehensive gaming experience due to its advanced features. Pandering to a preference for wireless connectivity, this pairing process elucidates technological progress within the gaming industry.
Verifying a Successful Wireless Connection
Once you've accomplished the initial phase of setting up your Pro controller for a wireless connection, the immediate subsequent step you ought to embark on is to validate the success of the connection. This procedure is vital to guarantee that your device can capitalize on all the enhanced gameplay features. Ensuring a successful wireless connection goes beyond merely joining the controller to the Switch. This process involves verifying that the connection is stable, responsive, and possesses the capacity to transmit input commands effectively and instantaneously. The most straightforward and arguably the most effective method of assessing the success of your wireless connection is by merely using your controller to navigate through the Switch console options. This simple action provides real-time insights into the controller’s responsiveness. This is because if you experience any form of lag, irresponsiveness, or commands not accurately reflecting on the screen input, you will quickly be aware that there are still issues to be resolved with your connection. Another foolproof way to confirm the success of a wireless connection is by observing the signal strength. Most devices represent this through a series of bars. Establishing a wireless connection with full bars guarantees crisp, consistent gameplay. However, a connection with one or two bars typically causes game lag, signal dropping, or even complete signal loss. Taking a quick glance at the battery power level of your Pro Controller is yet another crucial factor in ensuring a successful wireless connection. While it might seem trivial, it is essential to remember that low battery levels often lead to an unstable or intermittent wireless connection. Hence, always ensure that your controller battery is adequately charged to avoid unnecessary interruptions. You can also conduct a 'Dry Run' by engaging in a short session of non-rank gameplay. This test-run allows you to experience first-hand the controller’s performance under the least stressful conditions. It offers you a window to detect any hitches, input delay, or controller disconnect that could potentially disrupt your gaming experience. Finally, never undermine the importance of an excellent firmware update check. Occasionally, connectivity issues could be a result of outdated controller software. If your controller exhibits persistent issues, consider running a firmware update. Updating the controller's firmware often solves minor bugs that might affect the controller's efficiency. To conclude, verifying a successful wireless connection requires deliberate measures that encompass straightforward operational usage, signal strength check, battery power level monitoring, ‘Dry Run’ gameplay, and a firmware update check when needed. These steps collectively ascertain that your wireless pro controller is ready affording you an impeccable gaming experience on the Nintendo Switch. Just remember having your controller adequately connected is the gateway to a seamless gaming experience.
Connecting Your Pro Controller via USB-C
Before enjoying your favorite game on your Nintendo Switch, it's crucial that you understand how to connect your Pro Controller correctly for the optimum gaming experience. This article provides you with a comprehensive guide on how you can enhance your gaming sessions by connecting your Pro Controller via USB-C. Herein, three key areas will be discussed: Firstly, you'll learn how to locate the USB-C Port on your Pro Controller. This step is critical as it enables you to know where exactly you will connect your USB-C cable. Secondly, a detailed, step-by-step guide will take you through successfully connecting your Pro Controller to your Nintendo Switch using a USB-C connector. Finally, it's crucial to verify whether the connection has been successful to ensure smooth gameplay without any disruptions. Now, let’s begin by helping you identify the USB-C Port on your Pro Controller.
Locating the USB-C Port on Your Pro Controller
One of the most important steps in connecting your Pro Controller to the Switch Bedrock is identifying and locating the USB-C port on your controller. This port, which is central to establishing a stable and reliable connection, is typically located at the top of your Pro Controller. It's the only input of its kind on this device, and it plays a unique role in maintaining communication between your controller and your console. For those who may be unfamiliar or confused, the USB-C port can be quickly and easily identified by its oval shape and the presence of 24 pins or connectors within the port which are essential for data and power transmission. This is where you'll be inserting the USB-C cable. When you look at the top of your Pro Controller, you should see a few buttons, such as the 'L' and 'R' buttons. The USB-C port is ordinarily situated between these buttons. To create a connection, you must align your cable and port correctly, ensuring that the cable's connectors match those of your port before securing a snug fit. Remember, some cables may look similar to USB-C ones, but only the proper cable will ensure the expected and needed connection between the controller and the Switch Bedrock. Locating and recognizing the USB-C port is an important step because it is the channel through which your gaming commands travel from the controller to your console. It ensures your game progresses without any hitches as it keeps the communication robust between your Pro Controller and the gaming console. In addition, understanding where this port is and how to properly use it helps to prevent any potential damage to your Pro Controller due to incorrect use or forced cable insertion. With the need for faster and reliable data transmission, the USB-C port is your answer when it comes to connecting your Pro Controller to the Switch Bedrock, making your gaming experience smooth, fast, and awesome. The USB-C port is not just an ordinary port; it's the nucleus of your connectivity between the controller and the console. It's like a bridge that ensures there is a gapless connection for an unswerving gaming experience. Now that you are familiar with finding the USB-C port on your Pro Controller, connecting it to your Switch Bedrock will be a piece of cake. Enjoy your game with fewer disruptions and an assured connection.
Connecting Your Pro Controller to Your Switch via USB-C
Connecting your Pro Controller to your Nintendo Switch through a USB-C can be a straightforward process that provides a quick, wired way to ensure stability and zero input lag during gameplay. This connection can be essential for competitive gaming, where every millisecond counts. To achieve this connection, ensure you have a USB-C cable at your disposal - you will typically find one packed in the box with your Pro Controller. However, if you happen to have misplaced it, a standard USB-C smartphone charging cable would suffice. Essentially, the USB-C cable acts as a wire to tether the Pro Controller to the Switch. It's important to note here that the Switch dock should be duly connected to your television. To initiate the connection, plug one end of the USB-C cable into the port found at the top of your Pro Controller and the other into a USB port on the Switch dock. Your Switch will automatically detect the Pro Controller and associate it as a wired connection. This essentially means that, even though the Pro Controller has a functional Bluetooth connection, it will now operate solely as a wired device to maximize efficiency and prevent lagging. You'll notice this change reflected on the screen. The battery icon will disappear, replaced with a wired symbol. Also, remember, your Pro Controller USB-C connection keeps your device powered, and its usage won't deplete your controller's battery. This immediate connection automatically enhances the response time between the controller and the console, ensuring your in-game controls to be even more precise and swift. This is especially beneficial for gamers indulging in high-pace, action-packed gaming sessions. Remember to update your Pro Controller with the latest software before starting your gameplay for improved compatibility and functionality. Also, keep in mind, while using USB-C for connection, the Pro Controller should first be paired with the console by connecting it once through Bluetooth. It works as a one-time recognition procedure for the Switch to acknowledge the controller. To continue with this wired connection, the same USB-C cable must be plugged in each time you use the controller. In conclusion, the USB-C connection gives you a reliable option to seamlessly connect your Pro Controller to the Switch. This method is simple, efficient, and beneficial for gamers seeking to improve their gaming experience. The USB-C provides a swift and secure link between your Switch and Pro controller, allowing you to immerse entirely in your game without worrying about connectivity issues. Always remember to maintain your controller's firmware updated, ensuring the most optimal, smooth, and responsive gameplay experience.
Verifying a Successful USB-C Connection
Establishing a successful USB-C connection is crucial in connecting your Pro Controller to Switch Bedrock. USB-C, known for its high-speed transfers and charging capabilities, serves as an essential connection tool. However, successful connection doesn't happen automatically; it requires keen observation and proper follow-through of steps to ensure it's working as expected. First, locate the USB-C port on your Pro Controller and Switch Bedrock. The USB-C port is oval and can accept the charger from any direction, which distinguishes it from a regular USB. Upon connecting, you should see an indication on your Switch Bedrock's screen implying that the connection has been recognized. Some devices may vary in the type of acknowledgement they provide, but look for a noticeable sign such as a charging battery icon or a pop-up message. Bear in mind that defective cables can cause charging or connectivity issues. Hence, it's advisable to test the USB-C cable to ensure it's functional before use. You can test the cable using another device that supports USB-C. If the cable works with another device, you can be reasonably confident that it isn't the culprit in case of any connectivity challenges with the Switch Bedrock and the Pro Controller. Relying exclusively on physical observation may not guarantee a successful connection. As a fail-safe, access the ‘Controllers’ setting on your Switch Bedrock. If your Pro Controller is linked successfully, it should be evident in the list of connected devices under this setting. If your controller doesn't appear, it suggests that the Pro Controller and the Switch Bedrock are not communicating properly, even if your cable is plugged in correctly. Finally, it's always smart to keep your devices updated. Firmware updates often rectify problems related to connectivity for controllers. You might want to check if your Switch Bedrock needs updating and make sure your Pro Controller's firmware is also up-to-date. To summarize, verifying a successful USB-C connection involves physically connecting your devices, checking for any visual responses, inspecting the status in the system settings and ensuring all your devices are updated. As a last piece of advice, remember to handle your USB-C connections with care as they are fundamental parts of your gaming setup and can be susceptible to physical damage.