How To Remove Vibration On Iphone
 The high-pitched rattling sound of an iPhone vibrating incessantly can drive even the calmest of personalities to the brink of insanity. Yet, it's a notch easier to end this torment than you might think. This comprehensive guide will unravel the essential steps to remove vibrations on your iPhone, offering several effective solutions that fall under three main categories: Hardware Solutions, Software Solutions, and Advanced Troubleshooting. By exploring these categories, you will acquire a deep understanding of why your iPhone won't stop vibrating and learn how to rectify this issue promptly. We'll start by addressing the hardware solutions which talk about physical changes you can enact on your iPhone to mitigate the vibration, ensuring you no longer have to cope with this unwarranted inconvenience. So, fasten your seatbelts for a crash course on how to remove iPhone vibrations.
Hardware Solutions to Remove Vibration on iPhone
Advancements in mobile technology have enhanced our lifestyles immensely, but they can also bring challenges. One such issue that many iPhone users face is excess or unintended vibration. The good news is that there are several effective hardware solutions available to successfully address this troubling issue. Firstly, it is best to examine the vibration motor of the iPhone. Continuous use can potentially damage this component, causing it to misbehave. It might require a simple repair or even a replacement to rectify the issue. Secondly, the device's charging port could also contribute to the problem; a plethora of grime, dust, or lint might obstruct the port, leading to unnecessary vibration. A thorough cleaning can work wonders in such cases. Lastly, an underrated but highly effective solution might be using a vibration-dampening case or accessory, which can minimize the range of phone vibrations. Let's delve deeper into the first solution - checking and replacing the vibration motor, to gain a clear understanding of how we can eliminate this issue.
1. Check and Replace the Vibration Motor
The vibration motor is an important component of an iPhone as it escalates the tactile experience by enabling notifications and alerts. If the iPhone is facing issues with vibration, one of the possible hardware solutions could be to check and replace the vibration motor. Over prolonged use, the motor or its connectors could wear out, causing disturbances in the phone's vibration pattern. An abnormal vibration could indicate a potential jam in the motor, failure in the vibration code, or a physical breakdown of the motor. To figure out the root of the problem, initial examination steps can be undertaken. These include a mechanical inspection of the iPhone using specific tools to open the device and view the motor. If the motor looks in poor health or damaged, replacing it might be the only viable solution to fix the vibration issue. It's recommended to consult a professional technician or a representative at the Apple Store for this task, as it requires in-depth knowledge and delicacy to deal with sensitive hardware components. A skilled expert would be capable of properly diagnosing whether the issue lies with the vibration motor or not, and would then proceed to effect a change if needed, using standard, approved replacement parts. Depending on the iPhone model, the vibration motor could either be a rotary electric motor or a linear oscillating vibrator both of which provide a different kind of feedback. The technicians are very well experienced in handling both these types, so rest assured your phone would be in safe hands. The necessity of replacing the vibration motor arises only when it is certain that the problem is not software-based and the motor is thoroughly tested and found to be non-functioning. This hardware solution, although a tad stringent, goes a long way in restoring the phone back to its original state, ensuring that the vibration feature works smoothly henceforth. Moreover, it demonstrates the importance of regular maintenance and check-ups for all hardware components to substantiate their efficient functioning. However, it's vital to note that this measure is considered when all other troubleshooting steps, especially pertaining to the software have been exhausted. The direct manipulation of iPhone’s hardware should always be treated as a last resort. Nevertheless, timely replacing of the vibration motor will enhance the performance and extend the longevity of your iPhone device. Hardware solutions like these provide a comprehensive remedy for mitigating vibration related issues, ensuring that the user experience remains top-notch, as intended by Apple. In conclusion, the check and replacement of the vibration motor can be a highly effective method in removing vibration issues on the iPhone.
2. Inspect and Clean the iPhone's Charging Port
Charging issues can also contribute to an iPhone's incessant vibration. Thus, inspecting and cleaning the iPhone's charging port should not be overlooked in your quest for hardware solutions when ironing out this problem. Dust, lint, and debris accumulation in the charging port can impede proper function, influencing not just the device’s ability to charge, but also to read and respond appropriately to charging commands. Vibrations can result from the iPhone's misguided attempt to process the mixed signals caused by this debris. Application of a flashlight while scrutinizing the charging area can make debris readily visible. The procedure to clean an iPhone charging port is delicate and must be done carefully, to prevent unintended damage. It is advisable to use a new soft-bristle toothbrush or a similarly gentle tool to lightly skim over the port, dislodging dust particles. Another material that would work perfectly would be a can of compressed air, known for its effectiveness in gently dislodging debris from sensitive areas without causing damage. Additionally, ensure the iPhone is switched off before embarking on the cleaning process to prevent any electrical mishaps. Post cleaning, connect your iPhone charger and watch if there will be any vibrations. If vibrations cease, it signifies that the cleaning was successful, and the incessant vibrations were as a result of an obscured charging port. On the other hand, if vibrations persist, this indicates the problem lies elsewhere, and further troubleshooting steps are necessary. This process may seem minuscule in the grand scheme of fixing device-related technical issues. Still, it is a significant step towards mitigating any further unnecessary hardware-induced vibrations. In sum, cleaning the charging port not only helps improve the device's charging capability, but it also immensely contributes to reducing unwarranted vibrations. Regular checking and cleaning of the port contribute to the iPhone's overall longevity and efficient functionality. It is, however, worth noting that if the debris is too compact or the charging port seems damaged, professional help from authorized iPhone service providers should be sought instead of self-troubleshooting. A malfunctioning charging port can lead to a range of issues, with incessant vibrations being one of them. Therefore, don't underestimate the impact of a clean, fully functional charging port in maintaining your iPhone's optimal performance.
3. Use a Vibration-Dampening Case or Accessory
3. Using a Vibration-Dampening Case or Accessory
High quality and inventive hardware solutions have emerged in recent years to eliminate smartphone vibration, alimenting the growing demand for quieter, less intrusive notifications. Among these, one of the most effective options is the use of a vibration-dampening case or accessory. These specially designed products utilise certain materials and engineering principles to absorb the kinetic energy generated by the phone's vibration motor, thus significantly reducing the audible and tactile effects of alerts and notifications. Several companies design and sell these accessories with a range of added functionalities. For example, some don't just absorb the energy, but convert it into heat or another form of harmless energy disbursement. This way, the phone not only becomes quieter, but it also consumes less power, boosting overall battery life. Others integrate additional padding or shock absorbers. They serve a dual purpose by adding an extra layer of protection from falls or knocks, without adding excessive bulk or compromising the device design. Investing in a vibration-dampening case can be particularly beneficial for iPhone users, considering that Apple's proprietary Taptic Engine, while offering subtle and precise haptic feedback, is known for its potent vibrations. With one of these cases, you help to ensure the longevity and functional integrity of your iPhone, while providing an improved user experience free from disruptive vibration noise and sensation. Of course, it’s crucial to choose a case or accessory that fits your specific iPhone model for the maximum effectiveness. Also, considering the variety of options in the market, taking the time to research reviews and ratings can lead to a more satisfactory purchase. Understandably, managing phone vibrations might seem like a minor concern, but it can make a significant difference in use, particularly in settings where silence is golden, like meetings, libraries, or during sleep hours. In conclusion, a vibration-dampening case or accessory offers a hardware solution that goes beyond merely muting your device or adjusting settings. It's a practical and beneficial investment toward a more serene and less intrusive digital experience, especially for iPhone users who value device longevity, optimal battery life, and minimal disturbance during their day-to-day activities.Software Solutions to Remove Vibration on iPhone
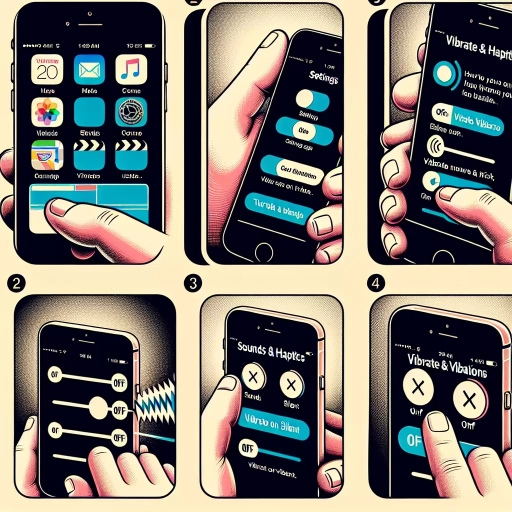
Technology has permeated all corners of our lives, with the ubiquitous iPhone being our constant companion. Nevertheless, certain functionalities like persistent vibrations can sometimes disrupt our usage experience. Various software solutions are available to tackle these disruptive vibrations on your iPhone. Firstly, one can disable vibrations completely in the settings function. Another smart way is by utilizing the 'Do Not Disturb' mode which effectively silences all notifications and subsequently all vibrations. Yet another alternative is to adjust the vibration patterns in the accessibility settings to suit personal preferences and reduce vibration intensity. It’s all about finding the right balance for your unique user experience. We will now delve into the first option, that is, disabling vibration in your settings, which is an extremely straightforward yet sometimes overlooked method to remove unwanted vibrations. Combining software functionality with user customization, these solutions allow every user to have a peaceful, uninterrupted iPhone experience.
1. Disable Vibration in Settings
There is no denying the convenience brought by notifications; however, they can also lead to excessive vibrations that can become bothersome over time. The iPhone has a built-in software feature called "Do Not Disturb" mode which comes in handy when you want to get some peace from these incessant notifications. When Do Not Disturb mode is activated, it effectively silences all calls, alerts, and vibrations that you would normally receive while your phone is locked.
Activating this mode is simple but it comes with customization options making it a go-to software solution for many users. Within the settings tab, you can schedule Do Not Disturb to get activated at certain times throughout the day to ensure its use is maximized to your most convenient time. For many, this is often during nighttime to suppress unwanted disturbances from overnight notifications. You can also allow calls from certain groups like your Favorites or contacts only during this mode. Furthermore, there is an option that would automatically disable Do Not Disturb mode if it detects that you’re moving, like when you’re driving.
While this function won’t completely solve the vibration problem, it provides a significant improvement by allowing you certain periods of time without any interruptions. The edges of the notifications are softer with much fewer vibrations, providing instant relief for users who find them disconcerting. This effective provision of tranquility and the leniency of the customization options make Do Not Disturb mode a favorable software solution against excessive vibration issues on your iPhone. By using this feature judiciously you can ensure a more serene interaction with your iPhone at your leisure without it entirely impeding your connectivity. The next time your iPhone's constant vibrations start to bother you, give Do Not Disturb mode a try, it may be the quiet solution you're looking for. Accessibility settings on the iPhone are packed with numerous functions that aim to aid user experience. One such feature is the adjusting of vibration patterns. If you're unhappy with the constant vibration on your device, you can entirely remove it or adjust the sequence to a more preferable vibratory feel. This not only suppresses the unpleasant feeling you get with unnecessary vibrations but also aids battery performance.
Here's a simple and straightforward process to accomplish this. First, you need to navigate to the settings app on your iPhone, then tap "accessibility." Next, select "touch," and then scroll down until you find the "vibration" option. This option allows you to either completely stop vibration or adjust it to a less intrusive level.
At this junction, you're availed of a variety of default vibration patterns that you can choose from. They range from "Alert" to "Heartbeat," among others. You can tap on each to have a feel of how exactly they vibrate. The good part about this feature is that you're not restricted to the default patterns.
In the same vibration settings, you can create a custom vibration pattern that perfectly suits your liking. You accomplish this by tapping on "Create New Vibration." Here, you can tap on the screen in the pattern that you want your iPhone to vibrate. This trick is essential as it can help individuals distinguish between different types of alerts without having to look at their iPhone.
To test the effectiveness of your custom vibration, simply press "play." If it doesn't match your expectation, the "record" button can help re-do the process until your desired pattern is realized. After this, all that's left is to save and name your new vibration pattern. Therefore, depending on the software version your iPhone is running, you can effectively mute or minimize unnecessary vibrations to make your interaction with the device more pleasant and personalized.
In conclusion, while adjusting vibration patterns may appear as a trivial task to many, it's a vital tool for individuals who precisely want to control how their iPhone communicates with them. It's a technique that positively contributes to removing any trace of irritation while using the device, thereby significantly enhancing user satisfaction. of any smartphone's functionality lies in its settings, just like our unique go-to guide for effective problem-solving—Advanced Troubleshooting to remove Vibration on iPhone. It's easy to overlook the small tweaks that can dramatically elevate or plummet overall usability, turning your device into a symphony of vibrational annoyance. This article offers a trifecta of solutions that should be your first line against a vibrational Armageddon. To fight this, we're going to reset iPhone settings to default—allowing you to dispel any modified settings causing the vibration. Secondly, it's crucial that your software is always up-to-date, and we will walk you through the process of updating your iPhone's software to the latest version to rectify any vibration issues. Lastly, we perform a DFU restore to fix any software issues that have been overlooked in regular resets or updates. Now, to begin our troubleshooting adventure, let's delve into the first resolution: Resetting iPhone Settings to Default. As an intricate part of the larger process of advanced troubleshooting to remove vibration on an iPhone, resetting the iPhone settings to default can debut as a remedy for problems that seem persistently adamant and beyond rectification. It is essential to understand before proceeding onto this step that the direct implication of resetting all settings is to restore your iPhone to its original factory settings, eradicating any personalized changes you have made. This step should only be considered when preliminary troubleshooting efforts are ineffective.
To initiate the process, navigate to the 'Settings' app on your iPhone and tap on 'General'. Scroll to the bottom of this section to locate 'Reset'. Herein, select 'Reset All Settings'. You may be prompted to confirm your decision; this is because, while your data and media will remain untouched, all your settings will revert to their original state. This includes network settings, the keyboard dictionary, the Home screen layout, location settings, and privacy settings. Make sure to memorize or note down any important network passwords, as they will need to be re-inputted after the reset.
Once you have proceeded with the reset, your iPhone will restart. It is important to refrain from interrupting this process to avoid damaging the software. Once the reset has been completed, you can check to see if the issue with vibration has been resolved. The reset essentially clears any clashing settings that may have been causing the vibration issue, providing your device with a clean slate from which to operate.
It's pertinent to note, however, resetting the settings should be used as a last resort. While it could possibly fix underlying issues causing unnecessary vibrations, it’s also time-consuming as you’ll need to reestablish all your preferred settings. Therefore, only take this step if you are ready for these changes and have exhausted other troubleshooting steps with no positive outcomes. By resetting iPhone settings to default, you have the potential to not only fix issues causing unwanted vibrations but pave the path for optimized overall device performance. There is a possibility that the cause for your iPhone continuously vibrating is due to software glitches. The system gets cluttered over time which can trigger unusual activities like unwanted vibration. Therefore, it's essential to always keep your iPhone updated with the latest software available from Apple. A software update typically contains fixes for multiple bugs and enhancements in the system’s performance. So, it's one of the first things you should consider when you face such problems.
Keeping your iPhone’s software up-to-date is not a significant process. It can be done automatically or manually. To update your software automatically, you need to go to your iPhone Settings, then go to ‘General’, followed by 'Software Update'. Tap 'Customize Automatic Updates', and then turn on 'Download iOS updates'. With this setting, your iPhone will automatically update to the latest iOS when on Wi-Fi and connected to power.
However, manual updates provide assured control over the process. To manually update your iPhone, you have to open 'Settings', then go to 'General', and then 'Software Update'. Tap 'Download and Install'. If a message asks to temporarily remove apps because the software needs more space for the update, tap Continue or Cancel. If you tap Continue, your iPhone will remove some apps temporarily and reinstall them after the update.
Remember, before initiating an update, ensure you have a backup of your iPhone data. Updates are generally safe, but it's always better to be on the safe side. On top of that, verify your iPhone has at least 50% charge, or if it's lower than 50%, be sure it's connected to a power source prior to the start of the update. This step is crucial to avoid any interruption during the update process.
Updating your iPhone to the latest software version can help optimize your device's performance and remove any glitches causing the continuous vibration. It gives you the chance to benefit from the latest features and improvements added by Apple. However, if the issue persists, even after updating, it might be more than just a software issue, and there might be a need for professional intervention. While you may have implemented a number of troubleshooting strategies to remove aberrant vibration on your iPhone, problems may persist due to underlying software issues. Hidden software glitches can cause your iPhone to act erratically, such as enabling vibration even when explicitly turned off. In such instances, a DFU or Device Firmware Update restore proves invaluable.
A DFU restore is the most comprehensive type of restore a user can perform on their iPhone. It reinstalls both the firmware and software, restoring your iPhone to its original settings while fixing any underlying software-related glitches. It essentially provides a deep clean that extends beyond the capabilities of a typical reset or update, reaching into the inner workings of your phone's system software.
One thing to keep in mind before performing a DFU restore is to back up your data. Since the restore process eliminates all data and settings, a backup ensures you do not lose critical information. The process is relatively simple, albeit it requires precision. Connecting your device to a computer, you hold the sleep and volume button for a specific time span before releasing the sleep button while maintaining the hold on the volume button. Maintain this until a message pops up on the computer indicating the phone is in recovery mode.
Subsequently, select to restore your device in iTunes or Finder, depending on your system. If performed correctly, this will allow you to successfully run a DFU restore, resolving potential software issues causing unnecessary vibrations on your iPhone. Once the restore process is complete, you can set up your iPhone from the beginning, or use a previous backup to instill the stored data back to your device.
To sum up, if all other troubleshooting methods fail to resolve the vibration issue on your iPhone, it could indicate a more systemic issue related to the device’s software. In such situations, performing a DFU Restore may prove to be the solution, restoring your iPhone to its original settings and resolving the software glitches causing the unexpected vibrations. Just make sure to back up your data before starting the process to avoid any potential data loss. Applying such advanced troubleshooting techniques can ensure the continued optimal performance and longevity of your device while providing you with a vibration-free iPhone experience.2. Use Do Not Disturb Mode to Silence Notifications
3. Adjust Vibration Patterns in Accessibility Settings
Advanced Troubleshooting to Remove Vibration on iPhone
1. Reset iPhone Settings to Default
2. Update iPhone Software to the Latest Version
3. Perform a DFU Restore to Resolve Software Issues