How To Record A Video On Iphone
With the rise of social media and video content, recording high-quality videos on your iPhone has become an essential skill. Whether you're a vlogger, a business owner, or simply a social media enthusiast, knowing how to record a video on your iPhone can help you create engaging content that resonates with your audience. In this article, we'll take you through the step-by-step process of recording a video on your iPhone, from pre-recording preparation to post-recording editing and sharing. We'll start by discussing the importance of pre-recording preparation, including choosing the right settings, selecting the best camera, and ensuring good lighting. By the end of this article, you'll be equipped with the knowledge and skills to create stunning videos that showcase your personality, products, or services. So, let's get started with the first step: Pre-Recording Preparation.
Pre-Recording Preparation
When it comes to pre-recording preparation, there are several key factors to consider in order to ensure that your final product is of the highest quality. To start, it's essential to choose the right iPhone model for your recording needs. Different models have varying levels of audio quality, storage capacity, and processing power, so selecting the right one is crucial. Additionally, understanding your recording goals is vital in determining the type of content you want to create and the equipment you'll need to achieve it. This will help you to focus on the specific features and tools that are necessary for your project. Finally, selecting the best recording app is also critical, as it will provide you with the necessary tools and features to capture and edit your audio. By considering these factors, you'll be well on your way to creating high-quality recordings. So, let's start by exploring the different iPhone models available and how to choose the right one for your recording needs.
Choose the Right iPhone Model
When it comes to recording a video on an iPhone, choosing the right model is crucial to ensure you get the best possible video quality. If you're planning to record a lot of videos, consider investing in a newer iPhone model, such as the iPhone 13 or later, which offers advanced camera features like 4K video recording at 60fps, slow-motion video, and extended dynamic range. These features will give your videos a more professional look and feel. If you're on a budget, the iPhone 12 or iPhone 11 series are also great options, offering 4K video recording at 30fps and other features like optical image stabilization and time-lapse video. However, if you have an older iPhone model, such as the iPhone 8 or earlier, you may not have access to these advanced features, and your video quality may not be as good. Ultimately, the right iPhone model for you will depend on your specific needs and budget, so be sure to do your research and choose a model that fits your video recording goals.
Understand Your Recording Goals
When it comes to recording a video on your iPhone, understanding your recording goals is crucial to ensure you capture the desired footage. Before you start recording, take a moment to reflect on what you want to achieve with your video. Are you creating a vlog, a tutorial, a product review, or a social media clip? Knowing your recording goals will help you determine the type of content you need to capture, the tone you want to convey, and the style of your video. For instance, if you're creating a tutorial, you may want to focus on clear instructions, close-ups, and a more formal tone. On the other hand, if you're creating a vlog, you may want to focus on capturing your personality, using a more conversational tone, and incorporating B-roll footage. By understanding your recording goals, you can plan your content, prepare your equipment, and ensure that your final video meets your expectations. Additionally, knowing your recording goals will also help you to stay focused and avoid unnecessary footage, saving you time and effort in the editing process. By taking a few minutes to define your recording goals, you'll be able to create a video that effectively communicates your message and engages your audience.
Select the Best Recording App
When it comes to recording a video on your iPhone, selecting the best recording app is crucial to ensure high-quality footage. While the native Camera app is a great starting point, there are many third-party apps that offer advanced features and functionalities to enhance your recording experience. Some popular options include Filmic Pro, ProCam, and Adobe Premiere Rush, which offer manual controls, 4K resolution, and color grading options. If you're looking for a more user-friendly interface, apps like InShot and VivaVideo offer intuitive editing tools and effects. Consider your specific needs and preferences when choosing a recording app, such as the type of content you're creating, the level of editing required, and the desired output quality. By selecting the best recording app for your needs, you can ensure that your iPhone video recordings are of the highest quality and meet your creative vision.
Recording a Video on iPhone
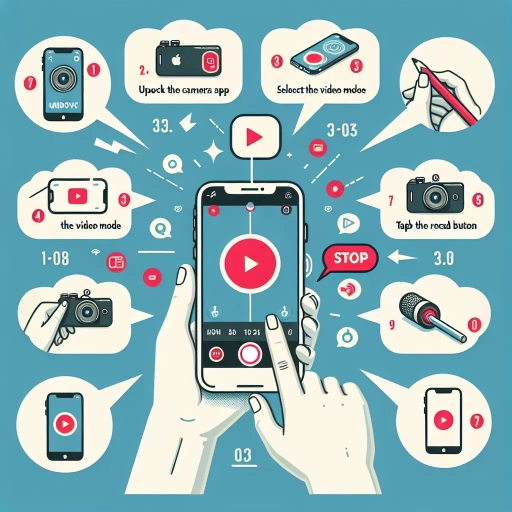
Recording a video on an iPhone is a straightforward process that can be accomplished with just a few taps on the screen. To start, you'll need to access the Camera app, which is usually found on the home screen. Once you've opened the app, you'll have the option to switch between the front and rear cameras, allowing you to choose the best angle for your video. When you're ready to start recording, simply tap the record button, and your iPhone will begin capturing your video. In this article, we'll take a closer look at each of these steps, starting with accessing the Camera app.
Accessing the Camera App
Accessing the camera app on your iPhone is a straightforward process that allows you to capture life's precious moments in the form of photos and videos. To access the camera app, you can use one of the following methods. First, you can find the camera app on your home screen, which is usually located on the bottom dock or on one of your home screens. Simply tap on the camera icon, which resembles a camera, to open the app. Alternatively, you can use Siri to open the camera app by saying "Hey Siri, open camera." You can also access the camera app from the lock screen by swiping left from the lock screen or home screen. Additionally, if you have an iPhone 6s or later, you can use 3D Touch to quickly access the camera app from the home screen. To do this, press firmly on the camera icon, and then tap on "Take Photo" or "Record Video" to open the app directly in the desired mode. Once you've accessed the camera app, you can switch between photo and video modes by tapping on the mode selector at the bottom of the screen. From there, you can start recording a video by tapping the record button, which is represented by a red circle.
Switching Between Cameras
When recording a video on your iPhone, you may want to switch between cameras to capture different angles or perspectives. To do this, tap the camera switch icon, which looks like a camera with arrows on either side, located at the bottom of the screen. This will toggle between the front-facing camera and the rear-facing camera. If your iPhone has a dual-lens camera, you can also switch between the wide-angle lens and the telephoto lens by tapping the "1x" button, which will change to "2x" or "0.5x" depending on the lens you're switching to. Additionally, if you're using an iPhone with a ultra-wide-angle lens, you can switch to it by tapping the "0.5x" button. Switching between cameras can help you capture more dynamic and interesting footage, and can be especially useful when recording videos of yourself or others. For example, you can start recording with the front-facing camera to capture your reaction, and then switch to the rear-facing camera to capture the action behind you. By switching between cameras, you can add more variety and depth to your videos, and make them more engaging for your viewers.
Using the Record Button
When you're ready to start recording, tap the Record button, which is a red circle located at the bottom center of the screen. This will begin the recording process, and you'll see a timer start counting up in the top right corner of the screen. You can record for as long as you want, but keep in mind that the longer you record, the larger the file size will be. If you're recording a long video, you may want to consider breaking it up into smaller segments to make it easier to manage. As you record, you can also switch between the front and rear cameras by tapping the camera switch button, which is located in the bottom right corner of the screen. This allows you to easily switch between recording yourself and recording what's in front of you. Additionally, you can also use the flash by tapping the flash button, which is located in the bottom left corner of the screen. This can be useful if you're recording in low-light conditions. Once you've finished recording, tap the Record button again to stop the recording process. Your video will then be saved to your iPhone's Photos app, where you can view, edit, and share it.
Post-Recording Editing and Sharing
Once you've finished recording your video, the real magic happens in post-recording editing and sharing. This is where you can transform your raw footage into a polished, engaging, and shareable content. With the right editing tools and techniques, you can enhance the visual and audio quality of your video, add creative effects, and make it more appealing to your audience. In this article, we'll explore the essential steps of post-recording editing and sharing, including trimming and cropping your video to remove unwanted parts, adding filters and effects to give it a professional look, and sharing your video on social media to reach a wider audience. By mastering these skills, you'll be able to take your video content to the next level and make a lasting impression on your viewers. So, let's start with the first step: trimming and cropping your video.
Trimming and Cropping Your Video
Trimming and cropping your video are essential steps in the post-recording editing process. Trimming allows you to remove unwanted parts from the beginning or end of your video, while cropping enables you to adjust the video's frame to focus on a specific area. To trim your video, open the Photos app, select the video you want to edit, and tap the "Edit" button. Then, drag the edges of the timeline to select the part of the video you want to keep. You can also split the video into multiple clips and delete the unwanted parts. To crop your video, tap the "Crop" button and adjust the frame to your desired size. You can also rotate the video to change its orientation. Additionally, you can use the "Aspect" feature to change the video's aspect ratio, such as from 16:9 to 1:1. By trimming and cropping your video, you can enhance its overall quality and make it more engaging for your audience.
Adding Filters and Effects
Adding filters and effects to your iPhone video recording can enhance its visual appeal and make it more engaging. To add filters, open the Photos app, select the video you want to edit, and tap the "Edit" button. Then, tap the "Filters" icon, which looks like a series of overlapping circles. You can choose from a range of filters, including Vivid, Dramatic, and Mono, to give your video a unique look. If you want to add more advanced effects, such as text, drawings, or stickers, you can use the "Markup" tool. To access Markup, tap the "More" icon (represented by three horizontal dots) and select "Markup" from the menu. From there, you can add text, drawings, or stickers to your video, and even adjust their size, color, and position. Additionally, you can use third-party apps, such as InShot or Adobe Premiere Rush, to add more complex effects, such as transitions, color adjustments, and audio ducking. These apps often offer a wide range of customization options, allowing you to fine-tune your video's look and feel. By adding filters and effects, you can take your iPhone video recording to the next level and make it more shareable and engaging.
Sharing Your Video on Social Media
Once you've finalized your video, it's time to share it with the world. Social media platforms are an excellent way to get your video seen by a large audience. To share your video on social media, start by selecting the platform you want to use. You can share your video directly from the Photos app on your iPhone. Tap the "Share" icon, which looks like a box with an arrow coming out of it, and then select the social media app you want to use. You can also copy the link to your video and paste it into a social media post. If you want to add some extra flair to your video, you can use the built-in editing features on social media platforms like Instagram and Facebook. These features allow you to add filters, text, and music to your video, making it more engaging and attention-grabbing. Additionally, you can use social media analytics tools to track the performance of your video and see how it's being received by your audience. This can help you refine your video content and improve your social media strategy. By sharing your video on social media, you can increase its visibility, reach a wider audience, and drive more engagement and conversions.