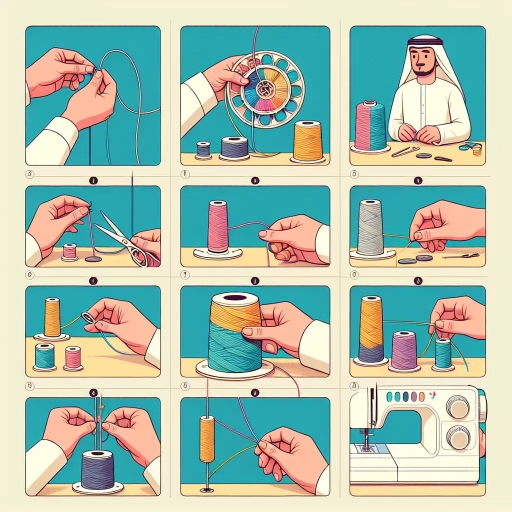
How To Thread Bobbin
Threading a bobbin is a fundamental skill for any sewer, quilter, or crafter. It's a crucial step in preparing your machine for sewing, and it can be a bit tricky if you're new to sewing or haven't done it in a while. In this article, we'll take you through the process of threading a bobbin, from understanding the basics to troubleshooting common issues. We'll start by breaking down the basics of threading a bobbin, including the different types of bobbins and threads, and how to choose the right one for your project. Then, we'll provide a step-by-step guide on how to thread a bobbin, covering everything from preparing your machine to inserting the thread. Finally, we'll address common issues that may arise when threading a bobbin, such as tangled threads or incorrect tension. By the end of this article, you'll be confident in your ability to thread a bobbin like a pro. So, let's get started by understanding the basics of threading a bobbin.
Understanding the Basics of Threading a Bobbin
Threading a bobbin is a fundamental skill in sewing that can seem daunting to beginners, but with practice and patience, it can become second nature. To master the art of threading a bobbin, it's essential to understand the basics of this process. This includes knowing what a bobbin is and its purpose in sewing, as well as the different types of bobbins and their uses. Additionally, having the right tools and materials is crucial for successful bobbin threading. In this article, we will delve into the world of bobbin threading, starting with the basics of what a bobbin is and its purpose in sewing. By understanding the role of a bobbin in the sewing process, you'll be better equipped to tackle the task of threading it with ease. So, let's begin by exploring what a bobbin is and its purpose in sewing.
What is a Bobbin and Its Purpose in Sewing
A bobbin is a small, cylindrical or oval-shaped device used in sewing machines to hold the lower thread, also known as the bobbin thread. Its primary purpose is to provide a continuous supply of thread to the sewing machine, allowing for smooth and uninterrupted stitching. The bobbin is typically made of plastic or metal and has a small hole in the center, through which the thread is passed. The thread is then wound around the bobbin in a specific pattern, creating a compact and organized spool of thread. When the sewing machine is in operation, the bobbin rotates, releasing the thread as needed, allowing the machine to create a continuous stitch. The bobbin plays a crucial role in the sewing process, as it helps to maintain tension, prevent tangles, and ensure a smooth, even stitch. By understanding the purpose and function of a bobbin, sewers can better appreciate the importance of proper threading and maintenance, leading to improved sewing results and reduced frustration.
The Different Types of Bobbins and Their Uses
There are several types of bobbins available, each designed for specific sewing tasks and machines. The most common type is the plastic bobbin, which is suitable for general sewing and comes in various sizes. Metal bobbins are also popular, offering durability and resistance to wear and tear. They are ideal for heavy-duty sewing, quilting, and embroidery. Another type is the magnetic bobbin, which is designed for use with magnetic hooks and is often used in industrial sewing machines. The pre-wound bobbin is a convenient option, as it comes with thread already wound onto it, saving time and effort. Some bobbins are also designed for specific sewing techniques, such as the longarm bobbin for quilting and the wing bobbin for sewing stretchy fabrics. Understanding the different types of bobbins and their uses is essential for achieving professional-looking results and ensuring smooth sewing operations.
Basic Tools and Materials Needed for Threading a Bobbin
To thread a bobbin, you will need a few basic tools and materials. First and foremost, you will need a bobbin itself, which is a small spool that holds the thread. You will also need a sewing machine, as well as a spool of thread that matches the color and type of fabric you are working with. Additionally, you will need a pair of scissors to cut the thread, and a small tool such as a seam ripper or a pin to help guide the thread through the bobbin's small holes. Some sewing machines may also come with a built-in bobbin winder, which can make the process of threading the bobbin much easier. It's also a good idea to have a small container or tray to hold the thread and other materials, keeping them organized and within reach. Having these basic tools and materials on hand will make the process of threading a bobbin much simpler and more efficient.
Step-by-Step Guide to Threading a Bobbin
Threading a bobbin is a crucial step in sewing, and it can be a daunting task for beginners. However, with a step-by-step guide, you can master this skill in no time. To thread a bobbin successfully, you need to prepare the bobbin and thread for threading, pass the thread through the bobbin's small hole, and wind the thread around the bobbin and secure it. In this article, we will break down each of these steps in detail, starting with preparing the bobbin and thread for threading. By following these simple steps, you'll be able to thread your bobbin with ease and get back to sewing in no time. So, let's get started by preparing the bobbin and thread for threading.
Preparing the Bobbin and Thread for Threading
When preparing the bobbin and thread for threading, it's essential to start with a clean and clear workspace. Begin by removing any debris or old thread from the bobbin and the machine's bobbin area. Next, cut a length of thread, approximately 18-20 inches long, and gently pull it to remove any tangles or twists. Hold the thread between your thumb and index finger, with the end of the thread facing away from you. Locate the bobbin's small notch or hole, usually found on the top or side of the bobbin, and insert the thread into it. Gently pull the thread through the notch until it's seated snugly, making sure not to pull too hard, which can cause the thread to break. Once the thread is in place, give it a gentle tug to ensure it's secure. Now, take the thread and wrap it around the bobbin in a clockwise direction, keeping the thread taut but not too tight. As you wrap the thread, make sure to maintain a consistent tension to prevent any twists or tangles. Finally, cut the excess thread, leaving a small tail, and your bobbin is now ready to be threaded into the machine. By following these simple steps, you'll be able to prepare your bobbin and thread for threading, ensuring a smooth and efficient threading process.
Passing the Thread Through the Bobbin's Small Hole
When threading a bobbin, one of the most crucial steps is passing the thread through the small hole. This can be a bit tricky, but with the right technique, you can master it easily. To start, hold the bobbin in one hand and the thread in the other. Locate the small hole on the bobbin, which is usually located on the side or top. Take the thread and insert one end into the hole, making sure it's seated properly. You may need to use a bit of force to get the thread to pass through, but be gentle so you don't damage the bobbin or the thread. Once the thread is through, pull it gently to make sure it's secure. You should feel a slight resistance as the thread catches on the bobbin's mechanism. If the thread doesn't pass through easily, try rotating the bobbin slightly while pushing the thread through. This can help the thread find its way through the hole. With the thread securely in place, you can now proceed to wind the bobbin with the desired amount of thread. Remember to keep the thread taut but not too tight, as this can cause the bobbin to become misshapen. By following these simple steps, you should be able to pass the thread through the bobbin's small hole with ease and get on with your sewing project.
Winding the Thread Around the Bobbin and Securing It
To wind the thread around the bobbin and secure it, start by holding the bobbin in one hand and the thread in the other. Locate the small notch or hole on the bobbin, which is usually found at the top or side. Insert the thread into the notch, leaving a small tail of about 1-2 inches. Hold the thread taut and begin winding it around the bobbin in a clockwise direction. Make sure to keep the thread taut and evenly spaced as you wind. As you wind, gently pull the thread to ensure it is not twisted or tangled. Once you have wound the desired amount of thread, cut the thread close to the bobbin, leaving a small tail. To secure the thread, pass the tail through the notch or hole and pull it gently to tighten. This will prevent the thread from coming loose while sewing. Finally, trim the excess thread close to the bobbin, and your bobbin is now ready to use.
Troubleshooting Common Issues with Threading a Bobbin
When it comes to threading a bobbin, many sewers and quilters encounter common issues that can be frustrating and time-consuming to resolve. However, with the right techniques and troubleshooting strategies, these problems can be easily overcome. In this article, we will explore three common issues that can arise when threading a bobbin, including dealing with tangled or twisted thread, resolving issues with the bobbin not spinning properly, and fixing problems with the thread not winding evenly. By understanding the causes of these issues and learning how to troubleshoot them, you can save time and improve the quality of your sewing and quilting projects. One of the most common issues that can occur when threading a bobbin is dealing with tangled or twisted thread, which can cause knots and uneven tension in your stitches. In the next section, we will take a closer look at how to deal with tangled or twisted thread and get your bobbin threading smoothly.
Dealing with Tangled or Twisted Thread
Dealing with tangled or twisted thread can be frustrating, but there are a few simple steps you can take to resolve the issue. First, stop what you're doing and take a deep breath - it's easier to deal with tangles when you're calm. Next, gently tease out the tangle with your fingers or a blunt tool like a chopstick or pencil. If the tangle is particularly stubborn, you can try soaking the thread in warm water for a few minutes to loosen it. Once you've removed the tangle, take a moment to rewind the thread onto the spool or bobbin, making sure it's not twisted or overlapping. To prevent tangles from happening in the future, try to keep your thread organized by storing it in a cool, dry place, away from direct sunlight. You can also use a thread conditioner or wax to help reduce static and prevent tangles. If you're still having trouble, consider using a high-quality thread that's designed to be tangle-resistant. By following these simple steps, you should be able to deal with tangled or twisted thread and get back to sewing in no time.
Resolving Issues with the Bobbin Not Spinning Properly
When the bobbin is not spinning properly, it can be frustrating and disrupt the sewing process. To resolve this issue, first, check if the bobbin is properly seated in the bobbin case. Ensure it is aligned with the spindle and the tension spring is not obstructing its movement. Next, inspect the bobbin for any debris or lint accumulation, which can prevent it from spinning smoothly. Gently remove any blockages using a small brush or a cotton swab. If the bobbin is damaged or worn out, consider replacing it with a new one. Additionally, check the bobbin case for any signs of wear or damage, as this can also affect the bobbin's spinning motion. If the issue persists, consult the user manual or contact the manufacturer for further assistance. By following these steps, you can identify and resolve the problem, ensuring your bobbin spins properly and your sewing project continues smoothly.
Fixing Problems with the Thread Not Winding Evenly
When the thread is not winding evenly onto the bobbin, it can be frustrating and affect the overall quality of your sewing project. To fix this issue, start by checking the thread tension. If the tension is too tight, it can cause the thread to wind unevenly, so try loosening it slightly. Next, inspect the bobbin winder and make sure it is properly seated and aligned with the machine's spindle. If the winder is not aligned correctly, it can cause the thread to wind unevenly, so adjust it as needed. Additionally, check the thread for any tangles or knots, as these can also cause uneven winding. If the thread is tangled, gently remove the tangles and re-thread the machine. If the problem persists, try using a different type of thread or a different bobbin winder. In some cases, the issue may be with the machine itself, so consult the user manual or contact the manufacturer for further assistance. By following these steps, you should be able to resolve the issue of uneven thread winding and get back to sewing with ease.