How To Authorize Computer Itunes
Here is the introduction paragraph: Are you tired of being unable to access your iTunes content on your computer? Do you want to enjoy your favorite music, movies, and TV shows without any restrictions? Authorizing your computer on iTunes is the solution to your problem. In this article, we will guide you through the process of authorizing your computer on iTunes, so you can access your content without any hassle. To start with, it's essential to understand what iTunes authorization is and how it works. Understanding iTunes Authorization is crucial in managing your digital content, and it's the first step in authorizing your computer on iTunes. By the end of this article, you will be able to authorize your computer, manage authorized computers, and enjoy seamless access to your iTunes content. Let's dive into the world of iTunes authorization and start with Understanding iTunes Authorization.
Understanding iTunes Authorization
Here is the introduction paragraph: Understanding iTunes authorization is crucial for any Apple device user who wants to access their purchased content across multiple devices. iTunes authorization is a process that allows users to access their purchased music, movies, and TV shows on up to five authorized computers. But what exactly is iTunes authorization, and why is it necessary? In this article, we will explore the concept of iTunes authorization, its necessity, and the benefits of authorizing your computer on iTunes. By the end of this article, you will have a clear understanding of how to manage your digital content and enjoy seamless access to your favorite music and videos. So, let's start by understanding what iTunes authorization is.
What is iTunes Authorization
iTunes authorization is a process that allows you to play your iTunes Store purchases on up to five computers. When you authorize a computer, you're giving it permission to access your iTunes account and play your purchased content. This is a security measure to prevent unauthorized access to your account and protect your purchased music, movies, and TV shows. To authorize a computer, you need to sign in with your Apple ID and password, and then click the "Authorize" button. Once a computer is authorized, you can play your iTunes purchases on it without needing to sign in again. You can also deauthorize a computer if you no longer want to access your iTunes account from that device. It's worth noting that you can only authorize up to five computers at a time, so if you need to authorize a new computer, you may need to deauthorize an old one first.
Why is iTunes Authorization Necessary
The iTunes authorization process is a security measure implemented by Apple to protect the digital rights of content creators and ensure that users are accessing their purchased or rented content legally. When you authorize a computer on iTunes, you are essentially giving Apple permission to associate that device with your Apple ID, allowing you to access and play your purchased or rented content on that specific computer. This authorization process is necessary for several reasons. Firstly, it helps to prevent piracy and unauthorized sharing of copyrighted content. By limiting the number of devices that can access your content, Apple can reduce the risk of your music, movies, or TV shows being shared or distributed without permission. Secondly, authorization helps to ensure that you are accessing your content on a trusted device, reducing the risk of malware or other security threats. Finally, authorization is necessary for Apple to keep track of your content licenses and ensure that you are not exceeding the allowed number of devices or plays. By authorizing a computer on iTunes, you are helping to protect the rights of content creators and ensuring that you can continue to access and enjoy your purchased or rented content safely and securely.
Benefits of Authorizing Your Computer on iTunes
Authorizing your computer on iTunes is a straightforward process that offers numerous benefits. By authorizing your computer, you can access and play your purchased iTunes content, including music, movies, and TV shows, on up to five authorized computers. This means you can enjoy your favorite media on multiple devices, making it convenient to share with family members or use on different computers at home or work. Additionally, authorizing your computer allows you to sync your iOS devices, such as iPhones and iPads, with your iTunes library, ensuring that your music, movies, and TV shows are always up-to-date and accessible across all your devices. Furthermore, authorizing your computer enables you to access and download previous purchases from the iTunes Store, so you can easily retrieve and enjoy content you've bought in the past. Overall, authorizing your computer on iTunes provides a seamless and convenient way to manage and enjoy your digital media collection across multiple devices.
Authorizing Your Computer on iTunes
Here is the introduction paragraph: To access your purchased music, movies, and other content on iTunes, you need to authorize your computer. Authorizing your computer on iTunes is a straightforward process that requires you to sign in with your Apple ID and password. However, before you start the authorization process, it's essential to ensure that your computer meets the necessary requirements. In this article, we will guide you through the step-by-step process of authorizing your computer on iTunes, discuss the requirements for authorization, and provide troubleshooting tips for common issues that may arise during the process. By the end of this article, you will be able to successfully authorize your computer and enjoy your iTunes content. So, let's get started with the step-by-step guide to authorizing your computer on iTunes.
Step-by-Step Guide to Authorizing Your Computer
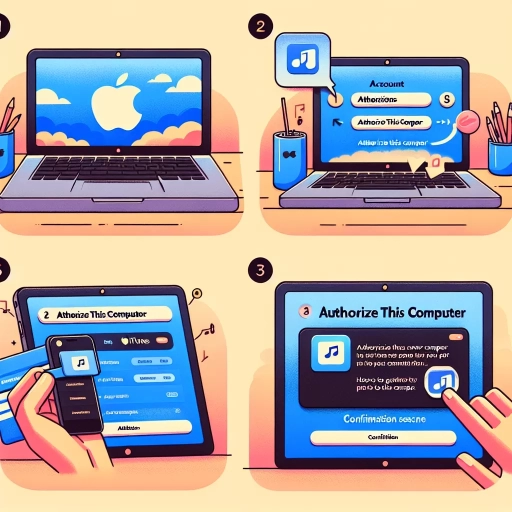
To authorize your computer on iTunes, follow these steps: First, open iTunes on your computer and sign in with your Apple ID and password. Next, click on "Account" in the top menu bar and select "Authorizations" from the drop-down menu. Then, click on "Authorize This Computer" and enter your Apple ID and password again to confirm. You will then see a message indicating that your computer has been authorized. You can authorize up to five computers at a time, and you can also deauthorize a computer if you no longer want to use it with your iTunes account. It's also important to note that you will need to reauthorize your computer if you reinstall iTunes or change your Apple ID. By following these steps, you can easily authorize your computer on iTunes and start enjoying your music, movies, and other content.
Requirements for Authorizing Your Computer
To authorize your computer on iTunes, you'll need to meet certain requirements. First and foremost, you must have an Apple ID, which is the account you use to access Apple services like the iTunes Store, Apple Music, and iCloud. If you don't have an Apple ID, you can create one for free on the Apple website. Next, you'll need to ensure that your computer is running a compatible operating system, such as macOS or Windows. Additionally, you'll need to have the latest version of iTunes installed on your computer. You can check for updates in the iTunes menu or download the latest version from the Apple website. It's also important to note that you can authorize up to five computers per Apple ID, so if you've already authorized five computers, you'll need to deauthorize one before authorizing a new one. Furthermore, if you're using a PC, you may need to disable any firewall or antivirus software that could be blocking the authorization process. By meeting these requirements, you'll be able to successfully authorize your computer on iTunes and access your purchased music, movies, and other content.
Troubleshooting Common Issues with iTunes Authorization
When troubleshooting common issues with iTunes authorization, there are several steps you can take to resolve the problem. First, ensure that you are using the correct Apple ID and password to authorize your computer. If you're still having trouble, try deauthorizing and then reauthorizing your computer. This can often resolve issues related to corrupted authorization files. Additionally, check that your computer's date and time settings are accurate, as incorrect settings can prevent authorization. If you're using a firewall or antivirus software, try temporarily disabling it to see if it's interfering with the authorization process. You can also try resetting the iTunes Store cache, which can sometimes resolve issues related to authorization. If none of these steps resolve the issue, you may need to contact Apple support for further assistance. It's also worth noting that you can only authorize up to five computers per Apple ID, so if you've reached this limit, you'll need to deauthorize one of your other computers before you can authorize a new one. By following these troubleshooting steps, you should be able to resolve common issues with iTunes authorization and get back to enjoying your music and other content.
Managing Authorized Computers on iTunes
Managing authorized computers on iTunes is a crucial aspect of maintaining control over your digital music and video library. With the ability to authorize up to five computers, you can access your iTunes content on multiple devices. However, managing these authorized computers can be a daunting task, especially when you need to deauthorize a computer or transfer authorization to a new device. In this article, we will explore the process of managing authorized computers on iTunes, including how to deauthorize a computer, managing multiple authorized computers, and transferring iTunes authorization to a new computer. By understanding these processes, you can ensure that your iTunes content is secure and accessible on the devices you need. If you need to remove a computer from your authorized list, read on to learn how to deauthorize a computer on iTunes.
How to Deauthorize a Computer on iTunes
To deauthorize a computer on iTunes, follow these steps. First, open iTunes on the computer you want to deauthorize. Then, click on "Account" in the top menu bar and select "View My Account" from the drop-down menu. You will be prompted to enter your Apple ID and password to sign in. Once you're signed in, click on "Manage Devices" and select the computer you want to deauthorize from the list of authorized devices. Click on "Remove" to deauthorize the computer. Alternatively, you can also deauthorize all computers at once by clicking on "Deauthorize All" and confirming that you want to deauthorize all computers associated with your Apple ID. Note that deauthorizing a computer will remove its access to your iTunes library and any content you've purchased or downloaded from the iTunes Store. If you're selling or giving away your computer, it's a good idea to deauthorize it to prevent unauthorized access to your iTunes account.
Managing Multiple Authorized Computers on iTunes
Managing multiple authorized computers on iTunes is a straightforward process that allows you to access your purchased content across various devices. To start, you need to authorize each computer you want to use with your iTunes account. This can be done by opening iTunes, signing in with your Apple ID, and clicking on "Account" followed by "Authorizations." From there, you can authorize up to five computers at a time, which is the maximum number allowed by Apple. If you need to authorize more than five computers, you'll need to deauthorize one of your existing computers first. To deauthorize a computer, simply go to the "Account" menu, select "View My Account," and click on "Manage Devices." From there, you can remove any device that you no longer want to be authorized. It's also worth noting that you can deauthorize all computers at once by clicking on "Deauthorize All" in the "Account" menu. This can be useful if you're selling or giving away a computer and want to ensure that your iTunes account is no longer linked to it. By managing your authorized computers effectively, you can easily access your iTunes content across multiple devices and enjoy a seamless listening experience.
Transferring iTunes Authorization to a New Computer
Transferring iTunes authorization to a new computer is a straightforward process that allows you to access your purchased content on a different device. To do this, you'll need to deauthorize your old computer and then authorize the new one. Start by opening iTunes on your old computer and signing in with your Apple ID. Then, go to the "Account" menu and select "View My Account." Click on "Manage Devices" and find the computer you want to deauthorize. Click "Remove" to deauthorize the computer. Next, open iTunes on your new computer and sign in with the same Apple ID. Go to the "Account" menu and select "View My Account." Click on "Manage Devices" and then click "Authorize This Computer." You'll be prompted to enter your Apple ID password to complete the authorization process. Once you've authorized your new computer, you'll be able to access all of your purchased content, including music, movies, and TV shows. It's worth noting that you can authorize up to five computers at a time, so you can easily transfer your authorization to a new computer without having to deauthorize all of your other devices.