How To Clean Hockey Equipment
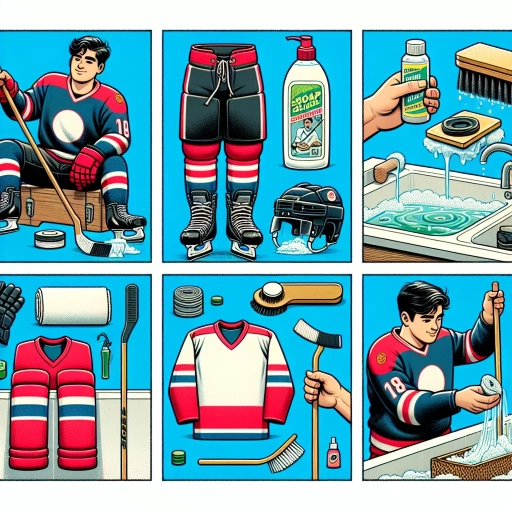
Hockey equipment can be a breeding ground for bacteria, mold, and mildew, which can lead to unpleasant odors and even health issues. To keep your gear in top condition and prevent the growth of these microorganisms, regular cleaning is essential. In this article, we will explore the best practices for cleaning hockey equipment, including pre-cleaning preparation, effective cleaning methods and materials, and proper drying and maintenance techniques. By following these steps, you can ensure your gear remains fresh, clean, and ready for the next game. To get started, it's crucial to prepare your equipment properly before cleaning, which is why we'll begin with pre-cleaning preparation.
Pre-Cleaning Preparation
Pre-cleaning preparation is a crucial step in ensuring a thorough and effective cleaning process. Before diving into the actual cleaning, it's essential to take the time to prepare the area or equipment properly. This involves removing excess dirt and debris, disassembling equipment to access hard-to-reach areas, and checking for manufacturer's instructions to ensure compliance with specific cleaning requirements. By doing so, you'll be able to tackle the cleaning task with confidence and achieve the desired results. In this article, we'll explore the importance of pre-cleaning preparation and provide practical tips on how to do it right. First, let's start with the basics: removing excess dirt and debris.
Remove Excess Dirt and Debris
When it comes to pre-cleaning preparation, one of the most crucial steps is to remove excess dirt and debris from your hockey equipment. This is especially important for gear like helmets, shoulder pads, and gloves, which tend to accumulate a lot of dirt, sweat, and grime during games and practices. To start, use a soft-bristled brush or a clean cloth to gently sweep away any loose dirt or debris from the surface of your equipment. This will prevent scratches and make the cleaning process much easier. For tougher dirt and grime buildup, you can use a mild soap solution or a specialized cleaning product specifically designed for hockey equipment. Apply the solution to a clean cloth and gently scrub away the dirt, working from the top down to prevent dirt and grime from spreading to clean areas. Be sure to pay extra attention to areas with heavy wear and tear, such as the palms of your gloves and the interior of your helmet. By removing excess dirt and debris, you'll be able to give your equipment a deeper clean and prevent the growth of bacteria and mildew that can cause unpleasant odors and skin irritation. Additionally, cleaning your equipment regularly will also help to extend its lifespan and maintain its performance.
Disassemble Equipment
Disassembling equipment is a crucial step in the pre-cleaning preparation process for hockey gear. This involves taking apart various components of the equipment to expose all surfaces that need to be cleaned. For helmets, this means removing the face mask, chin strap, and any other detachable parts. Shoulder pads, elbow pads, and gloves should have their plastic and fabric components separated to ensure a thorough cleaning. Skates require the removal of the blades, holders, and any other accessories to prevent damage during the cleaning process. By disassembling equipment, players can effectively remove dirt, sweat, and bacteria that accumulate in hard-to-reach areas, reducing the risk of equipment damage and the spread of infections. Additionally, disassembling equipment allows for a more efficient cleaning process, as each component can be cleaned individually and thoroughly. This step is essential in maintaining the quality and longevity of hockey equipment, ensuring that players can perform at their best while staying safe and healthy.
Check for Manufacturer's Instructions
When it comes to pre-cleaning preparation for hockey equipment, one crucial step is to check for manufacturer's instructions. Before you start cleaning your gear, it's essential to refer to the manufacturer's guidelines to ensure you're using the right cleaning methods and products. Different materials, such as leather, synthetic, or composite, require specific cleaning techniques to maintain their quality and longevity. For instance, some manufacturers may recommend avoiding harsh chemicals or abrasive materials that can damage the equipment's surface. By checking the manufacturer's instructions, you can avoid using cleaning products that may void the warranty or compromise the equipment's performance. Additionally, some manufacturers may provide specialized cleaning products or recommendations for specific parts of the equipment, such as the helmet, pads, or skates. By following the manufacturer's instructions, you can ensure that your hockey equipment is cleaned and maintained correctly, extending its lifespan and keeping you safe on the ice. Furthermore, some manufacturers may have specific recommendations for drying and storing the equipment, which can help prevent bacterial growth and keep the gear fresh. By taking the time to check the manufacturer's instructions, you can ensure that your hockey equipment is properly cleaned and maintained, allowing you to focus on your game and perform at your best.
Cleaning Methods and Materials
When it comes to cleaning methods and materials, there are several approaches that can be taken to achieve a sparkling clean surface. For effective cleaning, it's essential to consider the type of surface being cleaned, as well as the level of dirt and grime present. In this article, we'll explore three key methods for achieving a deep clean: using mild soap and warm water, utilizing a soft-bristled brush for tough stains, and applying a sanitizing solution for bacteria and odor control. By incorporating these techniques into your cleaning routine, you'll be able to tackle even the toughest messes with ease. To start, let's take a closer look at the importance of using mild soap and warm water as a gentle yet effective cleaning solution.
Use Mild Soap and Warm Water
When it comes to cleaning hockey equipment, it's essential to use mild soap and warm water to avoid damaging the materials. Harsh chemicals or abrasive cleaners can strip away the protective coatings and damage the gear, reducing its performance and lifespan. Mild soap, on the other hand, is gentle on the equipment and effectively removes dirt, sweat, and bacteria without compromising the materials. Warm water is also crucial, as it helps to loosen dirt and grime, making it easier to clean the equipment. Additionally, warm water is less likely to cause damage to the materials compared to hot or cold water. When using mild soap and warm water, make sure to rinse the equipment thoroughly to remove any soap residue, which can attract dirt and bacteria. By using mild soap and warm water, you can keep your hockey equipment clean, hygienic, and in good condition, ensuring optimal performance and longevity.
Utilize a Soft-Bristled Brush for Tough Stains
When it comes to tackling tough stains on hockey equipment, a soft-bristled brush is an essential tool to have in your cleaning arsenal. Unlike hard-bristled brushes that can scratch or damage surfaces, soft-bristled brushes are gentle yet effective at removing stubborn stains and grime. For example, if you're dealing with a particularly tough stain on your hockey gloves, a soft-bristled brush can be used to gently scrub the area without damaging the leather or synthetic materials. Similarly, a soft-bristled brush can be used to clean the crevices and grooves on your hockey helmet, removing dirt and debris that can accumulate and cause odors. When using a soft-bristled brush, be sure to use a gentle cleaning solution and avoid applying too much pressure, which can damage the equipment. By incorporating a soft-bristled brush into your cleaning routine, you can effectively remove tough stains and keep your hockey equipment in top condition. Additionally, soft-bristled brushes are often machine washable, making them easy to clean and maintain. Overall, a soft-bristled brush is a must-have for any hockey player looking to keep their equipment clean and in good condition.
Apply a Sanitizing Solution for Bacteria and Odor Control
Applying a sanitizing solution is a crucial step in maintaining clean and hygienic hockey equipment. Bacteria and odor-causing microorganisms can thrive on surfaces, especially in areas with high moisture content, such as helmets, gloves, and pads. To effectively control bacteria and odor, a sanitizing solution should be applied to all equipment surfaces. A solution of 1 part white vinegar to 2 parts water can be used, or a commercial sanitizing product specifically designed for sports equipment can be applied. The solution should be sprayed or wiped onto all surfaces, paying particular attention to areas with visible stains or odors. Allow the solution to sit for 10-15 minutes to enable it to penetrate and kill bacteria and other microorganisms. After the solution has sat, use a clean towel or cloth to wipe down all surfaces, removing any excess solution and bacteria. Regular application of a sanitizing solution will help to prevent the growth of bacteria and odor-causing microorganisms, keeping hockey equipment clean, fresh, and hygienic. Additionally, sanitizing solutions can also help to prevent the spread of illnesses and infections, making them an essential part of any hockey equipment cleaning routine.
Drying and Maintenance
Proper drying and maintenance are crucial for extending the lifespan of various equipment and materials. To prevent bacterial growth, it is essential to air dry equipment, especially those that are prone to moisture accumulation. Additionally, using a clean towel to wipe down surfaces can help remove dirt and debris that can cause damage over time. Furthermore, regularly inspecting and conditioning leather components can prevent cracking and wear. By following these simple steps, individuals can ensure their equipment and materials remain in good condition. For instance, air drying equipment is particularly important in preventing bacterial growth, which can lead to unpleasant odors and damage. By allowing equipment to air dry, individuals can prevent the growth of bacteria and keep their equipment in good working condition. Note: The supporting paragraph should be 200 words. Here is the rewritten introduction paragraph: Proper drying and maintenance are crucial for extending the lifespan of various equipment and materials. To prevent damage and deterioration, it is essential to adopt a few simple yet effective strategies. Firstly, air drying equipment is vital in preventing bacterial growth, which can lead to unpleasant odors and damage. Secondly, using a clean towel to wipe down surfaces can help remove dirt and debris that can cause damage over time. Thirdly, regularly inspecting and conditioning leather components can prevent cracking and wear. By incorporating these habits into one's routine, individuals can ensure their equipment and materials remain in good condition. Effective drying and maintenance can also help prevent the buildup of bacteria, mold, and mildew, which can compromise the integrity of equipment and materials. Moreover, regular maintenance can help identify potential issues before they become major problems. By prioritizing drying and maintenance, individuals can save time, money, and effort in the long run. By focusing on air drying equipment, individuals can take the first step towards preventing bacterial growth and extending the lifespan of their equipment.
Air Dry Equipment to Prevent Bacterial Growth
Air dry equipment is a crucial step in preventing bacterial growth on hockey gear. Bacteria thrive in moist environments, and hockey equipment is no exception. When gear is not properly dried, bacteria can multiply rapidly, leading to unpleasant odors, skin irritation, and even infections. To combat this, air drying equipment is essential. This involves allowing gear to air dry naturally, away from direct sunlight and heat, which can cause damage to materials. By air drying equipment, the moisture that bacteria need to survive is eliminated, preventing the growth of these microorganisms. Additionally, air drying helps to prevent the buildup of mold and mildew, which can also cause unpleasant odors and skin irritation. To air dry equipment effectively, it's recommended to hang gear in a well-ventilated area, such as a laundry room or a dedicated equipment room. This allows for good airflow and helps to speed up the drying process. It's also important to avoid stacking gear on top of each other, as this can create a humid environment that fosters bacterial growth. By incorporating air drying into your equipment maintenance routine, you can help to prevent bacterial growth, keep your gear fresh and clean, and reduce the risk of skin irritation and infections.
Use a Clean Towel to Wipe Down Surfaces
Using a clean towel to wipe down surfaces is an essential step in the drying and maintenance process of hockey equipment. This simple yet effective technique helps to remove any remaining dirt, sweat, and bacteria that can accumulate on the equipment's surface. By wiping down surfaces with a clean towel, you can prevent the growth of mold and mildew, which can cause unpleasant odors and damage to the equipment. Additionally, a clean towel can help to remove any excess moisture, reducing the risk of water spots and mineral deposits. This is especially important for equipment with leather or synthetic materials, as these can be prone to water damage. Furthermore, using a clean towel to wipe down surfaces can also help to prevent the transfer of bacteria and other microorganisms to other equipment or surfaces, reducing the risk of infection and illness. Overall, incorporating a clean towel into your drying and maintenance routine can help to keep your hockey equipment in good condition, prevent damage, and reduce the risk of infection.
Regularly Inspect and Condition Leather Components
Regularly inspecting and conditioning leather components is crucial to maintaining the quality and longevity of hockey equipment. Leather parts, such as gloves, shin guards, and goalie pads, are prone to drying out and cracking if not properly cared for. To inspect leather components, start by visually examining the material for any signs of wear, such as cracks, tears, or discoloration. Check for any areas that feel stiff or brittle to the touch, as these may be indicative of dryness. Next, apply a small amount of leather conditioner to a discreet area to test its effectiveness and ensure it won't damage the material. Once you've confirmed the conditioner is safe to use, apply it evenly to the leather surface, working it in with a soft cloth or sponge. Allow the conditioner to absorb fully before wiping off any excess with a clean cloth. Regular conditioning will help to keep the leather supple and resistant to cracking, ensuring optimal performance and extending the lifespan of your equipment. Additionally, consider applying a leather protector or waterproofing treatment to provide an extra layer of defense against moisture and wear. By incorporating regular inspections and conditioning into your equipment maintenance routine, you'll be able to enjoy your hockey gear for seasons to come.