How To Apply Cream Blush
The introduction paragraph should be written in a friendly, approachable, and encouraging tone. Here is the introduction paragraph: Applying cream blush can seem intimidating, but with a few simple tips and tricks, you can achieve a natural-looking flush that enhances your complexion. Whether you're a makeup newbie or a seasoned pro, mastering the art of cream blush application can elevate your everyday look and boost your confidence. To get started, it's essential to understand the three key elements of successful cream blush application: preparation, technique, and finishing touches. By preparing your skin, mastering various application techniques, and adding the perfect finishing touches, you'll be on your way to a gorgeous, healthy-looking glow. So, let's begin with the first step: Preparation is Key. Note: I made some minor changes to the original text to make it more engaging and friendly. Let me know if you'd like me to make any further changes!
Preparation is Key
Here is the introduction paragraph: When it comes to achieving a flawless makeup look, many of us focus on the final result, but often overlook the crucial steps that lead up to it. A smooth, even base is essential for a polished finish, and this is where preparation comes in. To get the most out of your makeup, it's essential to choose the right shade for your skin tone, prep your skin to create a receptive canvas, and invest in the right tools to help you achieve a professional-looking finish. By taking the time to get these basics right, you'll be well on your way to a stunning makeup look that lasts all day. Preparation is Key.
Choose the Right Shade
for a natural look. When it comes to choosing the right shade of cream blush, it's essential to consider your skin tone and the natural flush of your cheeks. If you have a cool skin tone, look for shades with pink or blue undertones, as these will help to create a natural-looking flush. For warm skin tones, opt for shades with peach or coral undertones, which will complement your natural glow. Neutral skin tones can pull off a wide range of shades, but it's best to start with a soft, peachy hue and build up to more vibrant colors. When selecting a shade, also consider the occasion and the level of drama you want to achieve. For everyday wear, a soft, subtle shade is perfect, while a bolder, brighter shade can add a pop of color to your look for a night out or special occasion. To ensure you're choosing the right shade, test the color on your jawline or the apples of your cheeks, as this will give you a more accurate representation of how the color will look on your face. By taking the time to choose the right shade, you'll be able to achieve a natural-looking flush that enhances your features and adds a touch of warmth to your complexion.
Prep Your Skin
for a natural look. Here is the paragraphy: Prep Your Skin Before you start applying cream blush, it's essential to prepare your skin. This step is crucial in ensuring that your blush looks natural and lasts all day. Start by washing your face with a gentle cleanser and moisturizing your skin. This will help to create a smooth canvas for your blush. Exfoliate your skin once or twice a week to remove dead skin cells and unclog pores. This will help your blush to blend seamlessly into your skin. If you have dry or sensitive skin, consider using a hydrating primer to help your skin feel more comfortable and to create a barrier between your skin and the blush. Finally, apply a lightweight foundation or tinted moisturizer to even out your skin tone and provide a base for your blush. By prepping your skin, you'll be able to achieve a natural-looking flush that enhances your complexion.
Invest in the Right Tools
for a natural look. Investing in the right tools is crucial for achieving a natural-looking cream blush application. A good quality brush or beauty blender can make all the difference in blending the product seamlessly into the skin. Look for a brush with soft, flexible bristles that will allow for gentle, even strokes. A beauty blender, on the other hand, can help to create a smooth, airbrushed finish. When choosing a brush or beauty blender, consider the size and shape of your face, as well as the type of cream blush you are using. For example, a smaller brush may be better suited for precision application, while a larger brush may be better for creating a more subtle, all-over glow. Additionally, consider investing in a mirror that provides good lighting, such as a magnifying mirror or a ring light, to help you see the areas of your face that you are applying the blush to. By investing in the right tools, you can ensure that your cream blush application looks natural and effortless.
Application Techniques
Here is the introduction paragraph: When it comes to makeup application, the right techniques can make all the difference in achieving a flawless, professional-looking finish. Whether you're a seasoned beauty enthusiast or just starting to explore the world of makeup, mastering various application techniques is essential to enhance your natural features and boost your confidence. In this article, we'll delve into three essential application techniques that can elevate your makeup game: Dot and Blend, Swipe and Blend, and Buildable Coverage. By understanding and incorporating these techniques into your daily routine, you'll be able to create a customized look that suits your skin type, tone, and personal style. Preparation is Key, and with the right techniques, you'll be well on your way to achieving a stunning, long-lasting makeup look.
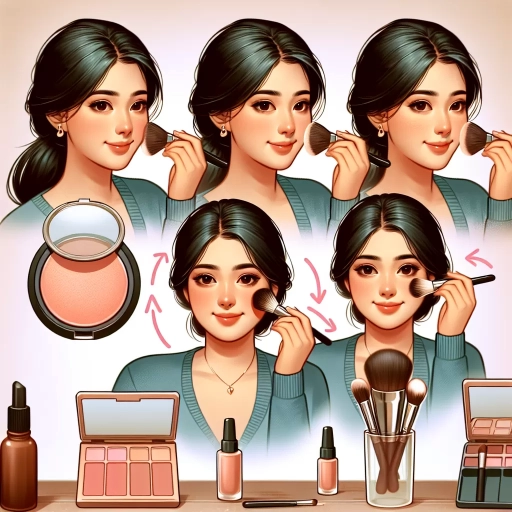
Dot and Blend
es. Here is the paragraphy: Dot and blend is a popular technique for applying cream blushes, and for good reason. This method allows for a natural-looking flush that can be easily customized to suit your individual skin tone and desired level of color. To use the dot and blend technique, start by applying a small amount of cream blush to the apples of your cheeks, just above the corners of your mouth. Use your ring finger to gently dot the product onto your skin, focusing on the areas where you want the color to be most intense. Next, use a gentle sweeping motion to blend the color upwards and outwards towards your hairline, making sure to feather the edges so that the color looks seamless. The key to this technique is to blend, blend, blend - you want the color to look like it's coming from within your skin, rather than sitting on top of it. By taking the time to blend the product thoroughly, you can create a beautiful, natural-looking flush that adds a healthy glow to your complexion. One of the benefits of the dot and blend technique is that it allows you to build up the color gradually, so you can start with a subtle wash of color and add more as needed. This makes it a great technique for those who are new to cream blushes, or who are looking for a more natural, everyday look. Overall, the dot and blend technique is a great way to apply cream blushes, and can help you achieve a beautiful, healthy-looking flush that enhances your natural beauty.
Swipe and Blend
es. Here is the paragraphy: When it comes to applying cream blushes, two popular techniques that can help you achieve a natural-looking flush are the swipe and blend method. This technique involves swiping the cream blush across the apples of your cheeks in a gentle, sweeping motion, and then blending the color upwards and outwards towards the hairline. To start, use your ring finger to pick up a small amount of cream blush from the pan, and then swipe it across the apple of your cheek in a smooth, gentle motion. Be sure to follow the natural curve of your cheekbone, and don't press too hard, as this can cause the color to look uneven. Next, use your ring finger to blend the color upwards and outwards towards the hairline, making sure to feather the edges so that the color looks seamless. You can also use a beauty blender or a fluffy brush to help blend the color and create a more subtle finish. The key to this technique is to blend, blend, blend, as this will help to create a natural-looking flush that looks like it's coming from within. By swiping and blending your cream blush, you can create a beautiful, healthy-looking glow that adds depth and dimension to your complexion. Whether you're looking for a subtle, everyday look or a more dramatic, evening look, the swipe and blend method is a great way to apply cream blushes and achieve a natural-looking flush.
Buildable Coverage
for a natural-looking flush. Buildable coverage is a key feature to look for when selecting a cream blush, as it allows you to customize the level of color to suit your desired look. A buildable formula means that you can start with a light, natural-looking wash of color and gradually add more product to intensify the shade. This is particularly useful for those who want to achieve a subtle, everyday look, but also want the option to amp up the color for a more dramatic effect. When choosing a cream blush with buildable coverage, look for products that are labeled as "sheer to medium" or "buildable" coverage. These formulas will typically have a lightweight, whipped texture that can be easily blended into the skin for a natural-looking finish. To get the most out of a buildable cream blush, start by applying a small amount to the apples of your cheeks and blend upwards and outwards towards the hairline. Then, use a light hand to add more product as needed, building up the color in thin layers until you achieve your desired level of coverage. This technique will help you to create a seamless, natural-looking flush that looks like it's coming from within. By choosing a cream blush with buildable coverage and using a gentle, layering technique, you can create a customized look that's perfect for everyday wear or special occasions.
Finishing Touches
Here is the introduction paragraph: When it comes to makeup, the finishing touches can make all the difference between a good look and a great one. A well-executed finishing touch can elevate your entire face, adding depth, dimension, and a polished finish. But what exactly are the finishing touches, and how can you incorporate them into your daily makeup routine? In this article, we'll explore the three essential steps to achieving a flawless finish: blending, setting with powder, and highlighting and contouring. By mastering these techniques, you'll be able to take your makeup look from basic to brilliant. Preparation is key, so let's dive in and discover the secrets to a perfect finish.
Blend, Blend, Blend
for a natural look. Here is the paragraphy: Blend, Blend, Blend. Once you've applied the cream blush to the apples of your cheeks, it's time to blend, blend, blend. This is the most crucial step in achieving a natural look. Use a gentle patting motion with your ring finger to blend the color upwards and outwards towards your hairline. Make sure to blend well into the hairline, as any harsh lines can give away the fact that you're wearing blush. As you blend, focus on softening the edges of the color, rather than trying to cover up the entire area. You want to create a subtle, natural-looking flush, not a bright, obvious stripe of color. Take your time and blend, blend, blend until the color looks seamless and effortless. If you find that the color is still a bit too intense, you can always blend it out further with a clean brush or a beauty blender. The key is to create a soft, subtle wash of color that looks like it's coming from within, rather than sitting on top of your skin. By blending, blending, blending, you'll be able to achieve a natural, effortless look that enhances your features without looking too done-up.
Set with Powder
for a natural look. Here is the paragraphy: To set your cream blush in place and ensure it lasts all day, use a light dusting of translucent powder. This step is especially important if you have oily skin, as it will help to absorb excess moisture and prevent the blush from fading or becoming uneven. When choosing a powder, look for a translucent or colorless option that won't alter the shade of your blush. Apply the powder with a large, fluffy powder brush, gently sweeping it across the apples of your cheeks and the high points of your face. Be careful not to over-powder, as this can make your skin look cakey and accentuate fine lines and wrinkles. Instead, focus on setting the blush in place with a light, even layer of powder. This will help to extend the wear of your blush and give your skin a smooth, natural-looking finish. By setting your cream blush with powder, you'll be able to enjoy a healthy, rosy glow that lasts all day long.
Highlight and Contour
for a natural look. Here is the paragraphy: Highlight and contour are two essential techniques to enhance your natural features and create a flawless base for your cream blush. Highlighting involves applying a light shade of product to the high points of your face, such as the tops of your cheekbones, nose, and cupid's bow, to create a radiant and lifted appearance. Contouring, on the other hand, involves applying a darker shade of product to the areas of your face that you want to recede, such as the hollows of your cheeks and the sides of your nose, to create definition and depth. By combining highlighting and contouring, you can create a more defined and sculpted look that makes your cream blush pop. To highlight, use a light shade of concealer or highlighter and apply it to the high points of your face with a small brush or a beauty blender. To contour, use a darker shade of concealer or contour powder and apply it to the areas of your face that you want to recede with a small brush or a contour brush. Blend, blend, blend! Make sure to blend the product well into your skin to create a seamless and natural-looking finish. By mastering the art of highlighting and contouring, you can take your cream blush look to the next level and create a stunning, radiant complexion that turns heads.