How To Change Opacity In Google Slides
Here is a 200-word introduction paragraph for the article: In the world of presentation design, visual hierarchy and balance are crucial elements that can make or break the effectiveness of your slide. One often overlooked yet powerful tool in achieving this balance is opacity. In Google Slides, opacity can be used to add depth, create contrast, and draw attention to specific elements. But how do you harness the power of opacity to elevate your presentations? In this article, we will explore the ins and outs of working with opacity in Google Slides, from understanding its basics to adjusting it to best practices for using it effectively. We will start by delving into the concept of opacity and how it works in Google Slides, including the different types of opacity and how to apply them. From there, we will move on to the nitty-gritty of adjusting opacity, including the various tools and techniques available in Google Slides. Finally, we will discuss best practices for using opacity to enhance your presentations and avoid common pitfalls. Let's start by Understanding Opacity in Google Slides.
Understanding Opacity in Google Slides
When creating presentations in Google Slides, it's essential to understand the concept of opacity to enhance the visual appeal and effectiveness of your slides. Opacity refers to the degree of transparency or translucency of an object or element, allowing you to control how much of the background or underlying elements show through. In this article, we'll delve into the world of opacity in Google Slides, exploring what it is and how it works, its importance in presentation design, and common misconceptions about its use. By grasping these concepts, you'll be able to create more engaging, professional, and effective presentations. So, let's start by understanding the basics of opacity and how it works.
What is Opacity and How Does it Work?
Opacity refers to the degree of transparency or opaqueness of an object or image. In the context of Google Slides, opacity determines how visible or invisible an element is on a slide. When an object has high opacity, it appears solid and opaque, while low opacity makes it more transparent. Opacity is measured on a scale from 0 to 100%, where 0% is completely transparent and 100% is completely opaque. By adjusting the opacity of an object, you can create a range of visual effects, such as layering images, creating subtle backgrounds, or adding depth to your slides. In Google Slides, you can adjust the opacity of shapes, images, and text boxes using the "Opacity" slider in the "Format" tab. This allows you to fine-tune the transparency of individual elements and achieve the desired visual effect.
Why is Opacity Important in Presentation Design?
Opacity is a crucial element in presentation design as it allows designers to control the level of transparency of objects, images, and text on a slide. By adjusting the opacity, designers can create a sense of depth, hierarchy, and visual interest, drawing the audience's attention to specific elements. When used effectively, opacity can enhance the overall visual appeal of a presentation, making it more engaging and memorable. For instance, a subtle background image with reduced opacity can add texture and context to a slide without overpowering the main content. Similarly, adjusting the opacity of text or shapes can help create a sense of layering, adding dimensionality to a flat design. Moreover, opacity can be used to create visual effects, such as fade-ins or fade-outs, to emphasize key points or transitions. By mastering opacity, designers can add sophistication and nuance to their presentations, making them more effective at communicating their message.
Common Misconceptions About Opacity in Google Slides
When it comes to working with opacity in Google Slides, there are several common misconceptions that can lead to frustration and confusion. One of the most prevalent misconceptions is that opacity only applies to images. However, opacity can be applied to any element in Google Slides, including text, shapes, and even entire slides. Another misconception is that opacity is only used to make elements transparent. While it's true that opacity can be used to create transparent effects, it can also be used to add depth and dimension to your slides by layering elements with different opacity levels. Some users also believe that opacity is a binary concept, where an element is either fully opaque or fully transparent. In reality, opacity exists on a spectrum, allowing you to fine-tune the level of transparency to achieve the desired effect. Additionally, some users assume that opacity is only applicable to individual elements, when in fact, it can be applied to groups of elements or even entire slides. By understanding these common misconceptions, you can unlock the full potential of opacity in Google Slides and take your presentations to the next level.
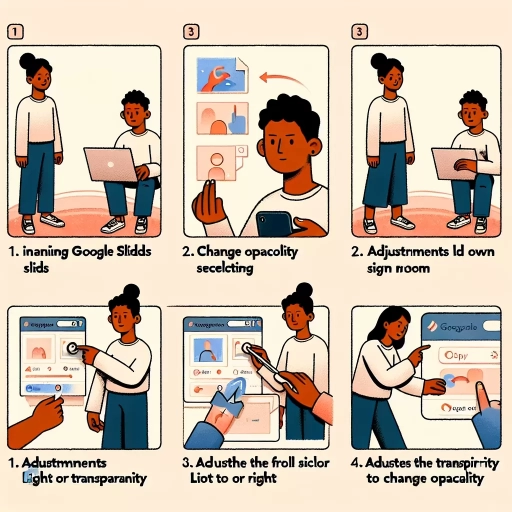
Adjusting Opacity in Google Slides
Adjusting the opacity of elements in Google Slides can significantly enhance the visual appeal and effectiveness of your presentation. By altering the transparency of text, images, or shapes, you can create a layered look, draw attention to specific information, or simply add a touch of sophistication to your design. There are several ways to adjust opacity in Google Slides, including using the transparency slider, entering a specific opacity value, and applying opacity to individual elements or the entire slide. Each of these methods offers a unique level of control and flexibility, allowing you to achieve the desired effect for your presentation. For instance, you can use the transparency slider to quickly adjust the opacity of an element, or enter a specific value for more precise control. Additionally, you can apply opacity to individual elements, such as text or images, or to the entire slide for a uniform look. To get started with adjusting opacity in Google Slides, let's first explore how to use the transparency slider to make quick and easy adjustments.
Using the Transparency Slider to Adjust Opacity
Using the Transparency Slider to Adjust Opacity To adjust the opacity of an object in Google Slides, you can use the transparency slider. This feature allows you to make an object more or less transparent, giving you more control over the overall design of your slide. To access the transparency slider, select the object you want to adjust, then click on the "Format" tab in the top menu. In the "Format" tab, click on the "Adjustments" dropdown menu and select "Transparency." This will open the transparency slider, which is a small bar with a slider that you can move to adjust the opacity of the object. Moving the slider to the left will make the object more transparent, while moving it to the right will make it less transparent. You can also enter a specific percentage value in the "Transparency" field to set the opacity to a precise level. The transparency slider is a useful tool for creating subtle design effects, such as layering objects or creating a sense of depth on your slide. By adjusting the opacity of an object, you can add visual interest and create a more dynamic design. Additionally, the transparency slider can be used to make text or images more readable by adjusting the opacity of the background object. Overall, the transparency slider is a powerful tool in Google Slides that can help you create professional-looking slides with ease.
Entering a Specific Opacity Value for Precise Control
When you need to achieve a specific level of transparency in your Google Slides presentation, entering a specific opacity value is the way to go. This method provides precise control over the opacity of your objects, allowing you to fine-tune the appearance of your slides. To enter a specific opacity value, select the object you want to adjust, then click on the "Format" tab in the top menu. From the dropdown menu, select "Opacity" and a slider will appear. Instead of moving the slider, click on the percentage value next to it, and a text box will open. Here, you can enter a specific value between 0 and 100, with 0 being completely transparent and 100 being completely opaque. For example, if you want an object to be 75% opaque, simply type "75" into the text box and press enter. This will apply the exact level of transparency you need, giving you precise control over the design of your slides. By entering a specific opacity value, you can achieve a consistent look and feel throughout your presentation, and make subtle adjustments to enhance the overall visual impact.
Applying Opacity to Individual Elements or the Entire Slide
Applying opacity to individual elements or the entire slide in Google Slides can enhance the visual appeal and convey the intended message more effectively. To apply opacity to individual elements, select the desired object, such as a shape, image, or text box, and navigate to the "Format" tab in the top menu. Click on "Opacity" and adjust the slider to the desired level of transparency, ranging from 0% (fully transparent) to 100% (fully opaque). Alternatively, you can also use the "Transparency" option in the "Format" tab to achieve a similar effect. When applying opacity to the entire slide, select the slide by clicking on the slide thumbnail in the left-hand sidebar, then navigate to the "Format" tab and click on "Background." From there, you can adjust the opacity of the background image or color using the "Opacity" slider. This can be particularly useful for creating a subtle background that doesn't overpower the content. Additionally, you can also use the "Master" slide to apply opacity to all slides in the presentation at once. To do this, go to the "View" tab, select "Master," and adjust the opacity of the background or individual elements as desired. This will apply the changes to all slides in the presentation, ensuring consistency throughout. By applying opacity to individual elements or the entire slide, you can add depth, create visual interest, and draw attention to specific parts of your presentation. Experimenting with different opacity levels can help you achieve the desired effect and make your presentation more engaging and effective.
Best Practices for Using Opacity in Google Slides
When it comes to creating visually appealing and effective presentations in Google Slides, one of the most powerful tools at your disposal is opacity. By adjusting the opacity of text, images, and other elements, you can add depth, create contrast, and guide the viewer's attention. However, using opacity effectively requires a thoughtful approach. To get the most out of this feature, it's essential to understand the best practices for using opacity in Google Slides. This includes enhancing readability with strategic opacity use, creating a visual hierarchy with opacity and layering, and ensuring consistency in opacity throughout the presentation. By mastering these techniques, you can create presentations that engage, inform, and persuade your audience. In this article, we'll explore these best practices in more detail, starting with the importance of enhancing readability with strategic opacity use.
Enhancing Readability with Strategic Opacity Use
When it comes to enhancing readability in Google Slides, strategic opacity use can be a game-changer. By carefully adjusting the opacity of text, images, and backgrounds, you can create a clear visual hierarchy that guides your audience's attention and improves overall comprehension. One effective approach is to use a subtle gradient or texture in the background, setting the opacity to around 10-20% to add depth without overwhelming the content. For text overlays, a higher opacity of 80-90% can help ensure readability, especially when placed over busy or dark backgrounds. However, be cautious not to overdo it, as excessive opacity can lead to visual noise and decreased legibility. To strike the perfect balance, experiment with different opacity levels and pay attention to how they interact with other design elements. Additionally, consider using opacity to create visual interest by making certain elements, such as icons or graphics, partially transparent. This technique can add a touch of sophistication and professionalism to your slides, making them more engaging and effective at communicating your message. By thoughtfully applying opacity, you can elevate your Google Slides presentations and make a lasting impression on your audience.
Creating Visual Hierarchy with Opacity and Layering
Creating a visual hierarchy with opacity and layering is a powerful technique to guide the audience's attention and emphasize key information in your Google Slides presentation. By strategically using opacity and layering, you can create a clear visual structure that draws the viewer's eye to the most important elements. To achieve this, start by identifying the most critical information you want to convey, such as headings, key statistics, or calls-to-action. Then, use a higher opacity (closer to 100%) for these elements to make them stand out. Conversely, use a lower opacity (closer to 0%) for secondary or background elements to create a sense of depth and hierarchy. You can also use layering to create a sense of dimensionality, by placing more important elements in front of less important ones. For example, you can place a semi-transparent image or shape behind a text box to create a sense of depth, while still keeping the text readable. Additionally, you can use the "bring to front" and "send to back" features in Google Slides to control the layering of your elements. By mastering the use of opacity and layering, you can create a clear and effective visual hierarchy that engages your audience and communicates your message effectively.
Ensuring Consistency in Opacity Throughout the Presentation
Here is the paragraphy: Ensuring consistency in opacity throughout the presentation is crucial to maintain a cohesive and professional look. To achieve this, it's essential to establish a standard opacity level for similar elements, such as text, images, or shapes. This can be done by creating a style guide or a template that outlines the opacity levels for each element. Additionally, using a consistent color scheme and typography can also help to create a cohesive look. When applying opacity to individual elements, it's best to use the same percentage or value throughout the presentation to maintain consistency. For example, if you're using 50% opacity for text overlays, use the same percentage for all text overlays throughout the presentation. This will create a sense of harmony and make the presentation more visually appealing. Furthermore, using the "Master" feature in Google Slides can also help to ensure consistency in opacity. By setting the opacity level for a particular element in the Master slide, it will be applied to all subsequent slides, making it easier to maintain consistency throughout the presentation. By following these best practices, you can ensure that your presentation has a consistent and professional look, making it more engaging and effective for your audience.