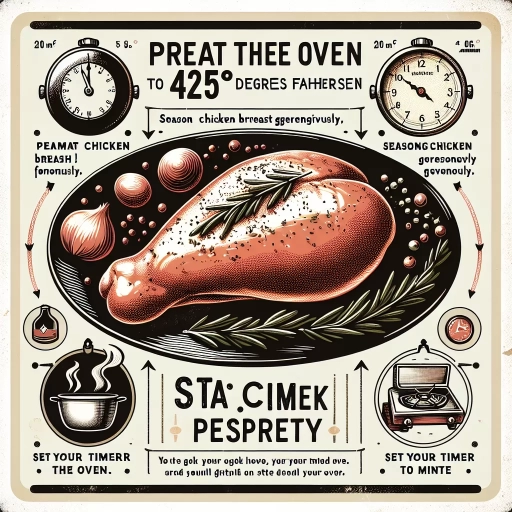
How Long To Cook Chicken Breast At 425
Cooking chicken breast to perfection can be a culinary challenge, especially when it comes to determining the ideal cooking time at a specific temperature. For those wondering how long to cook chicken breast at 425°F, the answer isn't as straightforward as one might hope. The cooking time can vary depending on several factors, making it essential to understand the nuances of chicken preparation. This article will explore the intricacies of cooking chicken breast at 425°F, providing you with the knowledge and techniques needed to achieve juicy, flavorful results every time. We'll begin by examining the various factors that influence cooking time, such as the size and thickness of the chicken breast, as well as whether it's bone-in or boneless. Next, we'll delve into recommended cooking times and techniques, offering practical guidance for different scenarios. Finally, we'll share valuable tips for achieving perfectly cooked chicken breast at 425°F, ensuring that your culinary efforts yield delicious results. To start our journey towards chicken perfection, let's first explore the factors that can affect cooking time and why they play such a crucial role in the process.
Understanding the Factors That Affect Cooking Time
Cooking chicken breasts to perfection can be a culinary challenge, as numerous factors influence the time required to achieve a safe and delicious result. Whether you're a seasoned chef or a home cook, understanding these variables is crucial for consistently preparing moist, flavorful chicken. Three key elements play a significant role in determining cooking time: the thickness of the chicken breast, the starting temperature of the meat, and the accuracy of your oven temperature. The thickness of the chicken breast directly impacts how long it takes for heat to penetrate to the center, ensuring thorough cooking. Similarly, the initial temperature of the meat, whether it's straight from the refrigerator or has been allowed to come to room temperature, affects the overall cooking process. Lastly, the precision of your oven's temperature control can make a substantial difference in achieving the desired doneness. By considering these factors and learning to adjust your cooking methods accordingly, you can master the art of perfectly cooked chicken breasts. In this article, we will delve deeper into understanding the factors that affect cooking time, providing you with valuable insights to enhance your culinary skills and ensure consistently delicious results.
Thickness of the chicken breast
The thickness of the chicken breast is a crucial factor that significantly influences cooking time and the overall quality of the final dish. When it comes to cooking chicken breasts at 425°F (218°C), understanding how thickness impacts the process can help you achieve perfectly cooked, juicy results every time. Chicken breasts naturally vary in thickness, with some parts being thicker than others. This inconsistency can lead to uneven cooking, where thicker sections may remain undercooked while thinner parts become dry and overcooked. To address this issue, many cooks opt to flatten or "butterfly" the chicken breasts to create a more uniform thickness. This technique not only ensures even cooking but also reduces overall cooking time. Generally, a chicken breast that is about 1 inch (2.5 cm) thick will take approximately 20-25 minutes to cook through at 425°F. However, if the thickness increases to 1.5 inches (3.8 cm), the cooking time may extend to 25-30 minutes or more. Conversely, a thinner breast of about 0.5 inches (1.3 cm) might only require 15-18 minutes. It's important to note that these are approximate times and can vary based on other factors such as the starting temperature of the meat and the accuracy of your oven. The relationship between thickness and cooking time is not linear, meaning that doubling the thickness doesn't simply double the cooking time. Heat penetrates meat at a decreasing rate as it cooks, so thicker pieces require disproportionately longer cooking times. This is why very thick chicken breasts can be challenging to cook evenly without drying out the exterior. To ensure consistent results, many chefs recommend using a meat thermometer to check the internal temperature of the chicken breast. The safe internal temperature for chicken is 165°F (74°C). By inserting the thermometer into the thickest part of the breast, you can accurately determine when the chicken is fully cooked, regardless of its thickness. For those who prefer not to flatten their chicken breasts, there are alternative cooking methods that can help manage the challenges posed by varying thickness. One approach is to start cooking the chicken at a high temperature to quickly sear the outside, then lower the temperature to allow the interior to cook through more slowly. Another method is to use a two-stage cooking process, such as pan-searing followed by oven-finishing, which provides greater control over the cooking of different parts of the breast. Understanding the impact of thickness on cooking time empowers home cooks to make informed decisions about preparation methods and cooking techniques. Whether you choose to adjust the thickness of your chicken breasts or adapt your cooking approach, considering this factor will help you achieve consistently delicious results when cooking chicken breasts at 425°F.
Starting temperature of the meat
The starting temperature of the meat is a crucial factor that significantly influences cooking time and the overall quality of the final dish, especially when it comes to preparing chicken breast at 425°F. This often-overlooked aspect can make a substantial difference in achieving perfectly cooked, juicy, and safe-to-eat poultry. When you begin cooking chicken breast straight from the refrigerator, typically at around 40°F (4°C), it will take longer to reach the desired internal temperature compared to meat that has been allowed to sit at room temperature for a short while. This is because the cold meat must first warm up before it can begin to cook through. The temperature gradient between the cold interior and the hot oven creates a longer cooking process, which can sometimes lead to uneven cooking or dry outer layers by the time the center reaches the safe internal temperature. On the other hand, allowing the chicken breast to come closer to room temperature before cooking can help promote more even heating throughout the meat. This practice, often referred to as "tempering," involves letting the chicken sit out of the refrigerator for about 20-30 minutes before cooking. During this time, the meat's temperature will rise to around 60-70°F (15-21°C), reducing the overall temperature difference between the meat and the oven. As a result, the chicken will cook more uniformly and often in less time. However, it's important to note that food safety should always be a primary concern. The USDA recommends not leaving raw poultry out at room temperature for more than two hours to prevent bacterial growth. Therefore, it's crucial to find a balance between tempering the meat and maintaining food safety standards. The starting temperature can also affect the texture and moisture content of the cooked chicken breast. When cold meat is exposed to high heat, it can contract more sharply, potentially squeezing out valuable moisture. This reaction is less pronounced when the meat starts at a slightly warmer temperature, helping to retain more of its natural juices and resulting in a more tender and succulent finished product. For those who prefer to cook their chicken breast directly from frozen, it's important to note that this will significantly increase the cooking time – often by 50% or more. While it's safe to cook chicken from frozen, it requires careful monitoring to ensure that the meat cooks evenly and reaches the safe internal temperature of 165°F (74°C) throughout. Understanding and accounting for the starting temperature of your chicken breast can help you better predict and control cooking times, leading to more consistent and delicious results. Whether you choose to temper your meat or cook it straight from the refrigerator, being aware of this factor will contribute to your overall success in preparing perfectly cooked chicken breast at 425°F.
Accuracy of your oven temperature
The accuracy of your oven temperature plays a crucial role in determining cooking times and ensuring the best results for your chicken breast. While many home cooks assume their ovens are precise, the reality is that oven temperatures can often be inconsistent or inaccurate. This discrepancy can significantly impact your cooking time and the quality of your final dish, especially when cooking at higher temperatures like 425°F (218°C). Oven temperature inaccuracies can stem from various factors, including age, calibration issues, or even the oven's design. Some ovens may run hotter or cooler than the set temperature, sometimes by as much as 25 to 50 degrees Fahrenheit. This variance can lead to undercooked or overcooked chicken breasts, potentially compromising both taste and food safety. To ensure accuracy, it's advisable to invest in an oven thermometer. This inexpensive tool can be placed inside your oven to provide a more precise reading of the actual temperature. By monitoring the thermometer, you can adjust your cooking time or temperature setting accordingly, compensating for any discrepancies between the oven's display and its actual internal temperature. Another factor to consider is temperature fluctuation during cooking. When you open the oven door to check on your chicken, the temperature can drop significantly, sometimes by as much as 50 degrees. This drop means your oven will need time to recover and return to the desired temperature, potentially extending your overall cooking time. The placement of your chicken within the oven can also affect cooking time and temperature accuracy. Most ovens have hot spots, areas where the temperature is higher than others. These spots can cause uneven cooking if not accounted for. To combat this, consider rotating your baking dish halfway through the cooking process to ensure even heat distribution. Preheating your oven properly is another critical step in maintaining temperature accuracy. Many cooks underestimate the time it takes for an oven to reach the desired temperature fully. While your oven may signal that it's preheated, the walls and surfaces inside may not have fully absorbed the heat. For best results, allow your oven to preheat for at least 20-30 minutes before placing your chicken inside. By understanding and accounting for these factors affecting oven temperature accuracy, you can better control your cooking process. This awareness allows you to make necessary adjustments, ensuring your chicken breast is cooked to perfection at 425°F. Remember, consistent and accurate temperatures are key to achieving juicy, flavorful chicken breasts every time.
Recommended Cooking Times and Techniques
Mastering the art of cooking chicken breasts to perfection is a skill that can elevate your culinary repertoire. Whether you're a novice cook or an experienced chef, understanding the nuances of cooking times and techniques is crucial for achieving juicy, flavorful results every time. This comprehensive guide will explore the essential aspects of preparing chicken breasts, focusing on three key areas: the basic timeline for different chicken breast sizes, the importance of using a meat thermometer for precision, and the often-overlooked resting time after cooking. By delving into these critical components, you'll gain the knowledge and confidence to consistently prepare delicious chicken dishes that will impress family and friends alike. Additionally, we'll examine various cooking methods, from pan-searing to baking, and provide expert tips to help you avoid common pitfalls. As we navigate through these topics, you'll discover how factors such as thickness, bone-in versus boneless cuts, and cooking temperature can significantly impact the final result. Understanding these elements is crucial for adapting recipes and achieving optimal results, regardless of the specific chicken breast you're working with.
Basic timeline for different chicken breast sizes
When it comes to cooking chicken breasts at 425°F (218°C), understanding the basic timeline for different sizes is crucial to achieving perfectly cooked, juicy results. The cooking time can vary significantly depending on the thickness and weight of the chicken breasts, so it's essential to adjust accordingly. For small chicken breasts weighing around 4-6 ounces (113-170 grams), the cooking time typically ranges from 18 to 22 minutes. These smaller cuts cook relatively quickly, so it's important to keep a close eye on them to prevent overcooking. Medium-sized chicken breasts, which usually weigh between 6-8 ounces (170-227 grams), generally require about 22 to 26 minutes of cooking time. These are the most common sizes found in grocery stores and are versatile for various recipes. Large chicken breasts, weighing 8-10 ounces (227-283 grams) or more, may need 26 to 30 minutes or even longer to cook through completely. It's worth noting that these timelines are approximate and can be influenced by factors such as the accuracy of your oven temperature, the starting temperature of the chicken (room temperature vs. cold from the refrigerator), and the specific shape of the breast. To ensure food safety and optimal texture, always use a meat thermometer to check that the internal temperature of the thickest part of the chicken breast reaches 165°F (74°C). For more precise cooking, consider the thickness of the chicken breast as well. As a general rule, plan for about 10 minutes of cooking time per inch of thickness. If you have particularly thick chicken breasts, you may want to consider butterflying or pounding them to an even thickness to promote more uniform cooking. To further enhance the cooking process and ensure even doneness, consider brining the chicken breasts for 30 minutes to 2 hours before cooking. This can help maintain moisture and improve flavor. Additionally, letting the chicken rest for 5-10 minutes after cooking allows the juices to redistribute, resulting in a more tender and flavorful dish. For those seeking a crispy exterior, start by searing the chicken breasts in an oven-safe skillet over high heat for 2-3 minutes per side before transferring to the preheated oven. This technique, known as pan-roasting, can create a delicious golden-brown crust while maintaining a juicy interior. Remember that these timelines serve as guidelines, and the best approach is to familiarize yourself with your oven's particularities and the typical size of chicken breasts you usually cook. With practice and attention to detail, you'll soon develop an intuitive sense of timing that will consistently yield perfectly cooked chicken breasts at 425°F.
Using a meat thermometer for precision
Using a meat thermometer for precision is an essential technique that can elevate your chicken breast cooking game to new heights. While recommended cooking times provide a general guideline, they don't account for variations in oven performance, chicken breast thickness, or starting temperature. A meat thermometer eliminates the guesswork and ensures that your chicken is cooked to perfection every time. When cooking chicken breast at 425°F, it's crucial to monitor the internal temperature to achieve both safety and optimal texture. The USDA recommends cooking chicken to a minimum internal temperature of 165°F (74°C) to eliminate harmful bacteria. However, many chefs prefer to cook chicken breast to 160°F (71°C) and then let it rest, as carryover cooking will bring the temperature up to the safe zone while maintaining juiciness. To use a meat thermometer effectively, insert the probe into the thickest part of the chicken breast, avoiding contact with bone or fat. For accuracy, place the thermometer at a slight angle and ensure that the sensor area (usually the bottom 1/2 inch of the probe) is in the center of the meat. Digital instant-read thermometers are particularly useful, providing quick and precise readings. It's important to note that opening the oven frequently to check the temperature can lead to inconsistent cooking and longer overall cooking times. Instead, use an oven-safe digital thermometer with a probe that can remain in the chicken throughout the cooking process. These thermometers often come with programmable alerts, notifying you when the desired temperature is reached. For those who prefer a more traditional approach, a leave-in analog thermometer can also be effective. However, these may require more frequent monitoring and can be less precise than their digital counterparts. When using a meat thermometer, remember that chicken breast temperatures can rise quickly near the end of cooking. Start checking the temperature a few minutes before the estimated cooking time to avoid overcooking. If you're cooking multiple chicken breasts, check each one individually, as they may cook at slightly different rates. By incorporating a meat thermometer into your chicken breast cooking routine, you'll gain confidence in your culinary skills and consistently produce perfectly cooked, safe, and delicious meals. This precision tool takes the stress out of cooking, allowing you to focus on other aspects of meal preparation and ensuring that your chicken breast is always cooked to your desired level of doneness.
Resting time after cooking
Resting time after cooking is a crucial yet often overlooked step in the culinary process, especially when it comes to preparing chicken breast at 425°F. This essential period allows the meat to complete its cooking process and redistribute its juices, resulting in a more flavorful and tender final product. When you remove chicken breast from the oven, it continues to cook for a short time due to residual heat, a phenomenon known as carryover cooking. Allowing the meat to rest gives it time to reach its final internal temperature without overcooking and drying out. Typically, a resting period of 5 to 10 minutes is sufficient for chicken breast cooked at 425°F. During this time, it's best to loosely tent the chicken with aluminum foil to keep it warm while allowing excess steam to escape. This prevents the chicken from becoming soggy due to trapped moisture. The resting period also allows the proteins in the meat to relax and reabsorb some of the juices that were forced towards the center during cooking. This redistribution of juices results in a more evenly moist and flavorful chicken breast. It's important to note that the size and thickness of the chicken breast can affect the ideal resting time. Larger or thicker pieces may require a slightly longer rest, up to 15 minutes, to ensure even distribution of heat and juices throughout the meat. On the other hand, smaller or thinner pieces may only need 3 to 5 minutes of resting time. Using a meat thermometer can help you determine when the chicken has reached its final temperature and is ready to be served. During the resting period, you can take advantage of this time to prepare accompanying sides or sauces, set the table, or put the finishing touches on your meal presentation. This not only maximizes efficiency in the kitchen but also ensures that your entire meal is ready to be enjoyed at its peak freshness and temperature. Remember that cutting into the chicken immediately after cooking can cause the juices to run out, resulting in a drier texture. By allowing the meat to rest, you're ensuring that each bite will be as juicy and flavorful as possible. This simple step can elevate your chicken dish from good to great, showcasing your culinary skills and attention to detail. Whether you're cooking for yourself, your family, or guests, incorporating a proper resting time into your chicken preparation routine will consistently yield superior results, making it a valuable technique in your cooking repertoire.
Tips for Perfectly Cooked Chicken Breast at 425°F
Mastering the art of cooking chicken breast to perfection is a skill that every home chef should possess. At 425°F, this versatile protein can be transformed into a succulent, flavorful dish that will impress even the most discerning palates. This article will guide you through the essential steps to achieve perfectly cooked chicken breast every time, focusing on three key areas: proper preparation methods, optimal oven rack placement, and techniques for enhancing flavor and moisture retention. By understanding and implementing these crucial elements, you'll be well on your way to creating restaurant-quality chicken dishes in your own kitchen. We'll explore how to prepare your chicken breasts for optimal cooking, discuss the importance of oven rack positioning for even heat distribution, and share tips on seasoning and cooking methods that will elevate your chicken's taste and texture. As we delve into these supporting ideas, you'll gain valuable insights that will transform your chicken-cooking game. However, before we dive into these specifics, it's essential to understand the various factors that affect cooking time, as this knowledge forms the foundation for achieving consistently perfect results.
Proper preparation methods
Proper preparation methods are crucial for achieving perfectly cooked chicken breast at 425°F. Before you even preheat your oven, there are several steps you can take to ensure your chicken turns out moist, flavorful, and evenly cooked. Start by selecting high-quality chicken breasts of uniform size and thickness. This helps ensure even cooking throughout. If your chicken breasts are particularly thick or uneven, consider butterflying them or using a meat mallet to pound them to an even thickness, ideally around 3/4 to 1 inch. Next, brine your chicken breasts for optimal moisture retention. A simple brine of water, salt, and sugar can work wonders in keeping your chicken juicy. For a quick brine, dissolve 1/4 cup of salt and 1/4 cup of sugar in 4 cups of water. Submerge the chicken breasts in this solution for 30 minutes to 2 hours before cooking. If you're short on time, even a 15-minute brine can make a difference. After brining, pat the chicken breasts dry with paper towels. This step is crucial for achieving a nice golden-brown exterior. Moisture on the surface of the chicken will create steam in the oven, hindering browning and potentially leading to a rubbery texture. Season your chicken breasts generously. While salt and pepper are classic choices, don't be afraid to experiment with different herbs and spices. A blend of paprika, garlic powder, onion powder, and dried herbs can add depth and complexity to your dish. For an extra layer of flavor, consider marinating your chicken for a few hours or overnight before cooking. To ensure your chicken doesn't stick to the pan and cooks evenly, lightly coat it with oil. Olive oil is a popular choice, but any cooking oil with a high smoke point will work well. You can also use melted butter for added richness. For easy cleanup and to prevent the chicken from sticking, line your baking sheet with parchment paper or aluminum foil. If you're aiming for a crispier exterior, consider using a wire rack set inside the baking sheet. This allows hot air to circulate around the entire chicken breast, promoting even cooking and browning. Finally, let your chicken rest at room temperature for about 20 minutes before cooking. This takes the chill off the meat and promotes more even cooking. By following these preparation methods, you'll be well on your way to perfectly cooked chicken breasts at 425°F, with a golden-brown exterior and a juicy, flavorful interior.
Optimal oven rack placement
Optimal oven rack placement plays a crucial role in achieving perfectly cooked chicken breasts at 425°F. The position of your oven rack can significantly impact the cooking process, affecting everything from browning to overall doneness. Generally, when cooking chicken breasts at high temperatures like 425°F, it's best to place the rack in the middle position of your oven. The middle rack provides the ideal balance of heat distribution, allowing the chicken to cook evenly from all sides. This position ensures that the top of the chicken breasts browns nicely without burning, while the bottom gets adequately cooked without becoming overly dry. The middle rack also helps maintain a consistent temperature around the chicken, promoting even cooking throughout. However, if you're looking for a crispier, more browned exterior, you might consider moving the rack one position higher. This placement will expose the chicken to more direct heat from the top heating element, resulting in a golden-brown crust. Be cautious with this approach, though, as it may require adjusting your cooking time to prevent the top from burning before the interior is fully cooked. Conversely, if you find that your chicken breasts are browning too quickly on the outside while remaining undercooked inside, lowering the rack one position below the middle can help. This adjustment will provide a bit more distance from the top heating element, allowing the interior to cook through without excessive browning on the surface. It's important to note that every oven is different, and factors such as size, age, and whether it's gas or electric can affect heat distribution. Some ovens may have hot spots or cook unevenly, so it's worthwhile to experiment with rack placement to find the optimal position for your specific appliance. Another tip to consider is using an oven thermometer to ensure your oven is actually reaching and maintaining the desired temperature of 425°F. Oven temperatures can sometimes be inaccurate, which can throw off your cooking times and results. If you're cooking multiple chicken breasts or using a larger baking dish, you may need to rotate the pan halfway through cooking to ensure even browning and cooking. This is especially important if your oven has known hot spots. Lastly, remember that the size and thickness of your chicken breasts will also impact cooking time and results. Thicker breasts may benefit from a slightly lower rack position to prevent over-browning before the center is cooked through, while thinner cuts might do well with a higher placement for quicker browning. By paying attention to your oven rack placement and making adjustments as needed, you'll be well on your way to consistently achieving juicy, perfectly cooked chicken breasts at 425°F. This attention to detail, combined with proper timing and temperature control, will help you master the art of cooking chicken breasts to perfection every time.
Enhancing flavor and moisture retention
Enhancing flavor and moisture retention is crucial when cooking chicken breast at 425°F to ensure a delicious and succulent result. One of the most effective methods to achieve this is through brining, a process that involves soaking the chicken in a saltwater solution before cooking. This technique not only seasons the meat throughout but also helps it retain moisture during the high-heat cooking process. To create a basic brine, dissolve 1/4 cup of salt and 1/4 cup of sugar in 4 cups of water, then submerge the chicken breasts for 30 minutes to 2 hours before cooking. Another excellent way to boost flavor and moisture is by using a marinade. Marinades typically consist of an acid (such as lemon juice or vinegar), oil, and various herbs and spices. The acid helps tenderize the meat, while the oil and seasonings infuse it with flavor. For best results, marinate chicken breasts for at least 30 minutes, but no longer than 24 hours, as extended marinating can actually toughen the meat. Incorporating a flavorful rub or seasoning blend directly onto the chicken breast before cooking is another effective method. This can include a mix of herbs, spices, and even citrus zest. Gently massage the rub into the meat, ensuring even coverage for maximum flavor impact. Popular combinations include garlic powder, paprika, and dried herbs like thyme or rosemary. To further enhance moisture retention, consider using a technique called "dry brining." This involves sprinkling salt directly on the chicken breasts and letting them rest in the refrigerator for a few hours or overnight. The salt draws out moisture, which then dissolves the salt and is reabsorbed into the meat, seasoning it from within. During the cooking process, basting the chicken breast with its own juices or a flavorful liquid can help maintain moisture and add an extra layer of taste. You can use melted butter, olive oil, or even a mixture of stock and herbs for basting. Apply the liquid every 10-15 minutes during cooking for best results. Finally, allowing the chicken to rest after cooking is essential for moisture retention. Tent the cooked chicken breasts loosely with foil and let them sit for 5-10 minutes before serving. This allows the juices to redistribute throughout the meat, resulting in a more tender and flavorful eating experience. By implementing these techniques, you can significantly enhance both the flavor and moisture retention of your chicken breasts when cooking at 425°F. The result will be juicy, well-seasoned chicken that's sure to impress your family and guests alike.