How To Drill Through Tile
 Drilling through tile can seem like a daunting task. The rigidity, brittleness, and tendency to crack can pose significant challenges, even to experienced DIY enthusiasts or construction professionals. However, with a sound understanding of what makes tiles unique and a well-appointed toolkit, this perceived hurdle can transform into an easily surmountable project. In this article, we will delve into the core principles of tile drilling, shedding light on the inherent challenges and peculiarities of various types of tiles in 'Understanding the Basics: What Makes Tiles Unique and Challenging'. We will also discuss the must-have tools and accessories that can make the job easier in 'Essential Tools and Accessories for Drilling Through Tiles'. Finally, we'll provide a comprehensive guide in 'A Step-by-Step Guide: How to Successfully Drill Through Tiles' that will empower you to accomplish the task securely and efficiently. So let's roll up our sleeves and start with understanding the basics of what makes tiles a unique and challenging material to drill through.
1. Understanding the Basics: What Makes Tiles Unique and Challenging
Understanding the intricate world of tiling might seem daunting, but an essential first step is recognizing what makes tiles unique and presents their own set of challenges. Tiles are not just an aesthetic solution, but their complex composition and characteristics make them a particularly resilient option for homeowners. Understanding the basics of tiles, such as their makeup and characteristics, starts from knowing the properties of their materials and how they interact with various tools and substances - an insight that clues us into why they can be challenging to drill through. This underscores the need for safety precautions when handling tiles, particularly when engaged in tasks such as drilling. You will find that a clear grasp of these aspects provides an appreciation for the sturdiness tiles offer and also the strategic techniques one must employ when working with them. As we delve into the first section, 'The Makeup and Characteristics of Tiles', we will further unravel the tile mystery, revealing why these versatile pieces prove to be an interesting puzzle in the world of interior design and architecture.
A. The Makeup and Characteristics of Tiles
Tiles, a ubiquitous material in our homes and buildings, boast a rich tapestry of makeup and characteristics that lend to their unique and sometimes challenging nature. Diverse in design, tiles embrace a vast spectrum of materials, including ceramic, porcelain, glass, marble, and more, each with distinct properties. This multitude exhibits varied strengths, durability, and textures, further shaping their unique attributes. Engaging with the depth of a tile's composition holds the key to unveiling their remarkable durability. Ceramic and porcelain tiles, for instance, are manufactured using natural clay, sand, and water; these are molded and heated under extreme temperatures, yielding a hard-wearing, resistant material perfect for areas with high footfall. These tiles often bear a note of elegance with their glazed, polished finish. Glass tiles, on the other hand, are renowned for their glossy charm, fashioned through a process of heating and cooling, which significantly ups their break-resistance. Unveiling further characteristics of tiles, we discover the inherent porosity of some. Stone tiles, such as marble, granite, and slate, contain naturally occurring minute spaces, making them somewhat porous. This porosity can become a viable challenge as it makes these tiles more susceptible to staining. It also gives them a lower tolerance against weathering factors, thereby requiring additional care like sealing for maintenance. Nonetheless, each type of tile imbues a distinctive aesthetic charm to the space it adorns. The glazed ceramic or porcelain tiles evoke a sleek, modern ambiance, while the varied veining and textures of natural stone tiles contribute to a more rustic, earthy vibe. Glass tiles, casting a glamorous gleam, add a classy touch, whereas metallic tiles infuse a room with an avant-garde look. Interestingly, the size of tiles also plays a critical part in enhancing or affecting the overall appearance of a space. Large-format tiles give a spacious, streamlined look, making small spaces appear larger, whereas mosaic tiles, due to their diminutive size, can be creatively arranged to bring about intricate patterns and intricate designs. In conclusion, the makeup and characteristics of tiles, brimming with inherent complexities, pose unique challenges, but also contribute to their charm and appeal. Understanding their innate properties aids in working with them more efficiently, from installation to maintenance, and even to the drilling process, ensuring they remain a durable, beautiful addition to any space.
B. Why Tiles are Difficult to Drill Through
When it comes to DIY projects around the house, most tasks would seem to be fairly straightforward until you encounter the tricky process of drilling through tiles. From glazed ceramic to tough porcelain, tiles can be exceptionally challenging to drill through, largely due to their unique properties. But what exactly makes tiles so notoriously difficult to penetrate? The answer lies in their structure and composition. Cosmetic elegance aside, tiles are designed with durability and longevity in mind. This toughness is a result of the manufacturing and kiln-firing process, which instills the tiles with a hardened and at times near impenetrable surface. This high-density structure is what makes drilling through ceramic or porcelain tiles a problematic task, even for enthusiasts who are generally handy around the house. Tiles are essentially a type of ceramic, created by shaping clay and setting it under high temperatures. In this process, tiles often get an additional layer of glass or enamel to protect their surface and add aesthetic appeal. This layer, known as glazing, enhances their toughness considerably - delivering an increased resistance not just to water and chemicals, but also to physical impact and wear. This glazed surface is much harder than the drywall it's often installed on, making it more challenging when you try to drill a hole. Moreover, this hardened surface is designed to be smooth and glossy, a trait that can cause drill bits to slip off the target area. This slippery surface is not only tricky; it can also lead to potentially dangerous accidents. Therefore, taking the necessary precautions before drilling can save you from unnecessary damages and repairs. Another critical factor contributing to this difficulty is the risk of cracking or shattering the tile. This is especially significant when drilling through porcelain tiles, which are denser and more brittle than their ceramic counterparts. This presents an interesting situation where what makes a tile strong is also what makes it vulnerable. Applying too much pressure, or using a drill bit not designed for tile, can cause the tile to break. Consequently, the seemingly simple task of drilling a hole requires quite a bit of knowledge, skill, and proper tools to effectively and safely complete. A detailed understanding of these aspects underscores why tiles are difficult to drill through and hints at the importance of a careful approach, the use of proper tools, and the knowledge of adequate techniques for this challenging task. Digital storytelling can be used to effectively explain these complexities, so that anyone attempting such a project can avoid potential pitfalls and successfully drill through tiles.
C. Safety Precautions to Take When Drilling Tiles
C. Safety Precautions to Take When Drilling Tiles Drilling through tiles is indeed a unique and challenging experience. The susceptibility of tiles, notably porcelain and ceramic tiles, to cracking or shattering necessitates a considered approach for safety. The first crucial safety factor is to wear personal protective equipment (PPE). Tiles can easily chip off during the drilling process, potentially causing injury, so protect yourself with safety goggles, a dust mask, and heavy-duty gloves. Secondly, consider your work area's safety and stability. Always ensure that the tile you are drilling is firmly secured to prevent any sliding or unnecessary movement during the action – any such movement could lead to accidents or destroy your work. Use a suitable clamping system that does not cause additional pressure which can crack the tile. Another significant precaution to bear in mind relates to the drill bit's heat. Drilling tiles, particularly hard varieties like porcelain, can generate substantial heat which may not only damage the tile but also potentially cause burns. Therefore, regularly cooling the drill bit with water or an appropriate lubricant is critical. Furthermore, to avoid electrical hazards, always ensure that there's no water near any electrical outlets or cords. Moreover, always double-check that you are not drilling into any electrical wires or plumbing hidden behind the tile. A stud finder or a pipe and wire detector can be particularly useful for this. Lastly, maintain a steady but gentle pressure on the drill. Applying too much force could cause the tile to break or the drill to slip and potentially cause injury. The art of drilling through tiles safely requires a balance of steady control and gentle force. Keeping your drill at a moderate speed will help maintain control and lessen the chance of breaking or chipping. In summary, taking safety precautions when drilling tiles goes hand-in-hand with understanding the unique nature of these materials. Tiles, while durable and aesthetically pleasing, can be challenging to work with due to their brittle nature. Thus, a keen appreciation of safety precautions plays a vital role in successful drilling. It might take a bit of time and patience, but with the right tools, safety equipment, and a cautious approach, drilling through tile can become a task well mastered.
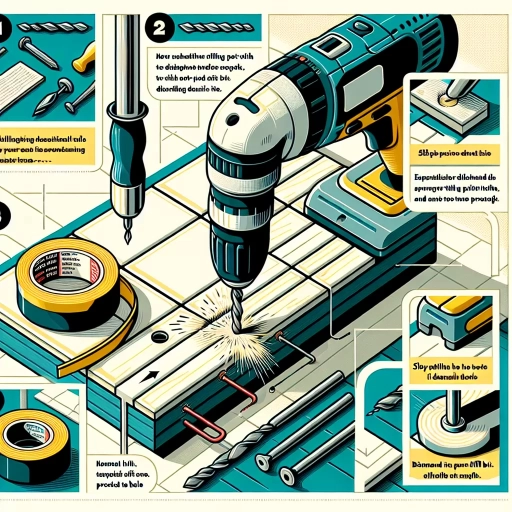
2. Essential Tools and Accessories for Drilling Through Tiles
Tiles are an integral part of home design, but drilling through them requires specific tools and accessories. Using the appropriate instruments not only ensures safety but also contributes to a cleaner, more efficient finish. This article goes into detail about the essential tools and accessories you will need for drilling through tiles. It will cover topics such as the correct type of drill bits used for tiles (A), the necessary safety gear that should always be a part of your toolkit (B), and other useful, often overlooked accessories that can make the drilling process smoother (C). Let's first delve into the realm of drill bits. The market is replete with a myriad of options, but choosing the right one can make a significant difference in your drilling task. The appropriate drill bits for tiles are designed for precision and durability, resulting in less chipping and cracking. They also have a design catered to dealing with the hard surface of tiles, thereby ensuring efficacy and longevity in your home renovation projects.
A. Appropriate Drill Bits for Tiles
Selecting the right drill bit is significantly important when it comes to drilling through tiles. While there are numerous drill bits available in the market, not every type is suitable for all tiles. One of the most potent drill bits suitable for tiles is the carbide-tipped masonry bit. This drill bit type is specially designed for heavy duty and provides excellent performance when drilling through hard tiles such as porcelain and stone. It works efficiently without cracking or damaging the surface of the tile, enabling a smooth operation. Another ideal choice is the diamond-tipped drill bits. As the name implies, these drill bits boast a diamond-tipped end which makes them highly robust and durable. Being the hardest substance on earth, diamonds offer unmatched cutting strength, making their way through the hardest tiles with relative ease. They are ideal for making holes for installations such as towel bars or shower doors. However, regardless of the drill bit you choose, it is essential to remember that drilling through tiles requires patience and precision. You must start at a slow speed to prevent the drill bit from skipping across the tile surface. As you make progress and the hole deepens, you can increase the speed gradually. Often, using a guide, such as a piece of wood or cardboard taped to the tile, can serve as an effective approach to ensure your drill bit doesn't slip and to guide the drill accurately. Moreover, consider using a cool tool - such as a sponge or a cloth soaked in cold water - to cool down the bit and the tile during the drilling process. This simple step can go a long way in preventing damages from overheating and prolonging the life of your drill bits. In conclusion, diving into drilling tiles without understanding the nuances of appropriate drill bits could end up causing unnecessary hassle and damages. However, by investing in the right tools and employing patience and precision, you can effectively drill through tiles, leaving smooth, clean holes that are perfect for any installation.
B. Necessary Safety Gear
B. Necessary Safety Gear In the realm of both professional and DIY tiling projects, safety should never be compromised. Essential safety gear is undoubtedly a significant component that drills its way into the heart of tile drilling processes, ensuring protection from potential hazards while allowing the project to proceed smoothly. Wearing safety goggles is a non-negotiable requirement when drilling through tiles. As tiles are often composed of tough materials like ceramic, porcelain or stone, the drilling process can cause small shards and dust particles to spread in the air, posing a potential risk to your eyes. To protect your vision from these minute fragments, it's crucial to invest in a hearty pair of safety goggles that can shield your eyes securely. Consideration should also be given to hearing protection. The loud noise produced in the process of drilling through tiles can potentially harm your hearing in the long run. Therefore, earplugs or noise-cancelling headphones are recommended to safeguard your auditory health while performing this heavy-duty task. A dust mask or respirator is also recommended, particularly when you're working on larger projects. Breathing in small dust particles from tiles may not immediately affect you, but over time, it can cause respiratory discomfort or problems. A proper mask or respirator acts as an efficient defense against breathing in such potentially harmful particles, ensuring your wellbeing as you work on your project. Finally, a good pair of work gloves provides not only a firm grip on your drill but also protection against cuts from sharp tile edges or the accidental slip of a drill. Nonslip gloves with a strong grip can give you both safety and the confidence to handle your equipment properly, and get your work done efficiently. In conclusion, never underestimate the power and importance of having the necessary safety gear. Their value cannot be overstated as they are as crucial as the drilling machine and the tiles themselves. Equipped with these safety tools, you'll be fully prepared to take on any tiling project, ensuring your safety while enhancing your efficiency and results.
C. Useful Accessories to Facilitate the Drilling Process
C. Useful Accessories to Facilitate the Drilling Process Drilling through tiles requires more than just a robust drill and masonry bits; it necessitates certain supportive accessories that can significantly improve the drilling operation and yield excellent results. These practical additions are invaluable to professionals and DIY enthusiasts alike as they ensure safety, increase efficiency, and enhance the precision and quality of the task. Starting with safety equipment, a good set of protective goggles and gloves is indispensable. Tiles, whether made from ceramic, porcelain, or stone, can produce small, sharp fragments during drilling, which could cause eye or skin injuries. Therefore, wearing these safety measures can keep you protected through the process. Next in line are drill guides and levelers- essential tools that improve the accuracy of your work. A drill guide helps keep the drill in place, preventing it from slipping over the glazed tile surface, thus ensuring precision. On the other hand, the leveler ensures that your drilling work remains level, straight, and correctly aligned, no matter the surface's angle. Both these tools work in tandem to give you a perfectly placed and smooth hole. Another immensely useful accessory is the cooling system. Continuous drilling on hard surfaces like tile generates a colossal amount of heat that could potentially damage your drill bits. A cooling system, often in the form of a water ring or cooling paste, keeps the temperature down, prolongs the life of your drill bits, and even improves the drilling speed. Lastly, don’t forget a trusty vacuum cleaner. It keeps your workspace clean by instantly sucking away the tile dust and debris during drilling. This proves helpful in maintaining visibility and effectiveness while drilling, and it reduces the subsequent clean-up effort. In conclusion, the brilliance of the drilling process is not defined singularly by the drills or bits, but synergistically with the aid of these supporting accessories. Their contribution towards ensuring safety, precision, speed, and cleanliness elevates the efficiency of the whole process, making them truly vital tools while drilling through tiles. Each accessory has its unique role, and together they facilitate a smoother, faster, and more precise drilling operation.
3. A Step-by-Step Guide: How to Successfully Drill Through Tiles
The essence of successfully drilling through tiles without causing a crack, chip, or brake lies not only with the execution but with the preparation and subsequent actions. Our step-by-step guide outlines every stage of this process, breaking it down into three comprehensive segments to ensure that even novices can conveniently achieve the desired result. We begin by guiding you through the essential elements of "Preparing Your Workspace and Safety Measures", detailing how a correct setup and safety equipment can save you unnecessary hassle and ensure a danger-free operation. We then transition into the heart of the project - "Beginning the Drilling Process" - where you learn the techniques of tile drilling, the size of drill bits to use, and the preferred drilling speed. Our final section, "Post-Drilling Care and Clean Up", provides important information on how to restore your workspace to a clean and safe condition post-drilling. So, let's dive into our first section, where we help set the stage for your successful tile drilling experience in "Preparing Your Workspace and Safety Measures".
A. Preparing Your Workspace and Safety Measures
Preparing your workspace and putting safety measures in place is an imperative part of successfully drilling through tiles. It paves the way for a smoother and safer process, preventing unnecessary incidents that may result in injury or damage to your property. Prior to embarking on the drilling process, the workspace must be cleared of any potential hazards, including clutter such as loose wires, unstable objects, or other obstructions that may impede your mobility in the area. A flat, steady bench or table is advisable, and it's important to secure your tile using a clamp or vice to prevent movement during drilling. Such a measure not only bolsters safety, but also accuracy during the drilling process. Moreover, ensuring proper lighting is critical. A poorly illuminated workspace can challenge your vision and precision, possibly altering the quality of your drilling work and endangering your safety. Personal protective equipment are non-negligible and should be acquired before venturing into drilling. Safety glasses shield your eyes from small tile chips that may splinter off during drilling and dust particles that could irritate your eyes. Likewise, gloves offer protection for your hands, and provide a better grip of the drill, which is particularly useful when drilling through slippery tiles. Ear protection might be beneficial if you are using a particularly loud drill. Lastly, maintain a first aid kit nearby in case of unexpected injuries. Now, with these safety procedures and workspace preparations in place, you are aligned for a more efficient conduct of drilling operations through tiles - ready to conquer your DIY project while minimizing risks. The importance of these preparatory steps cannot be overstated, as the benefits of a structured, safe workspace are profound, promising a seamless, accident-free drilling experience.
B. Beginning the Drilling Process
Beginning the Drilling Process Embarking on the drilling process for tiles might seem challenging, but when done correctly, it paves the way for successful installations or modifications within your tiling projects. Preparation is key in this initial stage to ensure a smooth and successful drilling process. Firstly, embrace the significance of utilizing a diamond-tipped drill bit. This specialized drill bit is specifically designed for hard materials such as tiles, providing the precision and gentleness needed to avoid shattering or cracking your tile. No matter the type of tile - be it ceramic, porcelain, or natural stone - a diamond-tipped drill bit makes for a suitable tool to pierce through their robust structures while causing minimal damage. The second crucial step at this juncture is properly marking your drilling spot. Making sure you have a well-placed and visible mark will serve as an invaluable guide as you begin the drilling process. A piece of masking tape can be placed on the spot not only to help the mark be more visible but also to prevent the drill bit from slipping off the glossy surface of the tile. Before commencing the drilling process, it's also important to consider speed. Using a low speed to start the drilling process can curb potential damage to both your drill bit and tile. Ideally, one should begin at a slow rate, gradually increasing the speed as you delve deeper into the tile. This cautious progression helps in maintaining the overall quality of the tile, preventing overheating and destruction of the drill bit. Lastly, remember that patience is paramount in the drilling process as tiles are hard-wearing and drilling through them is not an instant affair. Try not to force the drill but instead, allow it to gradually work its way through the tile. For lubrication and to reduce friction, it's advisable to occasionally dip the drill bit in water throughout the process. The beginning of the drilling process serves as a cornerstone for the rest of your tile drilling project. It's a union of patience, precision, and the right tools. This initial foundation paves the way for a successful, damage-free drilling process, ensuring that your tiles remain as pristine as possible while opening pathways for fixtures and fittings. By carefully adhering to each of these carefully mapped out steps, your journey through drilling tiles becomes easier and more efficient. Above all, this understanding and precision ensure the maintenance of your tile's aesthetic quality post-drilling.
C. Post-Drilling Care and Clean Up
C. Post-Drilling Care and Clean Up After successfully executing the precision-driven task of drilling through tiles, the subsequent step is critical: Post-drilling care and clean-up. This stage is every bit as essential as the drilling process itself; missing it could lead to unwanted damage to your beautiful tiles or your drill bits. Once you have finished piercing through your tiles, there are certain practices you need to incorporate to maintain the durability of your tools' functionality and the aesthetics of your new holes. First, you must allow your drill bits to cool down before storing them, as they can generate substantial heat during operation. This is crucial for their longevity. Then, consider using a brush or compressed air to remove any residual dust or debris from the drill bit. In doing so, you ensure that your drill bits stay sharp for future use and don't carry old debris into new projects. When focusing on the drilled tiles, it’s the small shards or dust that could cause scratches or loss of shine on the tile surface. Thus, it is important to sweep or vacuum the immediate area carefully. Using water and a soft cloth can also effectively clean the drilled hole, helping to ensure that your tiles look as good as new. Additionally, after cleaning the surrounding area, inspect the drilled hole for any ragged edges or fractures that might have been missed initially. If necessary, use a file to smooth down any imperfections. This not only helps to maintain the aesthetics of the tile but can make fitting screws or attachments much easier. Moreover, take into consideration the environmental impact of clean-up processes, implement recycling whenever feasible, and dispose of waste judiciously. In this way, you maintain your tile's aesthetics, your tools' durability, and adhere to practices that are beneficial for the environment. Always keep in mind that good post-drilling care and clean-up essentially extends the life of the tile, maintains the harmony of your interior décor, and guarantees the good performance of your tools in your future DIY tasks. Pay attention to detail, much like a professional would, and you will notice the difference in your drilling proficiency and results.