How To Crop A Photo On Mac
Cropping a photo on a Mac is a simple yet powerful way to enhance and refine your images. Whether you're a professional photographer or a casual user, cropping can help you focus attention, remove distractions, and create a more visually appealing composition. But where do you start? In this article, we'll take you through the basics of cropping a photo on Mac, from understanding the fundamental principles to using built-in apps like Preview and Photos. We'll also explore advanced techniques using third-party apps, giving you the tools and knowledge to take your photo editing skills to the next level. By the end of this article, you'll be able to confidently crop your photos like a pro. So, let's begin by understanding the basics of cropping a photo on Mac.
Understanding the Basics of Cropping a Photo on Mac
Cropping a photo is a fundamental aspect of photo editing that can make a huge difference in the overall appearance of an image. When done correctly, cropping can enhance the composition, remove distractions, and even change the mood of a photograph. In this article, we will explore the basics of cropping a photo on Mac, including the tools available for cropping, the terminology used in the process, and the reasons why cropping is essential in photo editing. We will start by understanding what cropping is and why it's important in photo editing, followed by a discussion on choosing the right tool for cropping on Mac, and finally, we will cover some basic cropping terminology to know. By the end of this article, you will have a solid understanding of the basics of cropping a photo on Mac and be able to edit your photos like a pro. What is cropping and why is it important in photo editing, and how can it transform your photos?
What is Cropping and Why is it Important in Photo Editing
Here is the paragraphy: Cropping is a fundamental technique in photo editing that involves selecting and removing unwanted parts of an image to improve its composition, focus, and overall aesthetic appeal. By cropping a photo, you can eliminate distractions, enhance the subject, and create a more balanced and visually appealing image. Cropping is important in photo editing because it allows you to refine the composition of your image, drawing the viewer's attention to the most important elements. It can also help to remove blemishes, unwanted objects, or excess background, resulting in a cleaner and more polished final product. Additionally, cropping can be used to change the aspect ratio of an image, making it suitable for different platforms or mediums, such as social media, printing, or web design. By mastering the art of cropping, you can take your photos to the next level and make them more engaging, effective, and professional-looking.
Choosing the Right Tool for Cropping on Mac
When it comes to cropping a photo on a Mac, choosing the right tool is crucial to achieve the desired results. The built-in Photos app on Mac offers a range of cropping tools, including the Rectangular Marquee Tool, Elliptical Marquee Tool, and Lasso Tool. The Rectangular Marquee Tool is ideal for cropping rectangular or square shapes, while the Elliptical Marquee Tool is perfect for cropping circular or oval shapes. The Lasso Tool, on the other hand, allows for more precise cropping by drawing a freehand selection around the desired area. Additionally, the Photos app also offers a range of pre-set aspect ratios, including 1:1, 3:2, and 16:9, making it easy to crop photos to specific dimensions. For more advanced cropping needs, users can also consider using third-party photo editing software such as Adobe Photoshop or Skylum Luminar, which offer a wider range of cropping tools and features. Ultimately, the right tool for cropping on Mac will depend on the user's specific needs and preferences.
Basic Cropping Terminology to Know
When it comes to cropping a photo on Mac, it's essential to understand the basic terminology involved. Here are some key terms to know: **Aspect Ratio**: The proportion of an image's width to its height, usually expressed as a ratio (e.g., 4:3 or 16:9). **Resolution**: The number of pixels in an image, measured in pixels per inch (PPI) or dots per inch (DPI). **Crop Box**: A rectangular frame that defines the area of the image to be cropped. **Handles**: Small squares or circles at the corners and edges of the crop box that can be dragged to resize or reposition the box. **Anchor Point**: A reference point that determines how the crop box is resized or repositioned. **Constrain Proportions**: A feature that maintains the original aspect ratio of the image while cropping. **Snap to Grid**: A feature that aligns the crop box to a grid, making it easier to crop images with straight edges. **Straighten**: A feature that allows you to adjust the image's orientation to ensure it's perfectly horizontal or vertical. **Crop Size**: The dimensions of the cropped image, usually measured in pixels or inches. Understanding these basic cropping terms will help you navigate the cropping process on your Mac with ease.
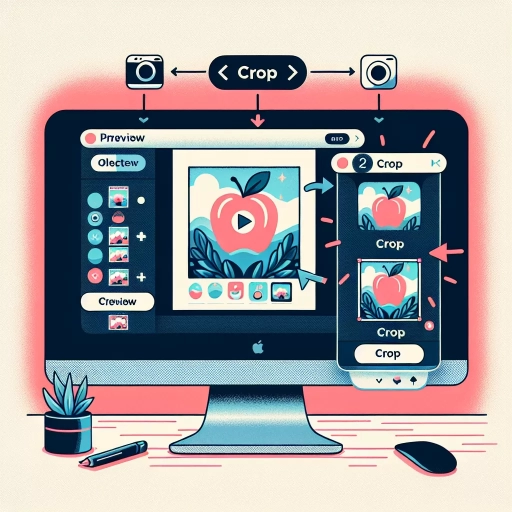
Using Preview to Crop a Photo on Mac
Using Preview to crop a photo on Mac is a straightforward process that can be completed in a few simple steps. To get started, users need to open and select the image they want to crop in Preview, which can be done by right-clicking on the image file and selecting "Open with Preview" or by dragging and dropping the image into the Preview application. Once the image is open, users can access the Markup tool, which allows them to crop the image to their desired dimensions. After cropping the image, users can save the changes and export the cropped image in various formats. In this article, we will walk through the process of using Preview to crop a photo on Mac, starting with opening and selecting the image in Preview.
Opening and Selecting the Image in Preview
To open and select an image in Preview, start by locating the image file you want to crop on your Mac. You can find it in the Finder, on your desktop, or in a folder. Once you've found the image, double-click on it to open it in Preview, which is the default image viewer on Mac. Alternatively, you can right-click (or control-click) on the image file and select "Open With" > "Preview" from the context menu. If Preview is not set as the default viewer, you can also open the image by launching Preview from the Applications folder or Spotlight search, then selecting "File" > "Open" and navigating to the image file. Once the image is open in Preview, you can select it by clicking on it, and you'll see the image displayed in the Preview window. You can then proceed to crop the image using the tools and options available in Preview.
Using the Markup Tool to Crop the Image
Using the Markup tool to crop an image is a straightforward process that allows you to trim unwanted parts of a photo and focus on the essential elements. To access the Markup tool, open the image you want to crop in Preview, then click on the Markup icon, which resembles a pencil, in the toolbar. This will open the Markup toolbar, where you'll find a variety of editing tools, including the crop tool. To crop the image, select the crop tool, which looks like a square with two arrows pointing outward. Click and drag the crop tool over the area of the image you want to keep, and the unwanted parts will be automatically trimmed away. You can adjust the crop area by dragging the edges of the crop box or by using the handles to resize it. Once you're satisfied with the crop, click "Done" to apply the changes. The Markup tool also allows you to crop an image to a specific aspect ratio or size, which can be useful if you need to prepare the image for a particular purpose, such as printing or sharing on social media. Additionally, you can use the Markup tool to add other edits to your image, such as text, shapes, or signatures, making it a versatile and powerful editing tool.
Saving the Cropped Image in Preview
When you're satisfied with the cropped image, you can save it in various formats using Preview. To do this, go to the "File" menu and select "Save" or use the keyboard shortcut Command + S. In the save dialog box, choose a location to save the file, such as your desktop or documents folder. You can also choose a file name and select a file format, such as JPEG, PNG, or TIFF. If you want to save the cropped image in its original format, select the "Original" option from the "Format" dropdown menu. Additionally, you can also choose to save the image with a specific resolution, such as 72 dpi or 300 dpi, depending on your needs. Once you've made your selections, click "Save" to save the cropped image. Alternatively, you can also use the "Export" option to save the image in a specific format, such as a PDF or a GIF. To do this, go to the "File" menu and select "Export," then choose the desired format and settings. Preview also allows you to save the cropped image to various cloud services, such as iCloud or Google Drive, making it easy to access and share your edited photos.
Advanced Cropping Techniques Using Photos and Third-Party Apps
When it comes to editing images, one of the most crucial steps is cropping. It helps to remove unwanted parts of the image, focus attention on a specific subject, and enhance the overall composition. However, cropping can be a complex process, especially when dealing with intricate images or specific requirements. Advanced cropping techniques can help to achieve professional-looking results, and there are several methods to explore. For instance, utilizing the built-in Photos app can provide a range of editing tools, including cropping features. Additionally, third-party apps can offer even more advanced features and precision. Furthermore, learning keyboard shortcuts can significantly speed up the editing process. In this article, we will delve into these advanced cropping techniques, starting with the basics of using the Photos app to crop and edit images.
Using the Photos App to Crop and Edit Images
The Photos app on Mac offers a range of tools to crop and edit images, making it a great option for those who want to enhance their photos without needing to use a third-party app. To crop an image in the Photos app, simply select the photo you want to edit and click on the "Edit" button in the top right corner of the screen. This will open the editing menu, where you can select the "Crop" tool from the toolbar. From here, you can choose from a range of pre-set aspect ratios, such as square, 3:2, or 16:9, or select "Freeform" to crop the image to a custom size. You can also use the "Straighten" tool to adjust the image's orientation and the "Constrain" tool to lock the aspect ratio. Once you've made your selection, you can use the handles on the edges of the image to adjust the crop area. The Photos app also offers a range of editing tools, including adjustments for exposure, contrast, and color, as well as filters and effects. You can also use the "Retouch" tool to remove blemishes and imperfections from the image. Additionally, the Photos app allows you to compare your edited image to the original by clicking on the "Compare" button, making it easy to see the changes you've made. Overall, the Photos app provides a comprehensive set of tools for cropping and editing images, making it a great option for Mac users who want to enhance their photos without needing to use a third-party app.
Exploring Third-Party Apps for Advanced Cropping Features
While Photos offers a range of cropping tools, you may find that you need more advanced features to achieve the desired effect. This is where third-party apps come in – offering a wide range of additional features and functionalities that can help you take your cropping skills to the next level. One popular option is Adobe Lightroom, which offers a range of advanced cropping tools, including the ability to crop in different aspect ratios, adjust the crop box, and even apply custom crop presets. Another option is Skylum Luminar, which offers a range of AI-powered cropping tools, including the ability to automatically detect and crop objects, as well as apply custom crop effects. Other popular options include Pixelmator Pro, which offers a range of advanced cropping tools, including the ability to crop in different layers, and Affinity Photo, which offers a range of professional-grade cropping tools, including the ability to crop in different modes and apply custom crop effects. By exploring these third-party apps, you can unlock a range of advanced cropping features that can help you achieve professional-looking results.
Using Keyboard Shortcuts for Efficient Cropping
Using keyboard shortcuts can significantly enhance your cropping efficiency when editing photos on a Mac. By familiarizing yourself with these shortcuts, you can streamline your workflow and focus on perfecting your images. To begin, you can use the 'C' key to activate the Crop tool in most photo editing applications, including Photos and third-party apps like Adobe Lightroom and Photoshop. Once the Crop tool is active, you can use the 'R' key to toggle between the different aspect ratios, such as 1:1, 3:2, or 16:9. This allows you to quickly experiment with different crop settings without having to manually adjust the dimensions. Additionally, you can use the 'Shift' key to constrain the crop to a specific aspect ratio, ensuring that your image is perfectly proportioned. To fine-tune your crop, you can use the 'Arrow' keys to nudge the crop boundaries by small increments, or the 'Shift+Arrow' keys to move the boundaries in larger increments. Finally, you can use the 'Enter' key to apply the crop and the 'Esc' key to cancel it. By mastering these keyboard shortcuts, you can crop your photos with precision and speed, allowing you to focus on the creative aspects of photo editing.