How To Draw A Bow
Here is the introduction paragraph: Drawing a bow can be a challenging yet rewarding task, requiring a combination of technical skill and artistic flair. Whether you're an archer looking to improve your form or an artist seeking to capture the elegance of a bow, mastering the basics of drawing a bow is essential. In this article, we'll take you through a comprehensive guide on how to draw a bow, covering the fundamentals, step-by-step instructions, and advanced techniques to help you create a realistic and visually stunning representation. We'll start by understanding the basics of drawing a bow, exploring the key components and proportions that make up this intricate piece of equipment. By grasping these foundational elements, you'll be well on your way to creating a beautiful and accurate drawing of a bow. So, let's begin by Understanding the Basics of Drawing a Bow.
Understanding the Basics of Drawing a Bow
Here is the introduction paragraph: Drawing a bow can be a challenging yet rewarding experience, especially for those who are new to the world of archery or art. Whether you're an archer looking to improve your skills or an artist seeking to capture the beauty of a bow, understanding the basics of drawing a bow is essential. To get started, it's crucial to familiarize yourself with the different types of bows, including recurve, compound, and traditional bows, each with its unique characteristics and features. Additionally, learning the basic shapes and proportions of a bow, such as the riser, limbs, and string, will help you create a more accurate and realistic representation. Furthermore, understanding the importance of perspective and proportion will enable you to capture the bow's three-dimensional form and create a visually appealing drawing. By mastering these fundamental concepts, you'll be well on your way to Understanding the Basics of Drawing a Bow.
1. Familiarizing yourself with the different types of bows
and arrow. When it comes to drawing a bow and arrow, it's essential to familiarize yourself with the different types of bows that exist. This knowledge will not only enhance your artistic skills but also provide you with a deeper understanding of the mechanics and functionality of these ancient yet elegant instruments. There are several types of bows, each with its unique characteristics, advantages, and historical significance. The most common types of bows include the recurve bow, compound bow, longbow, flatbow, and takedown bow. The recurve bow, for instance, is characterized by its curved limbs that store energy when drawn, making it a popular choice among archers. The compound bow, on the other hand, uses a system of cams and pulleys to store energy, allowing for greater accuracy and power. The longbow, with its simple yet elegant design, has been used for centuries and is often associated with traditional archery. The flatbow, with its wide, flat limbs, is known for its stability and accuracy, while the takedown bow is a versatile option that can be easily disassembled and transported. By understanding the different types of bows, you'll be able to accurately depict their unique features and mechanics in your drawings, adding depth and authenticity to your artwork. Whether you're an artist, archer, or simply someone who appreciates the beauty of bows, familiarizing yourself with these different types will enrich your understanding and appreciation of these incredible instruments.
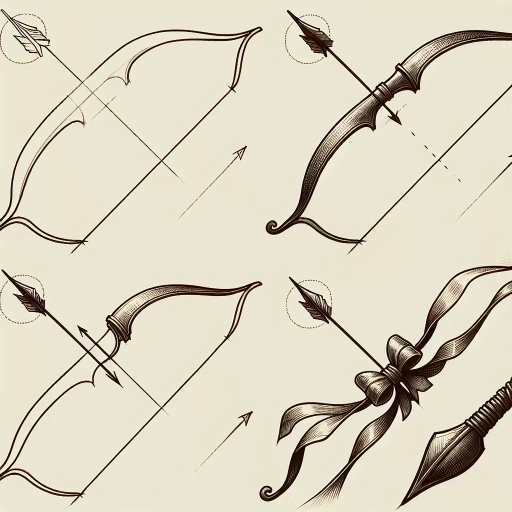
2. Learning the basic shapes and proportions of a bow
and arrow. Learning the basic shapes and proportions of a bow is a crucial step in drawing a realistic and accurate representation. A bow is typically composed of a few simple shapes, including a curved limb, a riser, and a string. The curved limb is the long, curved part of the bow that stores energy when drawn, while the riser is the middle section that the archer holds onto. The string is the cord that connects the two limbs and is drawn back to propel the arrow. To draw a bow, start by sketching the overall shape, paying attention to the proportions. The curved limb should be roughly the same width as the riser, and the string should be slightly thicker at the center. Next, add the details, such as the nocks (the notches at the end of the limbs where the string is attached) and the arrow rest (the small ledge on the riser where the arrow is placed). Pay attention to the subtle curves and contours of the bow, as these will help to create a sense of depth and dimension. By breaking down the bow into its basic shapes and proportions, you can create a more accurate and detailed drawing. Additionally, studying the shapes and proportions of different types of bows, such as recurve, compound, or longbow, can help you to understand the unique characteristics of each and create more realistic drawings.
3. Understanding the importance of perspective and proportion
and arrow. Understanding the importance of perspective and proportion is crucial when drawing a bow and arrow. Perspective refers to the way objects appear to shrink or converge as they recede into the distance, while proportion refers to the relationship between the size and scale of different parts of the bow and arrow. To draw a realistic bow and arrow, you need to consider the perspective and proportion of the different components, such as the bow's limbs, the riser, the arrow rest, and the arrow itself. For example, the bow's limbs should appear to taper and narrow as they approach the tips, while the arrow should appear to be in proportion to the bow. Paying attention to perspective and proportion will help you create a drawing that looks balanced, harmonious, and visually appealing. Additionally, understanding perspective and proportion will also help you to create a sense of depth and distance in your drawing, which is essential for creating a realistic and engaging image. By taking the time to study and practice drawing the bow and arrow from different angles and perspectives, you can develop your skills and create a drawing that accurately captures the beauty and complexity of this ancient and iconic weapon.
Step-by-Step Guide to Drawing a Bow
Here is the introduction paragraph: Drawing a bow can be a fun and rewarding experience, especially for those who enjoy archery or are interested in medieval history. However, for beginners, it can be challenging to know where to start. In this article, we will provide a step-by-step guide on how to draw a bow, covering the essential steps to create a realistic and detailed drawing. We will begin by sketching the overall shape and outline of the bow, followed by adding details such as the bowstring and arrow rest. Finally, we will refine the drawing with shading and texture to give it a more lifelike appearance. By following these steps, you will be able to create a beautiful and accurate drawing of a bow. Understanding the basics of drawing a bow is just the beginning, and with practice and patience, you can master the art of drawing this iconic symbol of archery.
1. Sketching the overall shape and outline of the bow
and arrow. To begin drawing a bow, start by sketching the overall shape and outline. Envision the bow as a gentle, elongated curve, with the ends tapering slightly towards the tips. Lightly draw a long, smooth arc that forms the body of the bow, making sure to keep the lines fluid and continuous. Pay attention to the proportions, ensuring the bow is roughly three to four times as long as it is wide. As you sketch, consider the type of bow you want to draw – a traditional recurve, a modern compound, or a sleek, minimalist design. This will help guide your lines and inform the overall shape. For a more realistic representation, you can also add a slight "belly" to the bow, where the curve is more pronounced, and the limbs are thicker. This will give your drawing a sense of depth and dimensionality. Remember to keep your lines soft and tentative at this stage, as you'll be refining the details and adding texture later. By establishing a strong, flowing outline, you'll set the foundation for a beautiful and accurate drawing of a bow.
2. Adding details such as the bowstring and arrow rest
and arrow. To add more depth and realism to your bow drawing, let's focus on the bowstring and arrow rest. The bowstring is a crucial element that connects the two ends of the bow, and it's what gives the bow its tension and power. To draw the bowstring, start by drawing a thin, curved line that follows the shape of the bow. The bowstring should be slightly thicker in the middle and taper off towards the ends. You can also add some texture to the bowstring to give it a more realistic look. For example, you can draw a series of small, diagonal lines that follow the curve of the string. This will give the bowstring a sense of tension and energy. Next, let's move on to the arrow rest. The arrow rest is a small notch or ledge on the bow that the arrow sits on when it's being drawn back. To draw the arrow rest, start by drawing a small, curved line that follows the shape of the bow. The arrow rest should be positioned about one-third of the way down from the top of the bow, and it should be slightly thicker than the bowstring. You can also add some texture to the arrow rest to give it a more realistic look. For example, you can draw a series of small, horizontal lines that follow the curve of the rest. This will give the arrow rest a sense of depth and dimension. By adding these details to your bow drawing, you'll be able to create a more realistic and engaging image that showcases the beauty and power of the bow and arrow.
3. Refining the drawing with shading and texture
and arrow. Refining the drawing with shading and texture is a crucial step in creating a realistic and visually appealing bow. To add depth and dimension to your drawing, start by identifying the areas where the light source is coming from and where the shadows would naturally fall. Use a range of shading techniques, such as hatching and cross-hatching, to create a sense of volume and texture on the bow's surface. Pay particular attention to the areas where the wood grain is visible, as this will help to create a sense of authenticity. You can also use texture to suggest the roughness of the wood or the smoothness of the bowstring. To add an extra layer of realism, consider adding some subtle wear and tear to the bow, such as scratches or scuffs, to give it a sense of age and use. By carefully balancing light and dark, smooth and rough, you can create a drawing that looks like it's about to leap off the page. Remember to take your time and be patient, as refining the drawing with shading and texture can be a time-consuming process, but the end result will be well worth the effort. With practice and attention to detail, you can create a bow that looks like it was plucked straight from the forest, ready to be strung and fired.
Advanced Techniques for Drawing a Realistic Bow
Here is the introduction paragraph: Drawing a realistic bow requires a combination of technical skill, attention to detail, and a deep understanding of the subject matter. While understanding the basics of drawing a bow is essential, taking your skills to the next level requires advanced techniques that can help you capture the intricate details and nuances of this complex subject. To achieve a truly realistic representation, artists must employ a range of strategies, including using reference images to capture realistic details, experimenting with different mediums and techniques to achieve texture and depth, and paying attention to the subtleties of lighting and shadow to create a sense of volume and dimension. By mastering these advanced techniques, artists can elevate their work and create stunning, lifelike drawings of bows that showcase their skill and artistry. With a solid foundation in the basics of drawing a bow, artists can now move on to exploring these advanced techniques to take their work to new heights.
1. Using reference images to capture realistic details
and arrow. When it comes to drawing a realistic bow, one of the most effective techniques is to use reference images to capture the intricate details of the bow's design. By studying high-quality images of bows, you can gain a deeper understanding of the subtle curves, textures, and shapes that make up the bow's structure. This can be especially helpful when drawing the bow's limbs, which can be tricky to render accurately. Reference images can also help you to accurately depict the bow's hardware, such as the riser, the arrow rest, and the bow sight. By carefully observing the way these components interact with each other and with the bow's limbs, you can create a highly detailed and realistic drawing. Additionally, reference images can also help you to capture the subtle play of light and shadow on the bow's surface, which can add depth and dimension to your drawing. By combining your observations of reference images with your own artistic skills and techniques, you can create a highly realistic and detailed drawing of a bow that is sure to impress. Whether you're drawing a traditional recurve bow or a modern compound bow, using reference images is an essential technique for capturing the intricate details and nuances of this complex and fascinating subject.
2. Experimenting with different mediums and techniques
and arrow. Experimenting with different mediums and techniques is a crucial step in mastering the art of drawing a realistic bow. By exploring various mediums, such as graphite, charcoal, ink, and paint, artists can discover new ways to capture the intricate details and textures of the bow. For instance, graphite pencils can be used to create smooth, precise lines, while charcoal can add a sense of depth and dimensionality. Ink, on the other hand, can be used to create bold, expressive lines, and paint can add a pop of color and vibrancy. By combining different mediums and techniques, artists can create a unique and captivating piece of art that showcases their skills and creativity. Additionally, experimenting with different techniques, such as hatching, cross-hatching, and stippling, can help artists achieve a range of tonal values and textures, adding depth and realism to their drawing. By pushing the boundaries of what is possible with different mediums and techniques, artists can take their drawing to the next level and create a truly realistic and stunning bow.
3. Paying attention to the subtleties of lighting and shadow
and arrow. When it comes to drawing a realistic bow, one of the most crucial aspects to consider is the subtleties of lighting and shadow. The way light interacts with the bow's curves and contours can make or break the overall illusion of depth and dimensionality. To achieve a convincing representation, pay close attention to the areas where light would naturally fall and the shadows that would be cast as a result. For example, the smooth, rounded surface of the bow's limbs would likely catch the light, creating a subtle highlight that gradates into a softer, more muted tone towards the edges. Conversely, the recessed areas, such as the bow's nocks and the space between the limbs, would be shrouded in shadow, adding depth and visual interest to the drawing. By carefully observing and rendering these subtleties, you can create a sense of volume and texture that draws the viewer's eye into the drawing. Additionally, consider the type of lighting you want to depict – is it a warm, golden light or a cool, blue-ish tone? This will help inform your color choices and overall mood of the piece. By mastering the subtleties of lighting and shadow, you can elevate your drawing from a flat, two-dimensional representation to a rich, immersive, and realistic portrayal of a bow.