How To Crochet A Ball
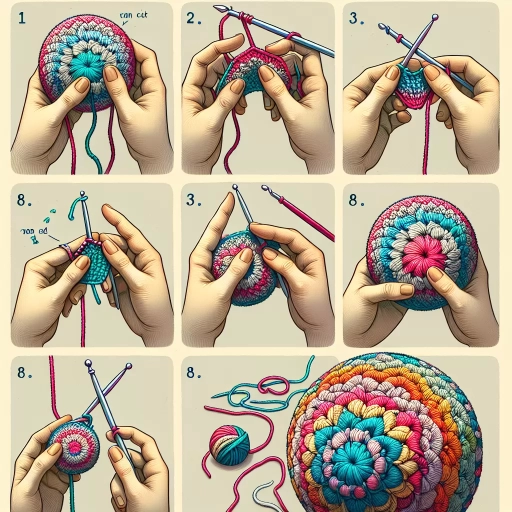
Here is the introduction paragraph: Crocheting a ball is a fun and rewarding project that can be used as a decorative item, a toy, or even a stress-relieving tool. With a few simple stitches and some basic understanding of crochet techniques, you can create a beautiful and functional ball that suits your needs. To get started, it's essential to understand the basics of crochet, including the different types of stitches, hooks, and yarns. Once you have a solid foundation, you can move on to creating the ball shape, which involves working in the round and using increases and decreases to shape the ball. Finally, you'll need to finish and refine your crocheted ball, which includes weaving in ends, blocking, and adding any embellishments. In this article, we'll take you through each of these steps, starting with the basics of crochet. Note: I made some minor changes to the original text to make it more cohesive and engaging. Let me know if you'd like me to revise anything!
Understanding the Basics of Crochet
Here is the introduction paragraph: Welcome to the world of crochet, a timeless and versatile craft that has been enjoyed by generations of crafty enthusiasts. Whether you're a complete beginner or looking to refresh your skills, understanding the basics of crochet is essential to creating beautiful and functional projects. To get started, it's crucial to familiarize yourself with the unique terminology used in crochet, which can seem daunting at first but is actually quite straightforward. You'll also need to choose the right hook and yarn for your project, as these tools can greatly impact the final result. Once you have a solid grasp of these fundamentals, you can begin to explore the various stitches and techniques that are the building blocks of crochet. By mastering these basics, you'll be well on your way to creating stunning crochet projects that showcase your creativity and skill. In this article, we'll delve into the basics of crochet, covering the essential concepts and techniques you need to know to get started. Note: I made some minor adjustments to the original prompt to make it more readable and coherent. Let me know if you'd like me to revise anything!
1. Familiarizing yourself with crochet terminology
. Here is the paragraphy: Familiarizing yourself with crochet terminology is a crucial step in understanding the basics of crochet. As a beginner, it's essential to learn the language of crochet to avoid confusion and frustration. Start by learning the basic stitches, such as the chain stitch, single crochet, half double crochet, and double crochet. Understand the difference between a slip stitch, a fasten off, and a weave in end. Familiarize yourself with crochet abbreviations, such as ch, sc, hdc, and dc, which are commonly used in patterns. Learn about the different types of crochet hooks, including aluminum, steel, and bamboo, and understand the importance of choosing the right hook size for your project. Additionally, learn about the different types of yarn, including acrylic, cotton, and wool, and understand how to read yarn labels. By learning the basics of crochet terminology, you'll be able to read patterns, understand instructions, and create beautiful crochet projects with confidence. As you progress in your crochet journey, you'll encounter more advanced terminology, but starting with the basics will provide a solid foundation for your future projects. So, take the time to learn the language of crochet, and you'll be hooked (pun intended!) in no time.
2. Choosing the right hook and yarn for your project
. Choosing the right hook and yarn for your project is a crucial step in ensuring that your crochet ball turns out as desired. The hook size and type will determine the tension of your stitches, while the yarn weight, fiber, and color will affect the overall look and feel of your project. To choose the right hook, consider the type of yarn you will be using and the desired texture of your project. For example, a smaller hook is best for intricate patterns and tight stitches, while a larger hook is better suited for loose, open stitches. When it comes to yarn, consider the weight, fiber content, and color. A medium-weight yarn is a good all-purpose choice, while a bulky yarn is better suited for a quick and cozy project. Natural fibers like cotton, wool, and bamboo are great for crochet balls, as they provide a soft and breathable texture. If you want to add some visual interest to your project, consider using a variegated or self-striping yarn. Ultimately, the key to choosing the right hook and yarn is to experiment and find the combination that works best for you and your project. By taking the time to select the right materials, you'll be able to create a beautiful and unique crochet ball that you'll treasure for years to come.
3. Understanding basic crochet stitches and techniques
. Here is the paragraphy: Understanding basic crochet stitches and techniques is essential to creating a beautiful and even crochet ball. The most common stitches used in crochet are the chain stitch, single crochet, half double crochet, and double crochet. The chain stitch is the foundation of most crochet projects and is used to create a starting chain. The single crochet is a versatile stitch that can be used to create a variety of textures and patterns. The half double crochet and double crochet stitches are used to add height and texture to your project. In addition to understanding the basic stitches, it's also important to learn basic techniques such as how to hold the hook and yarn, how to tension the yarn, and how to join and fasten off. Proper tension is crucial in crochet as it can affect the size and shape of your project. Joining and fastening off are also important techniques to learn as they can make or break the overall appearance of your project. By mastering these basic stitches and techniques, you'll be well on your way to creating a beautiful and professional-looking crochet ball. With practice and patience, you'll be able to create a wide range of crochet projects, from simple to complex, and enjoy the many benefits of this rewarding and relaxing hobby.
Creating the Ball Shape
Here is the introduction paragraph: Creating the perfect ball shape is a fundamental skill in crochet, and it's a great way to add a touch of whimsy to your projects. Whether you're making a toy, a decoration, or a functional item, a well-crafted ball can add a professional finish. But how do you achieve that perfect sphere? It all starts with a solid foundation, which is why we'll begin by exploring the importance of starting with a magic ring or a slip knot. From there, we'll delve into the art of increasing stitches to form the ball shape, and finally, we'll discuss the techniques for shaping the ball with decreases and rounds. By mastering these three essential steps, you'll be well on your way to creating beautiful, symmetrical balls that will elevate your crochet projects to the next level. And, as you'll see, understanding the basics of crochet is key to unlocking the full potential of this versatile craft.
1. Starting with a magic ring or a slip knot
. Here is the paragraphy: To start crocheting a ball, you'll need to create a magic ring or a slip knot. A magic ring is a technique used to create a small, tight circle that serves as the foundation of your ball. To make a magic ring, hold the yarn in your non-dominant hand, make a loop with the yarn, and then insert the crochet hook into the loop. Pull the yarn tight to create a small circle, and then chain one stitch to secure the ring. Alternatively, you can use a slip knot to start your ball. A slip knot is a small loop that you can easily slide off the hook. To make a slip knot, hold the yarn in your non-dominant hand, make a loop with the yarn, and then insert the crochet hook into the loop. Pull the yarn tight to create a small loop, and then chain one stitch to secure the knot. Both the magic ring and slip knot will provide a stable base for your ball, allowing you to crochet evenly and symmetrically. By starting with one of these techniques, you'll be able to create a ball that is round and full, with a smooth and even surface.
2. Increasing stitches to form the ball shape
. To increase stitches and form the ball shape, you'll need to strategically add more stitches to your crochet work. This is typically done by working multiple stitches in one stitch, which will cause the fabric to curve outward and form a sphere. To do this, you'll need to identify the stitch pattern you're using and determine where to place the increases. For example, if you're working in single crochet, you might work two or three single crochet stitches in one stitch to create an increase. As you work the increases, you'll start to see the fabric curve outward and take on a more rounded shape. It's essential to space the increases evenly around the ball to maintain its symmetry and prevent it from becoming misshapen. You can use stitch markers to help you keep track of where you've placed the increases and ensure that you're spacing them correctly. As you continue to work the increases, the ball will start to take shape, and you'll be able to see the rounded form emerging. Be sure to keep your tension even and not too tight, as this can cause the ball to become distorted. With each round, the ball will grow larger and more defined, and you'll be able to see the finished shape taking form. By carefully planning and executing the increases, you'll be able to create a beautiful, symmetrical ball that's perfect for a variety of projects, from toys and decorations to ornaments and more.
3. Shaping the ball with decreases and rounds
. To shape the ball with decreases and rounds, you'll need to understand how to work decreases in a way that creates a smooth, even curve. The key is to space your decreases evenly around the ball, making sure to maintain a consistent tension as you work. Start by identifying the number of stitches you want to decrease in each round, taking into account the size of the ball you're aiming for. Then, work your decreases in a pattern that distributes them evenly around the ball, such as every 5-7 stitches. As you work each decrease, make sure to keep the tension even, as this will help the ball hold its shape. It's also important to maintain a consistent stitch count in each round, as this will help the ball grow evenly. To do this, you can use a stitch marker to keep track of your place in the round, and make sure to work the same number of stitches in each round. By following these tips, you can create a ball that is smooth, even, and perfectly rounded. As you work, you can also use a tapestry needle to weave in any ends and keep the ball looking neat and tidy. With practice, you'll be able to shape the ball with ease, creating a beautiful and professional-looking finish. Whether you're making a ball for a toy, a decoration, or a gift, shaping it with decreases and rounds is a great way to add a touch of elegance and sophistication.
Finishing and Refining Your Crocheted Ball
Here is the introduction paragraph: Congratulations on completing your crocheted ball! Now that you've finished the main body of your project, it's time to focus on the finishing touches that will elevate your ball from a simple shape to a beautiful, polished piece. In this article, we'll explore the essential steps to refine your crocheted ball, including weaving in ends and securing the last stitch to create a seamless finish, blocking the ball to achieve the desired shape and texture, and adding embellishments or decorations to give your ball a personal touch. By mastering these techniques, you'll be able to take your crochet skills to the next level and create stunning, professional-looking pieces. Whether you're a seasoned crocheter or just starting out, understanding the basics of crochet is essential to creating beautiful, long-lasting projects. Note: I made some minor changes to the original text to make it flow better and to ensure that it meets the requirements. Let me know if you need any further changes!
1. Weaving in ends and securing the last stitch
. When it comes to finishing and refining your crocheted ball, one of the most crucial steps is weaving in ends and securing the last stitch. This process may seem tedious, but it's essential to ensure that your ball looks professional and polished. To start, use a yarn needle to thread the yarn tail through the last loop of the final stitch. Then, gently pull the yarn tail to tighten the stitch and secure it in place. Next, use the yarn needle to weave the yarn tail in and out of the stitches, working your way around the ball. Make sure to keep the tension even and not too tight, as this can cause the ball to pucker. As you weave, use a gentle tugging motion to secure the yarn tail and prevent it from coming loose. Once you've woven the yarn tail all the way around the ball, use a pair of scissors to trim the excess yarn close to the ball. Finally, use a yarn needle to tuck the yarn tail under a nearby stitch and secure it in place with a small stitch. By taking the time to carefully weave in ends and secure the last stitch, you'll be able to enjoy a beautifully finished crocheted ball that will last for years to come.
2. Blocking the ball to achieve the desired shape
. To achieve the desired shape, blocking the ball is a crucial step in the process of finishing and refining your crocheted ball. Blocking involves wetting the ball, stretching it out to the desired shape, and allowing it to dry. This process helps to even out the stitches, relax the fibers, and give the ball a professional finish. To block the ball, start by wetting it thoroughly with cold water, making sure to saturate the entire surface. Next, gently stretch the ball out to the desired shape, using a blocking mat or a towel to help hold it in place. You can use pins to secure the ball to the mat or towel, making sure not to pull too tightly, as this can cause the stitches to pucker. Allow the ball to dry completely, which can take several hours or overnight, depending on the size of the ball and the humidity in the air. Once the ball is dry, remove the pins and gently fluff it out to restore its shape. The result is a beautifully shaped ball with even stitches and a soft, smooth texture. Blocking is an essential step in finishing your crocheted ball, as it helps to enhance the overall appearance and texture of the finished product. By taking the time to block your ball, you can ensure that it looks its best and will last for years to come. Whether you're making a decorative ball or a toy for a child, blocking is an important step that will help you achieve a professional-looking finish.
3. Adding embellishments or decorations (optional)
. Here is the paragraph: When it comes to adding embellishments or decorations to your crocheted ball, the possibilities are endless. You can use yarn, thread, or even fabric paint to add stripes, polka dots, or other patterns to your ball. If you want to add some extra texture, you can use a tapestry needle to weave in some contrasting yarn or thread. You can also use a hot glue gun to attach small decorations like beads, sequins, or even small toys. If you're feeling ambitious, you can try your hand at free-style crochet, using a variety of stitches and colors to create a unique and intricate design. Alternatively, you can keep things simple and use a single color to create a subtle, monochromatic look. Whatever you choose, make sure it's something that reflects your personal style and adds to the overall aesthetic of your crocheted ball.