How To Make A Smithing Table
In the world of crafting and DIY projects, a smithing table is an essential tool for any serious enthusiast. A smithing table provides a sturdy and organized workspace for hammering, shaping, and molding metal into various forms and designs. To make a smithing table, you'll need to gather the necessary materials, assemble the table, and learn how to use it effectively. In this article, we'll guide you through the process of creating your own smithing table, starting with the crucial step of gathering materials. By following these steps, you'll be able to create a functional and durable smithing table that will serve as the foundation for your metalworking projects. So, let's begin by gathering the materials you'll need to get started.
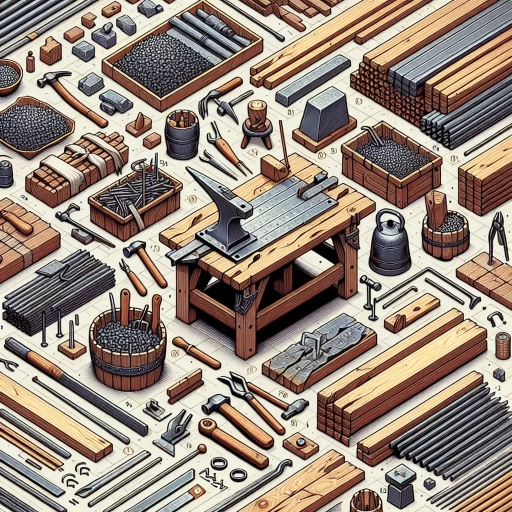
Gathering Materials
Gathering materials is a crucial step in any crafting or building project. Whether you're a seasoned crafter or a beginner, having the right materials is essential to bringing your vision to life. In this article, we'll explore three key materials that are commonly used in crafting and building: wood planks, iron ingots, and cobblestone. We'll take a closer look at how to collect wood planks, acquire iron ingots, and gather cobblestone, providing you with the knowledge and skills you need to get started on your next project. From the forest to the mine, we'll cover the best methods for collecting these essential materials. So, let's start with the basics and explore how to collect wood planks, a fundamental material for any crafting or building project.
Collecting Wood Planks
Collecting wood planks is a crucial step in crafting a smithing table, as it provides the necessary material for the table's frame and surface. To collect wood planks, you can start by punching trees or using an axe to chop down trees and collect logs. Once you have a sufficient amount of logs, you can then convert them into wood planks by placing them in your crafting grid. The type of wood planks you collect will depend on the type of tree you chop down, with different types of trees yielding different types of wood planks. For example, oak trees will yield oak wood planks, while spruce trees will yield spruce wood planks. It's worth noting that the type of wood planks you use will not affect the functionality of the smithing table, so you can use any type of wood plank you like. However, using different types of wood planks can add a touch of personality and customization to your smithing table. Additionally, collecting wood planks can also be a great way to explore your surroundings and discover new biomes and resources. As you collect wood planks, you can also keep an eye out for other useful materials, such as minerals and ores, that can be used to craft other essential items. Overall, collecting wood planks is a fun and rewarding process that is essential to crafting a smithing table.
Acquiring Iron Ingots
Acquiring iron ingots is a crucial step in crafting a smithing table. To obtain iron ingots, you can follow these methods. First, you can mine iron ore from caves or exposed deposits in the game world. Iron ore can be found in the form of iron ore blocks, which can be extracted using a pickaxe. Once you have collected iron ore, you can smelt it in a furnace to produce iron ingots. Alternatively, you can also obtain iron ingots by trading with villagers or exploring abandoned mineshafts and temples, where you may stumble upon chests containing iron ingots. Additionally, you can also craft iron ingots by combining nine iron nuggets in a crafting table. Iron nuggets can be obtained by breaking iron ore blocks or by finding them in treasure chests. By acquiring iron ingots through these methods, you can gather the necessary materials to craft a smithing table and unlock new crafting possibilities.
Gathering Cobblestone
Gathering cobblestone is a crucial step in crafting a smithing table, as it serves as the primary material for the table's base. Cobblestone can be found in abundance in the game's world, particularly in caves, ravines, and underground tunnels. To gather cobblestone, players can use a pickaxe, which is the most effective tool for mining stone and mineral resources. The type of pickaxe used can affect the efficiency of cobblestone gathering, with higher-tier pickaxes allowing for faster mining and increased resource yield. When mining for cobblestone, players should aim to mine stone blocks, as these have a high chance of dropping cobblestone. It's also essential to be mindful of the game's mining mechanics, as mining certain blocks can trigger explosions or cause damage to the player. By gathering a sufficient amount of cobblestone, players can craft the base of their smithing table and progress towards creating this essential crafting station.
Assembling the Smithing Table
Assembling the Smithing Table is a crucial step in Minecraft that requires attention to detail and a clear understanding of the crafting process. To successfully assemble the Smithing Table, players must follow a series of steps that involve placing wood planks, adding iron ingots, and finalizing the structure. By following these steps, players can create a functional Smithing Table that will enable them to craft and repair tools and armor. In this article, we will break down the assembly process into three key steps, starting with the placement of wood planks, which provides the foundation for the entire structure. By carefully placing the wood planks, players can ensure a sturdy base for their Smithing Table, setting the stage for the addition of iron ingots and the finalization of the structure. With a solid foundation in place, players can move on to the next step, Placing the Wood Planks.
Placing the Wood Planks
Placing the wood planks is a crucial step in assembling the smithing table. To do this, start by placing two wood planks side by side on a flat surface, ensuring they are aligned properly. Next, place two more wood planks on top of the first two, perpendicular to them, creating a rectangular shape. Make sure the corners are flush and the planks are evenly spaced. This will form the base of the smithing table. Then, place two more wood planks on top of the base, parallel to each other, to create the table's surface. Finally, place the last two wood planks on top of the surface, perpendicular to the previous two, to create the table's frame. Ensure all the planks are securely attached to each other using nails or screws, and the table is stable and even. By following these steps, you will have successfully placed the wood planks to create the foundation of your smithing table.
Adding the Iron Ingots
Adding iron ingots to the crafting grid is the next step in assembling the smithing table. To do this, open the crafting table and arrange the iron ingots in a specific pattern. Place two iron ingots in the top and bottom rows of the grid, and one iron ingot in the middle row. This will create the frame of the smithing table. Make sure to leave the middle square of the grid empty, as this is where the wooden planks will be placed. Once the iron ingots are in place, the crafting grid should resemble a rectangular shape with a hollow center. This is a crucial step in assembling the smithing table, as the iron ingots provide the structural support and durability needed for the table to function properly. By adding the iron ingots, you are one step closer to completing the smithing table and unlocking the ability to craft and repair tools and armor.
Finalizing the Structure
Finalizing the structure of your smithing table is a crucial step in the assembly process. Once you have attached the legs and frame, it's time to add the top surface. This is where you will be placing your hot metals and tools, so it's essential to ensure it's sturdy and even. Start by placing the top surface onto the frame, making sure it's centered and secure. Use clamps to hold it in place while you attach it to the frame using screws or nails. Make sure the surface is level and even, as any unevenness can cause your tools and metals to become unstable. Once the top surface is attached, you can add any additional features such as a vice or a metalworking surface. These features will help you to work more efficiently and effectively, and will make your smithing table a valuable asset to your workshop. With the structure complete, you can now move on to the final step of assembling your smithing table: adding the finishing touches.
Using the Smithing Table
The Smithing Table is a crucial tool in Minecraft that allows players to upgrade, craft, and repair various items. With the Smithing Table, players can take their gameplay to the next level by creating high-quality tools and armor, crafting new items, and repairing and refurbishing existing ones. In this article, we will explore the various uses of the Smithing Table, including upgrading tools and armor, crafting new items, and repairing and refurbishing. By understanding the capabilities of the Smithing Table, players can improve their overall gameplay experience and achieve their goals more efficiently. One of the most significant benefits of the Smithing Table is its ability to upgrade tools and armor, allowing players to enhance their equipment and take on more challenging tasks.
Upgrading Tools and Armor
Upgrading tools and armor is a crucial aspect of Minecraft gameplay, and the smithing table plays a vital role in this process. To upgrade your tools and armor, you'll need to gather the necessary materials, such as diamonds, gold, and obsidian. The smithing table allows you to combine these materials with your existing tools and armor to create upgraded versions. For example, you can upgrade your stone pickaxe to a diamond pickaxe, which will significantly improve its durability and mining speed. Similarly, you can upgrade your leather armor to diamond armor, which will provide better protection against hostile mobs. The smithing table also allows you to enchant your tools and armor, which can further enhance their abilities. By upgrading your tools and armor, you'll be able to explore deeper into the game's world, mine more efficiently, and defend yourself against increasingly difficult enemies. Overall, the smithing table is an essential tool for any Minecraft player looking to upgrade their gear and take their gameplay to the next level.
Crafting New Items
Crafting new items is an essential part of the Minecraft experience, and the smithing table is a crucial tool in this process. With a smithing table, players can upgrade their tools and armor, as well as craft new items that are not available through the standard crafting menu. To craft new items using the smithing table, players will need to gather the necessary materials, such as metals, gems, and other resources. The smithing table allows players to combine these materials in different ways to create new and improved items, such as diamond swords, golden armor, and enchanted tools. By experimenting with different combinations of materials, players can discover new recipes and craft unique items that will aid them in their Minecraft journey. Additionally, the smithing table also allows players to repair and upgrade their existing items, extending their lifespan and improving their performance. Overall, the smithing table is a versatile tool that opens up new possibilities for crafting and exploration in Minecraft.
Repairing and Refurbishing
Repairing and refurbishing are essential skills for any Minecraft player looking to extend the life of their tools and equipment. When using the smithing table, players can repair and refurbish their gear by combining two damaged items of the same type. This process restores the item's durability, making it good as new. To repair an item, simply place the damaged item in the smithing table's input slot, and then add another damaged item of the same type to the second input slot. The smithing table will then combine the two items, restoring their durability and creating a single, fully repaired item. This process can be repeated multiple times to fully restore an item's durability. Additionally, players can also use the smithing table to refurbish enchanted items, allowing them to maintain their enchantments while restoring their durability. By repairing and refurbishing their gear, players can save resources, reduce waste, and extend the life of their equipment, making the smithing table an essential tool for any Minecraft player.