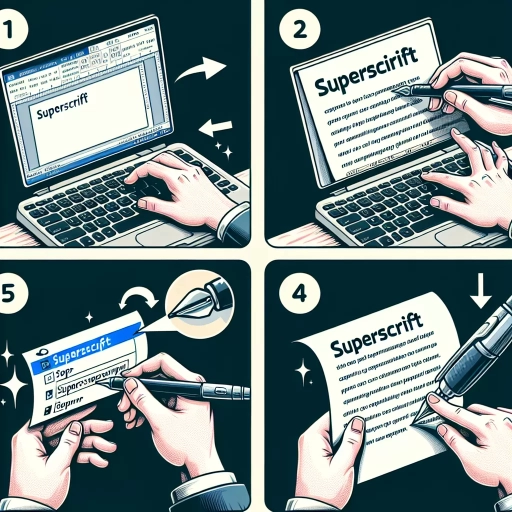
How To Do Superscript In Word
In Microsoft Word, superscript is a formatting feature that allows you to raise text above the normal line of type, often used in mathematical equations, chemical formulas, and citations. To apply superscript in Word, you have three convenient options. You can use the superscript button in the ribbon, which provides a quick and easy way to format your text. Alternatively, you can use keyboard shortcuts to apply superscript, saving you time and effort. Additionally, you can use the font dialog box to apply superscript, offering more advanced formatting options. In this article, we will explore each of these methods in detail, starting with the simplest and most straightforward approach: using the superscript button in the ribbon.
Using the Superscript Button in the Ribbon
The superscript button in the ribbon is a powerful tool that can help you add a professional touch to your documents. When used correctly, it can make your text stand out and convey important information in a clear and concise manner. But before you can start using the superscript button, you need to know where to find it and how it works. In this article, we will explore the superscript button's functionality, how to apply it to selected text, and provide a step-by-step guide on how to locate it in the Home tab. By the end of this article, you will be able to confidently use the superscript button to enhance your documents. So, let's start by locating the superscript button in the Home tab.
Locating the Superscript Button in the Home Tab
To locate the superscript button in the Home tab, start by opening your Microsoft Word document and navigating to the Home tab, which is usually the default tab displayed when you open the document. The Home tab is located at the top of the screen, and it contains various formatting options and tools. Once you are in the Home tab, look for the "Font" group, which is typically located in the middle section of the tab. Within the Font group, you will see a variety of font-related options, including font styles, sizes, and effects. The superscript button is usually represented by a small "x" with a superscript number next to it, and it is often located in the "Effects" section of the Font group. If you are having trouble finding the superscript button, you can also use the keyboard shortcut "Ctrl + Shift + =" to apply superscript formatting to your text. Alternatively, you can also use the "Superscript" option from the "Font" dialog box, which can be accessed by clicking on the small arrow in the bottom right corner of the Font group. By following these steps, you should be able to locate the superscript button in the Home tab and apply superscript formatting to your text with ease.
Understanding the Superscript Button's Functionality
The superscript button, located in the Font group of the Home tab in the Ribbon, is a powerful tool that allows users to easily format text as superscript. When clicked, the superscript button applies a formatting style that raises the selected text above the normal line of text, making it smaller and slightly elevated. This is commonly used in mathematical and scientific notation, such as in exponents, formulas, and equations. For instance, the superscript button can be used to format text as E=mc^2, where the "2" is raised above the normal line of text. Additionally, the superscript button can also be used to format ordinal numbers, such as 1st, 2nd, and 3rd, where the "st", "nd", and "rd" are raised above the normal line of text. By using the superscript button, users can add a professional touch to their documents and make complex mathematical and scientific notation easier to read and understand.
Applying Superscript to Selected Text
Applying superscript to selected text is a straightforward process in Microsoft Word. To do this, first, select the text you want to superscript by highlighting it with your mouse or using the keyboard shortcut Ctrl+A to select all. Once the text is selected, navigate to the Home tab in the ribbon and locate the Font group. Within this group, you'll find the Superscript button, which looks like a small "x" raised above the baseline. Clicking this button will immediately apply superscript formatting to the selected text, raising it above the baseline and reducing its size. Alternatively, you can also use the keyboard shortcut Ctrl+Shift+= to apply superscript formatting to the selected text. This method is often faster and more convenient, especially when working with large documents or complex formatting. By applying superscript to selected text, you can add visual emphasis and clarity to your document, making it easier to read and understand.
Using Keyboard Shortcuts to Apply Superscript
Using keyboard shortcuts to apply superscript can significantly enhance your productivity and efficiency when working with documents, presentations, or spreadsheets. Superscript is a formatting style that makes text appear smaller and higher than the normal text, often used in mathematical equations, chemical formulas, or citations. There are several keyboard shortcuts that can be used to apply superscript, including the Ctrl+Shift+= shortcut, the Ctrl+Plus Sign shortcut, and customizing your own keyboard shortcuts. By mastering these shortcuts, you can quickly and easily apply superscript to your text without having to navigate through menus or use a mouse. In this article, we will explore these shortcuts in more detail, starting with the most commonly used shortcut, the Ctrl+Shift+= shortcut.
Using the Ctrl+Shift+= Shortcut for Superscript
Using the Ctrl+Shift+= shortcut is a quick and efficient way to apply superscript formatting to text in Microsoft Word. To use this shortcut, simply select the text you want to superscript, press the Ctrl key, the Shift key, and the equals sign (=) key simultaneously. This will automatically apply superscript formatting to the selected text, making it appear smaller and raised above the baseline of the surrounding text. The Ctrl+Shift+= shortcut is a convenient alternative to using the Font dialog box or the Home tab in the ribbon, and it can save you time and effort when working with superscript text. Additionally, this shortcut can be used in combination with other formatting options, such as bold or italic, to create more complex formatting effects. By mastering the Ctrl+Shift+= shortcut, you can streamline your workflow and focus on creating high-quality documents with ease.
Using the Ctrl+Plus Sign Shortcut for Superscript
Using the Ctrl+Plus Sign Shortcut for Superscript. To apply superscript using a keyboard shortcut, select the text you want to superscript, then press the Ctrl key and the plus sign (+) key at the same time. This will raise the selected text above the normal line of text, making it a superscript. This shortcut is a quick and easy way to apply superscript formatting to your text, and it can be used in a variety of situations, such as in mathematical equations, scientific notation, or to indicate a footnote or endnote. By using the Ctrl+Plus Sign shortcut, you can efficiently apply superscript formatting to your text without having to navigate through menus or use other formatting tools. This shortcut is especially useful when working with complex documents that require frequent use of superscript text.
Customizing Keyboard Shortcuts for Superscript
Customizing keyboard shortcuts for superscript in Microsoft Word allows users to streamline their workflow and increase productivity. By default, Word does not have a built-in keyboard shortcut for superscript, but users can create a custom shortcut to suit their needs. To do this, go to the "File" tab, click on "Options," and then select "Customize Ribbon." In the "Customize Keyboard" dialog box, click on "Keyboard" and then select the "Superscript" command from the list of available commands. Next, click on the "Press new shortcut key" field and enter the desired shortcut key combination. For example, users can assign the shortcut "Ctrl+Shift+S" to apply superscript. Once the shortcut is created, click "Assign" to save the changes. With this custom shortcut, users can quickly and easily apply superscript to selected text, saving time and effort in the process. Additionally, users can also customize the shortcut to apply superscript to a specific font style or size, allowing for even more flexibility and control. By customizing keyboard shortcuts for superscript, users can work more efficiently and effectively in Microsoft Word.
Using the Font Dialog Box to Apply Superscript
The Font Dialog Box is a powerful tool in Microsoft Word that allows users to customize the appearance of their text. One of the features of the Font Dialog Box is the ability to apply superscript to selected text. Superscript is a formatting option that raises the selected text above the normal line of text, making it ideal for creating mathematical equations, chemical formulas, and other types of notation. To apply superscript using the Font Dialog Box, users must first access the dialog box, then select the superscript option, and finally apply the superscript to the selected text. In this article, we will explore how to use the Font Dialog Box to apply superscript, starting with accessing the Font Dialog Box in Word.
Accessing the Font Dialog Box in Word
To access the Font dialog box in Word, navigate to the Home tab in the ribbon and locate the Font group. Click on the small arrow in the bottom right corner of the Font group, which is labeled "Font." This will open the Font dialog box, providing you with a comprehensive set of options to customize your font. Alternatively, you can also press the keyboard shortcut Ctrl+D to open the Font dialog box directly. Once the dialog box is open, you can select the Superscript option from the Effects section to apply superscript formatting to your text. The Font dialog box offers a range of other features, including font style, size, and color options, allowing you to fine-tune your text's appearance. By accessing the Font dialog box, you can take full control of your font settings and achieve the desired look for your document.
Selecting the Superscript Option in the Font Dialog Box
When you want to apply superscript formatting to your text in Microsoft Word, the Font dialog box provides a convenient option to do so. To access this option, select the text you want to superscript, then navigate to the Home tab in the ribbon. Click on the small arrow in the bottom right corner of the Font group to open the Font dialog box. In the Font dialog box, click on the Superscript checkbox, which can be found in the Effects section. This will apply superscript formatting to the selected text, making it appear smaller and raised above the baseline of the surrounding text. Alternatively, you can also use the keyboard shortcut Ctrl+Shift+= to apply superscript formatting quickly. By selecting the superscript option in the Font dialog box, you can easily add superscript formatting to your text, which is commonly used in mathematical and scientific notation, as well as in titles and headings.
Applying Superscript to Selected Text using the Font Dialog Box
Applying superscript to selected text using the Font dialog box is a straightforward process in Microsoft Word. To begin, select the text you want to superscript by highlighting it with your mouse or keyboard. Next, navigate to the Home tab in the ribbon and click on the Font dialog box launcher, which is located in the Font group. This will open the Font dialog box, where you can access a range of font formatting options. In the Font dialog box, click on the Superscript checkbox, which is located in the Effects section. This will apply superscript formatting to the selected text. You can also use the shortcut key Ctrl+Shift+= to apply superscript formatting quickly. Additionally, you can use the Font dialog box to customize the superscript formatting, such as changing the font size or style, by selecting the desired options from the various dropdown menus and checkboxes. Once you have applied the superscript formatting, click OK to close the Font dialog box and view the changes in your document.