How To Winterize A Travel Trailer
As the winter months approach, it's essential to prepare your travel trailer for the cold weather to prevent damage and ensure it remains in good condition. Winterizing your travel trailer is a crucial step in maintaining its longevity and functionality. To do this effectively, you'll need to focus on three key areas: pre-winterization preparation, protecting the plumbing and water systems, and preparing the interior and appliances. In this article, we'll guide you through the process of winterizing your travel trailer, starting with the essential pre-winterization preparation steps. By following these steps, you'll be able to ensure your trailer is ready for the harsh winter conditions and prevent costly repairs. So, let's get started with the pre-winterization preparation to set the foundation for a successful winterization process.
Pre-Winterization Preparation
As the winter season approaches, it's essential to prepare your home for the cold weather to prevent damage and ensure a safe and comfortable living space. Pre-winterization preparation is crucial to avoid costly repairs and maintain your home's integrity. One of the critical steps in pre-winterization is to drain and flush the plumbing system to prevent pipes from freezing and bursting. Additionally, disconnecting and storing hoses and cables can help prevent damage from freezing temperatures and snow. It's also vital to inspect the roof and exterior of your home for any damage or vulnerabilities that could be exacerbated by winter weather. By taking these steps, you can help protect your home and ensure a warm and safe winter. To start, let's take a closer look at the importance of draining and flushing the plumbing system.
Drain and Flush the Plumbing System
Drain and flush the plumbing system to prevent water from freezing and causing damage. Start by locating the low-point drain valves, usually found near the water tank and at the bottom of the trailer. Open these valves to allow water to drain from the pipes. Next, use a water pump or a blowout adapter to force air through the pipes, removing any remaining water. Be sure to drain the water heater, as well, by opening the drain valve and allowing the water to flow out. Finally, flush the entire system with compressed air to remove any remaining water droplets. This will help prevent freezing and ensure the plumbing system is ready for the winter months. Additionally, consider using a plumbing antifreeze solution to provide extra protection against freezing temperatures. By taking these steps, you can help protect your travel trailer's plumbing system from damage caused by freezing temperatures.
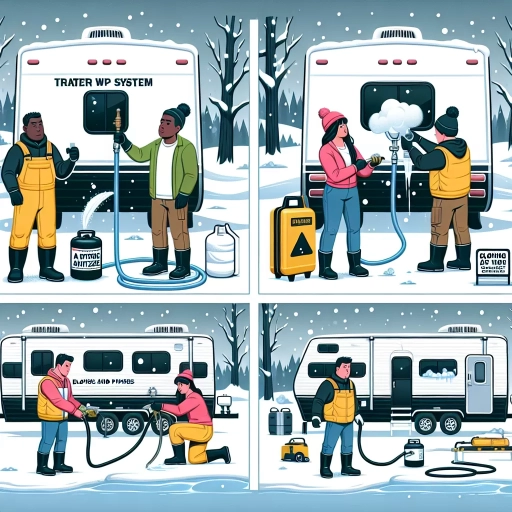
Disconnect and Store Hoses and Cables
When disconnecting and storing hoses and cables, it's essential to take the necessary steps to prevent damage and ensure they remain in good condition for the next camping season. Start by draining the water hoses, including the freshwater hose, city water hose, and any other hoses connected to the trailer's plumbing system. Use a blowout adapter or a wet/dry vacuum to remove any remaining water from the hoses. Next, disconnect the hoses from the trailer and store them in a dry, protected area, such as a storage bin or a designated hose storage compartment. Be sure to label each hose so you can easily identify them when it's time to reconnect them in the spring. For cables, such as the electrical cord and any other cables connected to the trailer, disconnect them from the trailer and store them in a separate, dry area. Use cable ties or zip ties to keep the cables organized and prevent tangles. It's also a good idea to inspect the cables for any signs of damage or wear and tear, and replace them if necessary. Finally, consider using a hose and cable storage bag or container to keep everything organized and protected from the elements. By taking the time to properly disconnect and store your hoses and cables, you'll help ensure they remain in good condition and are ready to go when you're ready to hit the road again.
Inspect the Roof and Exterior for Damage
Inspecting the roof and exterior of your travel trailer is a crucial step in pre-winterization preparation. Start by examining the roof for any signs of damage, such as cracks, tears, or worn-out seals around vents, skylights, and antennas. Check the condition of the roof's coating and reapply a new layer if necessary. Move on to the exterior walls, looking for any gaps or holes that could allow water to seep in. Inspect the windows, doors, and any exterior compartments, ensuring they are properly sealed and functioning correctly. Don't forget to check the tires, wheels, and brakes for any signs of wear or damage. Additionally, inspect the exterior plumbing, including the water heater, hoses, and connections, to ensure they are in good condition and won't freeze or burst during the winter months. Finally, take a closer look at the trailer's exterior paint and decals, touching up any faded or damaged areas to protect the trailer's finish. By thoroughly inspecting the roof and exterior of your travel trailer, you can identify and address any potential issues before they become major problems, ensuring your trailer remains safe and secure throughout the winter season.
Protecting the Plumbing and Water Systems
Protecting the plumbing and water systems in your home is crucial to prevent damage from freezing temperatures and corrosion. As the winter months approach, it's essential to take proactive steps to safeguard these systems. One of the most critical tasks is to drain and winterize the water heater, which will be discussed in more detail below. Additionally, using RV antifreeze to protect the plumbing and disconnecting and draining the water tank are also vital measures to ensure the integrity of your home's water systems. By taking these precautions, you can prevent costly repairs and ensure a safe and comfortable living space throughout the winter season. To start, let's focus on the importance of draining and winterizing the water heater.
Drain and Winterize the Water Heater
Drain and Winterize the Water Heater Draining and winterizing the water heater is a crucial step in protecting the plumbing and water systems of your travel trailer from freezing temperatures. Start by turning off the power to the water heater at the circuit breaker or fuse box. Next, locate the drain valve at the bottom of the water heater and attach a garden hose to it. Open the valve and allow the water to drain completely. Once the water has stopped flowing, close the valve and remove the hose. Now, open the temperature and pressure relief valve at the top of the water heater to release any remaining pressure. Finally, pour a non-toxic RV antifreeze into the water heater to prevent any remaining water from freezing. It's essential to use a non-toxic antifreeze specifically designed for RVs, as regular antifreeze can be toxic and contaminate the water system. By following these steps, you'll be able to drain and winterize your water heater, ensuring it remains in good working condition and ready for use when you're ready to hit the road again.
Use RV Antifreeze to Protect the Plumbing
When it comes to protecting the plumbing and water systems in your travel trailer, using RV antifreeze is a crucial step in the winterization process. RV antifreeze is a specialized type of antifreeze that is designed specifically for use in recreational vehicles, and it plays a vital role in preventing damage to the plumbing and water systems during the cold winter months. By using RV antifreeze, you can help to prevent the water in your trailer's pipes from freezing, which can cause costly damage and repairs. RV antifreeze is typically a non-toxic and biodegradable solution that is safe for use in potable water systems, and it is available in a variety of concentrations to suit different climates and temperatures. To use RV antifreeze effectively, it's essential to follow the manufacturer's instructions and take the necessary steps to ensure that the antifreeze is properly distributed throughout the plumbing system. This may involve pumping the antifreeze through the pipes, draining the water from the system, and then refilling the system with the antifreeze solution. By taking these steps, you can help to protect your trailer's plumbing and water systems from the harsh effects of winter and ensure that they remain in good working order when the warmer weather returns.
Disconnect and Drain the Water Tank
To disconnect and drain the water tank, start by locating the water tank drain valve, usually found at the bottom of the tank or near the water pump. Open the valve by turning it counterclockwise, allowing the water to drain out of the tank. You may need to use a wrench or pliers to loosen any corrosion or mineral buildup on the valve. Once the valve is open, allow the water to drain completely, which may take several minutes depending on the size of the tank. Next, disconnect the water hoses from the tank and drain them as well. You can use a blowout adapter to blow out any remaining water in the hoses. Finally, close the drain valve and replace any caps or plugs to prevent debris from entering the tank. It's also a good idea to inspect the tank and hoses for any signs of damage or wear, and make any necessary repairs before storing the trailer for the winter. By disconnecting and draining the water tank, you'll help prevent freezing and damage to the plumbing system, ensuring your trailer is ready for the next camping season.
Preparing the Interior and Appliances
Preparing the interior and appliances of your RV for winter storage is a crucial step in maintaining its overall condition and ensuring it remains in good working order for the next camping season. This process involves several key tasks, including defrosting and cleaning the refrigerator and freezer, draining and cleaning the water filter and purifier, and preparing the propane appliances for winter. By completing these tasks, you can help prevent damage from moisture and freezing temperatures, reduce the risk of mold and mildew growth, and ensure your appliances are ready to go when you need them again. In this article, we will explore each of these tasks in more detail, starting with the importance of defrosting and cleaning the refrigerator and freezer.
Defrost and Clean the Refrigerator and Freezer
Defrosting and cleaning the refrigerator and freezer is a crucial step in preparing your travel trailer for winterization. Start by removing all contents from the fridge and freezer, and discarding any expired or spoiled food. Next, turn off the refrigerator and freezer, and unplug them from the power source. Remove any shelves, drawers, and baskets, and wash them in warm soapy water. Then, mix a solution of equal parts water and white vinegar in a spray bottle, and spray the interior of the fridge and freezer, making sure to cover all surfaces. Let the solution sit for about 10-15 minutes to help loosen any tough stains and grime. Use a soft-bristled brush or a non-abrasive scrubber to gently scrub away any stubborn stains or grime. Rinse the interior with clean water, and dry it thoroughly with a clean towel. For tough stains or odors, you can also use a mixture of baking soda and water to create a paste, and apply it to the affected area. Let it sit for about 30 minutes before rinsing and drying. Once the fridge and freezer are clean, use a dry cloth to wipe down the exterior, and apply a thin layer of silicone-based lubricant to the seals to keep them from drying out during the winter months. Finally, plug in the fridge and freezer, and turn them back on to ensure they are working properly before storing your travel trailer for the winter.
Drain and Clean the Water Filter and Purifier
When it comes to winterizing a travel trailer, one crucial step is to drain and clean the water filter and purifier. This is essential to prevent any water from freezing and causing damage to the system during the cold winter months. Start by locating the water filter and purifier, usually found near the water pump or under the sink. Turn off the water pump and open the low-point drain valves to allow any water to drain out of the system. Next, remove the filter and purifier from their housings and soak them in a mixture of warm water and vinegar to loosen any mineral deposits. Use a soft-bristled brush to gently scrub away any debris or sediment, then rinse thoroughly with clean water. Once clean, reassemble the filter and purifier, making sure to secure them tightly in their housings. Finally, close the low-point drain valves and turn the water pump back on to test the system for any leaks. By taking the time to drain and clean the water filter and purifier, you'll help ensure your travel trailer's plumbing system remains in good working order and is ready for the next camping season.
Prepare the Propane Appliances for Winter
Preparing the propane appliances for winter is a crucial step in winterizing a travel trailer. Start by turning off the propane tank and disconnecting the propane hose from the regulator. Next, open the propane tank valve and let any remaining propane escape. Once the tank is empty, close the valve and reconnect the hose to the regulator. Then, turn the propane tank back on and check for any leaks by applying soapy water to the connections and watching for bubbles. If you find any leaks, tighten the connections and recheck. After that, turn off the propane tank again and go inside the trailer to prepare the appliances. Start by turning off the pilot lights on the stove, oven, and water heater. Then, cover the burner orifices with a small piece of tape or a burner cap to prevent debris from entering. Next, remove any food or debris from the oven and stove, and clean them thoroughly. Finally, turn off the propane tank and store it in a well-ventilated area, away from any open flames or sparks. By following these steps, you'll be able to prepare your propane appliances for winter and ensure they're ready to go when you need them again.