How To Repeat Header Row In Word
Here is the introduction paragraph: Repeating a header row in Microsoft Word is a useful feature that helps to maintain consistency and organization in your documents, especially when working with large tables. However, many users struggle to implement this feature effectively. To master the art of repeating header rows in Word, it's essential to understand the basics, follow a step-by-step guide, and be aware of common issues that may arise. In this article, we'll delve into the world of repeating header rows in Word, starting with the fundamentals. We'll explore the basics of repeating header rows, including how to set up your table and configure the header row to repeat. By grasping these basics, you'll be well on your way to creating professional-looking documents with ease. So, let's begin by understanding the basics of repeating header rows in Word.
Understanding the Basics of Repeating Header Rows in Word
When working with tables in Microsoft Word, understanding the basics of repeating header rows is essential for creating professional and well-organized documents. A repeating header row is a feature that allows you to repeat the header row of a table at the top of each page, making it easier for readers to understand the content of the table. But what exactly is a header row and why is it important? In this article, we will explore the basics of repeating header rows in Word, including how to identify the header row in your document, common scenarios where repeating header rows is necessary, and the benefits of using this feature. By the end of this article, you will have a clear understanding of how to use repeating header rows to enhance the readability and professionalism of your Word documents. So, let's start by understanding what a header row is and why it's important.
What is a Header Row and Why is it Important?
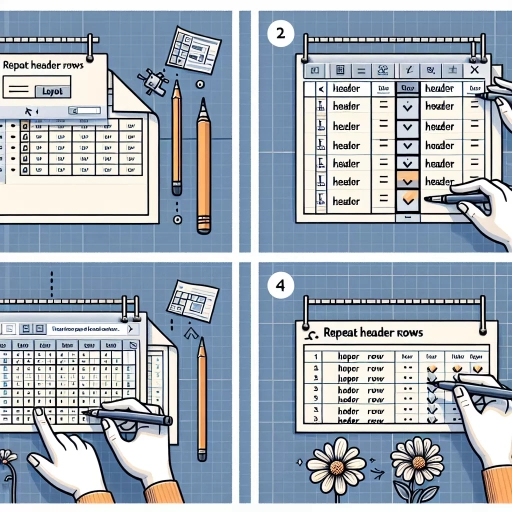
A header row is a row in a table that contains column headings or titles, typically located at the top of the table. It is an essential component of a table as it provides context and helps readers understand the data presented in the table. The header row is usually formatted differently from the rest of the table, with bold or italic text, and sometimes with a different background color or shading. In Microsoft Word, a header row can be repeated at the top of each page when a table spans multiple pages, making it easier for readers to understand the data as they navigate through the document. This feature is particularly useful for long tables, reports, and documents that require frequent reference to the column headings. By repeating the header row, readers can quickly identify the columns and rows, making it easier to analyze and understand the data. In Word, you can easily set a header row to repeat by selecting the row, going to the "Layout" tab, and checking the "Repeat Header Rows" box. This simple step can greatly enhance the readability and usability of your tables, making your documents more effective and professional.
How to Identify the Header Row in Your Word Document
To identify the header row in your Word document, start by looking for the row that contains the column headings or titles. Typically, this row is located at the top of the table and is formatted differently from the rest of the table. Check if the row has a distinct font style, size, or color that sets it apart from the other rows. You can also look for borders or shading that may be applied to the header row to make it stand out. Another way to identify the header row is to check if it is repeated at the top of each page when the table spans multiple pages. If the row is repeated, it is likely the header row. Additionally, you can check the table properties by selecting the table and going to the "Table Properties" dialog box. In the "Row" tab, look for the "Repeat as header row at the top of each page" checkbox. If this checkbox is selected, the row is designated as the header row. By using these methods, you can easily identify the header row in your Word document and take advantage of its formatting and functionality.
Common Scenarios Where Repeating Header Rows is Necessary
When working with large tables in Microsoft Word, there are several common scenarios where repeating header rows is necessary to maintain clarity and readability. One such scenario is when creating a table that spans multiple pages, where the header row needs to be repeated at the top of each page to provide context for the data below. This is particularly important in academic or technical documents, such as research papers or technical reports, where tables may be lengthy and complex. Another scenario is when creating a table with multiple sections or categories, where repeating the header row helps to distinguish between sections and makes it easier to navigate the table. For example, in a table comparing features of different products, repeating the header row can help to separate the features of each product and make it easier to compare them. Additionally, repeating header rows can also be useful in tables with multiple levels of subheadings, where the header row needs to be repeated to provide a clear hierarchy of information. Overall, repeating header rows is a useful feature in Word that can help to improve the clarity and readability of tables, making it easier for readers to understand and navigate complex data.
Step-by-Step Guide to Repeating Header Rows in Word
When working with tables in Microsoft Word, it's often necessary to repeat header rows at the top of each page to maintain clarity and organization. Fortunately, Word provides several methods to achieve this, making it easier to create professional-looking documents. In this article, we'll explore three step-by-step approaches to repeating header rows in Word. First, we'll discuss how to enable the "Repeat Header Rows" option in the table properties, which allows you to automatically repeat the header row at the top of each page. Alternatively, you can use the "Repeat Header Rows" button in the Table Tools tab, which provides a quick and easy way to repeat the header row. For more complex tables, you can also manually repeat the header row for each page, providing more control over the layout. By following these methods, you can ensure that your tables are well-organized and easy to read. To get started, let's take a closer look at enabling the "Repeat Header Rows" option in the table properties.
Enabling the "Repeat Header Rows" Option in the Table Properties
To enable the "Repeat Header Rows" option in the Table Properties, follow these steps. First, select the table for which you want to repeat the header rows. Then, go to the "Layout" tab in the ribbon. In the "Table" group, click on the "Properties" button. This will open the "Table Properties" dialog box. In the dialog box, click on the "Row" tab. In the "Row" tab, check the box next to "Repeat as header row at the top of each page." This option will repeat the header row at the top of each page where the table continues. You can also specify the number of header rows to repeat by entering a value in the "Number of header rows to repeat" field. Once you have made your selections, click "OK" to apply the changes. The header rows will now be repeated at the top of each page where the table continues.
Using the "Repeat Header Rows" Button in the Table Tools Tab
When working with tables in Microsoft Word, the "Repeat Header Rows" button in the Table Tools tab is a valuable feature that allows you to easily repeat header rows at the top of each page. This feature is particularly useful when working with large tables that span multiple pages, as it helps to maintain consistency and clarity throughout the document. To use the "Repeat Header Rows" button, simply select the header row of your table, navigate to the Table Tools tab, and click on the "Repeat Header Rows" button in the Data group. This will automatically repeat the selected header row at the top of each page, making it easier for readers to understand the table's structure and content. Additionally, you can also use this feature to repeat header rows at the top of each section or subsection, depending on your document's layout and organization. By using the "Repeat Header Rows" button, you can save time and effort in formatting your tables, and ensure that your documents are professional, well-organized, and easy to read.
Manually Repeating the Header Row for Each Page
To manually repeat the header row for each page, you can use the "Repeat Header Rows" feature in Word. This feature allows you to specify which rows you want to repeat at the top of each page. To do this, select the header row that you want to repeat, go to the "Layout" tab in the ribbon, and click on the "Repeat Header Rows" button in the "Data" group. In the "Repeat Header Rows" dialog box, select the rows that you want to repeat and click "OK". Alternatively, you can also use the "Page Break" feature to manually insert a page break before the header row, and then repeat the header row on each page. To do this, place your cursor before the header row, go to the "Layout" tab, and click on the "Breaks" button in the "Page Setup" group. Select "Page" from the drop-down menu, and then click "OK". This will insert a page break before the header row, and you can then repeat the header row on each page by copying and pasting it. However, this method can be time-consuming and prone to errors, especially if you have a large document with many pages. Therefore, it is recommended to use the "Repeat Header Rows" feature to manually repeat the header row for each page.
Troubleshooting Common Issues with Repeating Header Rows in Word
When working with Microsoft Word, one of the most frustrating issues users encounter is with repeating header rows. These rows are essential for maintaining consistency and professionalism in documents, especially in reports, academic papers, and business proposals. However, when they fail to repeat as expected, it can disrupt the entire layout and readability of the document. There are several common issues that can cause problems with repeating header rows, including the header row not repeating on every page, the header row not aligning properly, and the header row overlapping with the footer. Understanding the reasons behind these issues is crucial for effective troubleshooting. In this article, we will delve into the possible causes and solutions for these common problems, starting with why the header row is not repeating on every page.
Why the Header Row is Not Repeating on Every Page
When the header row is not repeating on every page in Microsoft Word, it's often due to incorrect settings or formatting issues. To resolve this, first, ensure that the header row is properly defined by selecting the entire row and going to the "Layout" tab in the ribbon. Then, check the "Repeat Header Rows" option in the "Data" group. If this option is not enabled, the header row will not repeat on subsequent pages. Additionally, verify that the table is set to break across pages by going to the "Table Properties" dialog box and checking the "Allow row to break across pages" option. If this option is not selected, the header row will not repeat on every page. Furthermore, check for any section breaks or page breaks within the table, as these can prevent the header row from repeating. If none of these solutions work, try resetting the table formatting by selecting the entire table and pressing "Ctrl+Space" to remove any unnecessary formatting. By addressing these common issues, you should be able to get the header row to repeat on every page in your Word document.
How to Fix the Header Row Not Aligning Properly
When the header row in your Word document is not aligning properly, it can be frustrating and affect the overall appearance of your table. To fix this issue, start by checking the table's alignment settings. Ensure that the table is aligned to the left or right margin, depending on your preference. You can do this by selecting the table, going to the "Layout" tab, and clicking on the "Alignment" dropdown menu. If the table is aligned to the center, it may cause the header row to misalign. Next, check the column widths and adjust them if necessary. If the columns are too narrow or too wide, it can cause the header row to shift out of alignment. You can adjust the column widths by selecting the column, going to the "Layout" tab, and using the "Width" dropdown menu. Additionally, check the paragraph settings of the header row. Ensure that the paragraph is aligned to the left or right, and that there are no unnecessary spaces or tabs that could be causing the misalignment. You can check the paragraph settings by selecting the header row, going to the "Home" tab, and clicking on the "Paragraph" group. If none of these solutions work, try resetting the table's formatting by selecting the table, going to the "Layout" tab, and clicking on the "Reset" button. This will remove any custom formatting and restore the table to its default settings. By following these steps, you should be able to fix the header row not aligning properly and achieve a professional-looking table in your Word document.
Resolving the Issue of the Header Row Overlapping with the Footer
When dealing with the issue of the header row overlapping with the footer in a Word document, there are a few potential solutions to consider. First, check the page layout settings to ensure that the header and footer are not set to overlap. To do this, go to the "Layout" tab in the ribbon, click on "Page Setup," and then select "Layout" from the dropdown menu. In the "Page Setup" dialog box, make sure that the "Header and Footer" section is set to "Don't overlap" or "Overlap" is unchecked. If this doesn't resolve the issue, try adjusting the header and footer margins. To do this, go to the "Layout" tab, click on "Margins," and then adjust the "Header" and "Footer" margins to ensure that they are not overlapping. Additionally, check the "Footer" section in the "Page Setup" dialog box to ensure that the "Footer" is not set to "Overlap" with the "Header." If the issue persists, try resetting the header and footer to their default settings. To do this, go to the "Insert" tab, click on "Header" or "Footer," and then select "Reset" from the dropdown menu. This will reset the header and footer to their default settings, which may resolve the overlap issue. Finally, if none of the above solutions work, try checking the document's compatibility settings. To do this, go to the "File" tab, click on "Options," and then select "Compatibility" from the dropdown menu. In the "Compatibility" dialog box, check to see if the document is set to be compatible with an earlier version of Word. If it is, try changing the compatibility settings to see if this resolves the issue. By trying these potential solutions, you should be able to resolve the issue of the header row overlapping with the footer in your Word document.