How To Unzip A File On Mac
Here is the introduction paragraph: Unzipping files on a Mac is a straightforward process that can be accomplished using built-in tools or third-party software. Whether you're a seasoned Mac user or just starting out, understanding how to unzip files is an essential skill that can save you time and frustration. In this article, we'll take a closer look at the basics of unzipping files on Mac, including the different types of zip files and how to use built-in tools to extract their contents. We'll also cover some common troubleshooting techniques and advanced unzipping methods for those who need more control over the process. By the end of this article, you'll be able to confidently unzip files on your Mac and get started with the basics of file compression. So, let's start by understanding the basics of unzipping files on Mac.
Understanding the Basics of Unzipping Files on Mac
If you're a Mac user, you've probably encountered ZIP files at some point. But do you know what they are and how to work with them? A ZIP file is a compressed file that contains one or more files or folders. It's a convenient way to share and store files, but you need to unzip it to access the contents. In this article, we'll explore the basics of unzipping files on Mac, starting with the fundamentals of ZIP files. We'll also cover how to identify if a file is zipped on a Mac and the basic requirements for unzipping files. So, let's dive in and start with the basics: what is a ZIP file and why do you need to unzip it?
What is a ZIP file and why do you need to unzip it?
A ZIP file is a compressed file format that contains one or more files or folders that have been reduced in size to make them easier to store and transfer. ZIP files are commonly used to share files over the internet, as they take up less space and can be downloaded more quickly. However, in order to access the contents of a ZIP file, you need to unzip it, which involves extracting the compressed files and folders from the ZIP archive. Unzipping a file allows you to view, edit, and use the contents of the ZIP file, making it a necessary step in working with compressed files. By unzipping a ZIP file, you can access the individual files and folders inside, which can then be used for various purposes such as editing, printing, or sharing. In essence, unzipping a ZIP file is like unpacking a digital package, allowing you to access the contents and use them as needed.
How to identify if a file is zipped on a Mac
To identify if a file is zipped on a Mac, you can follow these simple steps. First, look for the file extension. Zipped files typically have a ".zip" extension at the end of the file name. If you see this extension, it's likely that the file is zipped. Another way to check is to look at the file icon. Zipped files usually have a distinctive icon that resembles a folder with a zipper on it. If you see this icon, it's a good indication that the file is zipped. You can also check the file size. Zipped files are often smaller in size compared to the original file, as they are compressed. If the file size is significantly smaller than expected, it could be a zipped file. Additionally, you can right-click (or control-click) on the file and select "Get Info" to view the file's properties. If the file is zipped, it will say "Kind: Compressed" or "Kind: Zip archive" in the Get Info window. By checking these indicators, you can easily identify if a file is zipped on your Mac.
Basic requirements for unzipping files on Mac
To unzip files on a Mac, you'll need to meet some basic requirements. First, ensure your Mac is running macOS High Sierra or later, as this operating system and later versions have built-in support for unzipping files. You'll also need a compatible file archiver or unzip tool, such as Archive Utility, which comes pre-installed on Macs, or a third-party app like Unarchiver or WinZip. Additionally, make sure the zip file you want to unzip is not corrupted or password-protected, as this can prevent the unzipping process from working correctly. If the zip file is password-protected, you'll need to enter the correct password to access the contents. Furthermore, ensure you have enough disk space to store the unzipped files, as the unzipped files may take up more space than the original zip file. Finally, be cautious when downloading zip files from the internet, as they may contain malware or viruses, and always scan the files with an anti-virus software before unzipping them.
Using Built-in Tools to Unzip Files on Mac
Unzipping files on a Mac can be a straightforward process, thanks to the built-in tools that come with the operating system. There are several ways to unzip files on a Mac, and in this article, we will explore three of the most common methods. You can use the Archive Utility, which is a built-in app that allows you to easily extract files from zip archives. Alternatively, you can use the Finder, which provides a simple and intuitive way to unzip files. For more advanced users, the Terminal can also be used to unzip files using command-line commands. In this article, we will take a closer look at each of these methods, starting with how to use the Archive Utility to unzip files.
How to use the Archive Utility to unzip files
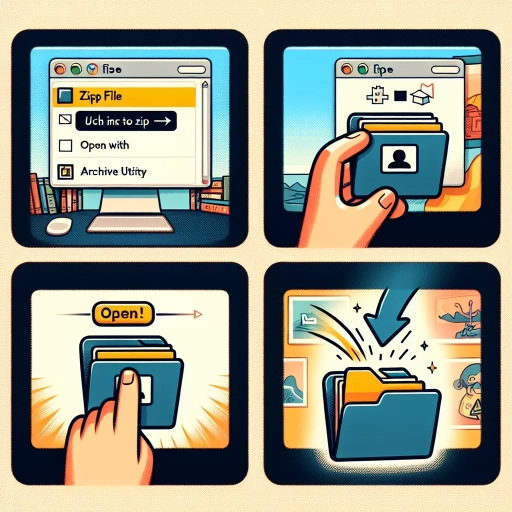
To use the Archive Utility to unzip files on your Mac, start by locating the zipped file you want to extract. You can find it in the Finder, on your desktop, or in any other folder. Once you've found the file, right-click (or control-click) on it and select "Open With" from the context menu. From the list of available applications, choose "Archive Utility." Alternatively, you can also double-click on the zipped file, and if Archive Utility is set as the default application for handling zip files, it will automatically open and start the extraction process. If not, you can change the default application by selecting "Get Info" from the context menu, clicking on "Open with," and choosing Archive Utility from the list. Once Archive Utility is open, it will automatically extract the contents of the zipped file to a folder with the same name as the original file, but without the ".zip" extension. You can also choose to extract the files to a different location by clicking on the "Extract" button and selecting a new destination folder. Additionally, you can also use the "Extract to" option to specify a different folder or location for the extracted files. The Archive Utility will then extract the files to the specified location, preserving the original folder structure and file names. Overall, using the Archive Utility to unzip files on your Mac is a straightforward and efficient process that can be completed in just a few clicks.
Using the Finder to unzip files on Mac
Using the Finder to unzip files on Mac is a straightforward process that can be completed in a few simple steps. To start, locate the zipped file you want to unzip in the Finder. You can do this by searching for the file in the search bar at the top right corner of the screen or by navigating to the folder where the file is stored. Once you've found the file, click on it to select it. Next, right-click (or control-click) on the file and select "Open With" from the dropdown menu. From the list of available applications, select "Archive Utility." This will open the Archive Utility app, which will automatically unzip the file. Alternatively, you can also double-click on the zipped file to open it with the Archive Utility app. The unzipped files will be extracted to the same folder as the original zipped file. You can also choose to extract the files to a different location by selecting "Extract" from the Archive Utility app and choosing a new location. Using the Finder to unzip files on Mac is a convenient and easy way to access the contents of zipped files without having to download any additional software.
Unzipping files using the Terminal on Mac
Unzipping files using the Terminal on Mac is a straightforward process that can be accomplished with a few simple commands. To start, open the Terminal application, which can be found in the Applications/Utilities folder or by using Spotlight search. Once the Terminal is open, navigate to the directory where the zipped file is located using the "cd" command, followed by the path to the file. For example, if the file is on the desktop, the command would be "cd ~/Desktop". Next, use the "unzip" command, followed by the name of the zipped file, to extract the contents. For instance, if the file is named "example.zip", the command would be "unzip example.zip". The Terminal will then display the progress of the unzipping process, and once complete, the contents of the zipped file will be extracted to the same directory. Alternatively, you can use the "tar" command to unzip files, especially if the file is in a tarball format. The command would be "tar -xvf example.tar", where "x" stands for extract, "v" stands for verbose, and "f" stands for file. By using the Terminal to unzip files, you can take advantage of the command-line interface to automate tasks and streamline your workflow. Additionally, the Terminal provides more control over the unzipping process, allowing you to specify options such as the extraction directory and file permissions. Overall, unzipping files using the Terminal on Mac is a quick and efficient way to access the contents of zipped files, and can be a valuable skill for anyone who works with compressed files regularly.
Troubleshooting and Advanced Unzipping Techniques on Mac
When it comes to working with ZIP files on a Mac, there are several techniques and tools that can help you troubleshoot and manage these compressed files more efficiently. One common issue that Mac users face is dealing with corrupted or unzippable files, which can be frustrating and time-consuming to resolve. In this article, we will explore some advanced unzipping techniques and troubleshooting methods to help you overcome these challenges. We will also discuss how to password-protect a ZIP file on Mac, providing an additional layer of security for sensitive data. Furthermore, we will examine the use of third-party apps to unzip files on Mac, offering alternative solutions for users who require more advanced features. By the end of this article, you will be equipped with the knowledge and skills to handle even the most stubborn ZIP files. So, let's start by addressing one of the most common problems: what to do if a ZIP file is corrupted or cannot be unzipped.
What to do if a ZIP file is corrupted or cannot be unzipped
If a ZIP file is corrupted or cannot be unzipped, there are several steps you can take to try and recover the contents. First, try using a different unzipping tool, such as The Unarchiver or StuffIt Expander, as these may be able to extract the files even if the built-in Archive Utility cannot. If this doesn't work, try checking the file for errors using a tool like Disk Utility or a third-party disk repair app. You can also try using a ZIP repair tool, such as ZIP Repair or Repair ZIP, which can scan the file for errors and attempt to fix them. If the file is still not unzipping, try downloading it again from the original source, as it's possible that the file was corrupted during the download process. Additionally, you can try using a cloud storage service like Google Drive or Dropbox to upload the file and then download it again, as these services often have built-in error correction and can help recover corrupted files. If none of these steps work, it's possible that the file is irreparably damaged and cannot be recovered. In this case, you may need to contact the person or organization that sent you the file and ask them to resend it.
How to password-protect a ZIP file on Mac
To password-protect a ZIP file on Mac, you can use the built-in Archive Utility or a third-party compression tool like Keka. Here's how to do it using Archive Utility: First, select the files you want to compress and right-click on them, then choose "Compress Items" from the context menu. Alternatively, you can go to "File" > "Compress" in the Finder menu. This will create a ZIP file in the same location as the original files. To add a password, open the Terminal app and navigate to the location of the ZIP file using the "cd" command. Then, type the command "zip -e archive.zip" (replace "archive.zip" with the name of your ZIP file). You will be prompted to enter and confirm a password. Once you've set the password, the ZIP file will be encrypted and can only be opened by entering the correct password. If you prefer a more user-friendly approach, you can use Keka, which offers a simple and intuitive interface for creating password-protected ZIP files. Simply drag and drop the files you want to compress into the Keka window, select the "ZIP" format, and check the "Encrypt" box. Then, enter and confirm your password, and Keka will create a password-protected ZIP file. Either way, your ZIP file will be securely protected with a password, and you can share it with others without worrying about unauthorized access.
Using third-party apps to unzip files on Mac
Using third-party apps to unzip files on Mac is a viable option when the built-in Archive Utility is not sufficient or when you need more advanced features. There are several third-party apps available that can help you unzip files on your Mac, including WinZip, StuffIt Expander, and The Unarchiver. These apps offer a range of features, such as support for multiple archive formats, password protection, and the ability to extract files to a specific location. To use a third-party app to unzip a file on your Mac, simply download and install the app, then drag and drop the zip file onto the app's icon or open the app and select the zip file from within the app. The app will then extract the contents of the zip file to a folder, which you can access and use as needed. Some third-party apps also offer additional features, such as the ability to create zip files, compress files, and encrypt files for secure sharing. Overall, using a third-party app to unzip files on your Mac can be a convenient and efficient way to manage your files, especially if you work with a variety of file formats or need advanced features not available in the built-in Archive Utility.