How To Block Sites On Iphone
In today's digital age, it's easy to get sidetracked by social media, email, or other distracting websites on your iPhone. Blocking certain sites can help you stay focused, increase productivity, and even protect your children from accessing inappropriate content. Fortunately, there are several ways to block sites on your iPhone, and we'll explore three effective methods in this article. You can use the built-in Screen Time feature, download third-party apps, or utilize DNS filtering to restrict access to unwanted websites. By the end of this article, you'll know how to block sites on your iPhone and take control of your online experience. Let's start with the simplest method: using the Screen Time feature.
Using Screen Time Feature
In today's digital age, it's essential to monitor and control our screen time to maintain a healthy balance between technology use and other aspects of our lives. The Screen Time feature, available on various devices, provides a comprehensive solution to track and manage our screen time. By utilizing this feature, we can set boundaries, prioritize tasks, and ensure a more productive and focused lifestyle. To get started, we need to enable Screen Time, which allows us to track our screen time and set goals for reduction. Additionally, we can set up Content & Privacy Restrictions to limit access to certain apps and features, and even block specific websites that may be distracting or inappropriate. By taking these steps, we can take control of our screen time and develop healthier habits. In this article, we will explore how to enable Screen Time, set up Content & Privacy Restrictions, and block specific websites, starting with the first step: enabling Screen Time.
Enabling Screen Time
Enabling Screen Time on your iPhone allows you to monitor and control the amount of time you spend on your device, helping you maintain a healthy balance between screen time and other activities. To enable Screen Time, go to Settings, then tap on Screen Time. If you're using an iPhone with iOS 12 or later, you'll see a toggle switch to turn Screen Time on. If you're using an iPhone with an earlier version of iOS, you'll need to tap on Turn On Screen Time. Once enabled, you'll be asked to set up Screen Time, which includes setting a passcode to restrict changes to Screen Time settings. You'll also be prompted to set up Downtime, which allows you to schedule time away from your screen. Additionally, you can set up App Limits, which enables you to set time limits for specific apps or categories of apps. By enabling Screen Time, you'll gain valuable insights into your screen time habits and be able to make informed decisions about how to manage your time more effectively.
Setting Up Content & Privacy Restrictions
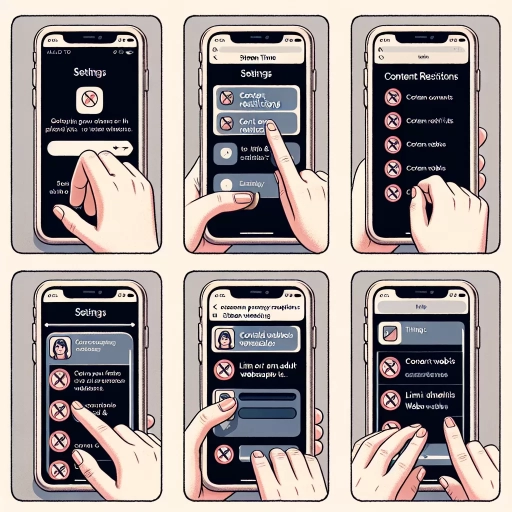
Setting up Content & Privacy Restrictions on your iPhone is a straightforward process that allows you to control what content is accessible on your device. To start, go to the Settings app and tap on Screen Time. From there, select Content & Privacy Restrictions and toggle the switch to the right to enable the feature. You will be prompted to set a passcode, which will be required to make any changes to these settings in the future. Once you've set your passcode, you can begin configuring the restrictions. You can choose to restrict explicit content, such as music, movies, and TV shows, as well as limit access to certain websites and apps. You can also set restrictions on Siri, allowing you to control what type of content she can access and share. Additionally, you can restrict purchases and downloads from the App Store, and even limit the amount of time spent on certain apps. By setting up Content & Privacy Restrictions, you can have peace of mind knowing that your iPhone is secure and that you have control over the content that is accessible on your device.
Blocking Specific Websites
Blocking specific websites on an iPhone can be an effective way to boost productivity, reduce distractions, and protect yourself from unwanted content. By using the Screen Time feature, you can easily restrict access to certain websites across all your devices connected to the same iCloud account. To block a specific website, go to Settings > Screen Time > Content & Privacy Restrictions > Allowed Websites. From there, you can add specific websites to the "Never Allow" list, which will prevent them from being accessed on your iPhone. You can also use the "Limit Adult Websites" feature to automatically block a wide range of adult content. Additionally, you can use third-party apps, such as Freedom or SelfControl, to block distracting websites or set time limits on specific sites. These apps can be especially useful if you need to block websites during certain times of the day or for a set period. By blocking specific websites, you can take control of your online activity, stay focused, and maintain a healthy balance between screen time and other aspects of your life.
Using Third-Party Apps
Using third-party apps can be a game-changer for individuals looking to boost their productivity and stay focused on their goals. By leveraging these apps, users can block distracting websites, set custom block lists, and establish schedules to ensure they stay on track. In this article, we will explore the process of using third-party apps to block distracting websites, starting with the initial step of downloading and installing a website blocker app. We will then delve into configuring the app to block specific sites, and finally, discuss how to set up custom block lists and schedules. By the end of this article, readers will have a comprehensive understanding of how to harness the power of third-party apps to achieve their goals. To get started, let's begin with the first step: downloading and installing a website blocker app.
Downloading and Installing a Website Blocker App
To download and install a website blocker app on your iPhone, start by opening the App Store and searching for a reputable app that suits your needs, such as Freedom, SelfControl, or Cold Turkey. Read reviews and check the app's ratings to ensure it's reliable and effective. Once you've selected an app, tap the "Get" button to begin the download process. Wait for the app to download and install on your device, then tap the "Open" button to launch it. You'll be prompted to create an account or log in if you already have one. Follow the in-app instructions to set up the blocker, which may include selecting the websites you want to block, setting a schedule, and choosing a block duration. Some apps may also offer additional features, such as customizable block lists, password protection, and analytics. Once you've configured the app, it will start blocking the specified websites on your iPhone, helping you stay focused and avoid distractions.
Configuring the App to Block Specific Sites
Configuring the app to block specific sites is a straightforward process that can be completed in a few steps. First, open the app and navigate to the settings or configuration section. Look for the option to add or block specific websites, and click on it. You will then be prompted to enter the URL of the website you want to block. Type in the URL and click the "Add" or "Block" button to add it to the list of blocked sites. You can also add multiple sites at once by separating the URLs with commas. Some apps may also allow you to block entire domains or subdomains, which can be useful for blocking multiple sites at once. For example, if you want to block all social media sites, you can block the entire domain of "facebook.com", "twitter.com", "instagram.com", etc. Once you have added the sites you want to block, save the changes and the app will start blocking access to those sites. You can also set a password or PIN to prevent others from accessing the blocked sites or changing the settings. Additionally, some apps may also provide features such as scheduling, which allows you to block sites during specific times of the day or week, or whitelisting, which allows you to allow access to specific sites even if they are blocked. By configuring the app to block specific sites, you can take control of your online activity and stay focused on your goals.
Setting Up Custom Block Lists and Schedules
Setting up custom block lists and schedules is a great way to take control of your iPhone's content filtering. To do this, you'll need to use a third-party app, such as Freedom, SelfControl, or Moment. These apps allow you to create custom block lists of websites, apps, or even entire categories of content that you want to restrict access to. You can also set up schedules to block certain content during specific times of the day or week. For example, you might want to block social media during work hours or block gaming apps during bedtime. By setting up custom block lists and schedules, you can help yourself stay focused, avoid distractions, and maintain a healthy balance between screen time and other activities. Additionally, some apps also offer features like whitelisting, which allows you to specify certain websites or apps that are always allowed, even during blocked times. This can be useful for work or educational purposes. Overall, setting up custom block lists and schedules is a powerful way to customize your iPhone's content filtering and take control of your screen time.
Using DNS Filtering
Using DNS filtering is a simple and effective way to block unwanted websites and content on your devices. By configuring your DNS settings, you can restrict access to certain websites, protecting your family and employees from harmful or distracting content. In this article, we will explore how to use DNS filtering to block unwanted websites, starting with configuring DNS settings on your iPhone. We will also discuss setting up a DNS filtering service and how to block specific websites using DNS filtering. By the end of this article, you will have a comprehensive understanding of how to use DNS filtering to create a safer and more productive online environment. To get started, let's take a look at how to configure DNS settings on your iPhone.
Configuring DNS Settings on the iPhone
Configuring DNS settings on your iPhone is a straightforward process that can significantly enhance your online security and browsing experience. To start, go to your iPhone's Settings app and tap on Wi-Fi. Locate the network you are currently connected to and tap the "i" icon next to it. Scroll down to the "Configure DNS" section and tap on it. You will be presented with two options: "Automatic" and "Manual." If you choose "Manual," you will need to enter the DNS server addresses provided by your DNS service provider. For example, if you are using Cloudflare DNS, you would enter "1.1.1.1" and "1.0.0.1" in the respective fields. Once you have entered the DNS server addresses, tap "Save" to apply the changes. Alternatively, you can also configure DNS settings using a third-party app, such as DNS Changer or DNS Manager. These apps allow you to easily switch between different DNS services and configure advanced settings, such as DNS over HTTPS (DoH) and DNS over TLS (DoT). By configuring DNS settings on your iPhone, you can enjoy faster and more secure browsing, as well as access to content that may be blocked by your internet service provider. Additionally, using a reputable DNS service can also help protect your device from malware and phishing attacks. Overall, configuring DNS settings on your iPhone is a simple and effective way to take control of your online experience and stay safe online.
Setting Up a DNS Filtering Service
Setting up a DNS filtering service is a straightforward process that can be completed in a few steps. First, choose a reputable DNS filtering service provider, such as CleanBrowsing or DNSFilter, that offers a free or paid plan that suits your needs. Next, sign up for an account and follow the provider's instructions to set up the service on your iPhone. This typically involves changing the DNS settings on your device to point to the provider's servers. You can do this by going to the Settings app, selecting Wi-Fi, and tapping on the "i" icon next to your network name. Then, tap on "Configure DNS" and select "Manual" to enter the provider's DNS server addresses. Once you've set up the service, you can configure the filtering settings to block specific websites, categories, or types of content. Many providers also offer additional features, such as custom block lists, time-based filtering, and activity monitoring, to help you tailor the service to your needs. By setting up a DNS filtering service, you can enjoy a safer and more controlled browsing experience on your iPhone.
Blocking Websites Using DNS Filtering
Blocking websites using DNS filtering is a highly effective method to restrict access to unwanted online content. DNS filtering works by intercepting DNS requests and blocking access to specific websites or domains. This method is particularly useful for parents, educators, and employers who want to limit internet access for children, students, or employees. By using DNS filtering, you can block websites that contain explicit content, malware, or other types of unwanted material. The process involves configuring your DNS settings to use a filtering service, which can be done on individual devices or at the network level. Once configured, the DNS filtering service will block access to any website that is listed on its blocklist, preventing users from accessing the site even if they try to do so directly. This method is also useful for blocking websites that are known to be malicious or phishing sites, helping to protect users from online threats. Additionally, DNS filtering can be used to block access to websites that are not suitable for a particular age group or that are not aligned with an organization's policies. Overall, blocking websites using DNS filtering is a simple and effective way to control internet access and ensure a safe and secure online environment.