How To Cut Drywall
Understanding the Basics of Drywall Cutting
Materials and Equipment Required for Drywall Cutting
Before embarking on the process of cutting drywall, it is importante to understand the tools and equipment required. The primary tool used for cutting drywall is a utility knife. This lightweight, handheld tool is effective for making precise and clean cuts in the drywall material. It's important to ensure the utility knife has a sharp blade to prevent tearing the drywall, which can affect the finish of the project. The tape measure and pencil are fundamental for marking the dimensions of the cut on the drywall sheet. Additionally, the use of a straight edge or drywall T-square ensures that the cuts are straight and accurate, contributing to a professional-looking finish.
- Utility knife: For making precise cuts
- Tape measure and pencil: For marking dimensions
- Straight edge or T-square: For ensuring straight cuts
Safety Precautions During Drywall Cutting
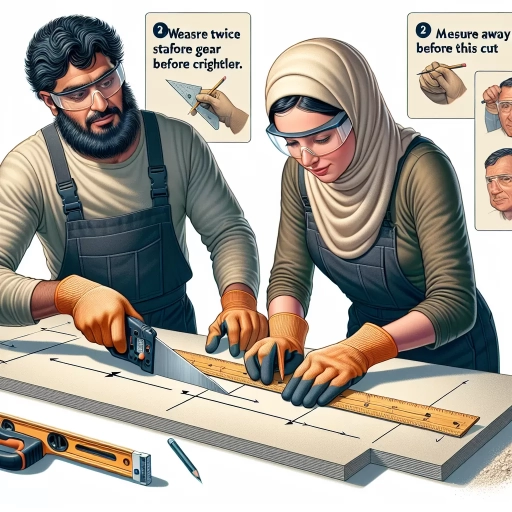
Like any other DIY project, safety precautions are vital when cutting drywall. Although drywall cutting is not considered highly dangerous, without proper safety measures, minor accidents can still occur. Wearing safety goggles helps to protect the eyes from dust particles. Likewise, using a dust mask prevents the inhalation of drywall dust, which can be hazardous to the respiratory system. Further, wearing gloves can prevent potential cuts from the sharp edges of the cut drywall or the utility knife used in the process. It's also advisable to work in a well-ventilated area to mitigate dust accumulation.
- Safety goggles: Protects eyes from dust particles
- Dust mask: Prevents inhalation of drywall dust
- Gloves: Guards against potential cuts
General Drywall Cutting Tips
Drywall cutting is a process that requires patience and precision. One important tip is to avoid rushing the process. It's essential to take time to measure and mark the required dimensions accurately before initiating the cutting process. Secondly, it's advisable to score the drywall before making the cut. This involves drawing an initial shallow cut along the marked lines before making the final deeper cut. This helps to guide the utility knife and makes the cutting process smoother and more accurate. Lastly, steadiness while maneuvering the utility knife is crucial in achieving a clean and straight cut.
- Don't rush the process: Accurate measurements and markings are crucial
- Score before cutting: Guides the cut and improves accuracy
- Steady handle of the utility knife: Helps accomplish clean and straight cuts
The Process of Drywall Cutting
Measuring and Marking the Drywall
Once the necessary tools and equipment are assembled, the first step in cutting drywall is measuring and marking the drywall sheet according to the required dimensions. The tape measure and pencil are used in this process. The importance of accurate measurement cannot be overstated as it ensures that the cut pieces fit perfectly into their designated spots. To maintain straight lines, using a straight edge or T-square as a guide while marking is advised.
- An accurate measurement: Ensures perfect fit for cut pieces
- Use of straight edge or T-square: Assists in maintaining straight lines
Scoring and Cutting the Drywall
After making accurate markings, the next step is the cutting process. Scoring the drywall along the marked lines using the utility knife is the initial stage in this process. Scoring should be done gently and deliberately to avoid making unwanted deep cuts. It helps in providing a guide for the actual cut, making the process smoother. The utility knife is then used to cut along the scored line until the drywall is cut all the way through.
- Gentle scoring: Aids in avoiding unwanted deep cuts
- Utility knife use: Cuts through the drywall along the scored line
Sanding the Edges
Once the drywall is cut, the process does not end there. The edges of the cut drywall may be rough and need a bit of finishing. This is where sanding comes in. Sanding the edges helps to smooth out any unevenness and sharpness. However, it's important to do this gently to avoid chipping off more drywall than intended.
- Sanding: Smooths out unevenness and sharpness
- Gentle process: Prevents unnecessary chipping of the drywall
Common Mistakes and Effective Fixes In Drywall Cutting
Mistake: Rushed Measurements and Markings
One common mistake in drywall cutting is rushed measurements and markings. This results in inaccurate cuts that lead to waste of materials and could compromise the integrity of the project. The most effective solution to this issue is taking the time to accurately measure and mark the drywall. Using a straight edge or T-square can also be a beneficial tool in ensuring accuracy.
- Avoid rushing: Allows for accurate measurement and marking
- Use a straight edge: Assists in creating accurate lines
Mistake: Not Scoring Before the Cut
Another mistake that can be made is not scoring the drywall before making the cut. Not scoring can make the cutting process more difficult and increases the chances of uneven cuts. Therefore, taking the time to score the drywall gently using the utility knife along the marked lines before the actual cutting process can drastically increase the ease and precision of the cut.
- Scoring: Enhances precision and ease of cut
- Utility knife: Essential tool for gentle scoring of drywall
Mistake: Not Sanding After the Cut
The process of not sanding the edges of the cut drywall is another common mistake. Neglecting to sand can leave rough edges which do not only look unprofessional but could also pose a safety risk. Therefore, using sandpaper to gently smooth these edges not only enhances the professional look but also ensures safety.
- Sanding: Enhances professional look and safety
- Gentle process: Preserves drywall from unnecessary chipping