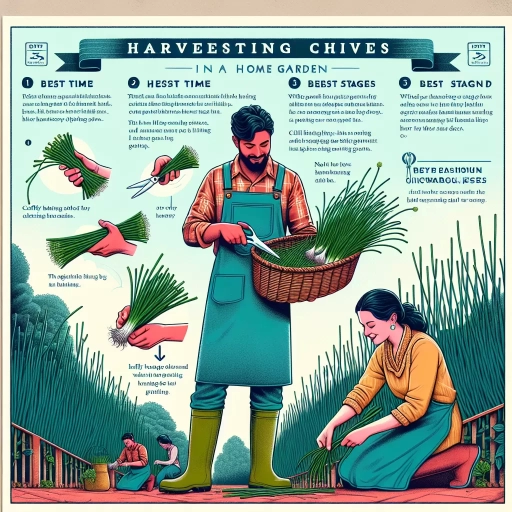
How To Harvest Chives
Chives, with their delicate onion-like flavor and vibrant green appearance, are a beloved herb in many kitchens around the world. Whether you're growing them in your garden or in pots on your windowsill, knowing how to properly harvest chives is essential to ensure their longevity and maximize their culinary potential. This article will guide you through the process of harvesting chives, from preparation to storage, helping you make the most of this versatile herb. We'll begin by exploring the crucial steps in preparing for your chive harvest, ensuring that your plants are ready and that you have the right tools at hand. Next, we'll delve into the proper harvesting techniques, showing you how to cut chives correctly to promote regrowth and maintain plant health. Finally, we'll cover post-harvest care and storage methods, allowing you to preserve your chives' freshness and flavor for extended periods. By following these guidelines, you'll be well-equipped to enjoy a bountiful chive harvest throughout the growing season. Let's start by examining the essential preparations you need to make before harvesting your chives.
Preparing for Chive Harvest
Chives, with their delicate flavor and vibrant green appearance, are a beloved herb in kitchens worldwide. As a gardener, knowing how to properly prepare for chive harvest is essential to ensure the best quality and yield from your plants. This article will guide you through the crucial steps of preparing for a successful chive harvest, focusing on three key aspects. First, we'll explore how to identify the right time to harvest, ensuring that your chives are at their peak flavor and nutritional value. Next, we'll discuss the necessary tools and equipment you'll need to gather for a smooth and efficient harvesting process. Finally, we'll delve into the importance of assessing plant health and maturity, which is vital for maintaining the longevity of your chive plants and ensuring future harvests. By mastering these three elements, you'll be well-equipped to tackle the task of preparing for chive harvest with confidence and expertise. Let's dive into the world of chive cultivation and discover how to make the most of your herbal bounty.
Identifying the right time to harvest
Identifying the right time to harvest chives is crucial for ensuring optimal flavor and quality. Chives are a versatile and hardy herb that can be harvested multiple times throughout the growing season, but timing is essential to maximize their potential. Generally, chives are ready for their first harvest about 60 days after planting, when the leaves have reached a height of 6 to 8 inches (15 to 20 cm). However, the exact timing can vary depending on growing conditions and the specific variety of chives you're cultivating. One of the most reliable indicators that your chives are ready for harvest is the appearance of flower buds. When you notice these small, round buds forming at the tips of the plants, it's an excellent time to start harvesting. Harvesting before the flowers fully open ensures that the leaves retain their peak flavor and tenderness. If left to bloom, the plant will divert energy to flower production, potentially reducing the quality of the leaves. Visual cues are also important when determining harvest readiness. Look for chive leaves that are a vibrant green color and stand upright. Avoid harvesting leaves that appear yellowed, wilted, or damaged, as these may indicate stress or disease. The thickness of the leaves can also be a good indicator; ideally, they should be about the width of a pencil lead for the best taste and texture. It's worth noting that the time of day can impact the flavor of your harvested chives. For the best results, harvest in the morning after the dew has dried but before the heat of the day sets in. This is when the essential oils in the leaves are most concentrated, resulting in a more intense flavor profile. Another factor to consider is the frequency of harvesting. Chives benefit from regular harvesting, which encourages new growth and prevents the plant from becoming overcrowded. You can typically harvest chives every 3 to 4 weeks during the growing season, allowing enough time between cuts for the plant to regenerate. For a continuous supply, consider staggering your harvests by cutting different sections of the plant at different times. This approach ensures that you always have fresh chives available while allowing parts of the plant to recover and regrow. Lastly, be mindful of the plant's lifecycle. In colder climates, plan your final harvest of the season about 2 to 3 weeks before the first expected frost. This gives the plant time to store energy in its bulbs for the winter dormancy period, ensuring a healthy resurgence in the spring. By paying attention to these various factors and indicators, you can confidently identify the right time to harvest your chives, ensuring a bountiful and flavorful crop throughout the growing season.
Gathering necessary tools and equipment
When preparing for a chive harvest, gathering the necessary tools and equipment is a crucial step that ensures a smooth and efficient process. Having the right implements at your disposal not only makes the task easier but also helps preserve the quality of your chives and promotes plant health. To begin, you'll need a pair of sharp, clean scissors or garden shears. These should be specifically designated for harvesting herbs to avoid cross-contamination and maintain hygiene. Opt for stainless steel tools, as they are durable, easy to clean, and less prone to rusting. In addition to cutting tools, consider having a small basket or container on hand to collect your freshly harvested chives. A shallow, wide-mouthed container is ideal, as it allows you to lay the chives flat, preventing them from becoming crushed or tangled. If you plan on harvesting a large quantity, you may want to use multiple containers or a larger harvest basket lined with a soft cloth to protect the delicate herbs. Don't forget to gather cleaning supplies for your tools and hands. A small bottle of rubbing alcohol or a mild bleach solution can be used to sanitize your scissors between cuts, reducing the risk of spreading plant diseases. Clean gardening gloves are also essential to protect your hands and maintain hygiene during the harvest. For those with larger chive patches or who frequently harvest, investing in a kneeling pad or a small, portable stool can make the process more comfortable and reduce strain on your back and knees. These tools are particularly useful when dealing with low-growing chive plants or when harvesting for extended periods. If you plan to process your chives immediately after harvesting, consider preparing a clean work area with additional tools such as a cutting board, kitchen knife, and storage containers. Having these items ready will allow you to quickly rinse, chop, and store your chives while they're still fresh. For those interested in preserving their harvest, gather materials like paper towels for drying, freezer bags for long-term storage, or small glass jars if you intend to dry your chives. An herb drying rack or dehydrator can also be valuable tools for those looking to extend the shelf life of their harvest. Lastly, don't overlook the importance of having a watering can or hose nearby. Chive plants benefit from a light watering after harvest, which helps stimulate new growth and ensures the plant remains healthy for future harvests. By assembling these tools and equipment beforehand, you'll be well-prepared to harvest your chives efficiently and effectively, maximizing both the quantity and quality of your yield while maintaining the health and productivity of your chive plants.
Assessing plant health and maturity
Assessing plant health and maturity is a crucial step in preparing for a successful chive harvest. Chives, with their delicate tubular leaves and vibrant purple flowers, require careful observation to determine the optimal time for harvesting. A healthy chive plant typically exhibits lush, deep green foliage that stands upright and reaches a height of 12 to 18 inches. The leaves should appear firm and crisp, without any signs of wilting, yellowing, or browning, which could indicate stress or disease. Maturity in chives is often marked by the thickness of the leaves rather than their height. Ideally, the leaves should be about the diameter of a pencil, indicating they have reached their full potential in terms of flavor and nutritional content. As the growing season progresses, you may notice the emergence of flower buds at the tips of some stalks. While these edible flowers are a delightful addition to salads and garnishes, their appearance also signals that the plant is nearing the end of its peak harvest period. To assess plant health, gently run your fingers along the leaves, feeling for any unusual textures or sticky residues that might indicate pest infestations. Inspect the base of the plant for signs of overcrowding or rot, which can occur if the soil is too moist or the plants are too densely packed. Healthy chives will have a clean, onion-like aroma when the leaves are lightly crushed. The timing of your harvest can significantly impact the flavor and regrowth of your chives. For the best taste, plan to harvest in the morning after the dew has dried but before the heat of the day sets in. This is when the essential oils in the leaves are most concentrated, providing the most robust flavor profile. If you're growing chives primarily for their leaves, it's best to harvest before the flowers appear, as flowering can divert energy from leaf production and may slightly alter the taste. Regular harvesting throughout the growing season encourages continued growth and helps maintain plant health. However, it's essential to leave at least 2 inches of growth above the soil line to ensure the plant can regenerate. Overharvesting can stress the plant and reduce its ability to produce new growth, so aim to remove no more than one-third of the plant at any given time. By carefully assessing the health and maturity of your chive plants, you can ensure a bountiful harvest of flavorful leaves that will enhance your culinary creations. This attentive approach not only maximizes your yield but also promotes the longevity and vitality of your chive patch, allowing you to enjoy fresh, homegrown chives throughout the growing season and for years to come.
Proper Harvesting Techniques for Chives
Chives, with their delicate onion-like flavor and vibrant green appearance, are a versatile and popular herb in many cuisines worldwide. As a gardener or culinary enthusiast, understanding the proper harvesting techniques for chives is crucial to ensure a bountiful and continuous supply of this flavorful herb. This article delves into the essential aspects of harvesting chives, providing you with expert insights to maximize your yield and maintain healthy plants. We'll explore cutting methods that promote optimal regrowth, allowing you to enjoy fresh chives throughout the growing season. Additionally, we'll uncover the often-overlooked potential of chive blossoms, discussing how to harvest these delicate flowers and their various culinary and decorative uses. To help you avoid common pitfalls, we'll also highlight frequent harvesting mistakes and provide tips on how to sidestep them, ensuring your chive plants remain robust and productive. By mastering these techniques, you'll be well-equipped to nurture and harvest your chive plants like a pro. Before we dive into the specifics of harvesting, let's first examine the crucial steps in preparing for a successful chive harvest, setting the stage for a rewarding and abundant yield.
Cutting methods for optimal regrowth
Cutting methods for optimal regrowth are crucial when harvesting chives to ensure a continuous supply of this flavorful herb throughout the growing season. The key to successful chive harvesting lies in understanding the plant's growth patterns and employing techniques that promote healthy regeneration. When cutting chives, it's essential to use sharp, clean scissors or shears to make precise cuts without damaging the surrounding foliage. This minimizes stress on the plant and reduces the risk of disease transmission. The optimal cutting height for chives is approximately 2 inches (5 cm) above the soil level. This leaves enough of the plant intact to support photosynthesis and encourage new growth. Cutting too close to the base can weaken the plant and slow its recovery, while leaving too much height may result in woody, less palatable stems. It's best to harvest chives from the outside of the clump, working your way inward. This approach allows the inner, younger shoots to continue developing and ensures a more uniform appearance of the plant. When harvesting, aim to remove no more than one-third of the plant's total growth at any given time. This practice maintains a balance between harvesting for use and allowing the plant to retain enough energy for regrowth. If you need a larger quantity of chives, it's better to harvest from multiple plants rather than over-harvesting from a single clump. This method distributes the stress of harvesting across several plants, promoting overall health and productivity of your chive patch. Timing is also crucial for optimal regrowth. Harvest chives in the morning, after the dew has dried but before the heat of the day sets in. This timing ensures that the plant is well-hydrated and less stressed, leading to quicker recovery and regrowth. Additionally, avoid harvesting during periods of extreme heat or drought, as the plant will be under more stress and may struggle to regenerate effectively. To further encourage robust regrowth, consider implementing a rotation system for harvesting. Divide your chive patch into sections and harvest from different areas on a rotating basis. This approach allows each section ample time to recover and produce new growth before being harvested again. Additionally, providing proper care after harvesting, such as adequate watering and occasional fertilization, will support healthy regrowth and ensure a continuous supply of fresh chives throughout the growing season. By employing these cutting methods and considering the plant's needs, you can harvest chives in a way that promotes optimal regrowth, maintaining a healthy and productive herb garden for years to come. Remember that observing your plants closely and adapting your techniques based on their response will help you refine your approach and achieve the best results in harvesting and regrowing chives.
Harvesting chive blossoms and their uses
Harvesting chive blossoms is a delightful and rewarding aspect of cultivating this versatile herb. These delicate, edible flowers not only add a pop of color to your garden but also offer a range of culinary and decorative uses. To properly harvest chive blossoms, timing is crucial. Wait until the flowers have fully opened and are in full bloom, typically in late spring or early summer. This ensures that you capture the blossoms at their peak flavor and visual appeal. When harvesting, use clean, sharp scissors or pruning shears to cut the flower stems about an inch below the blossom. Be gentle to avoid damaging the surrounding foliage or other developing buds. It's best to harvest in the morning after the dew has dried but before the heat of the day sets in, as this is when the flowers are most flavorful and aromatic. Collect only what you plan to use immediately or within a day or two, as the blossoms are quite delicate and don't store well for extended periods. Chive blossoms offer a mild, onion-like flavor with a hint of sweetness, making them a versatile ingredient in the kitchen. They can be used whole to garnish salads, soups, or appetizers, adding both flavor and visual appeal. The individual florets can be separated and sprinkled over dishes like omelets, roasted vegetables, or grilled meats for a subtle oniony kick. For a unique twist, try infusing vinegar or olive oil with chive blossoms to create flavored condiments. The infused vinegar takes on a beautiful pink hue and makes an excellent base for salad dressings or marinades. Beyond culinary uses, chive blossoms have decorative applications as well. They make charming additions to fresh flower arrangements, adding a whimsical touch with their globe-like shape and lavender hue. Dried chive blossoms can be used in potpourri or pressed to create beautiful, long-lasting decorations for cards or bookmarks. Some gardeners even use chive blossoms as natural pest deterrents, as their strong scent can help repel certain insects. It's important to note that while harvesting chive blossoms, you should leave some flowers on the plant. This allows the chives to complete their natural life cycle and potentially self-seed, ensuring a continuous supply of plants for future seasons. Additionally, bees and other pollinators are attracted to chive blossoms, so leaving some flowers intact contributes to the overall health of your garden ecosystem. By incorporating chive blossom harvesting into your gardening routine, you can maximize the yield and enjoyment of your chive plants. Whether used in cooking, crafting, or simply admired for their beauty, these versatile blossoms offer a multitude of ways to enhance your culinary creations and home decor while adding a touch of homegrown charm to your daily life.
Avoiding common harvesting mistakes
When it comes to harvesting chives, avoiding common mistakes is crucial to ensure the longevity and health of your plants while maximizing yield. One of the most frequent errors gardeners make is harvesting too much at once. Chives are resilient plants, but over-harvesting can weaken them, reducing their ability to regrow and potentially shortening their lifespan. To prevent this, it's advisable to harvest no more than one-third of the plant at any given time, allowing the remaining foliage to continue photosynthesis and support regrowth. Another common mistake is cutting chives too close to the base. While it might seem efficient to cut as low as possible, this can damage the plant's crown, which is essential for new growth. Instead, aim to cut the chives about 2 inches above the soil line, leaving enough stem for the plant to regenerate quickly. Using sharp, clean scissors or shears is also crucial, as dull or dirty tools can crush the stems, leaving them vulnerable to disease and pests. Timing is another factor where errors often occur. Harvesting chives too early in the season or too late in the day can affect both flavor and storage life. It's best to wait until the plants are at least 6 inches tall before the first harvest, typically in late spring. Additionally, harvesting in the morning, after the dew has dried but before the heat of the day, ensures that the chives are at their peak flavor and moisture content. Many gardeners overlook the importance of proper post-harvest handling. Chives should be used or stored promptly after cutting to maintain their freshness and nutritional value. Leaving them out in the sun or failing to cool them quickly can lead to wilting and loss of flavor. If not using immediately, wrap them loosely in slightly damp paper towels and store in a plastic bag in the refrigerator. Lastly, a common oversight is neglecting to monitor the plants for signs of stress or disease during harvest. This is an ideal time to inspect your chives closely, checking for any discoloration, pest damage, or other issues that might require attention. Addressing these problems early can prevent them from spreading and ensure the continued health of your chive patch. By avoiding these common harvesting mistakes, you can maintain a healthy, productive chive plant that provides a bountiful harvest throughout the growing season. Remember, gentle and mindful harvesting practices not only benefit the current crop but also contribute to the long-term sustainability of your herb garden.
Post-Harvest Care and Storage
Chives, with their delicate flavor and vibrant green appearance, are a cherished herb in many cuisines worldwide. However, the true art of enjoying chives extends far beyond their cultivation and harvest. Post-harvest care and storage play a crucial role in maintaining the herb's quality, flavor, and nutritional value. This article delves into the essential practices that ensure your chives remain fresh and flavorful long after they've been picked. We'll explore three key aspects of post-harvest care: cleaning and preparing chives for storage, various preservation methods for long-term use, and techniques for encouraging regrowth to ensure future harvests. By mastering these practices, you'll be able to enjoy the crisp, oniony flavor of chives year-round, reducing waste and maximizing your garden's yield. Whether you're a home gardener or a culinary enthusiast, understanding these post-harvest techniques will elevate your chive game to new heights. As we embark on this journey of chive preservation, it's important to first consider the proper steps for preparing your chive harvest, setting the stage for successful storage and longevity.
Cleaning and preparing chives for storage
Cleaning and preparing chives for storage is a crucial step in the post-harvest care process, ensuring that your freshly harvested chives remain flavorful, nutritious, and free from contaminants. Begin by gently shaking the chives to remove any loose dirt or debris. Next, rinse them thoroughly under cool, running water, being careful not to damage the delicate leaves. Pay special attention to the base of the stems where dirt and small insects may hide. For a more thorough cleaning, you can soak the chives in a bowl of cool water for a few minutes, then rinse them again. After washing, it's essential to remove excess moisture to prevent spoilage during storage. Gently pat the chives dry with a clean kitchen towel or paper towels. Alternatively, you can use a salad spinner to remove water quickly and efficiently. Once dry, inspect the chives for any yellowed, damaged, or wilted leaves, and remove them to prevent them from affecting the quality of the rest of the bunch. To prepare chives for storage, you have several options depending on how long you intend to keep them and how you plan to use them. For short-term storage of up to a week, wrap the chives loosely in a slightly damp paper towel and place them in a perforated plastic bag or container in the refrigerator's crisper drawer. This method helps maintain humidity while allowing excess moisture to escape, preventing mold growth. For longer-term storage, consider freezing your chives. Start by chopping them into small pieces, about 1/4 inch in length. Spread the chopped chives on a baking sheet lined with parchment paper and freeze them for about an hour. Once frozen, transfer the chives to an airtight container or freezer bag, removing as much air as possible to prevent freezer burn. Frozen chives can last for up to six months and can be used directly in cooked dishes without thawing. Another preservation method is drying the chives. After cleaning and drying, tie small bundles of chives together at the base and hang them upside down in a warm, dry, well-ventilated area away from direct sunlight. Once completely dry (usually after 1-2 weeks), crumble the chives into a powder or small flakes and store them in an airtight container in a cool, dark place. Regardless of the storage method you choose, always label your containers with the date of harvest or preparation. This practice helps you keep track of freshness and ensures you use the oldest chives first. By taking the time to properly clean and prepare your chives for storage, you can enjoy their fresh, oniony flavor in your culinary creations long after the harvest season has ended.
Various preservation methods for long-term use
Various preservation methods for long-term use of chives can significantly extend their shelf life and allow you to enjoy their unique flavor throughout the year. While fresh chives are always preferred, proper preservation techniques can help maintain their quality and nutritional value for extended periods. One of the most popular methods is freezing, which is particularly effective for chives due to their high water content. To freeze chives, begin by washing and thoroughly drying the herbs. Then, finely chop them and spread them out on a baking sheet lined with parchment paper. Place the sheet in the freezer for a few hours until the chives are completely frozen. Once frozen, transfer them to an airtight container or freezer bag, removing as much air as possible to prevent freezer burn. This method allows you to easily portion out the chives as needed for cooking. Another effective preservation technique is drying, which concentrates the flavor of chives and extends their shelf life significantly. Air-drying is a simple method that involves tying small bundles of chives together and hanging them in a warm, dry, and well-ventilated area away from direct sunlight. Alternatively, you can use a food dehydrator or oven set to the lowest temperature to speed up the process. Once completely dry, store the chives in an airtight container in a cool, dark place. Dried chives can be rehydrated by soaking them in water for a few minutes before use or added directly to soups and stews. For those looking to preserve the fresh flavor of chives, creating herb-infused oils or vinegars can be an excellent option. To make chive-infused oil, sterilize a glass jar and fill it with clean, dry chives. Pour high-quality olive oil or another neutral oil over the herbs, ensuring they are completely submerged. Seal the jar and store it in a cool, dark place for about two weeks, shaking it gently every few days. Strain the oil and transfer it to a clean bottle for use. Similarly, chive-infused vinegar can be made by steeping chopped chives in white wine vinegar or apple cider vinegar for several weeks. Lastly, salt preservation is an age-old technique that works well for chives. Layer finely chopped chives with sea salt in a clean, dry jar, alternating between salt and herb layers. The salt draws out moisture from the chives, creating a flavorful herb salt that can be used to season various dishes. This method not only preserves the chives but also creates a versatile seasoning blend that can add depth to your culinary creations. By employing these preservation methods, you can ensure a steady supply of chives throughout the year, allowing you to enjoy their distinct flavor and nutritional benefits long after the harvest season has ended. Each method offers unique advantages, so consider experimenting with different techniques to find the one that best suits your culinary needs and storage capabilities.
Encouraging regrowth for future harvests
Encouraging regrowth for future harvests is a crucial aspect of post-harvest care for chives, ensuring a continuous and bountiful supply of this versatile herb throughout the growing season. After harvesting, it's essential to provide the right conditions and care to stimulate new growth and maintain the plant's health. One of the primary factors in promoting regrowth is proper cutting technique during harvest. When harvesting chives, it's recommended to cut the leaves about 2 inches above the soil line, leaving enough of the plant intact to support regeneration. This approach preserves the plant's energy reserves and allows for quicker recovery. Adequate watering is another vital element in encouraging regrowth. After harvesting, ensure that the soil around the chive plants remains consistently moist but not waterlogged. This helps the plants recover from the stress of harvesting and provides the necessary hydration for new growth. Additionally, applying a balanced, water-soluble fertilizer every 4-6 weeks during the growing season can provide the nutrients needed for robust regrowth. However, be cautious not to over-fertilize, as this can lead to excessive foliage growth at the expense of flavor. Mulching around the base of the chive plants can also contribute to successful regrowth. A layer of organic mulch, such as compost or well-rotted manure, helps retain soil moisture, suppress weed growth, and provide a slow release of nutrients to the plants. This creates an optimal environment for new shoots to emerge and thrive. Regular removal of any dead or yellowing leaves is also important, as it prevents the spread of diseases and allows the plant to focus its energy on producing new, healthy growth. In regions with harsh winters, it's crucial to prepare chive plants for the cold season to ensure vigorous regrowth in spring. Before the first frost, cut the plants back to about 1-2 inches above the soil line and apply a thick layer of mulch for insulation. In milder climates, chives may continue to grow throughout the winter, albeit at a slower rate. In these cases, periodic light harvesting can help maintain plant vigor and stimulate new growth. For container-grown chives, consider repotting every 2-3 years to refresh the soil and provide more space for root development. This practice can significantly boost the plant's ability to regenerate after harvests. Lastly, it's important to practice crop rotation if growing chives in the same location for multiple seasons. This helps prevent soil depletion and reduces the risk of pest and disease buildup, ensuring healthier plants with stronger regrowth potential. By implementing these post-harvest care strategies, gardeners can enjoy multiple harvests of fresh, flavorful chives throughout the growing season while maintaining the long-term health and productivity of their plants.