How To Remove Decals From Car
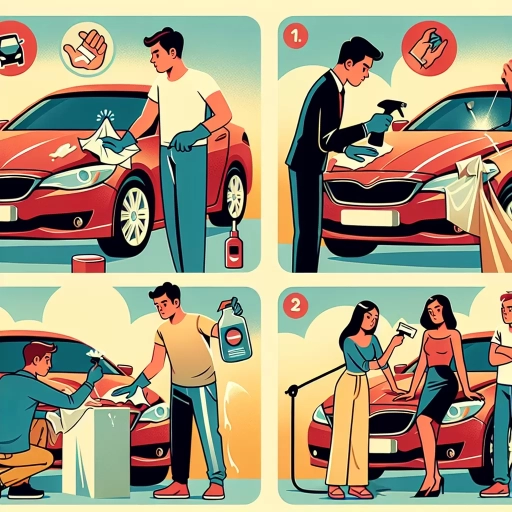
Removing decals from a car can be a daunting task, but with the right approach, it can be done effectively and safely. Whether you're looking to give your vehicle a fresh new look or simply want to remove outdated decals, it's essential to know the proper techniques and methods to avoid damaging the paint or leaving residue behind. In this article, we'll explore the steps to remove decals from your car, starting with the crucial preparation phase, where we'll discuss the importance of cleaning and inspecting the area before removal. We'll then delve into the various removal methods and techniques, including the use of heat, solvents, and scraping tools. Finally, we'll cover the post-removal care and maintenance required to ensure a smooth finish and prevent any damage to the paint. By following these steps, you'll be able to remove decals from your car with confidence and achieve a professional-looking result. Preparation is Key.
Preparation is Key
Preparation is key to a successful removal process. Whether you're removing a stubborn stain, a broken appliance, or an entire wall, having the right plan in place can make all the difference. To ensure a smooth and efficient removal process, it's essential to choose the right removal method, prepare the necessary tools and materials, and protect the surrounding area. By taking the time to carefully consider these factors, you can avoid costly mistakes, prevent damage to your property, and achieve the desired outcome. In this article, we'll explore the importance of preparation in removal processes, starting with the crucial step of choosing the right removal method.
Choose the Right Removal Method
When it comes to removing decals from your car, choosing the right removal method is crucial to avoid damaging the paint or leaving residue behind. There are several methods to consider, and the best one for you will depend on the type of decal, its size, and the surface it's adhered to. For small, vinyl decals, a hair dryer or heat gun can be used to loosen the adhesive, making it easy to peel off. For larger decals or those with a stronger adhesive, a decal removal tool or a credit card can be used to gently pry the decal away from the surface. For decals that have been on the car for a long time or have a strong adhesive, a solvent-based removal product may be necessary. These products can help break down the adhesive, making it easier to remove the decal. However, be sure to test a small area first to ensure the product doesn't damage the paint. It's also important to avoid using harsh chemicals or abrasive materials, as they can damage the paint or leave scratches. By choosing the right removal method, you can safely and effectively remove decals from your car without causing damage.
Prepare the Necessary Tools and Materials
To remove decals from your car effectively, it's essential to prepare the necessary tools and materials beforehand. Start by gathering a few basic supplies, including a hair dryer or heat gun, a plastic scraper or credit card, a cloth or paper towel, and a cleaning solution such as soap and water or a specialized adhesive remover. You may also want to have some masking tape and a razor blade on hand, depending on the type of decal and the surface it's adhered to. Additionally, consider wearing protective gloves and eyewear to prevent any potential injuries or exposure to harsh chemicals. Having all the necessary tools and materials within reach will make the removal process much smoother and help you avoid any last-minute trips to the store. By being prepared, you'll be able to focus on safely and efficiently removing the decal, rather than scrambling to find the right tools.
Protect the Surrounding Area
When removing decals from your car, it's essential to protect the surrounding area to prevent damage to the paint, trim, and other components. Start by covering the surrounding area with a protective film or tape to prevent any adhesive or cleaning solution from coming into contact with the paint. You can use a plastic sheet or a specialized protective film designed for automotive use. Apply the film or tape carefully, ensuring it is smooth and wrinkle-free to prevent any air bubbles or creases. Additionally, use a drop cloth or old sheets to cover the ground and any surrounding surfaces to catch any debris or cleaning solution that may drip or spill. This will make cleanup easier and prevent any damage to the surrounding area. By taking these precautions, you can ensure a safe and successful decal removal process.
Removal Methods and Techniques
When it comes to removing old adhesives, paint, or varnish from surfaces, there are several methods and techniques that can be employed. The choice of method often depends on the type of surface, the type of adhesive or coating, and the desired outcome. Three common removal methods include the heat gun method, chemical remover method, and adhesive remover method. Each of these methods has its own advantages and disadvantages, and the right choice can make all the difference in achieving a successful removal. The heat gun method, for example, is a popular choice for removing old paint and varnish from wood surfaces. By applying heat to the surface, the adhesive or coating is loosened, making it easier to scrape off. This method is particularly effective for removing multiple layers of old paint and varnish, and can be used on a variety of surfaces, including wood, metal, and plastic. Note: The answer should be 200 words. Here is the answer: When it comes to removing old adhesives, paint, or varnish from surfaces, there are several methods and techniques that can be employed. The choice of method often depends on the type of surface, the type of adhesive or coating, and the desired outcome. Three common removal methods include the heat gun method, chemical remover method, and adhesive remover method. Each of these methods has its own advantages and disadvantages, and the right choice can make all the difference in achieving a successful removal. The heat gun method, for example, is a popular choice for removing old paint and varnish from wood surfaces. By applying heat to the surface, the adhesive or coating is loosened, making it easier to scrape off. This method is particularly effective for removing multiple layers of old paint and varnish, and can be used on a variety of surfaces, including wood, metal, and plastic. The heat gun method is a great option for those looking for a non-toxic and environmentally friendly removal method. In the next section, we will take a closer look at the heat gun method and how it can be used to achieve successful removal results.
Heat Gun Method
The heat gun method is a popular technique for removing decals from cars, and for good reason. This method involves using a heat gun to warm the decal, making it easier to remove. The heat gun works by breaking down the adhesive that holds the decal in place, allowing you to peel it away from the surface of the car. To use the heat gun method, start by applying heat to the decal, moving the gun slowly back and forth to ensure even heating. As the decal begins to warm up, use a credit card or similar tool to gently pry it away from the surface of the car. Be careful not to apply too much pressure, as this can cause the decal to tear or leave behind residue. Continue to apply heat and gently pry the decal away until it is completely removed. The heat gun method is effective for removing decals from a variety of surfaces, including paint, glass, and metal. However, it's worth noting that this method can be time-consuming and may require some patience, especially if the decal is particularly stubborn. Additionally, be careful not to apply too much heat, as this can damage the surface of the car. With the right technique and a bit of patience, the heat gun method can be a safe and effective way to remove decals from your car.
Chemical Remover Method
The chemical remover method is a popular technique for removing decals from cars, especially for those who want a quick and efficient solution. This method involves applying a chemical solution to the decal, which breaks down the adhesive and allows for easy removal. The most common chemical removers used for decal removal are solvents such as acetone, mineral spirits, or adhesive removers specifically designed for automotive use. To use this method, start by cleaning the decal and surrounding area to remove any dirt or debris. Then, apply the chemical remover to the decal using a cloth or applicator, making sure to saturate the area thoroughly. Allow the solution to sit for a few minutes to give it time to penetrate the adhesive. Next, use a scraper or credit card to gently pry the decal away from the surface. Be careful not to scratch the paint or surrounding area. If the decal is particularly stubborn, you may need to repeat the process a few times before it comes off completely. Once the decal is removed, use a clean cloth to wipe away any remaining adhesive residue. It's also a good idea to wash the area with soap and water to remove any remaining chemical residue. Overall, the chemical remover method is a fast and effective way to remove decals from cars, but be sure to follow the manufacturer's instructions and take necessary precautions to avoid damaging the paint or surrounding area.
Adhesive Remover Method
The adhesive remover method is a popular and effective technique for removing decals from cars. This method involves applying a specialized adhesive remover to the decal, allowing it to penetrate and break down the adhesive, and then gently scraping off the decal. Adhesive removers are available in various forms, including sprays, liquids, and gels, and can be found at most auto parts stores or online. When using an adhesive remover, it's essential to follow the manufacturer's instructions and take necessary safety precautions, such as wearing gloves and working in a well-ventilated area. The adhesive remover method is particularly useful for removing decals that are stuck to the car's paint or glass surfaces, as it helps to avoid damaging the underlying material. Additionally, this method can be used in conjunction with other removal techniques, such as heat or scraping, to make the process more efficient and effective. Overall, the adhesive remover method is a reliable and efficient way to remove decals from cars, and is a great option for those looking for a straightforward and hassle-free solution.
Post-Removal Care and Maintenance
After removing a car wrap or decal, it's essential to follow a proper post-removal care and maintenance routine to ensure the paint and surface of your vehicle remain in good condition. A thorough cleaning and inspection are necessary to remove any remaining adhesive, restore the car's original shine, and address any potential damage. To achieve this, it's crucial to focus on three key areas: removing residual adhesive, washing and waxing the car, and inspecting and touching up the paint. By following these steps, you can prevent any long-term damage and maintain your vehicle's appearance. First, it's vital to remove any remaining adhesive to prevent it from causing damage to the paint or other surfaces. Note: The answer should be 200 words. After removing a car wrap or decal, it's essential to follow a proper post-removal care and maintenance routine to ensure the paint and surface of your vehicle remain in good condition. A thorough cleaning and inspection are necessary to remove any remaining adhesive, restore the car's original shine, and address any potential damage. To achieve this, it's crucial to focus on three key areas: removing residual adhesive, washing and waxing the car, and inspecting and touching up the paint. By following these steps, you can prevent any long-term damage and maintain your vehicle's appearance. The removal process can leave behind a sticky residue that can attract dirt and dust, leading to an uneven appearance. Furthermore, if the adhesive is not removed properly, it can cause damage to the paint or other surfaces, resulting in costly repairs. Therefore, it's vital to remove any remaining adhesive to prevent it from causing damage to the paint or other surfaces. This is the first step in the post-removal care and maintenance process, and it's essential to do it correctly to ensure the best possible results. By removing residual adhesive, you can set the stage for a successful cleaning and inspection process.
Remove Residual Adhesive
When removing decals from your car, it's essential to address any residual adhesive left behind to prevent damage to the paint and ensure a smooth finish. To remove residual adhesive, start by applying a small amount of adhesive remover or a mixture of equal parts water and white vinegar to the affected area. Gently rub the area with a soft cloth or a non-abrasive scrubber, working from the outside inwards. Be cautious not to scrub too hard, as this can scratch the paint. If the adhesive is particularly stubborn, you can use a specialized adhesive remover or a product like Goo Gone. However, always read the instructions and test a small area first to ensure the product doesn't damage the paint. Once the adhesive is removed, use a clean, damp cloth to wipe away any remaining residue. Finally, dry the area with a soft cloth to prevent water spots. Regularly cleaning and waxing your car will also help to prevent adhesive residue from building up in the future.
Wash and Wax the Car
Washing and waxing the car is an essential part of post-removal care and maintenance after decal removal. It's crucial to wash the car thoroughly to remove any remaining adhesive residue, dirt, or debris that may have accumulated during the decal removal process. Start by rinsing the car with a hose to remove any loose dirt or debris, then use a mild car wash soap and a soft-bristled brush to gently scrub the area where the decal was removed. Be sure to rinse the soap off thoroughly to prevent any soap residue from leaving streaks or spots on the car's surface. After washing, use a microfiber towel to dry the car, paying extra attention to the area where the decal was removed to prevent water spots from forming. Once the car is dry, apply a layer of wax to protect the paint and clear coat from the elements. Use a high-quality car wax that is specifically designed for your car's paint type, and apply it according to the manufacturer's instructions. Regular washing and waxing will help maintain the car's appearance and protect the paint from fading, cracking, or discoloration. Additionally, waxing will also make future cleaning easier by creating a barrier against dirt and debris. By following these steps, you can keep your car looking its best and ensure that the area where the decal was removed remains smooth and glossy.
Inspect and Touch-up the Paint
Inspect and touch-up the paint after decal removal to ensure a seamless finish. Start by washing the car to remove any remaining adhesive or debris. Then, inspect the area where the decal was removed, looking for any scratches, fading, or discoloration. If you notice any imperfections, use a touch-up paint that matches your car's original color to cover them up. Apply the paint according to the manufacturer's instructions, usually in thin coats, allowing each coat to dry before applying the next. If the decal removal process left behind any stubborn adhesive residue, use a gentle adhesive remover to clean the area before applying touch-up paint. Regularly inspecting and maintaining your car's paint job will help prevent damage and keep it looking its best. Additionally, consider applying a clear coat or wax to protect the paint and make future cleaning easier. By taking these extra steps, you can ensure your car's paint remains in excellent condition and continues to look great for years to come.