How To Flip An Image On Google Docs
Here is the introduction paragraph: Flipping an image in Google Docs can be a useful skill to have, especially when working on presentations, reports, or other visual projects. However, many users are unsure of how to do it, or even where to start. In this article, we will explore the basics of Google Docs and how they relate to image manipulation, before diving into the step-by-step process of flipping an image. We will also cover some common issues that may arise and provide advanced techniques for more complex image editing tasks. By the end of this article, you will be able to confidently flip an image in Google Docs and take your document design to the next level. To get started, let's first take a look at the basics of Google Docs and how they lay the foundation for image manipulation.
Understanding the Basics of Google Docs
Google Docs is a powerful online word processing tool that offers a range of features and functions to help users create, edit, and share documents. To get the most out of Google Docs, it's essential to understand its basics. In this article, we'll explore the fundamentals of Google Docs, including what it is and its key features, how to access and create a new document, and the basic editing tools and functions available. By the end of this article, you'll be equipped with the knowledge to start using Google Docs like a pro. So, let's start with the basics - what is Google Docs and what features does it offer?
What is Google Docs and its features
Google Docs is a free, web-based word processing and document management tool offered by Google. It allows users to create, edit, and share documents online, making it a popular choice for individuals, businesses, and educational institutions. With Google Docs, users can access their documents from anywhere, at any time, as long as they have an internet connection. The platform offers a range of features that make it an ideal tool for collaborative work, including real-time commenting, editing, and revision history. Users can also export their documents in various formats, such as Microsoft Word, PDF, and plain text. Additionally, Google Docs integrates seamlessly with other Google apps, such as Google Drive, Google Sheets, and Google Slides, making it a versatile tool for managing and sharing documents. Some of the key features of Google Docs include automatic saving, spell and grammar checking, and a range of templates and add-ons to enhance functionality. Overall, Google Docs is a powerful and user-friendly tool that makes it easy to create, edit, and share documents online.
How to access and create a new document
To access and create a new document in Google Docs, start by navigating to the Google Drive website or opening the Google Docs app on your device. If you're using the website, click on the "New" button located in the top left corner of the page, then select "Google Docs" from the drop-down menu. If you're using the app, tap the "+" icon in the bottom right corner of the screen. This will open a new, blank document. You can also access Google Docs from other Google apps, such as Google Drive or Gmail, by clicking on the "New" button and selecting "Google Docs." Once you've opened a new document, you can start typing and editing your content immediately. You can also choose from a variety of templates, such as resumes, reports, and meeting notes, to help you get started. To create a new document from a template, click on the "Template gallery" button in the top right corner of the page, then browse through the available templates and select the one that best suits your needs. You can also upload a document from your computer or device by clicking on the "File" menu and selecting "Upload." This will allow you to edit and share your document in Google Docs.
Basic editing tools and functions
Basic editing tools and functions in Google Docs are essential for creating and refining your documents. The toolbar at the top of the page provides access to a range of tools, including font styles, font sizes, bold, italic, and underline options. You can also change the text color and background color to enhance the visual appeal of your document. The "Undo" and "Redo" buttons allow you to experiment with different formatting options and easily revert to previous versions. Additionally, the "Cut," "Copy," and "Paste" functions enable you to manipulate text and images with ease. The "Find and replace" tool helps you locate specific words or phrases and replace them with new text, while the "Spell check" feature ensures that your document is error-free. Furthermore, the "Alignment" options, including left, center, and right alignment, enable you to control the layout of your text. You can also use the "Indentation" and "Line spacing" tools to adjust the spacing and formatting of your paragraphs. By mastering these basic editing tools and functions, you can efficiently create and edit documents in Google Docs.
Flipping an Image in Google Docs
Flipping an image in Google Docs can be a useful feature for various purposes, such as creating a mirror image, reversing the orientation of a picture, or simply adding some creativity to your document. Fortunately, Google Docs provides several ways to flip an image, and in this article, we will explore three methods to achieve this. Firstly, we will discuss how to use the "Rotate" tool to flip an image, which is a straightforward and efficient way to change the orientation of a picture. Additionally, we will cover the "Flip" tool, which allows you to mirror an image, creating a reversed version of the original picture. Lastly, we will delve into adjusting image properties, which provides more precise control over the flipping process. By the end of this article, you will be able to flip an image in Google Docs with ease, and we will start by exploring the first method: Using the "Rotate" tool to flip an image.
Using the "Rotate" tool to flip an image
To flip an image in Google Docs, you can use the "Rotate" tool. This tool allows you to rotate an image by a specific angle, including 180 degrees, which effectively flips the image. To access the "Rotate" tool, select the image you want to flip by clicking on it. Then, go to the "Format" tab in the top menu and select "Image" from the drop-down menu. In the "Image" menu, click on "Rotate" and select "180°" from the sub-menu. Alternatively, you can also use the keyboard shortcut "Ctrl + Shift + R" (Windows) or "Cmd + Shift + R" (Mac) to rotate the image by 180 degrees. Once you've selected the rotation angle, the image will be flipped horizontally. You can also use the "Rotate" tool to rotate the image by other angles, such as 90 or 270 degrees, if needed. Additionally, you can also use the "Flip horizontally" or "Flip vertically" options in the "Image" menu to flip the image without using the "Rotate" tool.
Using the "Flip" tool to mirror an image
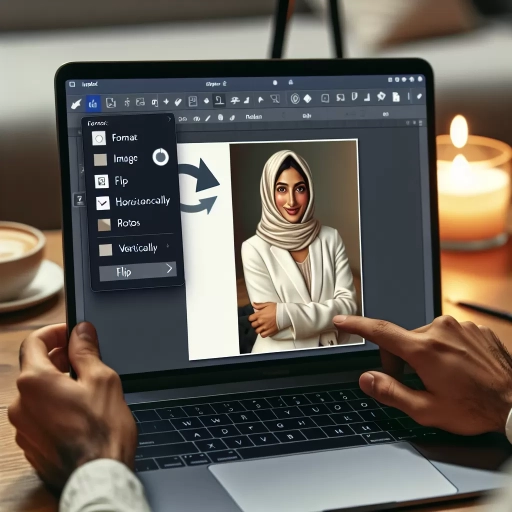
Using the "Flip" tool to mirror an image in Google Docs is a straightforward process that can be completed in a few simple steps. To begin, select the image you want to flip by clicking on it. Once the image is selected, navigate to the "Format" tab in the top menu bar and click on it. From the drop-down menu, select "Image" and then click on "Flip." You will then be presented with two options: "Flip horizontally" and "Flip vertically." Choose the option that corresponds to the type of flip you want to perform. If you want to mirror the image, select "Flip horizontally." This will reverse the image, creating a mirror-like effect. If you want to flip the image upside down, select "Flip vertically." Once you've made your selection, the image will be flipped accordingly. You can also use the keyboard shortcut "Ctrl + Shift + H" (Windows) or "Cmd + Shift + H" (Mac) to flip the image horizontally, or "Ctrl + Shift + V" (Windows) or "Cmd + Shift + V" (Mac) to flip the image vertically. By using the "Flip" tool, you can easily create a mirrored image in Google Docs, which can be useful for a variety of purposes, such as creating a symmetrical design or adding visual interest to a document.
Adjusting image properties for precise flipping
Adjusting image properties is a crucial step in precise flipping of an image in Google Docs. To access the image properties, select the image and click on the "Format" tab in the top menu. From the drop-down menu, select "Image" and then click on "Image options." This will open the "Image options" sidebar, where you can adjust various properties of the image, including its size, position, and rotation. To flip the image, click on the "Rotation" dropdown menu and select the desired flip option, such as "Flip horizontally" or "Flip vertically." You can also use the "Custom rotation" option to enter a specific angle of rotation. Additionally, you can adjust the image's size and position by entering specific values in the "Width" and "Height" fields or by using the "Scale" option to resize the image proportionally. By adjusting these image properties, you can achieve a precise flip of the image and ensure that it is properly aligned with the surrounding text and other elements in your document.
Troubleshooting and Advanced Techniques
When working with images in Google Docs, it's not uncommon to encounter issues that can hinder your productivity. Fortunately, there are various troubleshooting techniques and advanced methods that can help you overcome these challenges. In this article, we'll explore some of the most effective ways to resolve common image-related problems in Google Docs. We'll start by looking at how to resolve issues with image flipping, which can be a frustrating problem to deal with. Additionally, we'll discuss how to use add-ons to enhance your image editing capabilities, allowing you to achieve more complex edits and manipulations. Finally, we'll delve into advanced image manipulation techniques in Google Docs, including how to use features like image masking and layering. By the end of this article, you'll be equipped with the knowledge and skills to tackle even the most complex image-related tasks in Google Docs. So, let's start by resolving issues with image flipping.
Resolving issues with image flipping
When dealing with image flipping issues in Google Docs, there are several steps you can take to resolve the problem. First, ensure that the image is properly aligned and not overlapping with other elements on the page. If the image is still not flipping correctly, try adjusting the image's wrapping style to "Inline" or "Wrap text" to see if this resolves the issue. Additionally, check if the image is in a table or frame, as this can sometimes cause flipping issues. If the image is in a table, try removing it from the table and then re-inserting it. If the issue persists, try converting the image to a different format, such as PNG or JPEG, to see if this resolves the issue. You can also try resetting the image's formatting by selecting the image and pressing "Ctrl+Space" (Windows) or "Command+Space" (Mac). If none of these steps resolve the issue, it may be worth checking if there are any add-ons or extensions installed that could be interfering with the image flipping functionality. By following these steps, you should be able to resolve any issues with image flipping in Google Docs.
Using add-ons to enhance image editing capabilities
Using add-ons to enhance image editing capabilities can significantly improve the overall image editing experience in Google Docs. One popular add-on is PixiClip, which offers a wide range of advanced image editing tools, including filters, effects, and adjustments. Another useful add-on is Photopea, which provides a comprehensive set of image editing features, including support for layers, masks, and effects. By installing these add-ons, users can access a broader range of image editing tools and techniques, enabling them to achieve more complex and sophisticated edits. Additionally, add-ons like Auto-Draw and Prisma can be used to create custom illustrations and artwork, further expanding the creative possibilities within Google Docs. By leveraging these add-ons, users can unlock new levels of image editing functionality and take their Google Docs projects to the next level.
Advanced image manipulation techniques in Google Docs
Advanced image manipulation techniques in Google Docs allow users to take their image editing to the next level. One of the most powerful tools is the "Wrap text" feature, which enables users to wrap text around an image, creating a more dynamic and visually appealing layout. To access this feature, users can select the image and then click on the "Wrap text" button in the toolbar. Additionally, users can also use the "Behind text" or "In front of text" options to adjust the image's position relative to the text. Another advanced technique is the use of image masks, which allow users to hide or reveal parts of an image. To create an image mask, users can select the image and then click on the "Format" tab, followed by "Image" and then "Mask". From there, users can choose from a variety of pre-made masks or create their own custom mask. Furthermore, users can also use the "Crop" tool to remove unwanted parts of an image or to create a custom shape. To access the "Crop" tool, users can select the image and then click on the "Format" tab, followed by "Image" and then "Crop". By mastering these advanced image manipulation techniques, users can create professional-looking documents and presentations that showcase their creativity and attention to detail.