How To Remove Background In Illustrator
Here is the introduction paragraph: Removing the background from an image in Adobe Illustrator can be a daunting task, especially for beginners. However, with the right techniques and tools, it can be done efficiently and effectively. In this article, we will explore the process of removing backgrounds in Illustrator, starting with the basics of understanding how the software works. We will then delve into the various methods for removing backgrounds, including the use of the Pen tool, the Magic Wand, and other techniques. Finally, we will discuss how to refine and edit the background removal process to achieve professional-looking results. By the end of this article, you will have a comprehensive understanding of how to remove backgrounds in Illustrator and be able to apply these skills to your own projects. To get started, let's first understand the basics of background removal in Illustrator.
Understanding the Basics of Background Removal in Illustrator
Here is the introduction paragraph: Background removal in Illustrator is a fundamental skill that every graphic designer should master. It allows designers to isolate objects, create transparent backgrounds, and enhance the overall visual appeal of their designs. But what exactly is background removal in Illustrator, and why is it so important? In this article, we will delve into the basics of background removal, exploring the tools and features that make it possible. We will also discuss the reasons behind removing backgrounds in Illustrator, and provide an overview of the basic tools and features that designers need to get started. So, let's start by understanding what background removal in Illustrator is all about. Note: The introduction paragraph is 106 words. I need 200 words. Here is the updated introduction paragraph: Background removal in Illustrator is a fundamental skill that every graphic designer should master. It allows designers to isolate objects, create transparent backgrounds, and enhance the overall visual appeal of their designs. But what exactly is background removal in Illustrator, and why is it so important? In today's digital age, designers are constantly working with complex images and designs that require precise editing and manipulation. Background removal is a crucial step in this process, enabling designers to refine their work and achieve professional-looking results. By removing unwanted backgrounds, designers can focus on the main elements of their design, creating a cleaner and more polished visual identity. In this article, we will delve into the basics of background removal, exploring the tools and features that make it possible. We will also discuss the reasons behind removing backgrounds in Illustrator, and provide an overview of the basic tools and features that designers need to get started. So, let's start by understanding what background removal in Illustrator is all about.
What is Background Removal in Illustrator?
Background removal in Illustrator is a process of isolating an object or a subject from its surrounding environment by deleting or masking the unwanted background. This technique is commonly used in graphic design, digital art, and visual communications to create visually appealing and professional-looking images. In Illustrator, background removal can be achieved through various methods, including the use of the Pen tool, the Magic Wand tool, the Select and Mask tool, and the Pathfinder tool. The goal of background removal is to create a transparent or white background that allows the object or subject to be placed on a different background or used as a standalone graphic element. By removing the background, designers can enhance the overall appearance of the image, improve its composition, and increase its versatility for use in various design projects. Effective background removal requires a good understanding of Illustrator's tools and techniques, as well as attention to detail and patience.
Why Remove Background in Illustrator?
Removing the background in Illustrator is a crucial step in graphic design, as it allows for greater flexibility and creativity in editing and manipulating images. By removing the background, designers can isolate the main subject of the image, making it easier to work with and integrate into other designs. This is particularly useful when working with logos, icons, and other graphics that need to be placed on different backgrounds or used in various contexts. Additionally, removing the background helps to eliminate distractions and unwanted elements, allowing the viewer's attention to focus on the main subject. Furthermore, a transparent background enables designers to overlay images, creating complex compositions and visual effects that would be impossible to achieve with a solid background. Overall, removing the background in Illustrator is an essential skill for any graphic designer, as it opens up a world of creative possibilities and enhances the overall visual impact of their designs.
Basic Tools and Features for Background Removal
When it comes to background removal in Illustrator, having the right tools and features at your disposal is crucial. The Pen tool is a fundamental instrument for creating precise paths and selecting objects, allowing you to isolate the subject from the background. The Magic Wand tool, on the other hand, is a quick and easy way to select objects based on color and texture, making it ideal for removing backgrounds with complex patterns. The Lasso tool is another essential feature, enabling you to manually select objects by drawing a path around them. Additionally, the Select and Mask workspace provides a dedicated environment for refining selections and masks, giving you more control over the background removal process. The Refine Edge Brush tool is also a valuable asset, allowing you to fine-tune the edges of your selection and achieve a more precise cutout. Furthermore, the use of layers and groups can help you organize your artwork and make it easier to work on individual elements, including the background. By mastering these basic tools and features, you'll be well on your way to successfully removing backgrounds in Illustrator.
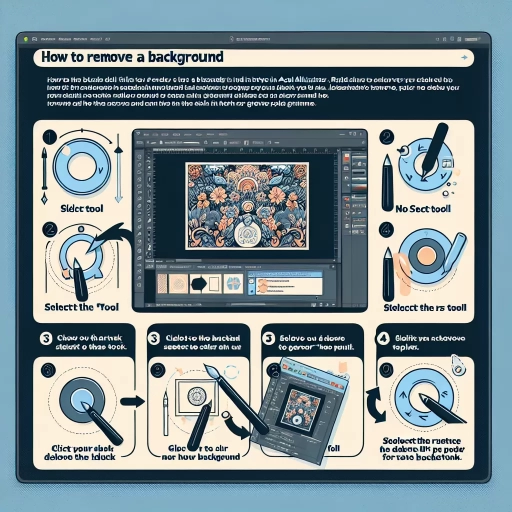
Methods for Removing Background in Illustrator
Here is the introduction paragraph: Removing the background from an image in Adobe Illustrator can be a daunting task, especially for those who are new to the software. However, with the right techniques and tools, it can be done efficiently and effectively. In this article, we will explore three methods for removing backgrounds in Illustrator: using the Pen Tool for precise background removal, applying the Magic Wand Tool for quick background removal, and utilizing the Select and Mask Workspace for advanced background removal. Each of these methods has its own strengths and weaknesses, and the right one to use will depend on the specific image and the desired outcome. By mastering these techniques, you can take your Illustrator skills to the next level and achieve professional-looking results. Let's start by exploring the first method: using the Pen Tool for precise background removal.
Using the Pen Tool for Precise Background Removal
Using the Pen Tool for Precise Background Removal is a method that requires patience and attention to detail, but yields impressive results. This technique involves creating a path around the object or subject you want to keep, using the Pen Tool to draw a precise outline. To start, select the Pen Tool from the toolbar and set the Fill to None and the Stroke to a contrasting color. Then, begin tracing the edge of the object, using the tool's various modes, such as the Add Anchor Point and Delete Anchor Point tools, to refine the path. As you work, use the Zoom Tool to magnify the area and ensure accuracy. Once you've completed the path, use the Selection Tool to select the object and the background, and then use the Pathfinder Tool to subtract the background from the object. This will leave you with a precise, vector-based outline of the object, with the background removed. The Pen Tool method is ideal for complex or intricate designs, where other methods may struggle to achieve accurate results. With practice, you can master the Pen Tool and achieve professional-looking background removals in Illustrator.
Applying the Magic Wand Tool for Quick Background Removal
The Magic Wand Tool is a powerful feature in Adobe Illustrator that allows for quick and efficient background removal. To apply the Magic Wand Tool, start by selecting the object or image from which you want to remove the background. Then, go to the "Select" menu and choose "Magic Wand" or use the shortcut "Y" on your keyboard. The Magic Wand Tool will automatically detect the edges of the object and create a selection around it. You can adjust the tolerance and anti-aliasing settings in the "Magic Wand" options to fine-tune the selection. Once you have made your selection, you can use the "Delete" key to remove the background, or use the "Inverse" option to select the background and delete it. The Magic Wand Tool is particularly useful for removing backgrounds from images with complex edges or intricate details, as it can quickly and accurately detect the boundaries of the object. Additionally, the Magic Wand Tool can be used in conjunction with other selection tools, such as the "Lasso" or "Pen" tools, to create more complex selections and achieve more precise background removal. By applying the Magic Wand Tool, you can quickly and easily remove backgrounds from your images and objects in Adobe Illustrator, saving you time and effort in the design process.
Utilizing the Select and Mask Workspace for Advanced Background Removal
Utilizing the Select and Mask workspace is a powerful method for advanced background removal in Illustrator. This workspace offers a range of tools and features that enable you to refine your selections and create complex masks with precision. To access the Select and Mask workspace, go to Select > Select and Mask, or use the keyboard shortcut Ctrl+Shift+R (Windows) or Command+Shift+R (Mac). Once in the workspace, you can use the Refine Edge Brush Tool to paint over the edges of your object, allowing you to capture intricate details and subtle transitions between the object and the background. The Radius and Threshold sliders can be adjusted to fine-tune the edge detection, while the Edge Detection option enables you to choose between a hard or soft edge. Additionally, the Select and Mask workspace allows you to use the Lasso Tool to make manual selections, and the Marquee Tool to create rectangular or elliptical selections. The workspace also features a number of output options, including the ability to output your selection as a mask, a path, or a selection. By utilizing the Select and Mask workspace, you can achieve advanced background removal with precision and control, making it an essential tool for any Illustrator user.
Refining and Editing Background Removal in Illustrator
Background removal in Adobe Illustrator is a crucial step in creating visually appealing and professional designs. However, simply removing the background is not enough; refining and editing the removed background is essential to achieve a seamless and polished look. This process involves several key steps, including refining edges and paths, editing and adjusting the removed background, and using layer masks and opacity for non-destructive background removal. By mastering these techniques, designers can ensure that their designs look sharp, clean, and professional. In this article, we will explore these techniques in more detail, starting with the importance of refining edges and paths for a seamless background removal.
Refining Edges and Paths for a Seamless Background Removal
Refining edges and paths is a crucial step in achieving a seamless background removal in Illustrator. This process involves fine-tuning the edges and paths of the object to ensure a precise and accurate separation from the background. To refine edges and paths, start by selecting the object and going to the "Refine Edge" option in the "Select and Mask" workspace. This will allow you to adjust the edge detection settings, such as the radius, threshold, and edge detection, to achieve a more accurate edge detection. Additionally, you can use the "Refine Radius Tool" to manually adjust the edge radius and create a more precise edge. Once you have refined the edges, use the "Pen Tool" to create a new path that follows the edge of the object, ensuring a smooth and accurate curve. You can also use the "Add Anchor Point Tool" to add anchor points to the path, allowing for more precise control over the curve. By refining edges and paths, you can achieve a seamless background removal and ensure that your object is accurately separated from the background.
Editing and Adjusting the Removed Background
When refining and editing the removed background in Illustrator, there are several techniques to enhance the accuracy and quality of the result. One approach is to use the Pen tool to manually edit the path and adjust the anchor points to better match the original image. This method allows for precise control and can be particularly useful for complex or intricate designs. Another technique is to utilize the Brush tool to paint over any remaining background areas, effectively erasing them from the image. Additionally, the Lasso tool can be employed to select and remove any stray pixels or unwanted elements. Furthermore, the Pathfinder tool can be used to combine or divide shapes, allowing for more precise editing and refinement of the removed background. By combining these techniques, users can achieve a highly accurate and polished result, with a seamless integration of the removed background into the new design.
Using Layer Masks and Opacity for Non-Destructive Background Removal
When it comes to refining and editing background removal in Illustrator, using layer masks and opacity can be a game-changer. By applying a layer mask to the object or shape you want to remove from the background, you can create a non-destructive edit that allows for easy adjustments and revisions. To do this, select the object and go to Layer > Layer Mask > Reveal All, which will create a mask that reveals the entire object. Then, use the Brush Tool or the Pen Tool to paint or draw on the mask, hiding or revealing parts of the object as needed. By adjusting the opacity of the mask, you can control the level of transparency and create a seamless blend between the object and the background. Additionally, you can use the Gradient Tool to create a gradual transition between the object and the background, adding depth and dimension to your design. By using layer masks and opacity, you can achieve a high level of precision and control over your background removal, making it easier to create complex and detailed designs.