How To Flip An Image In Photoshop
 Understanding the art of image manipulation is a crucial skill in the world of digital technology. One fundamental tool, particularly in Adobe's widely-used software, Photoshop, is the technique of 'flipping' images. By altering the orientation or mirror-reflecting an object, designers can drastically manipulate the aesthetic of their work, thereby creating unique and compelling visual narratives. This dynamic and enlightening article offers you insightful guidance on "How to Flip an Image in Photoshop", incorporating three principal areas of knowledge and skills. We commence by "Understanding the Basics of Image Flipping in Photoshop", in which we broach the theoretical aspects and primary functionalities. Next, we provide a "Step-by-Step Guide to Flipping an Image in Photoshop" to lead you through the practical process. Ultimately, we address "Advanced Techniques and Tips for Image Flipping in Photoshop", where we explore more complex features, promising to enhance your technical proficiency. Now, let's have an in-depth look at the fundamentals to demystify this essential graphic tool's complexity.
Understanding the Basics of Image Flipping in Photoshop
knowledge of photo editing techniques often becomes vital in today's digital space, where images significantly enhance our communication. This article aims to provide a comprehensive guide to understanding the basics of image flipping in Photoshop, an essential but understated function in photo editing. Divided into three main sections, we will initially discuss 'What is Image Flipping and Why is it used?' to bestow a fundamental understanding; this will include the concept, applications, and importance in visual aesthetics. Then we will delve into the 'Key Tools and Features in Photoshop for Image Flipping,’ which will introduce you to the specific functions within Photoshop’s extensive toolbox that facilitate the smooth flipping of images. Lastly, we pay heed to the 'Preparation Steps Before Flipping an Image,' essential to ensure high-quality results without compromising the original image’s integrity. Stepping into the first section, let's comprehend the idea behind image flipping and its usage across multiple platforms.
What is Image Flipping and Why is it Used?
Image flipping is a fundamental aspect of photo editing; a technique commonly employed in photography, graphic design and digital art. It essentially involves inverting an image, which can be executed either horizontally or vertically. Think of a playing card being flipped over, causing changes in the perspective of the viewer. This reflects the primary concept behind image flipping. But why is it used? The reasons are multiple-fold. Firstly, image flipping can significantly improve the aesthetics and balance of an image. Graphic designers often use flipping as a tool to rectify composition issues, attracting attention to a specific area or element within the image. For instance, flipping an image may cause a vital object in the frame to shift towards the "Golden Ratio" point, thereby enhancing viewer engagement and attention. Secondly, image flipping aids in avoiding monotony in design. Repeated elements in the same orientation can end up appearing dreary and expected. Flipping these elements can bring about diversity, making the contents of the image more dynamic and interesting. Thirdly, it assists in mirroring objects in the visual frame. This comes handy in product photography, where the same item needs to be displayed from multiple angles. It also helps in creating reflective surfaces or water bodies in landscape photography or digital art. Additionally, image flipping plays a crucial role in creating symmetry, which is often pleasing to the human eye. It also proves useful in instances where designers have to create a twin effect, or rapidly duplicate an image for a design layout. It's important to note that the direction in which an image is flipped can also create particular visual effects. For instance, people in Western cultures tend to read and interpret images from left to right, making a flipped image seem like it's moving in a different direction. In conclusion, image flipping is a utilitarian trick in the arsenal of any visual artist, designer, and enthusiast. However, the decision to flip an image should not be random, it should be based upon the aim and desired outcome of the design. A well thought-out flip can add depth and interest to an image, improving its overall impact and effectiveness.
Key Tools and Features in Photoshop for Image Flipping
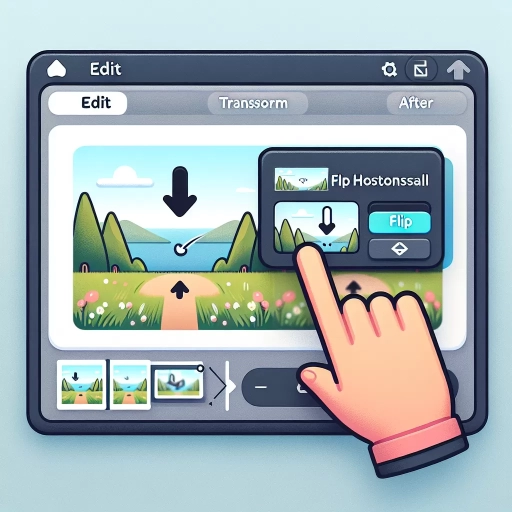
of digital graphics and photo editing, Adobe Photoshop offers a multitude of features and tools that aid in image manipulation such as image flipping. Image flipping in Photoshop is an essential skill to possess as it allows users to reverse an image or layer within a photo, creating a mirror-like reflection or effect. This feature is particularly beneficial when working with different perspectives, design layouts, and even in correcting image orientation. One key tool used for image flipping in Photoshop is the Transform Tool. Accessed through the Edit menu, this tool provides several options for manipulating the orientation and alignment of images. The Flip Horizontal and Flip Vertical options, specifically, allow users to flip an image along the respective axis. Using the Transform Tool enables a user to flip an entire image or an isolated layer within the image. Another vital feature used for image flipping in Photoshop is the Free Transform command. This command comes in handy when a user wants to flip a section of an image or to do more precise adjustments, as this tool allows the user to stretch and resize the selected area to fit the desired orientation. A user can access Free Transform by selecting it from the Edit menu or using the keyboard shortcut Ctrl/Command + T. The Canvas Flip tool is also essential when editing images in Photoshop. This tool will flip the entire canvas, flipping all layers and elements along with it. Flipping a canvas can be necessary when an artist wants to gain a fresh perspective on their work to easily spot and correct errors or imbalances in the design. In addition to these tools, Selection tools such as the Marquee, Lasso, or Quick Selection tools help to select the given area that will be subjected to flipping. Accurate selection ensures only the targeted area is flipped leaving the rest of the image unaffected. Once you've made your selection, you can use the Free Transform command to flip the selected area in your chosen orientation. Layer flipping offers an extra advantage, as it allows the user to flip individual layers without affecting the rest of the image. This is useful when you want to create mirrored effects or when working with multiple layers that need to be flipped in various directions. In summary, understanding and mastering these key Photoshop tools and features—Transform Tool, Free Transform command, Canvas Flip, and Selection Tools, used separately or in combination, along with the skills for layer flipping, ensures that you can perform image flipping easily and effectively, serving as a critical prerequisite to more complex Photoshop manipulations.
Preparation Steps Before Flipping an Image
Before delving into the detailed process of flipping an image in Photoshop, there are a few preparation steps that need to be adhered to ensure a seamless execution. The first step is to get a quality image. The quality of the image to be flipped is paramount as it directly influences the end-product. Therefore, choose an image with high resolution. If the image quality is poor, flipping it may further degrade its quality which could lower the visual appeal of the image. The second crucial step is understanding the rationale behind flipping the image. Are you flipping the image for design purposes or to correct an element in the image that was flipped by default? Analyzing the goal beforehand will guide you to choose the appropriate flipping method (vertical or horizontal) and apply the necessary corrections if need be. The third preparation step is making a backup of the original image. In Photoshop, once an image has been edited and saved, it’s nearly impossible to revert back to the original form. As such, it is advisable to make a duplicate copy of the image prior to flipping it. This would ensure you have the original image to fall back to should anything go wrong during the flipping process. Also, before you commence the image flipping process, familiarize yourself with the Photoshop workspace if you haven't done so already. Photoshop is a professional editing tool that has many functions and options. These multiple options can sometimes be overwhelming to beginners. Consequently, a basic understanding of the Photoshop dashboard, where to find the flip image command and how to apply it effectively to your image is essential. You can go through YouTube tutorials, online courses, or even refer to the manual provided by Adobe to get a grasp of the basic functioning of Photoshop. Lastly, you must understand the impact flipping image may have on the elements within your image. For instance, flipping an image with text might make the text unreadable. Or flipping an image with a recognizable landmark might make the scene look unrealistic. So, you need to be cautious about these issues and make necessary adjustments to maintain the visual integrity of the image. All of these elements combined will ensure a successful flipping outcome in Photoshop. Even though these steps may seem like a lot at first, they will seamlessly merge with the overall Photoshop workflow once you start practicing. The preparation may take some time initially, but it essentially sets a strong base for you to master the art of image flipping in photoshop.
Step-by-Step Guide to Flipping an Image in Photoshop
Photoshop has revolutionized digital editing since its inception, offering innumerable ways to manipulate an image. One such modification technique, flipping an image, is simple yet powerful and can be employed using various methods. This informative guide will demonstrate three different processes for flipping an image in Photoshop; using the Flip Horizontal and Flip Vertical options, employing the Transform Tool for precise flipping, and flipping an entire selection or layer. Each method has its unique utility depending on the sort of alteration required. The Flip Horizontal and Flip Vertical options are easy to access and straightforward to use, often used for quick, general image rotation. However, when precision is paramount, the Transform Tool facilitates more exact flipping, allowing users to specify the exact degrees of rotation. Finally, for more complex edits, Photoshop allows flipping of isolated selections or individual layers, granting even greater control over the final image orientation. Let us now begin with the first method, using the Flip Horizontal and Flip Vertical options to make basic image flips.
Using the Flip Horizontal and Flip Vertical Options
The flip tool in Photoshop is quite handy when you want to alter the orientation of an image without distorting its elements. Two primary options you can utilize are the 'Flip Horizontal' and 'Flip Vertical' options. The Flip Horizontal option provides a mirror-like reflection of the image. It flips the image along its vertical axis, essentially swapping the left and right sides of the image. The application of this tool can be seen in designs that require symmetrical balance or for creating reflective surfaces and shadows. For instance, if you have an image of a car facing right, applying the 'Flip Horizontal' option will make the car face left. On the other hand, the 'Flip Vertical' option flips the image along its horizontal axis, interchanging the top and the bottom sections of the image. This is quite similar to turning your image upside down. This flipping style comes handy in creating reflections in water or mirror effects, or for images which need to be inverted, such as reflections in a pond or a lake. These two flipping options are highly intuitive and user-friendly. To use them, simply select the layer that needs flipping, then navigate to 'Edit', followed by 'Transform' and then choose either 'Flip Horizontal' or 'Flip Vertical'. The image is instantaneously flipped. However, remember to apply these transformations judiciously, as overuse might cause your composition to look unnatural or out of place. The ability to flip an image aligns with the flexible, creative control provided by Photoshop. Whether you're adjusting an image to achieve a certain artistic effect or correcting a photo taken from the wrong angle, the 'Flip Horizontal' and 'Flip Vertical' commands are effective tools to help you manipulate and perfect your work. They enhance your editing skills, give your designs a professional touch, and ensure that you can work seamlessly without any limitations on your creativity. Hence, mastering these tools is crucial for any budding graphic designer or anyone looking to create engaging, high-quality visual content.
Utilizing the Transform Tool for Precise Flipping
The Transform Tool is the backbone of flipping images, allowing for absolute precision and exactitude in Photoshop. Under the Edit menu, it provides a broad range of manipulation options such as rotation, skewing, distorting, scaling and, of course, flipping. Let’s dissect the mechanics of this versatile tool to give you the confidence to flip with finesse. The utilization of the Transform Tool begins by selecting it from the edit menu. The user will then see bounding box corners appear around the image to signify the active selection. Simultaneously, users gain access to the control panel of the Transform Tool. It provides the option to input values for both Flip Horizontal and Flip Vertical, proving extremely helpful when pursuing exactness and avoiding discrepancies. By merely keying the desired degree of the flip into the corresponding field, the image can be changed with accuracy. Once the necessary alterations have been made, pressing "Enter" or double clicking within the boundary box will apply the transformation. The Transform Tool offers an unrivalled advantage of allowing adjustments even after the flipping has been applied; one can simply click on the 'Show Transform Controls' option to reopen the control panel for additional adjustments. Moreover, the Transform Tool option of flipping vertically or horizontally can be adapted to distinct scenarios. Generally, horizontal flipping is used to obtain a mirror image effect. On the other hand, vertical flipping is often used to create reflections. The luxury of this tool lies in its ability to flip any layer selected, not just the background layer, making it diverse and highly practicable. Furthermore, the flexibility of the tool allows for the simultaneous flipping of multiple layers. If you want to flip more than one layer at the same time, simply select multiple layers in the Layers panel. Once the layers are selected, again head to the Edit menu, select Transform, and choose either Flip Horizontal or Flip Vertical. In conclusion, the Transform Tool in Photoshop is a powerful and invaluable asset for image flipping. Offering a variety of properties for precise manipulation and control in your hands, this tool is a game-changer for both amateurs and professionals. The precise and error-free flipping can create visually stunning effects, bringing life and allure to your images. Having gained an understanding of the Transform Tool, the flipping function will no longer seem daunting but rather a doorway to explore and innovate! With the simple push of a button, images can be flipped, mirrored, and transformed achieving perfect accuracy and impressive visual results.
Flipping a Selection or a Layer in Photoshop
Flipping a selection or layer in Photoshop is an essential skill in image manipulation, providing a practical tool for graphic designers, photographers, and digital artists across a spectrum of industries. It pivots around the selection of a target image section or layer then invoking Photoshop's Flip command. This technique makes it possible to mirror or rotate elements within an image without affecting the overall composition, adding an innovative approach to image enhancement. Before you flip a selection or layer, you need to make an accurate selection using the Lasso Tool, the Magic Wand, or any other selection tools that can specify the area you want to flip. Once the specific selection has been made, navigate to the "Edit" menu, proceed to "Transform" and then select either "Flip Horizontal" or "Flip Vertical" depending on the desired outcome. This action inverses the selection or layer along a central axis, either horizontally or vertically, giving a mirrored effect. Flipping a layer is somewhere similar in approach. Select the layer you want to flip by clicking on it in the Photoshop Layers panel. Then, in the same "Edit" menu, go to "Transform," and choose the desired flip orientation - horizontal or vertical. This technique comes in handy when you want to create reflections or symmetry in images, adjust perspectives, or when you need to invert an object for a more visually appealing arrangement. It's important to note that flipping a layer or selection is a non-destructive action, which means you can always undo the flip transformation if you're not satisfied with the results. However, also be aware that flipping can occasionally cause pixel distortion, particularly with images that have high levels of detail. So always use this tool with care and precision to ensure your final image retains its quality. Whether you're designing promotional materials, tweaking a photograph, or creating a digital painting, knowing how to flip a selection or layer in Photoshop can considerably expand your creative options. It's a powerful tool in your Photoshop toolkit and, when utilized properly, can contribute to more professional and visually compelling imagery. After mastering this technique, you'll be better equipped to achieve your creative vision and contour your images to perfection.
Advanced Techniques and Tips for Image Flipping in Photoshop
Digital image orientation and imagery play a crucial role in digital graphics and photography; mastering these complex skills can significantly enhance your images' overall look. One such advanced technique involves flipping image in Photoshop, a concept that might appear straightforward but holds a ground for numerous errors and complex functions. This article provides enthusiasts with an in-depth exploration into three crucial aspects of image flipping: Flipping an Image with Perspective and Distortion, Using Actions and Scripts for Batch Image Flipping, and Common Mistakes to Avoid When Flipping an Image. The first phase will investigate the process and nuances of flipping an image with perspective and distortion, which can dramatically transform a flat image into a dynamic, exciting composition. Proceeding with 'Using Actions and Scripts for Batch Image Flipping', you will discover how to streamline and automate the flipping process across multiple images efficiently. Lastly, the article will delve into 'Common mistakes to Avoid when Flipping an Image', providing valuable insights to prevent basic errors and ensure success in your graphic endeavors. Now, let's begin our journey with the first and rather intriguing aspect of flipping an image with perspective and distortion.
Flipping an Image with Perspective and Distortion
In the advanced realm of Photoshop techniques, flipping an image with perspective and distortion provides skilled users and creative professionals with conducive options for their visual manipulations. This complex task involves more than a simple horizontal or vertical flip; it calls for a deep understanding of image planes, axes, visual effects, and Photoshop's plethora of tools to ensure a seamless, realistic flip. These tools include the Free Transform command, Marquee tools, Liquefy filter, and the Clone Stamp tool, amongst others. The use of perspective is pivotal while flipping an image as it charters the visual path that the viewer’s eyes will follow. This enhances visual communication in design projects by making images appear three-dimensional and lifelike. For example, flipping an image of a road stretching into the horizon wouldn't deliver the desired effect if it doesn't observe the laws of perspective. Proper perspective techniques can invert the image in a way where the road still seems to stretch into a distant horizon, ensuring spatial coherence. Distortion, on the other hand, can be used skillfully to augment the effect of image flipping. Adding certain amounts of distortion to flipped images can exaggerate or attenuate certain elements, giving the image a unique visual appeal and enhancing the image's overall composition. In Photoshop, the Liquefy filter is incredibly useful for adding creative distortions. However, mastery of this tool requires an understanding of how to control and stabilize brush movements and command over pressure sensitivity, whether manually with a mouse or with a more responsive tool such as a drawing tablet. To successfully flip an image with perspective and distortion, professionals start by creating a duplicate layer of the image they wish to flip. This ensures the original image remains unaffected by changes. Next, using the Free Transform command, they flip the image horizontally or vertically. Then, using advanced tools like the Marquee tools or the Liquefy filter, they subtly adjust elements in the image to ensure the flip looks natural and following perspective rules. In cases where certain areas seem unnatural after flipping, the Clone Stamp tool is applied to render enhancements. Finally, professionals delicately add distortion for an appealing final result. Yet, the understanding and mastering of these techniques demand practice, patience, and an in-depth understanding of Photoshop's tools. Also, to successfully emulate reality, one must understand real-world principles of perspective and distortion. Combining these skills is what allows profound image edits such as flipping an image with perspective and distortion to produce highly engaging and realistic visuals. Understanding this complex process truly sets apart casual users from seasoned Photoshop professionals.
Using Actions and Scripts for Batch Image Flipping
In mastering advanced techniques of image flipping in Photoshop, understanding the use of actions and scripts for batch image flipping becomes vital. This process allows for efficient handling of multiple images simultaneously, significantly saving time and energy. Actions are a series of tasks that can be recorded and applied to a single file or a batch of files. To batch flip images, first, you must record the steps required in performing image flipping as an action. These commands get recorded by Photoshop and can be saved under a distinctive name for future use. On the other hand, scripting extends functionalities even further. Scripts tackle more complex series of commands, allowing the use of logical statements like loops and conditionals. If you find yourself needing to flip hundreds or even thousands of images, investing time mastering writing scripts, like JavaScript or VBScript, is practically beneficial. To start a batch process, you just have to select the previously recorded action or your prepared script. Photoshop Actions and Scripts provide an automated process that ensures consistent results, preventing manual repetitive tasks. It's as simple as defining your source and destination folders, selecting your preferred action or script, and letting Photoshop do the rest of the task. Moreover, apart from image flipping, this procedure can be used for a wide array of other tasks as well, such as resizing, applying filters, and adjusting color balance among other things. Thus, the benefits of using actions and scripts for batch image flipping extend beyond the stated and into broader Photoshop application and functionality. In conclusion, actions and scripts make batch image flipping a breeze. They are powerful tools that can greatly simplify the process, making it quick, easy, and foolproof. Mastering these advanced techniques truly becomes a game-changer in handling image manipulation tasks, improving productivity while maintaining the high-quality output that Photoshop is known for. After all, in the world of graphic design and photo editing, time-efficiency and precision are tantamount to success.
Common Mistakes to Avoid When Flipping an Image
Improperly flipping an image can compromise the entire visual aspect of it, leading to unfavorable outcomes. Several common mistakes should be avoided when flipping an image in Photoshop. Firstly, selecting the wrong layers. Photoshop allows you to work with multiple layers, and it’s vital to ensure that the correct layer is selected before initiating the flipping process. Failure to do so can result in the wrong part of the image being flipped, compromising the desired result. It’s also essential to avoid disregarding image resolution. Flipping an image can impact the resolution, especially if the pixels aren't proportionate. This can degrade the image quality, making it appear blurred. Similarly, disregarding aspect ratio is another common error. Maintaining the aspect ratio when flipping an image preserves its proportions. If this aspect is ignored, it can result in distorted images, disrupting the original composition and aesthetic appeal. Another error to look out for is missing out on utilizing the guidelines and grids. They are instrumental in ensuring accurate positioning and maintaining harmonious composition when flipping images. Ignoring these guides may lead to a misplaced image flip, ruining the intended perspective. Moreover, avoid an excessive image flip. When applied unnecessarily or excessively, it may reduce the impact of the desired visual change and could confuse the viewer's eye or draw attention away from focal points. Saving inadequently is another common mistake. It’s crucial to always save a copy of the original image before flipping it. This allows you to revert to the original image if any mistakes occur. Forgetting to save a backup can be costly, especially when working with original art or client work where re-doing it may not be practical or possible. Unnecessary application of horizontal or vertical flips is another key mistake. Understanding when to apply which kind of flip is of paramount importance. Failing to consider this can decrease the professional look and feel of the image, making it undergo a flip that it perhaps did not require. Lack in applying advanced flipping techniques such as incremental flipping, flipping selections, or using smart objects are also notable mistakes. These techniques help you ensure precision, produce non-destructive edits and maintain high image quality. Ignorance or avoidance to learn and apply these can limit the potential of your image editing. Remember, ignoring these common mistakes not only provides you with a flipped image of high quality but also helps optimize your Photoshop usability. Improving one's skills in image flipping requires addressing these mistakes by applying the corresponding remedial measures and advanced techniques.