How To Change Iphone Language
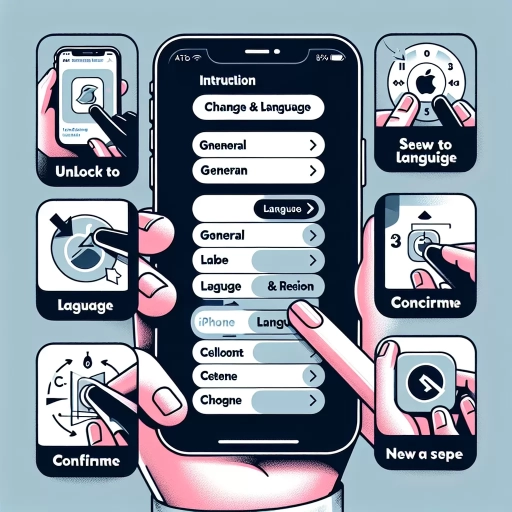 Communication is the key to understanding, and language is the heart of communication. Understandably, when we purchase a device, we want it to communicate with us in a language we understand. If you've recently bought an iPhone and it's in a different language, or perhaps you're learning a new language and want to immerse yourself totally, you're in the right place. This comprehensive guide will walk you through changing your iPhone language settings. This process involves three principal steps: initially accessing the iPhone settings, changing the iPhone language, and making minor adjustments to your language preferences. Keep reading as we delve into the first step: accessing your iPhone settings as the entry point to the world of multiple languages at your fingertips.
Now, let's journey into the first step - accessing your iPhone settings where the magic of language transformation begins. Bedrock
Communication is the key to understanding, and language is the heart of communication. Understandably, when we purchase a device, we want it to communicate with us in a language we understand. If you've recently bought an iPhone and it's in a different language, or perhaps you're learning a new language and want to immerse yourself totally, you're in the right place. This comprehensive guide will walk you through changing your iPhone language settings. This process involves three principal steps: initially accessing the iPhone settings, changing the iPhone language, and making minor adjustments to your language preferences. Keep reading as we delve into the first step: accessing your iPhone settings as the entry point to the world of multiple languages at your fingertips.
Now, let's journey into the first step - accessing your iPhone settings where the magic of language transformation begins. BedrockStep 1: Accessing iPhone Settings
of understanding your iPhone and making the most of its various features, is familiarity with accessing your device's settings. Generally, iPhone settings are the command hub of your gadget, controlling everything from connectivity, brightness, to app permissions, and much more. However, many people falter at simply accessing their iPhone settings due to various reasons. This article aims at simplifying this process in a detailed yet digestible manner. The supporting paragraphs will cover three basic steps in this guide. These steps are; locating your settings app, opening the said settings app and finally, how to navigate to the general settings. By adhering to the guide provided, you'll be able to swiftly modify your phone settings according to your preferences, thereby enhancing your iPhone experience. Now, let's get right into it starting with the first step, how do you locate the settings app on your iPhone?
1.1 Locate the Settings App
In the article which discuss how to change iPhone language, it's essential to start by accessing your iPhone settings. To do this, you will need to locate the "Settings" App on your iPhone. The Settings app is typically found on the home screen, appearing as an icon featuring a simple gear icon design. Aligning with Apple's minimalistic aesthetics, it sports a thin-lined cogwheel design against a gray background. However, with the dynamism of iPhone functionalities, you may have moved the app to another location on your phone. If not immediately visible, you can use the quite handy 'swipe down' from midway the screen to access the 'Spotlight Search' function. Key in 'settings'; and the results displayed should include the Settings app. Tapping on it will bring you to the main screen of the Settings app. This main screen is your control hub for numerous iPhone features and functionalities. It begins with your Apple ID avatar at the top, and immediately below is a list of complex systems as Airplane Mode, Wi-Fi, Bluetooth, etc. Scroll down, and you'll see Notifications, Sound, Brightness, Wallpapers, and more. Each of these headings leads you to another pane giving further settings you can change. For this purpose of changing the phone’s language, you will be focusing on 'General,' but the settings app holds the keys for you to fine-tune your phone's personal, system and account settings to your preference. It's quite remarkable how straightforward this app is constructed. While it contains very complex systems, it’s displayed in the simplest way possible. Each menu item leads to specific settings that you can toggle on/off or edit as per your needs. Additionally, the interface flaunts a very organized, neat, and crisp design, making navigation around it very user-friendly. You should be aware, however, that many items are nested within other items, so for deeper function settings, you'll have to drill down through specific items. Using the Settings app is a basic yet important skill as an iPhone user. It opens the gateway for you to customize your iPhone based on your preference, right from theme, privacy settings, to applications and connectivity. Importantly, it offers a platform to personalize the predefined configurations to make the iPhone your own, thus enhancing your overall user experience with Apple products. This critical step of locating your iPhone 'Settings' app is a significant start to the journey of changing your iPhone's language. Always remember that customized settings help you optimize your device’s user-friendliness and functionality.
1.2 Open the Settings App
Upon completing step 1 and successfully accessing your iPhone settings, the subsequent action in line involves maneuvering through the 'Settings App'. Now, this phase is critical as most operations that pertain to the modifying and adjusting of settings are performed here. This application towers above other apps in terms of importance as it enables you with the capacity to tweak your iPhone's functionality to suit your tailored preferences. The platform is robust, user-friendly, and encompasses numerous device settings. The 'Settings App', represented by the gear icon, has a minimalist design that parallels Apple's clean and refined design ethos. When the icon is tapped, it unwraps a complex yet orderly array of various settings; from adjusting screen brightness to managing passwords, and much more. However, your point of focus in this context will be the 'General' tab, which houses the language settings that you desire to alter. Immediately you tap 'Settings', your display is swarmed by an alphabetical list of settings for varied apps and features offered by your device. The 'General' tab is strategically located in the heart of this list, just between 'Face ID & Pass Code' and 'Control Centre'; making it reasonably easy to locate. To ensure that you have found the right setting, the 'General' icon is often synonymous with a gear image. In the 1.2 step of 'Open the Settings App', it's all about navigating your way to the language settings buried deep into the 'General' section. Despite its seemingly complex outlook, it is essential that you approach this stage with ultimate patience. Your mission is to comb through the list until you stumble upon the 'Language & Region' option, beneath the 'VPN' and above 'iTunes Wi-Fi Sync' options. Unveiling the 'Language & Region' option signifies a milestone in your endeavor to alter your iPhone's language settings. Remember, all these operations fundamentally hinge on this critical stage - 1.2 Open the Settings App. It simplifies everything, serving as the doorway to a plethora of customization options. It's the bridge linking you to the thrilling experience of a tailor-made iPhone language setting, lining up the pathway to a world of multiple language selections that suit your taste. Evolving digital trends have amplified the importance of linguistic variety, making it extremely pivotal on gadgets like your iPhone. And as you journey through these settings, your grasp on the device's language setting manipulation significantly improves. Therefore, it's paramount to really master the art of 'Opening the Settings App'; it's the first major stride towards attaining a more personalized iPhone experience.
1.3 Navigate to General Settings
After accessing your iPhone settings as per Step 1, the second essential step to change language is to navigate to General Settings. This step forms the basis of making numerous advancements towads personalising your device. To ace this process, you must familiarize yourself with the icon labelling 'General', which is frequently characterized by a cog symbol. This instruction is accessible for any user regardless of their model of the iPhone, from the latest iPhone 13 Pro Max to the oldest such as iPhone 6. The general settings option is the gateway for a wide variety of functions, which showcases the iPhone's incredible adaptability and user-centric design. It provides access to your device's most foundational settings, managing everything from software updates, device information to keyboard settings and date & time. This is where you can also modify a spectrum of parameters to tailor your iPhone experience as per your convenience and preferences. If you are facing difficulties locating 'General Settings,' the most uncomplicated indication is to look around the midpoint of the main Settings menu. It is easy to spot and typically situated below the 'Notifications' and right above the 'Control Centre'. Once you have fallen upon the right icon, tap on General settings. The screen will swiftly change to reveal further adjustments that include 'Software Update', 'Accessibility', 'Keyboard', 'International' etc. Also, note that the topmost part of the screen usually displays the Apple ID, Airplane Mode, Wi-Fi, and Bluetooth settings, whereas the concluding part accommodates more application-specific options such as iTunes & App Store and Wallet & Apple Pay. This systematic organization of the settings menu is part of Apple's effort to prioritize user-friendly navigation, making it easy for users to locate and adjust different features accordingly. The 'General Settings' is a pivotal starting point if you're aiming to make your iPhone more attuned to your preferences. This encapsulates not only the language switch but also introduces a string of other customizable features for a well-rounded iPhone exploration. As a user, you have the freedom to experiment and discover more about what your iPhone offers. Furthermore, if your device is an updated model, there's a search bar at the top of the 'Settings' screen; it can directly lead you to 'General settings' without evoking manual scrolling. However, the key is to gradually grow accustomed to the settings and use them as per your necessitate. Happy Customizing!
Step 2: Changing iPhone Language
The second step in the process of changing your iPhone language involves a few critical sub-steps that make the process fluid and effective. This step doesn't need any technical prowess, just the ability to follow simple guidelines. In the first supporting paragraph, we will expound on 'Select Language & Region', where we guide you through the navigation process within your iPhone settings, leading you to the page where you can change your language. The second supporting paragraph, 'Choose a Language from the List', delves deeper into choosing your preferred language from the extensive list provided by Apple, ensuring that this feature caters to a global audience. Finally, the third paragraph, 'Confirm Language Change', is an important step that finalizes the process, allowing your iPhone to accommodate your desired language preference throughout its system. Let’s now take more of an in-depth look at the first supporting guideline 'Select Language & Region' to get the ball rolling.
2.1 Select Language & Region
Once you've made up your mind to change the language on your iPhone, the initial and integral step is to select the language and region you wish to switch to under the 'Language & Region' menu. The first sub-step in this process, 2.1 'Select Language & Region', involves going to 'Settings' on your iPhone and subsequently tapping on 'General.' A new page will manifest, and from there, you have to locate and select 'Language & Region'. It's significant to acknowledge why Apple has provided the 'Language & Region' setting in the first place which it allows users to modify their device's primary and preferred language. This feature is more than just a linguistic preference; it's able to provide a more immersive and personalized user experience. For instance, if a user moves to a new country where the language is different, or if they're studying a foreign language and want to practice immersion, this setting can facilitate that aim. Moreover, iOS devices are built to recognize and use a number of languages, hence supporting multilingual users. Everyone can use their device in the language they are most comfortable with. Besides just changing the display language or keyboard layout, this function also influences how certain apps respond and operate; tailoring your experience by adjusting to your geographical location, dates, times and even local holidays; thereby drenching your device with a personal touch. Apple strictly follows the mantra of user-friendliness, and the option to 'Select Language & Region' further echoes this sentiment. Wise use of this feature incites a personalised user experience that essentially provides users with that sought-after feeling of uniqueness and attention to detail. This feature also applauds diversity by catering to and respecting an array of different languages and regions. In summary, 'Select Language & Region' is an intuitive, all-inclusive feature that lets iPhone users tailor their device to fit their language preferences and geographical needs. This transforms the iPhone into more than a communicative tool; it becomes a personal digital companion that syncs perfectly with the user's lifestyle, linguistically and geographically. As an integral part of 'Changing iPhone Language', it echoes the inclusive and attentive values of Apple, promising to offer a seamless, personalized user experience for all.
2.2 Choose a Language from the List
In the world of technology, diversity is not simply confined to people or geography, but also manifests in the availability of multilingual options in tech devices. These language options can make using devices more comfortable and accessible for users world over. To tailor your iPhone to your language preferences, step 2.2, following the initial selection of "General" in the "Settings" menu, is the crucial "Choose a Language from the List" step. In this segment of changing your iPhone’s language, you will be presented with an expansive list of languages compiled by Apple. This list stands as a testament to the global outreach of the company’s products. From the predictable options of English, Spanish, or French, to the lesser-used, yet equally respected, languages such as Catalan, Hebrew, or Maori, the list is impressively comprehensive, ensuring that virtually everyone, regardless of their native tongue, can customize their iPhone to personally resonate with them. Once you have marvelled over the sheer range of language options, noting Apple's assertion that everyone's language is worthy of inclusion, the next task is the actual selection of your preferred language. This process is quite straightforward; you merely scroll through the litany of languages on offer, locate and tap on your desired language, and allow a few seconds for your phone to shift its linguistic framework in accordance with your selection. This particular option not only changes the language of your phone’s interface, but also automatically adjusts the language for apps that support the language change function. This means that users will have a more cohesive, personalized, and comprehendible experience on their iPhone. Moreover, this language change also impacts autocorrect, ensuring that you will have the correct word suggestions while typing text messages, notes, or emails. At this level of technological advancement, a device’s ability to transcend language barriers and cater to individual preferences is considered a basic necessity. By learning to successfully navigate this important aspect of your iPhone, you are empowering yourself to make the most out of your device based on your unique linguistic needs. Remember that if you want to switch back or even experiment with a new language, the comprehensive list is only a few simple steps away. Embrace this liberating, user-friendly feature, and optimize your interaction with your popular hand-held device, the iPhone. Thus, "Choose a Language from the List" is more than just a step in customizing your iPhone’s language settings; it is a delightful realization of inclusivity, personalization, and accessibility in the sphere of tech usability. Make sure to explore it thoroughly and appreciate the diversity it represents, bringing the world to your fingertips.
2.3 Confirm Language Change
After successfully navigating to the language settings on your iPhone, you will come across a section designated 2.3 Confirm Language Change. This crucial part of step 2, Changing iPhone Language, ensures that you are certain of the language change, preventing any possible confusion or discrepancy in the system. It serves as a secure measure by Apple to authenticate the alterations made to your phone's settings. Upon reaching this stage, you would typically find a list of available languages displayed. However, your iPhone will not immediately change the language setting; instead, it will need an affirmation from you before implementing the desired modifications. The process is quite straightforward. All you have to do is select your desired language and then confirm your choice. Usually, a pop-up window will appear on your screen, prompting you to confirm your decision or cancel it. This window typically bears the phrase 'Are you sure you want to continue? Changing the language will affect all apps and system functions.' It also includes options to 'Cancel' or 'Continue.' The presence of the 'Cancel' option is essential. It gives you the flexibility to reconsider your decision should you realize that you've made a wrong selection or pressed the wrong button. Clicking on 'Cancel' keeps your language settings intact, taking you back to your previous screen. It ensures that you won't be stuck with an undesirable language on your phone due to inadvertent mistakes during the process. However, if you are confident with your selection, opting for 'Continue' will finalize your language change. As indicated in the popup, this impacts the whole system, changing the language used across all applications and functions on your iPhone. Furthermore, depending on the specific language you've opted for, the change might also affect your phone's voice assistant language, Siri. Finally, one critical detail to remember when dealing with the language modification process is that the change does not take effect instantly. Depending on your iPhone's model and the iOS version running on your device, there might be a delay. You might even have to reboot your device manually or wait for an automatic restart for the changes to get into effect. So, don't worry if you don't see an immediate transformation; your iPhone is simply taking some time to adapt to the new language settings that you've designated. In conclusion, the 2.3 Confirm Language Change section is a fail-safe measure designed to protect your iPhone from unintentional modifications that could otherwise lead to confusion. By requiring you to confirm your language change, it ensures your iPhone adapts only to your conscious choices, providing a refined, user-centric experience.
Step 3: Additional Language Settings
In the third step towards mastering the dynamics of language settings on a device, we will delve into the more intricate elements. This consists of enabling or disabling language features, setting a default language for apps and customizing keyboard layouts. These additional language settings play a pivotal role in maximizing comprehensibility and ease of use for diverse audiences. For instance, one may wish to switch language features on or off to suit their needs, which is especially useful when using multilingual applications. Furthermore, setting a default language for apps can ensure that all your applications operate in your preferred language, providing a uniform and seamless experience. Finally, customizing your keyboard layout can adapt the user-interface to accommodate different language characters, ensuring each user can input text easily and comfortably. Now, let's delve deeper into how we can enable or disable language features effectively. It is a simple process, but understanding it will greatly enhance your device's usability. These additional settings ensure that language configurations on your device aren't merely a static feature but a dynamic tool tailored to your multilingual needs.
3.1 Enable or Disable Language Features
In the process of adjusting the language on your iPhone, another important action you need to consider is enabling or disabling specific language features, which falls under Step 3.1. This step is crucial because various language features can greatly enhance your experience and help you make the most out of the language you've chosen to use. Apple has included numerous features like auto-correction, spell check, predictive text, emoji suggestions, and many more. Suppose the language you are using is supported. In that case, these features can drastically aid you, such as by making typing smoother or ensuring you use the correct vocabulary and grammar. They often learn from your commonly used phrases and patterns, making your device even more personalized and convenient to use over time. However, not all users prefer these features, especially if they often switch between languages or utilise distinctive colloquial language that the iPhone's algorithms might not understand. In such circumstances, these features might cause more confusion than assistance. Consequently, Apple provides the option to enable or disable these features based on the user's preference. To enable or disable these language features, go to 'languages & Region’ under the ‘General' tab in the Settings app. Here you'll be able to see a 'Keyboard' selection where you can add new keyboard languages if needed, and manage your keyboard's software settings including features like predictive text, auto-capitalization, and more. Additionally, ‘Voice Control' is an option found under the 'Accessibility' settings, that you can customize in ways that best suit your needs. This includes the language used for commands, whether you want confirmation before commands take place, and even creating personalized commands. By adjusting these settings, you can make your iPhone work best for you and ensure that the language experience is optimal and matches your desired level of interaction and convenience. It's all about creating a user experience that suits your individual needs, and Apple has done an excellent job in enabling a high degree of customization. So, whether you're a multilingual user or someone who prefers a very straightforward, simple language experience, the iPhone has got you covered under 3.1 Enable or Disable Language Features. Through this step, the versatility and personalized nature of the iOS ecosystem becomes even more obvious. It demonstrates how Apple is dedicated to catering to the needs of a wide variety of users worldwide, going beyond mere language availability but venturing into fine-tuning the language experience to match the user's preferences.
3.2 Set Default Language for Apps
While the overall language of your iPhone can be set to your preference, individual applications may offer the ability to support multiple languages. Step 3.2 entails how you can set a different, default language for apps. The ability to change an app's default language is valuable, particularly for users who are multilingual or for those who prefer using specific apps in a language different from their iPhone's primary language. To change the default language for apps on your iPhone, you'll need to jump into the "Settings," then tap on the "Apple ID" at the top. From there, select the "Language & Region" option. In this menu, you'll find "iPhone Language" and "Other Languages." While the former dictates the primary language of your iPhone, the latter commands the language of individual apps. By clicking on "Other Languages", you will be provided with an extensive list of languages from which you can select. After selecting your preferred language, it's pivotal to remember that your choice will only materialize in apps that support the language you've selected. Not every app supports every language; it varies from app to app, based on the languages the developer has incorporated. Once a language has been chosen, it is typically applied instantly, though certain apps may require a restart before displaying the new language. If you want to switch back or modify the language of an app, you'll need to trace back your steps and alter your selection in the "Language & Region" setting. This feature comes in handy in several scenarios. For example, learning a new language could be aided by setting a language-learning app to the language you are trying to grasp. Besides, it also proves useful to redefine the language of social media or news apps into local languages to ensure you stay informed of regional happenings. In conclusion, setting a default language for apps is a remarkably intuitive and accessible process. By enabling users to tailor their language experience to their individual needs, Apple further personifies the iPhone experience, reinforcing its commitment to user convenience and accessibility.
3.3 Customize Keyboard Layout
In step 3.3 of altering your iPhone language settings, you'll have the chance to customize your keyboard layout. The process of keyboard customization provides a robust and more personalized user experience. By default, when you add a new language on your iPhone, Apple attaches an appropriate keyboard layout. However, you may need to adjust this to best suit your preferences or to enhance your screen interactions using different scripts. To begin customizing your keyboard layout, click on the “Settings” icon on your iPhone’s home screen. Continue by selecting “General” from the list of options. Scroll down until you encounter “Keyboard.” Tap on it, then select “Keyboards” at the top of the next screen. A list of all your current keyboard settings will appear. To adjust the keyboard for a new language, tap “Add New Keyboard” and select the desired language from the list. Your phone enables multiple keyboard layouts hence, if you frequently type in two languages, consider adding the other language here too. Dual-language typing helps the iPhone predict words more accurately, giving you a smoother, more efficient typing experience. Plus, it's simple to switch between languages while typing—just tap the globe icon on the left of the space bar. Remember that each language can have numerous keyboards. For instance, English has the U.S., U.K., Australia, Canada options, and others. There are also specialized keyboards like the QWERTY, AZERTY and QWERTZ, reflecting variations in letter placement used in different countries. Select according to your personal preference. Beyond the default keyboards, there's potential for even more customization. You can even download third-party keyboards from Apple’s App Store. These offer a list of additional features, which may include swipe-typing, themed keyboard skins, extra emojis, and more. In sum, keyboard customization under additional language settings in an iPhone is an often overlooked feature that can significantly improve your overall user experience. It helps bring a sense of personal touch and functionality tailored to your typing habit. It is a valuable feature whether you're a multilingual typing maestro or someone who wants to add flexibility to their SMS, email, or note dictation. The beauty lies in its trilingual capacity which enables you to switch from one language keyboard to another with a mere tap. By embracing these settings, you get to push inhibitions set by language barriers and gain control over your communication style. Remember, adapting to these settings isn't hard or time-consuming, and the benefits are immediate and appealing — making your iPhone truly universal! So take a leap, explore the options, and set a keyboard layout that best resonates with your messaging modus. Enjoy seamless and stress-free communications by making your iPhone's keyboard layout favorable to your language input requirements. The keyboard layout isn't just about keys. It's about how you communicate in this digital era. Make it count!