How To Hang A Mirror Without Hooks On The Back
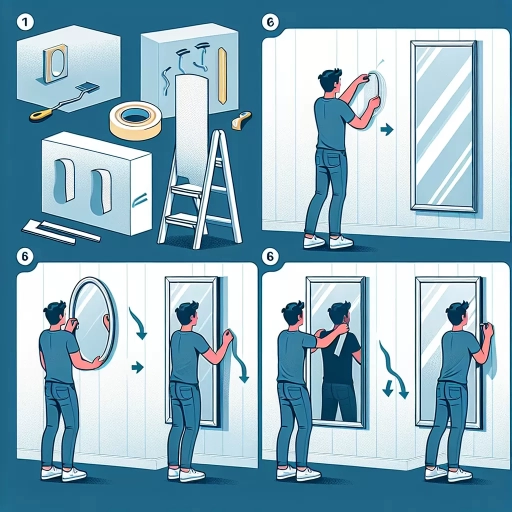
Hanging a mirror without hooks on the back can be a daunting task, but it's not impossible. In fact, there are several creative and effective ways to achieve this. If you're looking for a solution that's both easy and damage-free, you're in luck. In this article, we'll explore three innovative methods to hang a mirror without hooks on the back. We'll discuss the use of adhesive strips, 3M Command Strips, and mirror hanging kits. Each of these methods offers a unique set of benefits and advantages. For instance, adhesive strips provide a strong and durable hold, while 3M Command Strips are removable and won't damage your walls. Mirror hanging kits, on the other hand, offer a comprehensive solution that includes everything you need to hang your mirror securely. To start, let's take a closer look at one of the most popular methods: using adhesive strips.
Using Adhesive Strips
When it comes to hanging a mirror, using adhesive strips is a popular choice due to their ease of use and minimal damage to walls. However, to ensure a successful and secure installation, it's essential to follow the right steps. First, choosing the right type of adhesive strip is crucial, as different types are designed for specific weights and surfaces. Next, preparing the wall and mirror surface is vital to ensure a strong bond between the strip and the surface. Finally, applying the adhesive strips correctly is key to preventing the mirror from falling or becoming misaligned. By following these steps, you can achieve a professional-looking installation without the need for nails or screws. In this article, we will explore each of these steps in detail, starting with the importance of choosing the right type of adhesive strip.
Choosing the Right Type of Adhesive Strip
When it comes to choosing the right type of adhesive strip for hanging a mirror without hooks on the back, there are several factors to consider. The weight and size of the mirror are crucial in determining the type of adhesive strip to use. For smaller and lighter mirrors, a standard adhesive strip with a weight capacity of 1-2 pounds may be sufficient. However, for larger and heavier mirrors, a heavy-duty adhesive strip with a weight capacity of 5-10 pounds or more may be required. Additionally, the type of surface the mirror will be attached to is also important. For smooth surfaces such as glass, metal, or plastic, a standard adhesive strip may work well. However, for textured or porous surfaces such as wood or drywall, a specialized adhesive strip designed for these surfaces may be necessary. It's also important to consider the temperature and humidity of the environment where the mirror will be hung, as some adhesive strips may not perform well in extreme conditions. Furthermore, the type of adhesive strip that is removable or reusable may also be a consideration, especially if the mirror needs to be moved or repositioned frequently. By taking these factors into account, you can choose the right type of adhesive strip for your specific needs and ensure a safe and secure installation of your mirror.
Preparing the Wall and Mirror Surface
When preparing the wall and mirror surface for hanging a mirror without hooks on the back, it's essential to ensure both surfaces are clean, dry, and free of dust and debris. Start by gently wiping the wall with a soft cloth or sponge, removing any dirt, grime, or old adhesive residue. Next, inspect the mirror's surface for any dust, fingerprints, or smudges, and clean it with a lint-free cloth and a mild glass cleaner. Avoid using paper towels or other abrasive materials that may scratch the mirror's surface. For particularly stubborn spots, mix a solution of equal parts water and white vinegar, and apply it to the affected area using a soft cloth. Once the wall and mirror are clean, allow them to dry completely before proceeding. This will ensure a strong bond between the adhesive strips and the surfaces, preventing the mirror from falling or becoming misaligned over time. Additionally, if you're hanging a large or heavy mirror, consider enlisting a second person to help with the installation, as this will make it easier to handle the weight and ensure the mirror is properly aligned. By taking the time to properly prepare the wall and mirror surface, you'll be able to achieve a secure and level installation that will last for years to come.
Applying the Adhesive Strips Correctly
When applying adhesive strips to hang a mirror without hooks on the back, it's crucial to follow the manufacturer's instructions and take necessary precautions to ensure a secure and damage-free installation. Start by cleaning the wall surface thoroughly with a gentle detergent and water to remove any dirt, grime, or old adhesive residue. This will help the strips adhere better and prevent them from falling off over time. Next, peel the backing off the strips and press them firmly onto the back of the mirror, making sure they are centered and evenly spaced. Hold the mirror against the wall and press the strips firmly onto the surface, applying even pressure to avoid air bubbles or wrinkles. Hold the mirror in place for a few seconds to allow the adhesive to set, then step back and inspect the installation. If necessary, make any adjustments to the mirror's position before the adhesive sets completely. It's also essential to follow the weight limit specified by the manufacturer to avoid overloading the strips and causing them to fail. By applying the adhesive strips correctly, you can ensure a safe and secure installation that will hold your mirror in place for years to come.
Utilizing 3M Command Strips
When it comes to hanging a mirror, utilizing 3M Command Strips is a popular choice among homeowners and DIY enthusiasts. These strips offer a convenient and damage-free way to hang heavy objects on walls without the need for nails or screws. However, to ensure a successful installation, it's essential to follow some crucial steps. Firstly, selecting the correct weight limit for your mirror is vital to prevent it from falling and causing damage. Additionally, following the manufacturer's instructions for installation is crucial to ensure a secure and level hang. Finally, knowing how to remove the strips without damaging the wall is also important to maintain the integrity of your walls. By considering these factors, you can confidently use 3M Command Strips to hang your mirror. In this article, we will explore these key considerations in more detail, starting with the importance of selecting the correct weight limit for your mirror.
Selecting the Correct Weight Limit for Your Mirror
When selecting the correct weight limit for your mirror, it's essential to consider the size and weight of the mirror itself, as well as the type of wall it will be hung on. A general rule of thumb is to choose a weight limit that is at least 1-2 pounds more than the weight of the mirror. This will provide a safety margin and prevent the mirror from falling or becoming dislodged over time. For example, if your mirror weighs 10 pounds, look for a weight limit of at least 12 pounds. Additionally, consider the type of wall you have - drywall, plaster, or concrete - as this will affect the weight limit of the hanging solution. For instance, drywall can typically support less weight than plaster or concrete walls. It's also important to check the manufacturer's instructions for the specific hanging solution you're using, as they may have specific weight limits or recommendations. By choosing the correct weight limit for your mirror, you can ensure a safe and secure installation that will last for years to come.
Following the Manufacturer's Instructions for Installation
When it comes to utilizing 3M Command Strips for hanging a mirror without hooks on the back, following the manufacturer's instructions for installation is crucial. The instructions provided by 3M are designed to ensure that the strips are used correctly and safely, and that the weight limit of the strips is not exceeded. To start, make sure to read the instructions carefully and understand the recommended weight limit for the specific type of strip you are using. Next, clean the wall surface thoroughly with a degreaser to remove any dirt, grime, or oils that may interfere with the adhesive. Then, remove the backing from the strip and press it firmly onto the wall, making sure it is centered and straight. Hold the strip in place for a few seconds to ensure it adheres properly. Finally, hang your mirror on the strip, making sure it is level and secure. It's also important to note that 3M Command Strips should not be used on certain types of surfaces, such as wallpaper, textured surfaces, or surfaces that are prone to moisture. By following the manufacturer's instructions, you can ensure a safe and secure installation of your mirror.
Removing the Strips Without Damaging the Wall
When removing the strips without damaging the wall, it's essential to follow the correct procedure to avoid any damage or residue. Start by grasping the tab at the bottom of the strip and pulling it downwards slowly and steadily. This will help to release the adhesive from the wall without causing any damage. If the strip breaks or the adhesive remains on the wall, do not attempt to pull or scrape it off, as this can cause damage to the paint or wallpaper. Instead, use a hair dryer or a warm cloth to heat the adhesive, making it easier to remove. Once the adhesive is warm, use a credit card or a similar tool to gently scrape it off the wall. If there is still some residue left, use a gentle adhesive remover or a mixture of equal parts water and white vinegar to wipe it away. By following these steps, you can remove the strips without damaging the wall, making it easy to reuse the strips or replace them with new ones.
Employing a Mirror Hanging Kit
When it comes to hanging a mirror, it's essential to have the right tools and equipment to ensure a secure and level installation. A mirror hanging kit is a great solution, providing everything you need to get the job done efficiently. To employ a mirror hanging kit effectively, it's crucial to understand the components of the kit, measure and mark the wall for accurate placement, and assemble and attach the kit to the mirror. By following these steps, you can achieve a professional-looking result without the need for extensive DIY experience. In this article, we'll delve into the details of each step, starting with understanding the components of the kit, which is the foundation of a successful mirror hanging project.
Understanding the Components of the Kit
When it comes to employing a mirror hanging kit, understanding the components of the kit is crucial for a successful installation. A typical mirror hanging kit usually includes a set of hanging hardware, such as D-rings, screws, and wall anchors, as well as a hanging wire or chain. The D-rings are attached to the back of the mirror, while the screws and wall anchors are used to secure the hanging wire or chain to the wall. Some kits may also include additional components, such as a level, a pencil, and a measuring tape, to help with the installation process. It's essential to familiarize yourself with each component and its purpose to ensure a safe and secure installation. By understanding the components of the kit, you can confidently hang your mirror without hooks on the back, achieving a professional-looking result.
Measuring and Marking the Wall for Accurate Placement
Measuring and marking the wall for accurate placement is a crucial step in hanging a mirror without hooks on the back. To start, determine the wall type and locate the studs using a stud finder. This will help you identify the best spot to place the mirror, ensuring it is securely fastened. Next, measure the width of the mirror and the distance between the hanging points on the back of the mirror, if any. Use a level to draw a straight line on the wall, indicating the top edge of the mirror. Then, measure down from the line to mark the spot where the hanging point will be placed. Use a pencil to lightly mark the spot, taking care not to press too hard and create a visible mark. If using a mirror hanging kit, follow the manufacturer's instructions for measuring and marking the wall. Typically, the kit will include a template or guide to help you accurately mark the wall. Double-check your measurements to ensure accuracy, and make any necessary adjustments before proceeding with the hanging process. By taking the time to carefully measure and mark the wall, you can ensure a secure and level installation of your mirror.
Assembling and Attaching the Kit to the Mirror
Assembling and attaching the kit to the mirror is a straightforward process that requires attention to detail and a few basic tools. First, carefully unpack the kit and lay out all the components, including the hanging hardware, adhesive strips, and any additional accessories. Next, read the manufacturer's instructions to understand the specific assembly requirements for your particular kit. Typically, you'll need to attach the hanging hardware to the back of the mirror using the provided screws or adhesive strips. Make sure to position the hardware in the center of the mirror, ensuring it is level and secure. If your kit includes a hanging bracket, attach it to the wall according to the manufacturer's instructions, usually by screwing it into a stud or using a wall anchor. Once the bracket is in place, hang the mirror on the bracket, adjusting it as needed to achieve a level and secure fit. Finally, double-check that the mirror is properly attached and adjust the hanging hardware if necessary to ensure a sturdy and even hang. By following these steps, you'll be able to successfully assemble and attach the kit to the mirror, providing a safe and secure hanging solution.