How To Delete A Row In Excel
 Excel, the widely used spreadsheet program, offers numerous features to manage and organize data efficiently, albeit with a learning curve. One such fundamental task is removing unwanted or superfluous data - specifically, deleting rows in an Excel document. This comprehensive yet straightforward guide can ease the process, irrespective of your proficiency level. Our article will cover the mechanisms of Deleting a Row in Excel: A Step-by-Step Guide for those just beginning their journey. We will then progress to Methods for Deleting a Rows in Excel to outline various techniques available within the program. Finally, we will discuss Advanced Techniques for Deleting a Row in Excel, ensuring that even seasoned Excel users can pick up a trick or two. Let's get started with our step-by-step guide to deleting a row in Excel.
Deleting a Row in Excel: A Step-by-Step Guide
knowledge of Microsoft Excel is a must-have skill in today's tech-heavy work environment. In this article, we will elaborate on an often-used but understated feature: deleting a row in Excel. Through this comprehensive step-by-step guide, we aim to simplify the process and equip you with knowledge essential for efficient data handling. The discussion encompasses three integral aspects centered around the process: 'Understanding the Basics of Deleting a Row', 'Precautions to Take Before Deleting a Row', and 'Common Mistakes to Avoid When Deleting a Row'. Each segment provides valuable insight, enabling you to master the process and avoid pitfalls. First, understanding the basics will form the foundation of your practical application. This involves familiarizing yourself with Excel’s layout and specific commands used for deletion. Moreover, you will learn why and when to use this tool, enhancing your skills in data management. Now, let's journey into the first area: Understanding the Basics of Deleting a Row.
Understanding the Basics of Deleting a Row
Deleting a row in Excel is one of those fundamental skills that every user should be familiar with. The rows in Excel are the horizontal subsets of data that numerous purposes in data organization and manipulation serve. Rows could contain different types of data altogether, ranging from text, dates, numbers to complex calculations. Sometimes, it would be necessary to delete certain rows for a variety of reasons. It might be to eliminate redundant data, wave off errors, or adjust space constraints. Having a solid grasp of the basics of deleting a row will unlock user flexibility and enhance your productivity. The first step involves identification and selection. Excel offers quite a convenience when it comes to selecting rows. A click on the row number at the far left side of the screen will efficiently select the entire row, highlighting it. Alternatively, you can hold and drag the cursor across multiple rows to select them if you want to delete more than one row. Once a row, or rows, are selected, the deletion process can be initiated. This process can be carried out in several ways. The simplest is right clicking on the selected row and choosing the 'Delete' option. Another method is using the menu bar option where you go to 'Home', then 'Cells', selecting 'Delete', and finally clicking 'Delete Sheet Rows'. For keyboard enthusiasts, a simple key combination of 'Ctrl' + '-' (minus key) will work the magic promptly. It's important to note, the deleted row leaves a void that's immediately filled by the lower row moving up. Ultimately, it's crucial to understand that once a row is deleted, it's gone for good along with its data. There's that imminent risk of losing any unsaved progress if done unintentionally or prematurely. So, it's advised to always ensure that you are deleting the right row. The "Undo" function (CTRL + Z) can reverse the action if carried out immediately, but that can't be relied upon if you make several edits afterwards. Understanding the dynamics of deleting a row in Excel is therefore critical. It's not just about getting rid of a row, but involves a calculated approach of accurately selecting the target row, executing the delete function, and managing the aftermath of the operation. Whether you are a beginner or a seasoned user of Excel, knowing how to efficiently and effectively delete rows can not only save time but also preserve the accuracy and integrity of your data.
Precautions to Take Before Deleting a Row
Before you embark on the journey of deleting a row in Excel, it is important to understand the possible dangers or mistakes that come with it, and adopt some precautions to limit these risks. The very first precautionary measure is to always make a copy of your original data and work on the duplicate data. This is a safety net just in case anything goes wrong or if you delete something mistakenly, which can happen to even the most skilled Excel users, particularly when working with a large dataset. Next, try to ensure that you are not deleting a row containing unique, non-repeated data that may be hard or impossible to recover. Before you delete a row, take your time to carefully review the data therein. Scan the row from end-to-end and be certain that there are no crucial records which might be needed later. Remember that when it comes to data, it's always better to have it and not need it than to need it and not have it. Another precaution you need to take is to avoid deleting rows in volume if you don't have absolute certainty about their irrelevance. This caution extends towards the function "Delete All." It’s always worth taking a few additional minutes to review your dataset before proceeding with a large-scale deletion. Ensure that all formulas, especially those linked to other sheets or documents, aren't disturbed while deleting the rows. Excel autofills the references when a row is deleted which may cause discrepancies in the overall summaries and conclusions. It is recommended to reassess all the formulas especially those with relative cell reference formulas. Finally, always use the right method for deleting rows. Excel offers various methods, each suitable for different tasks. Learn about them and use what's best according to your situation. You can either choose one by one deletion, deletion by selection, or deletion using specific conditions. You also have the ability to undo a deletion, but bear in mind that this function is effective only for the most recent action. In summary, data deletion is a significant action in Excel which, while it can help to streamline your data, requires careful thought and several precautions to avert any loss of important information. Whether you're working on a project, a financial report, or an academic research paper, these standard precautions can be an absolute lifeline, saving you hours of work and potential stress.
Common Mistakes to Avoid When Deleting a Row
When managing Excel worksheets, deleting rows is a routine task, yet there are several common errors to avoid which may lead to data loss or unintentionally altering the structure of your spreadsheet. One of the principal mistakes to steer clear from involves the deletion of rows without fully understanding the content within them. Deleting a row without due diligence might not only result in catastrophic data loss, but also corrupted formulas that reference cells in the deleted row. As Excel adjusts references based on row deletions, it can create formula errors like #REF! which signifies that a cell reference is invalid. Misjudging the span of selected rows is another common pitfall. Many users, particularly novices, might select more rows than necessary and inadvertently delete essential data. Ensuring careful selection by reviewing the row numbers in the row header before deletion is crucial. Attempting to delete a row while still in edit mode can also lead to errors as Excel does not permit row deletion in this mode. Hence, safely exit the cell editing mode by pressing 'Enter' or 'Escape' before deleting a row. Moreover, neglecting to back up your worksheet prior to deleting rows is a common but grave mistake. While several of these actions are reversible with the 'Undo' command or by pressing 'Ctrl+Z', in instances where the action can't be reversed, a back up file proves invaluable. Finally, the hasty removal of rows without considering whether similar tasks need to be executed in the future can also be classified as an error. Using Excel’s table structures can automate row deletions based on specific conditions and significantly contribute to a more efficient workflow. Ensuring you are mindful of these common mistakes when deleting rows in Excel will go a long way in preserving the integrity of your data and your worksheet's structure. Understanding what not to do can also improve your Excel skills, streamline the row deletion process, and maintain a well-curated, error-free dataset. Therefore, each step in the deletion of rows in Excel must be performed with precision, backed with a clear understanding of data management, and with mindfulness towards error prevention.
Methods for Deleting a Row in Excel
As digital data continues to grow in importance, tools like Excel play a major role in data management. Central to effectively using Excel is understanding how to delete rows, which can help maintain the cleanliness and streamlined state of your data. This article will shed light on three simple but effective methods of deleting a row in Excel. First, we'll delve into how to utilize the delete key, a straightforward approach than can immensely simplify the process. Following that, we'll discuss the right-click menu method, an alternative that allows for more nuanced selections and deletions. The final section will illuminate the use of keyboard shortcuts to delete a row, a time-efficient maneuver that accelerates the data organizing process. These methods may seem simple in isolation, but when used in conjunction, they arm you with a highly flexible toolkit to manage your worksheets like a professional. Let's start by defining the process of using the delete key to delete a row. This method, in essence, requires a few simple steps to fulfill your requirement and provide a clean, clutter-free worksheet to work on.
Using the Delete Key to Delete a Row
The delete key is not the only but one of the effective ways to remove a row in Excel. Employing the Delete Key to remove a line in Excel involves the act of removing the entire row and moving the adjacent rows to fill the gap. Initially, it is crucial to select the entire row before hitting the delete key. The point of the cursor and the selection of the cell play a pivotal role in this process. There is no default short key for deleting the row. To select the row, move the cursor to the grey box at the beginning of the row to get hold of the row number. Left-click the mouse or keep pressing the shift and space keys simultaneously to select the row you wish to delete. Once the row is selected, all cells within the row will be highlighted. Now, the delete key should be used to implement the delete action. Pressing the delete key from the keyboard removes the data within the cells of the selected row but can't eliminate the row completely. To delete the entire row, take the help of the Excel menu bar or the ribbon. Click on the home tab, find the cells group option, choose delete, and select delete sheet rows. In the case of using the right-click method, after selecting the row, right-click the mouse, and select delete from the appeared options. Alternatively, you can use the shortcut ‘Ctrl + - ‘ after selecting the required row. This shortcut command helps to remove the complete row efficiently in less time. However, remember that this action, once implemented, cannot be undone. Therefore, double-check before performing this action, as this change is permanent and any data deleted accidentally may not be recoverable. These methods are extremely beneficial in manipulating data in a vast and complex spreadsheet. Deleting rows help streamline the worksheet by eliminating redundant or unneeded information. This function enhances the clarity and coherence of the data representation for better understanding and analysis. Be it cleaning up a database, condensing data, or simply discarding erroneous entries, a functional comprehension of using the delete key to delete a row in Excel significantly expedites the process. The delete key method of deleting a row in Excel not only simplifies the clerical work by aiding in the removal of unnecessary data but also contributes to building a precise and efficient database. The ease and the user-friendly features of Excel thus make this function universally preferred, regardless of the individual's technical acumen.
Using the Right-Click Menu to Delete a Row
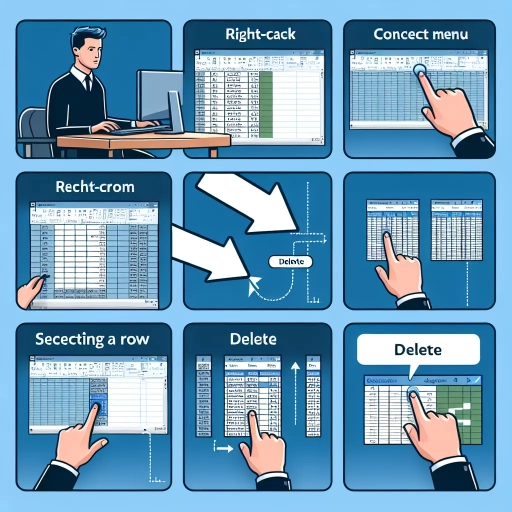
Often, when working on a data set, you might realize that certain rows are unnecessary or redundant. At such times, it becomes essential to efficiently delete these rows to ensure neatness, clarity, and efficiency of your data management. One such method recommended for this purpose is the use of the right-click menu. This method is simple, user-friendly, and highly effective, making it a preferred choice for many Excel users across the world. Before implementing this measure, ensure your cursor is located on the row you wish to delete. Once you've done this, the next step is to right-click. This action will trigger a drop-down menu filled with several options. Navigate this list to spot and select 'Delete.' Doing so will instantly delete your chosen row. The beauty of this process is how effortless and intuitive it is. It also ensures minimal room for error, as it allows you to physically locate and confirm the row before making any changes. Nevertheless, while this method is effective, it's advisable always to be aware of deleting excessive information or erasing crucial data accidentally. Regular backups can alleviate any potential loss, as significant data can be recovered if mistakes were made. To make it more precise, you could highlight the entire row to clearly identify it before right-clicking. An added advantage of this method is that it allows you to delete multiple rows simultaneously. By selecting a range of rows, you can delete several rows at once to save time and streamline your actions. In scenarios where the damaged or irrelevant data is interspersed or ungrouped, the right-click method becomes truly advantageous. This is because, unlike other methods that work on a sequential order or clustered groups, using the right-click menu allows you to pick and delete rows randomly without affecting the rest of the order. In the world of spreadsheet management, time, efficiency, and accuracy matter significantly. Tools like the right-click menu make these attributes more feasible, and they integrate seamlessly with the platform's more complex features. Remember, mastering these seemingly minor tricks and skills is what separates an average spreadsheet user from an Excel wizard. In summary, the right-click menu is an excellent tool for deleting rows from your Excel worksheets. It is an easy, effective, non-complicated method that requires zero formula knowledge and has a high success rate. Nevertheless, caution is essential when deleting data to prevent accidental data loss or row deletion. Therefore, using the right-click menu to delete rows not only simplifies the task but also makes data management in Excel a ready-to-use, user-friendly experience.
Using the Keyboard Shortcut to Delete a Row
Using keyboard shortcuts to delete a row is an efficient way to manage your datasets in Excel. This technique is versatile and can be particularly beneficial when dealing with large files or when you require quick edits. Before you utilize this method, first make sure that the cell you wish to delete is selected. Now, let's demystify this fascinating shortcut! To delete a single row, you simply press 'Ctrl + -' (minus key). If, for example, you've selected cell A3, hitting these keys will delete the third row and move any ensuing rows upwards to fill the now-empty space. To delete multiple rows at once, you'll need to select the entirety of these rows first. Let's say you need to delete row 3 to 5, clicking and dragging from A3 to A5 (or B3 to B5 and so forth) will highlight this range. With these cells still selected, pressing 'Ctrl + -' will erase these rows entirely. This speedy action saves you the trouble of clicking and deleting each row individually, which can be particularly cumbersome in larger datasets. There's one aspect that can't be overlooked while using keyboard shortcuts: they significantly reduce the risk of human error. In manual row deletion, there's always a risk of inadvertently deleting the wrong row—a mistake that the 'Ctrl + -' method potentially eliminates. Additionally, this shortcut is not just a time-saver, it can also boost your productivity levels. Once mastered, it can substantially diminish the time taken to navigate and alter your Excel files. Indeed, understanding this shortcut is a marvellous way to supercharge your Excel skills. It's perfect for those who're looking to drive efficiency and accuracy. Remember that it's vital that you've selected the correct cells before you delete- otherwise, you might end up deleting information you didn't intend to! With a bit of practice, you'll find that using the 'Ctrl + -' feature becomes second nature. These keyboard shortcuts to delete rows are just part of a suite of innovative features that Excel has to offer, each designed to enhance your data manipulation prowess to conceptualize and display your insights more effectively. In summary, the keyboard shortcut 'Ctrl + -' mechanism offers a robust method to manage your rows in Excel, providing a swift and accurate technique to delete data. This cornerstone skill can boost your productivity, simplify your data analysis, and empower you to tackle complex datasets with relative ease. It might only be a small part of mastering Excel, but it's a vital stepping stone on your path to becoming an expert.
Advanced Techniques for Deleting a Row in Excel
Excel is an indispensable tool that provides outstanding functionalities to enhance productivity. Among its many features, deleting rows in Excel is a fundamental operation, but a deeper dive reveals a number of advanced techniques that truly expands its capabilities. One of these includes deleting multiple rows at once, a superb time-saver when dealing with large data sets. Another technique, deleting rows based on specific conditions, allows users to filter and manage data more effectively. The third technique explores the use of Visual Basic for Applications (VBA) Macros for automatic row deletion, a fantastic method for automating processes and enhancing efficiency. Thorough understanding and application of these techniques significantly elevate the proficiency of any Excel user, leading to a more streamlined and effective data management experience. Let's kick-off with an exploration of the first technique, deleting multiple rows at once, and delve into how much time it can save you while working on extensive Excel sheets.
Deleting Multiple Rows at Once
Microsoft Excel is a powerful tool that can handle large swathes of data effectively. One often used function pertains to deleting multiple rows at once, a subset under the broad umbrella of advanced techniques for deleting a row in Excel. This capability is not just time-saving but also enhances the user's proficiency in managing extensive datasets. To delete multiple rows, you first need to select those rows. The common way of doing this is by clicking and dragging across the row headers (the numbers on the left side of your worksheet). For instance, if you want to delete rows 3 to 7, click on the header number 3, continue holding down your left mouse button, and then drag down to row number 7. Once the rows are selected, right-click within the selected section, and a context menu will appear. Navigate to 'Delete', then click on it. Promptly, the selected rows will be removed from your Excel worksheet. This process might seem straightforward, but challenges could arise when dealing with large volumes of data. For instance, you might want to delete hundreds or even thousands of rows at once. In such cases, manual selection can be tedious and impractical. However, thanks to Excel's extensive functionalities, a more efficient approach exists. This approach involves using the 'Go To Special' tool in Excel. First, based on your criteria, apply conditional formatting to highlight the rows you want to delete. For instance, you could highlight rows that contain certain words, values, or fall within a certain date range. Once you've applied the conditional formatting, press F5 to open the 'Go to' dialog box and click on 'Special...'. Choose 'Conditional formats', then 'Same', and click 'OK'. All cells with the same conditional formatting will be selected. Now, by right-clicking on the selected cells and choosing 'Delete Row', you can remove all the selected rows at once. Deleting multiple rows at once is not just a neat trick to impress co-workers but it serves as an essential technique when handling extensive datasets. Proper utilization of this feature can save you a significant amount of time, avoiding the monotonous task of deleting rows one by one. Therefore, building proficiency in such advanced techniques is of utmost importance for anyone looking to handle massive datasets more effectively using Excel. This, in the long run, will not only enhance productivity but also augment data manipulation competency, which is a valuable skill in many professional fields.
Deleting Rows Based on Conditions
Data Management. Improper handling of data can lead to an assortment of issues, all of which can lead to errors in decision-making processes based on collected data. Deleting rows in Excel based on certain conditions can contribute substantially in obtaining accurate results and can make data management tasks more efficient. Often, large datasets contain redundant entries or irrelevant data that needs to be eliminated. Instead of deleting each row manually one-by-one, which is time-consuming and highly prone to human error, advanced techniques allow you to swiftly eliminate multiple rows at once based on specified conditions. In Excel, this can be accomplished using different methods such as Filter and Delete, Using the "Find & Select" Function, as well as Using Excel Formulas like "IF", or even with the use of VBA (Visual Basic for Applications) if your conditions are much more complex. For instance, using the filter and delete method – assuming you want to delete rows with '0' in column 'B', you can apply filter in column 'B', select '0', and once all the rows with '0' are highlighted, right-click and choose 'delete row'. It's as easy as that. Similarly, the 'Find and Select' tool can also be employed to delete rows based on specific conditions. However, if you want to delete rows based on more complex criteria, then Excel formulas or VBA can be more suitable. An "IF" formula, for instance, could be used in a helper column to label rows that meet certain conditions, then you can filter and delete these labeled rows. VBA, on the other hand, is a more sophisticated method which requires basic coding knowledge. It is highly flexible though, and can automate your tasks of deleting rows thus saving a lot of your time and effort. These are just a few illustrative scenarios that demonstrate the usefulness of Excel’s advanced techniques for deleting rows based on certain conditions. In essence, the option you use heavily relies on the complexity of your condition and your comfort-level with Excel. Regardless of your method, the ability to delete rows depending on certain criteria can certainly enhance productivity, reduce the chance of errors, and improve the accuracy of your results. Understanding these techniques can go a long way in helping you manage large data sets with ease and efficiency. This knowledge, when applied correctly, can ultimately improve data quality in Excel, and pave the way for more accurate analysis, better decision-making, and overall cost and time savings.
Using VBA Macros to Delete Rows
Using Visual Basic for Applications (VBA) macros, an advanced technique is introduced for deleting rows in Excel and proves to be a highly efficient and flexible tool. As a subset of programming with Excel, VBA macros hold a pivotal role in handling and manipulating Excel data. It goes beyond the simple manual method of deleting rows and offers an automated way of managing multiple Excel rows. VBA macros are especially helpful because they provide detailed control over the removal process. This is achieved by scripting a series of commands in VBA, focusing on specific criteria or conditions. For instance, you can use VBA macros to delete every alternate row, rows having zeros, blank rows or rows with specific text. It saves valuable time and effort when dealing with huge volumes of data. Starting with VBA might appear daunting, but its advantages are worth the learning curve. Excel provides a built-in VBA editor where you can script your macro. For deleting a row, the code typically starts with defining a range using the 'For Each' statement, followed by the criteria that needs to be satisfied, and ending with the 'Delete' method to remove the row. It's vital to take note of certain considerations while using VBA to delete rows. For example, looping from the last row to the first is recommended to avoid skipped rows. Further, when deleting rows using VBA, remember to 'Turn Off' the screen updates and automatic calculations which can notably speed up your macro. Also, always ensure to save a copy of your data before running a macro as this process is largely irretrievable once run. In conclusion, using VBA Macros for deleting rows in Excel is an advanced technique enabling efficient data handling for large datasets. Amidst the basic options of deleting rows manually or using filters and sorting, VBA stands out with its feature of automating the process guided by specific conditions. With essential practice and caution, VBA can transform the way you manage your Excel data. Careful implementation of this tool not only enhances the flexibility of Excel but also promotes a higher level of accuracy and efficiency in your tasks.